Table of Contents
Advertisement
Quick Links
Advertisement
Table of Contents

Summary of Contents for CookingPal Multo
- Page 1 User Manual...
- Page 2 Before We Get Started, Let Me Introduce Myself!
-
Page 3: Table Of Contents
� � � � � � � � � � � � � � � � � � � � � � � � 11�1 Logging In/Out of Your CookingPal® Account � � � � � � � � � � � � � � � � � � � � � � � � �... - Page 4 12.0 Cooking Modes 18.0 FCC – Supplier’s Declaration of � � � � � � � � � � � � � � � � � � � � � Conformity � � � � � � � � � � � � � � � � � � � � � � � � � 12�1 Knead �...
-
Page 5: Important Safeguards
1.0 IMPORTANT SAFEGUARDS For Your Safety Signal Words Safety is an essential part of every CookingPal® Be aware of the signal words WARNING and NOTICE product� However, the product safety of the as they relate to safety notes� These are the signal words for the respective safety notes: CookingPal®... - Page 6 Read these instructions and the accompanying Safety Guide and Warranty carefully and retain them for future use� If this appliance is passed to a third party, then these instructions and the accompanying Safety Guide and Warranty must be included� When using electrical appliances, basic safety before cleaning�...
- Page 7 A scraper • Read and understand the Multo Safety Guide may be used but must be used only when the and Limited Warranty completely before blender is not running�...
-
Page 8: Intended Use
This appliance is intended to be used in dry indoor areas only� • No liability will be accepted for damages resulting from improper use or non-compliance with these instructions and instructions on the Hub� • Please fully read the Multo Safety Guide and Limited Warranty� Intended Use... -
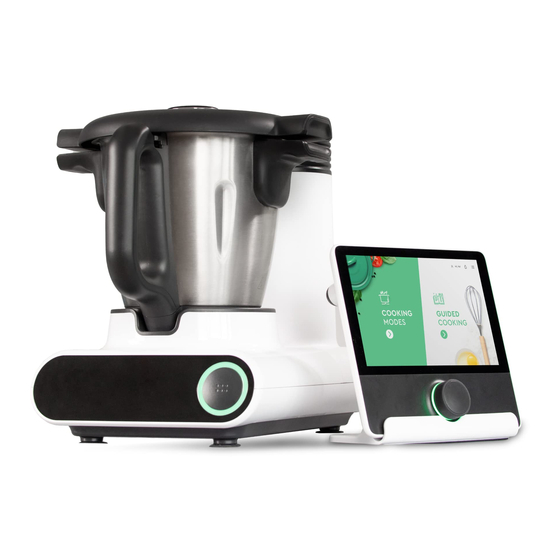
Page 9: Appliance Description
3.0 Appliance Description Blade Blade seal Stainless steel mixing bowl (3�1 QT / 3 L) Main unit USB port Control Button Power socket with LED light Power switch Appliance Description... - Page 10 Measuring cup Steamer lid (3�5 oz / 100 ml) Shallow steaming tray Lid seal Deep steaming tray Steamer seal Butterfly whisk Simmering basket Appliance Description...
- Page 11 Jog dial with LED light Hub stand Spatula Speaker On/off switch Charging cable Charging port (Type-C to Type A) Camera Power cable Appliance Description...
-
Page 12: Led & Button Guidelines
4.0 LED & Control Button Guidelines Standby Turbo Unlocked Bluetooth Pairing Turbo in Use Cooking in Progress Lid Open / Bowl Not Secured Cooking Paused Overheat Cooking Done LED & Control Button Guidelines... - Page 13 • Pause cooking Push • Resume cooking Press and hold when • Turbo function turbo unlocks Long press for • Enter Bluetooth pairing 5 seconds function Remove the mixing bowl� Press and hold • Reset to factory settings for 10 seconds LED &...
-
Page 14: Choosing The Setup Location
Please refer to our Safety Guide for more details on WARNING Scalding Risk the safe use of the Multo� When choosing where to Serious burns from hot liquids and steam may place your appliance for use, please keep in mind the result from CookingPal®... - Page 15 • Only operate the CookingPal® Multo with the Hub� alternating current voltage of 114-126 V and main 4� Do not use the CookingPal® Multo with an frequency of 50 to 60 Hz, as indicated on the plug extension cord� label�...
-
Page 16: Before First Use
6.0 Before First Use WARNING Risk of suffocation Keep any packaging materials away from children - these materials are a potential source of danger, e�g� suffocation� 1� Remove all the packing materials� 2� Check the appliance for transport damages� 3� Clean the appliance and all the accessories following the “Cleaning &... -
Page 17: 6�1 Hub Initial Setup
Hub Initial Setup 1� Press and hold the switch to switch on the Hub� 2� Tap “Start”� START 3� Scroll down to read the “End User License End User License Agreement Agreement”� When you have read, understood and agreed to the “End User License Agreement”, tap “Agree”... - Page 18 4� Connect the Hub to a Wi-Fi network� Select the desired network� Wi-Fi Input your Wi-Fi network password, then tap “Join”� NOTICE For detailed Wi-Fi setup, follow the “Connecting to a Wi-Fi Network” chapter� Wi-Fi Password JOIN Before First Use...
- Page 19 If an update is available, tap “Update” to proceed with the update� UPDATE 6� Follow the instructions on the display to pair CONNECT DEVICE Multo to the Hub� NEXT Before First Use...
-
Page 20: Assembling The Mixing Bowl
7.0 Assembling the Mixing Bowl This assembly can be used for the following functions: Cook Weigh Knead I - 1 QT (1L) Grind Emulsify Chop Grate II - 2�1 QT (2L) III MAX - 3�1 QT (3L) max� capacity WARNING Risk of injury •... - Page 21 WARNING • Contents of the mixing bowl can spill out and cause damage and injury if the lid seal is not positioned correctly� • Do not try to open with force� • Securely lock the measuring cup when processing hot food to avoid injury� •...
-
Page 22: Use Of Accessories
8.0 Use of Accessories After assembling the mixing bowl (for boiling, heating, grinding, chopping and grating), different accessories can be added to perform different functions� The possible combinations are: Butterfly Whisk Use the butterfly whisk when you want to: Whisk Emulsify NOTICE The butterfly whisk attachment cannot be... -
Page 23: Simmering Basket
Simmering Basket Use the simmering basket when you want to: Cook Boil Steam 1� After attaching the blade, place the simmering basket into the mixing bowl� 2� Place the assembled mixing bowl on the main unit� 3� Close the lid� WARNING After cooking, the handle of the simmering basket will become too hot to pick up with your hands�... - Page 24 Removing the Simmering Basket The handle of the simmering basket will become too hot to pick up with your hands� To remove the simmering basket from the mixing bowl: 1� Use the hook on the side of the spatula to latch onto the handle of the simmering basket�...
-
Page 25: Steamer
Steamer Use the steamer when you want to: Steamer lid Shallow Steam steaming tray 1� After attaching the blade, place the assembled mixing bowl on the main unit� Deep steaming tray 2� Place the steamer seal on the base of the deep steaming tray�... -
Page 26: Operation
9.0 Operation Switching the Main Unit On/Off • Connect the power cable to the power socket and then to a suitable electrical wall outlet, ensuring each is dry and clean� • To switch the main unit on, set the power switch to “I” position�... -
Page 27: 9�3 Switching The Hub On/Off
Switching the Hub On/Off 1� Press and hold the switch to switch on the Hub� 2� To switch off, press and hold the switch, then press the power off button on the display� NOTICE After 5 minutes of inactivity, the display enters sleep mode�... -
Page 28: Side Menu Functions
10.0 Side Menu Functions Tap the icon on the top right corner of the user interface to access the side menu� Then proceed to tap the function needed� Cook History - This function keeps track of recently cooked recipes� Tutorials - This function shows step-by-step videos of how to use the appliance� Settings - This brings you to the settings menu�... -
Page 29: 10�1 Managing The Cook History
10.1 Managing the Cook History NOTICE If no recipes have been cooked before, COOK HISTORY EDIT EDIT the Cook History will be empty� 1� Tap “Cook History”� 2� The display shows most recently cooked recipes� Tap “Edit”, then select the Cook History you want to delete�... -
Page 30: Settings
2� Then tap “Settings” to proceed� SETTINGS 11.1 Logging In/Out of Your CookingPal® Account 1� Tap “Login”� 2� Input your email address and CookingPal® account LOG IN/SIGN UP password or your social media credentials to access your CookingPal® account� 3� To log out, tap the icon on the top right side to access the side menu, tap “Log out”�... -
Page 31: Account
11.2 Changing the Password of Your CookingPal® 1� To change the password, tap the icon on Account the top right side to access the side menu, tap “Settings”, then “Account Management”� RESET/CHANGE PASSWORD 2� Input your current password, the new password... -
Page 32: Connecting To A Wi-Fi Network
Wi-Fi network, then tap “Confi rm”� 11.6 Managing Appliances NOTICE This menu shows the connected controllers and appliances to your CookingPal® MY DEVICES REFRESH account� The following actions can be done: CONTROLLERS 1� Tap “My Devices”�... -
Page 33: Tablet Storage Management
11.7 Tablet Storage Management NOTICE When the Hub storage memory is full, an alert pops up� Tap “Manage Storage” to clear space for new downloads� STORAGE EDIT EDIT 1� Tap the icon on the top right side to access the side menu, tap “Settings”, then “Storage”�... -
Page 34: 11�9 Viewing Favorite Recipes
11.9 Viewing Favorite Recipes If no recipes have been marked with a NOTICE icon, the Favorite Recipes list will be empty� FILTER SORT • Tap the icon on the top right side to enter “Favorite Recipes” • To mark a recipe as a Favorite, tap on the icon on the top right of the recipe photo�... -
Page 35: Cooking Modes
12.0 Cooking Modes 1� Tap “Cooking Modes”� Scroll on the display or rotate the jog dial to find the desired cooking mode including Knead, Steam, Sauté, Scale, Keep Warm and Manual� 2� Tap on the mode or press the jog dial to select the mode� NOTICE To quickly switch to Guided Cooking, tap “Guided”... - Page 36 12.2 Steam NOTICE Use the steamer for this mode� This mode is intended for steaming� 1� Fill the mixing bowl with water� Do not fill above TIMER the MAX mark on the mixing bowl� Place the 20 00 steamer on top of the mixing bowl and lock the deep steaming tray�...
-
Page 37: Scale
12.3 Sauté This mode is intended for sautéing� 1� Place the ingredients into the mixing bowl� Lock the lid� TEMP. 265°F 2� On the Hub, tap the temperature setting, tap to set the cooking temperature (125 - 265 °F/50 - 130 °C) or turn the jog dial� 3�... -
Page 38: 12�5 Keep Warm
12.5 Keep Warm NOTICE Use this mode to keep cooked dishes warm� 1� Place the food that needs to be kept warm in the TEMP. 145°F mixing bowl� 2� On the Hub, tap the temperature setting, set the temperature (100 - 160 °F/37 - 70 °C) using the display or the jog dial�... -
Page 39: Manual
12.6 Manual 2� On the Hub, tap the temperature setting, set the temperature (100 - 265 °F/37 - 130 °C) using the display or the jog dial� Set to -- - (no heat)� TEMP. 3� Tap the timer, set the timer (1 second - 99 minutes 59 seconds) using the display or the jog dial� 4�... -
Page 40: Guided Cooking
13.0 Guided Cooking 1� To cook with a guided recipe, tap “Guided Cooking”� NOTICE To quickly switch to Cooking modes, tap the words “Modes” on the top left side of the Hub� 2� Scroll on the display or rotate the jog dial to browse the recipe selection�... - Page 41 3� Download the recipe� Set the number of servings needed� Check the ingredients for the recipe� 4� Tap “Start Cooking”, then follow the steps to cook the recipe� Swipe left or right or rotate the jog dial to scroll through the steps� To go to a specifi c step, tap the downwards arrow to expand the recipe timeline, then tap the desired step to go to that step�...
-
Page 42: Turbo Function
13.1 Turbo Function NOTICE Turbo function appears on the top right side of the display when it is available for the step� The Turbo function is suspended when the bowl STEP 1 Turbo countdown : temperature is higher than 140 °F (60 °C)� UNLOCK TURBO NOTICE Turbo function is also supported in... -
Page 43: Cleaning For The First Time
• Thoroughly wash all components and accessories, that could come into contact with food, with warm water and dish soap before using CookingPal® Multo for the first time� • Make sure to thoroughly dry all washed components and accessories before use�... -
Page 44: Cleaning & Maintenance
Do not wash in the dishwasher� cleaning the base unit� • To clean the components, wipe with a soft, slightly • Do not use the CookingPal® Multo outdoors� moist cloth� • Do not immerse the main unit in water or other liquids�... -
Page 45: Clean Mode
15.2 Clean Mode Clean mode features two cleaning modes: Quick Clean - Quick and easy bowl refreshment in between two cooking steps and similar uses� Deep Clean - Removing tough or dried up food residue� Quick Clean • This mode is only used for cleaning non-sticky foods off of the mixing bowl (with the blade)�... - Page 46 Deep Clean • This mode is only used for cleaning the mixing bowl (with the blade)� Do not place any attachments into the mixing bowl� CLEAN 1� Fill the mixing bowl with water and washing liquid up to the MAX mark� QUICK WASH 2�...
-
Page 47: Cleaning The Accessories
15.4 Cleaning the Blade, Lid & Steamer Seals • Remove the seal from the blade/lid/steamer, and then wipe with a soft, slightly moist cloth� WARNING Your Multo blade can get very • Never use corrosive detergents, wire brushes, hot after prolonged use, even if you have not been abrasive scourers, metal or sharp utensils to clean using the heating function�... -
Page 48: Storage
15.5 Storage • Store the appliance in its original packaging in a dry area� Keep away from children and pets� • Do not expose to direct sunlight� • When not in use, the built-in battery of the Hub should be charged monthly� 15.6 Maintenance Any other servicing than mentioned in this manual... -
Page 49: Troubleshooting
If the main unit or power cord is damaged, you could mixing bowl� receive an electric shock� Do not use the CookingPal® • Do not insert any objects into these openings�... - Page 50 Problem Cause Solution The appliance does not The mixing bowl is not positioned Insert the mixing bowl correctly� start� correctly� The lid or the deep steaming tray have Place the lid or the deep steaming tray not been locked correctly onto the on correctly�...
- Page 51 Problem Cause Solution Cannot set the Speed setting 4 - 10 is selected� At these speed settings, there is a risk of temperature� hot food spilling, so the speed range is limited to only 0 - 3� Cannot set the speed to The temperature setting is set between Set the temperature to -- - (no heat) more than 3�...
-
Page 52: Grounding Instructions
17.0 Grounding Instructions This appliance must be grounded while in use to protect the operator from electrical shock� The Circuit grounding conductor appliance is equipped with a 3-conductor cord and connected properly a 3-prong grounding-type plug to fit the proper grounding-type receptacle�... -
Page 53: Fcc - Supplier's Declaration Of Conformity
18.0 FCC - Supplier’s Declaration of Conformity Unique Identifier 2AX9F-MULTO Responsible Party Smart Product Concepts Limited 6600 Silacci Way U.S. Contact Information Gilroy, CA 95020 Telephone Number (866) 548-3092 18.1 FCC Compliance Statement 1� This appliance complies with Part 15 of the FCC rules�... -
Page 54: Fcc Interference Statement
18.2 FCC Interference Statement This equipment has been tested and found to comply with the limits for a Class B digital appliance, pursuant to part 15 of the FCC Rules� These limits are designed to provide reasonable protection against harmful interference in a residential installation� This equipment generates, uses and can radiate radio frequency energy and, if not installed and used in accordance with the instructions, may cause harmful... -
Page 55: Trademarks
19.0 Trademarks CookingPal® is a registered trademark in the United States and in other countries and owned by Smart Product Concepts Limited� The Bluetooth® word mark and Logos are registered trademarks owned by Bluetooth SIG, Inc� and any use of such marks is under license� Other trademarks and trade names are those of their respective owners�... -
Page 56: Specifications
20.0 Specifications 20.1 Main Unit Model number: SKA-CP-MUL-WHI-528 Rated voltage: 120 V~, 60 Hz Power output (USB): 5 V, max� 2 A Power rating: 1200 W Net weight approx� 13 lbs (5�9 kg) (excluding the Hub): Mixing bowl capacity: 3�1 QT (3 L) 20.2 Smart Kitchen Hub Display: 8�9"... -
Page 57: Disposal
21.0 Disposal This symbol means that electrical and electronic appliances may not be disposed of in the normal household waste� Please check your local guidelines for instructions on how to dispose of electronic devices� Disposal... -
Page 58: Help And Support
22.0 Help and Support We’re here to help! Visit us: support�cookingpal�com Contact us: support@cookingpal�com Call us: (866) 548-3092 Help and Support... - Page 59 Great! Great! Now That We Are All Set, Now That We Are All Set, Let’s Start Cooking! Let’s Start Cooking!
- Page 60 (866) 548-3092 support@cookingpal.com...
Need help?
Do you have a question about the Multo and is the answer not in the manual?
Questions and answers