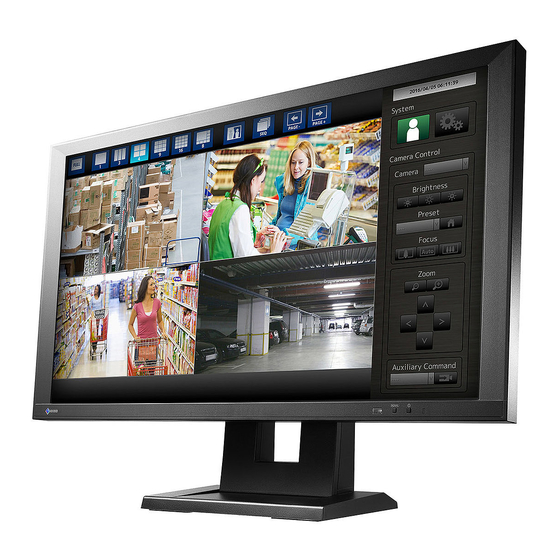
Eizo DuraVision FDF2304W-IP Setup Manual
Color lcd monitor
Hide thumbs
Also See for DuraVision FDF2304W-IP:
- Installation manual (82 pages) ,
- Manual (60 pages) ,
- Instruction manual (26 pages)
Table of Contents
Advertisement
Quick Links
Setup Manual
Color LCD Monitor
Software Version 4.2
Important
Please read this "Setup Manual", the "Instruction Manual" and the
"Installation Manual " carefully to familiarize yourself with safe and
effective usage.
Please retain this manual for future reference.
• For the latest product information including the "Setup Manual",
refer to our web site :
http://www.eizoglobal.com
Advertisement
Table of Contents

Related Manuals for Eizo DuraVision FDF2304W-IP


Summary of Contents for Eizo DuraVision FDF2304W-IP
- Page 1 Setup Manual Color LCD Monitor Software Version 4.2 Important Please read this “Setup Manual”, the “Instruction Manual” and the “Installation Manual ” carefully to familiarize yourself with safe and effective usage. Please retain this manual for future reference. • For the latest product information including the “Setup Manual”, refer to our web site : http://www.eizoglobal.com...
- Page 2 EIZO Corporation is under no obligation to hold any submitted material or information confidential unless prior arrangements are made pursuant to EIZO Corporation’s receipt of said information. Although every effort has been made to ensure that this manual provides up-to-date information, please note that EIZO monitor specifications are subject to change without notice.
-
Page 3: Precautions
A unit placed on an inadequate surface may fall and result in injury or equipment damage. If the unit falls, disconnect the power immediately and ask your local EIZO representative for advice. Do not continue using a damaged unit. Using a damaged unit may result in fire or... - Page 4 Otherwise, the unit may become detached, resulting in injury and/or equipment damage. If the unit falls, please ask your local EIZO representative for advice. Do not continue using a damaged unit. Using a damaged unit may result in fire or electric shock. When reattaching the...
- Page 5 WARNING Handle the batteries for the remote control with care. Not doing so may result in battery explosion, liquid leakage, or burns. • Do not disassemble, heat, short-circuit, or immerse the provided batteries in water. • Install/change batteries in a correct way. •...
-
Page 6: Table Of Contents
CONTENTS PRECAUTIONS ............3 IMPORTANT .............. 3 CONTENTS ............. 6 Package Contents ..........7 Controls and Functions ........8 ● Monitor ............8 ● Remote Control ..........9 Setup ..............10 Connect the network camera(s) ......11 Prepare the remote control ........12 Turning On the Power ..........13 ●... -
Page 7: Package Contents
• Remote control • Power cord • AA batteries (2 pcs) • Setup Manual (this manual) • EIZO User’s Manual (CD-ROM) • HDMI cable (HH200HS) Note • Please keep the packaging box and materials for future movement or transport of the monitor. -
Page 8: Controls And Functions
Controls and Functions ● Monitor Name Description 1. Remote control detector Receives signals from the remote control. button Switches input signals for display. button Turns the power on or off. Indicates the monitor’s operation status. Blue Operating 4. Power Indicator Flashing blue Shutting off the system Power off (With “Quick Start”... -
Page 9: Remote Control
● Remote Control Name Description Switches input signals for display. Turns the power on or off. Used to display/exit the monitor’s Adjustment menu. Adjusts the brightness of the monitor screen. 5. Number Buttons Used to enter numbers and letters. ( 0 to 9 ) / Adjusts the network camera display magnification. -
Page 10: Setup
Setup Sets up to displaying network camera images on the monitor. You can operate and set the monitor by using either the remote control or a USB mouse. For details, refer to the corresponding pages. Setup Flow Connect the network camera(s) (page 11) Prepare the remote control (page 12) Turning On the Power (page 13) Configuring the Language (page 17) -
Page 11: Connect The Network Camera(S)
Connect the network camera(s) Connect the network camera and the monitor according to the following procedure. Connect the network camera to the monitor via the network hub. 1. Connect the network cable (straight cable, Cat 5e or higher) to the monitor and the LAN port of the network hub. -
Page 12: Prepare The Remote Control
Prepare the remote control Insert batteries into the remote control. The remote control is used for operating and configuring this monitor. On the back of the remote control, press the knob to unlock, and remove the cover. Input AA batteries, and slide the cover back. Attention •... -
Page 13: Turning On The Power
Turning On the Power Turn on the main power switch on the back of the monitor. The main power switch is turned on when factory default settings are configured. Press on the front of the monitor or on the remote control. The power indicator lights up blue and the live image screen is displayed. - Page 14 Menu Operations Each menu is operated using the remote control or a USB mouse. If the menu is not displayed, press on the remote control, or click the screen with the USB mouse to display the menu. Display mode menu System setup menu / Camera control menu Display mode menu Camera images displayed on the live screen can be operated.
-
Page 15: Logging In
System setup menu / Camera control menu The system settings menu is used for logging into and configuring the system. The camera control menu controls network cameras from the monitor in the camera operation menu. Item Description To select an item Press the buttons. - Page 16 Entering characters 1. Press The text field is highlighted in green. 2. Press the number buttons ( 0 to 9 ). Press a button consecutively to change over to the character next in order. For the order of character entry, refer to the table shown below.
-
Page 17: Configuring The Language
Configuring the Language Set the display language for the live screen menu and the setting screen from the setting menu. Select (Setup) and press The setup screen is displayed. Check that “System” is selected and press Select “Other” and press Displays current settings. -
Page 18: Perform Easy Setup
Perform Easy Setup Necessary settings for displaying network camera images on the monitor. Start up the network camera(s). For network camera setup, refer to the network camera’s manual. Attention • Connect cameras other Panasonic or AXIS network cameras using ONVIF. Check if ONVIF is enabled in the settings of the camera. - Page 19 5. Select “Clock Setting” using , then press 6. Set the “Year”, “Month”, “Day”, “Hour”,and “Minute”. Select the list box of an item and press Select a setting with and press 7. After completing the setting, select “Apply” and press The setting complete screen is displayed.
- Page 20 3. After completing the setting, select “Apply” and press The setting complete screen is displayed. Press to select “OK”. 4. Select “Next” and press The network camera automatic discovery screen is displayed. Automatically discover network cameras. 1. Select “Camera Discovery”, then press 2.
- Page 21 5. Select “OK” and press Automatic discovery is started and a “Searching” message is displayed. Information on discovered network cameras are displayed. The network camera discovery results are displayed. Discovery Results Description When there is no information update for the registered network cameras, or one Blank is not connected When there is an unregistered network camera, or information was updated for a...
- Page 22 Set the positions for displaying the network camera images. Indicates the display positions on the monitor screen. 1. Press The “After Change” list box is selected. 2. Set a network camera to a position for displaying images. Select the list box of a display position you wish to set and press Select a network camera with and press 3.
- Page 23 Close the setup screen. 1. Select “Return” and press 2. Select “Exit” and press The screen returns to the live image screen. Check that images from the network camera(s) are displayed on the monitor. (Example)
-
Page 24: Reference
Reference ● How to Attach the Optional Arm An optional arm (or an optional stand) can be attached by removing the stand section. Please refer to our web site (http://www.eizoglobal.com) for the corresponding optional arm (or optional stand). Attention • When attaching an arm or stand, follow the instructions of their user’s manual. •... -
Page 25: Connecting Hdmi Devices
● Connecting HDMI Devices Connect an HDMI device to this product to switch over the network camera display to the HDMI device. Connection examples HDMI device (Network video recorder etc.) HDMI cable (supplied HH200HS) Compatible Resolutions / Formats The monitor supports the following resolutions and signal format. PC Signal Vertical Scan Resolution... - Page 26 To switch among input signals Press on the remote control to change over the input signal. When the signal is switched, the active input port name appears at the top right corner of the screen. Note • on the monitor also can change the input. Adjusting screen brightness Adjust the brightness of the monitor screen by changing the brightness of the backlight (light source at the back of the LCD panel).
-
Page 27: Specifications
● Specifications LCD Panel Type Backlight Size 58 cm (23.0 inch) (58.4 cm diagonal) Native resolution 1920 dots × 1080 lines Display size (H x V) 509.1 mm × 286.4 mm Pixel pitch 0.2652 mm Display colors 8-bit colors : 16.77 million colors Viewing angles (H / V, typical) 178˚... -
Page 28: Display Capability
● Display capability The table below shows the display capability of this product H.264 (when the “Bit rate” is set at “4096kbps”) At 1-screen display 1920 × 1080 / 30 fps At 3-screen display 640 × 1024 / 30 fps At 4-screen display 1920 ×... -
Page 29: Appendix
Note Use the attached specifi ed cable below or EIZO signal cable with this monitor so as to keep interference within the limits of a Class B digital device. - AC Cord... - Page 30 153 Shimokashiwano, Hakusan, Ishikawa 924-8566 Japan Helmut-Grashoff-Strasse 18, 41179 Mönchengladbach, Germany 中国苏州市苏州工业园区展业路 8 号中新科技工业坊 5B 00N0L856G1 http://www.eizoglobal.com SUM-FDF2304WIP-4 Copyright © 2014-2017 EIZO Corporation. All rights reserved. 7th Edition-June, 2017 Printed in Japan.
Need help?
Do you have a question about the DuraVision FDF2304W-IP and is the answer not in the manual?
Questions and answers