Advertisement
Quick Links
Advertisement

Related Manuals for Auslock Glory Series

Summary of Contents for Auslock Glory Series
- Page 1 Smart Lock User Manual Special Attention: 1. Mechanical keys please keep outdoor, just in case keys lock in doors. 2. Please change the batteries when notified by low wattage alarm. 3. Read this manual carefully before installation, and keep it for future reference (warranty).
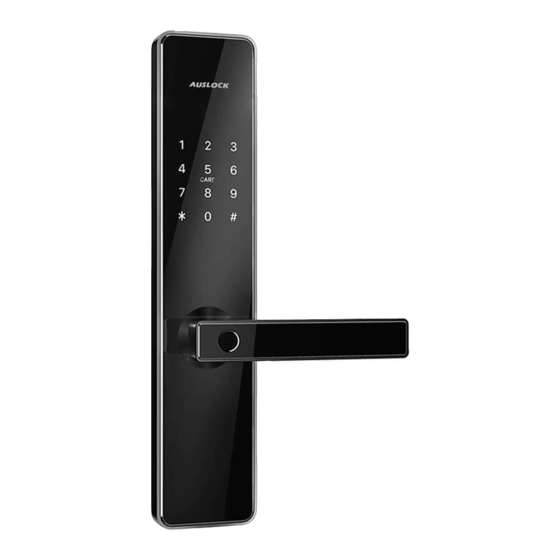
- Page 2 1. Lock Structure G11B- Glory series H31B- Handy series...
- Page 3 2. Mortise 3. Insallation 3.1 Turn the handle Notice: Adjust the handle according to the direction you open the door...
-
Page 4: Installation Diagram
3.2 Installation Diagram Step 1 Install Mortise Step 2 Install Sliding Screw Casing and Fixed Front Panel The screw casing place is adjustable from 55mm to 100mm far from the square shaft. Depending on the location of the hole-drilling or the old door hole. -
Page 5: Specifications
4.Specifications G11B & H31B Models Only Suitable for Models 304 Stainless Steel Materials Front Panel Lock Size 335*70*20mm(G11)- 270*70*20mm(H31) 335*70*20mm(G11)- 270*70*20mm(H31) Back Panel Lock Size Lock Weight Bluetooth Wifi - Gateway(option) Fingerprint Unlock Methods Password Card Mechanical key Silver Colour Black Aluminum door Wooden door... - Page 6 2) Apple mobile phone, please scan the right QR code as above 3) You can also search for AUSLOCK in the APP store or Google play for download 4) Register a new account (phone number or email) or login with an existing account.
- Page 8 APP and register an account) Enter recipient's → → account of AUSLOCK, set the name and effective time of the eKey as shown in figure 2-2 Send recipient's account has Bluetooth unlock permission 5.2.4 The Admin password management →...
- Page 9 5.2.7 IC Cards management " as shown in finger 2-1 → Click " " → Add IC Cards as finger 2-6 Click "...
- Page 10 5.3 Add Gateway(Option)
-
Page 11: Packing List
Packing List Picture Name Front Panel Back Panel User Manual Mortise Quantity Picture Name Strike Strike Box Mechanical Key Card Quantity Picture Name Fixing screws 2 Sliding Screw Fixing screws 1 Sliding Screw Casing Quantity Picture Name Pointed screw Waterproof rubber plate Gateway (option) Quantity 1 (option) - Page 12 Guarantee (To Validate warranty, below details must be filled by customer and emailed back to Auslock within 30 days or else Auslock may not offer full services (au@auslock.net) : Customer Full Name : Customer Contact No. Place of Purchase (store) :...
Need help?
Do you have a question about the Glory Series and is the answer not in the manual?
Questions and answers