Table of Contents
Advertisement
Quick Links
Color Ink Jet Printer
All rights reserved. No part of this publication may be reproduced, stored in a retrieval
system, or transmitted in any form or by any means, electronic, mechanical, photocopying,
recording, or otherwise, without the prior written permission of SEIKO EPSON
CORPORATION. The information contained herein is designed only for use with this EPSON
printer. EPSON is not responsible for any use of this information as applied to other printers.
Neither SEIKO EPSON CORPORATION nor its affiliates shall be liable to the purchaser of
this product or third parties for damages, losses, costs, or expenses incurred by the purchaser
or third parties as a result of: accident, misuse, or abuse of this product or unauthorized
modifications, repairs, or alterations to this product, or (excluding the U.S.) failure to strictly
comply with SEIKO EPSON CORPORATION's operating and maintenance instructions.
SEIKO EPSON CORPORATION shall not be liable for any damages or problems arising from
the use of any options or any consumable products other than those designated as Original
EPSON Products or EPSON Approved Products by SEIKO EPSON CORPORATION.
SEIKO EPSON CORPORATION shall not be held liable for any damage resulting from
electromagnetic interference that occurs from the use of any interface cables other than those
designated as EPSON Approved Products by SEIKO EPSON CORPORATION.
EPSON is a registered trademark and EPSON Stylus is a trademark of SEIKO EPSON
CORPORATION.
Microsoft and Windows are registered trademarks of Microsoft Corporation.
General Notice: Other product names used herein are for identification purposes only and may be
trademarks of their respective owners. EPSON disclaims any and all rights in those marks.
Copyright © 2000 by SEIKO EPSON CORPORATION, Nagano, Japan.
-1
Advertisement
Table of Contents

Subscribe to Our Youtube Channel
Related Manuals for Epson Stylus Color 580


Summary of Contents for Epson Stylus Color 580
- Page 1 EPSON Approved Products by SEIKO EPSON CORPORATION. EPSON is a registered trademark and EPSON Stylus is a trademark of SEIKO EPSON CORPORATION. Microsoft and Windows are registered trademarks of Microsoft Corporation.
-
Page 3: Table Of Contents
Contents Printer Parts and Functions Unpacking the Printer........1 Printer Parts . - Page 4 Making Changes to Printer Settings ..... . . 2-3 Making the Media Type setting ..... . 2-4 Using the Automatic mode .
- Page 5 Chapter 4 Using the Printer Software for Macintosh Printer Software Introduction ......4-1 Making Changes to Printer Settings .
- Page 6 For Windows 98 Users........6-1 Setting up your printer as a shared printer ... . . 6-1 Accessing the printer through a network .
- Page 7 Printer does not work correctly with the USB cable ..9-3 Diagnosing the Problem ........9-4 Cancelling Printing .
- Page 8 Ink Cartridges ......... . A-6 Mechanical.
-
Page 9: Printer Parts And Functions
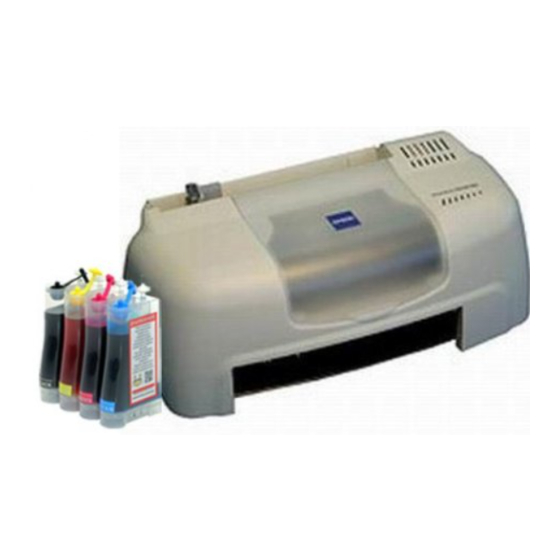
Printer Parts and Functions Unpacking the Printer Your printer box should include a CD-ROM containing printer software that runs your printer, and the items shown in the illustration below. paper support printer output tray ink cartridges In some locations, the power cord comes attached to the printer. The shape of the AC plug varies by country;... -
Page 10: Printer Parts
Printer Parts paper support edge guides printer cover output tray sheet feeder ink cartridge clamps print head Printer Parts and Functions... -
Page 11: Safety Instructions
Safety Instructions Important Safety Instructions Read all of these instructions before using your printer. Also, be sure to follow all warnings and instructions marked on the printer. ❏ Do not block or cover the openings in the printer’s cabinet. Do not insert objects through the slots. ❏... -
Page 12: A Few Precautions
❏ If you use an extension cord with the printer, make sure that the total ampere rating of the devices plugged into the extension cord does not exceed the cord’s ampere rating. Also, make sure that the total ampere rating of all devices plugged into the wall outlet does not exceed the wall outlet’s ampere rating. -
Page 13: When Handling The Ink Cartridges
❏ Do not put your hand inside the printer or touch the ink cartridges during printing. ❏ Do not move the print head by hand; otherwise, you may damage the printer. ❏ Before transporting the printer, make sure that the print head is in the home (far right) position and the ink cartridges are in place. -
Page 14: When Choosing A Place For The Printer
❏ Do not dismantle the ink cartridges or try to refill them. This could damage the print head. ❏ After bringing an ink cartridge inside from a cold storage site, allow it to warm up at room temperature for at least three hours before using it. -
Page 15: Energy Star Compliance
ENERGY STAR Compliance As an ENERGY STAR Partner, EPSON has determined that this product meets the ENERGY STAR guidelines for energy efficiency. The International ENERGY STAR Office Equipment Program is a voluntary partnership with the computer and office equipment industry to promote the introduction of energy-efficient personal computers, monitors, printers, fax machines, copiers, and scanners in an effort to reduce air pollution caused by power generation. -
Page 16: Warnings, Cautions, And Notes
If you have to fit a plug: As the colours of the mains lead of this appliance may not match coloured markings used to identify the terminals in a plug, please proceed as follows: The green and yellow wire must be connected to the terminal in the plug which is marked with the letter E or the earth symbol ( G). -
Page 17: Chapter 1 Paper Handling
Chapter 1 Paper Handling Loading Plain Paper Follow the steps below to load plain paper in the printer. 1. Slide the left edge guide so that the distance between the edge guides is slightly wider than the width of your paper. 2. -
Page 18: Loading Special Paper And Other Media
❏ Leave enough space in front of the printer for the paper to be fully ejected. ❏ Always load paper into the sheet feeder short edge first. ❏ Make sure the paper stack fits under the arrow mark inside the edge guide. - Page 19 ❏ Make sure the printable side of the paper is facing up when loading media into the sheet feeder. See the instruction sheets packed with the media to determine which side is the printable surface. Some media have cut corners to help identify the correct loading direction, as shown in the illustration.
- Page 20 ❏ The loading capacities for EPSON special media are shown below. 360 dpi Ink Jet Paper and Up to 30 sheets. Photo Quality Ink Jet Paper Photo Quality Ink Jet Cards, Ink Up to 30 index cards. Jet Note Cards, and Ink Jet Always place the included Greeting Cards support sheet* under the cards.
-
Page 21: About Special Media Cleaning Sheets
❏ If the paper is curled, flatten it or curl it slightly toward the opposite side before loading. Printing on curled paper may smear your printout, especially when printing with Maximum selected as the Printable Area setting. If you wish to print on the reverse side of an Ink Jet Card with Maximum selected as the Printable Area setting, flatten the card or curl it slightly toward the opposite side before loading. -
Page 22: Using Epson Photo Paper (4 X 6 Inch, 200 X 300 Mm)
❏ Load envelopes flap edge first with the flap side down, as shown in the illustration. Available envelopes sizes are: No.10, DL, C6, 132 mm × 220 mm ❏ Do not use envelopes that are curled or folded. Flatten the envelope flaps before loading. -
Page 23: Removing The Perforated Margins
❏ Load the paper printable side up with the perforated margins positioned as shown in the illustration. loading position ❏ Use flat, undamaged paper. If the paper is curled, flatten it before loading to avoid paper feeding problems. ❏ You can load up to one sheet of 4 × 6 inch Photo Paper or one sheet of 200 ×... - Page 24 ❏ To remove the perforated margins, fold the paper back and forth a few times along the perforations, then carefully tear the margins off. ❏ You can also remove the margins by cutting along the perforations. Note: Keep in mind that the edges of your image might be cut off when you remove the perforated margins.
- Page 25 4 x 6 inch 17 mm (0.67 in.) trimmed size 6 mm (0.24 in.) printed image size 3 mm (0.12 in.) 3 mm 6 mm 200 x 300 mm 19 mm (0.75 in.) trimmed size 8 mm (0.31 in.) printed image size 5 mm (0.2 in.) 5 mm 19 mm...
-
Page 26: Storing Epson Photo Paper
Storing EPSON Photo Paper Keep the following points in mind when storing Photo Paper. ❏ Return unused paper to the original package as soon as you finish printing, and avoid storing it in places exposed to high temperature, humidity, or direct sunlight. ❏... -
Page 27: Chapter 2 Printing With Windows
Chapter 2 Printing with Windows Printer Software Introduction The printer software which comes with your printer includes a printer driver and printer utilities. The printer driver lets you choose from a wide variety of settings to get the best results from your printer. -
Page 28: Accessing The Printer Software
Accessing the printer software You can access the printer software from most Windows applications, or from the Windows Start menu. When you access the printer software from a Windows application, the settings that you make apply only to the application you are using. When you access the printer software from the Start menu, the settings that you make apply to all of your Windows applications. -
Page 29: Making Changes To Printer Settings
Making Changes to Printer Settings The printer driver features the following menus and settings. Main: Media Type, Ink, Mode, Print Preview Paper: Paper Size, Copies, Orientation, Printable Area Layout: Reduce/Enlarge, Multi-Page, Watermark The Mode settings on the Main menu are arranged to give you three levels of control over the printer driver, as explained below. -
Page 30: Making The Media Type Setting
Note: To make the Mode setting using the printer-shaped icon on the Windows taskbar, right-click the icon and select Printer Settings from the shortcut menu that appears. Making the Media Type setting The Media Type setting determines what other settings are available, so you should always make this setting first. - Page 31 Photo Quality Ink Jet Paper EPSON Photo Quality Ink Jet Paper (A4) S041061 EPSON Photo Quality Ink Jet Cards (A6) S041054 EPSON Photo Quality Ink Jet Cards (5 × 8”) S041121 EPSON Photo Quality Ink Jet Cards (8 × 10”) S041122 EPSON Photo Quality Self Adhesive Sheets (A4) S041106 EPSON Ink Jet Note Cards A6 (with envelopes)
-
Page 32: Using The Automatic Mode
Ink Jet Transparencies EPSON Ink Jet Transparencies (A4) S041063 Note: The availability of special media varies by location. Using the Automatic mode When Automatic is selected as the Mode setting on the Main menu, the printer driver takes care of all detailed settings based on the current Media Type and Ink settings. -
Page 33: Using The Photoenhance Mode
Note: ❏ Depending on the media selected in the Media Type list (while Automatic is selected), a slider appears under the Custom radio button that lets you choose from Quality or Speed settings. Select Quality when print quality is more important than speed. ❏... - Page 34 ❏ Printing with PhotoEnhance selected may increase the time required for printing, depending on your computer system and the amount of data contained in your image. You can select from the following settings. Standard This setting provides standard image correction for most photos.
-
Page 35: Using The Custom Mode
Using the Custom mode Selecting Custom as the Mode setting enables the Custom Settings list, from which you can select a color-matching method. Color-matching methods automatically adjust the colors produced by the printer to match the colors that appear on your screen. - Page 36 To select a color-matching method, select Custom as the Mode setting on the Main menu. This enables the Custom Settings list. Click anywhere in the Custom Settings list box to open it, then select the most appropriate color-matching method. The color- matching method that you select will automatically adjust the colors produced by the printer to match the colors that appear on your screen.
- Page 37 1. Select Custom as the Mode setting on the Main menu, then click the Advanced button. The Advanced dialog box opens. 2. Select the Media Type that is loaded in the printer. For details, see “Making the Media Type setting” on page 2-4. 3.
- Page 38 6. To save your advanced settings in the Custom Settings list for later use, see the next section. If you only wish to use these settings for the current print job, click OK to apply your settings and return to the Main menu. Click Cancel to return to the Main menu without applying your settings.
-
Page 39: Modifying The Printout Style
To delete advanced settings from the Custom Settings list, select them in the Custom Settings dialog box and click Delete. Using your saved settings To use your settings, select Custom as the Mode setting on the Main menu, then select your settings in the Custom Settings list, located below the Custom radio button. -
Page 40: Making The Paper Menu Settings
Making the Paper menu settings Use the settings on the Paper menu to change the paper size, set the number of copies and other copy parameters, specify the paper orientation, and adjust the printable area. You can make the following settings on the Paper menu: Paper Size Select the paper size you want to use. -
Page 41: Fitting Your Document To The Paper Size
Printable Area Select Centered if you want to center the printout. Select Maximum if you need to increase the printable area. Note: When Maximum is selected, the print quality may decline at the edges of the printout. Before printing large jobs using this setting, print a single sheet to confirm quality. -
Page 42: Printing Two Or Four Pages On One Sheet
Custom Allows you to manually reduce or enlarge an image. Click the arrows next to the Scale to box to select a percentage between 10% and 400%. Printing two or four pages on one sheet Select N-up as the Multi-Page setting on the Layout menu to print two or four pages of your document on one sheet of paper. -
Page 43: Printing Posters
Print page Prints a frame around each page that is frames printed on the sheet of paper. Printing posters A single document page can be enlarged to cover 4, 9, or 16 printed sheets of paper. Select Poster as the Multi-Page setting to print a poster-size image. -
Page 44: Printing A Watermark On Your Document
You can make the following settings. Overlapping Slightly overlaps the images so that they can be Panels aligned more precisely. Print Cutting Prints border lines on the images to guide you Guidelines when trimming the pages. If you only want to print a few of the panels without printing the entire poster, click the panels that you don’t wish to print, then click OK to close the Poster Settings dialog box. - Page 45 You can also add your own text-based or image-based watermarks to the Watermark list. To add a watermark, click the Add/Del button. The following dialog box appears. Refer to the appropriate section below to finish creating a custom watermark. Creating an image-based watermark Follow the steps below to create an image-based watermark.
- Page 46 Creating a text-based watermark Follow the steps below to create a text-based watermark. 1. Select Text. 2. Type your text in the Text box. The text that you enter will also be assigned to the watermark as a watermark name. 3.
-
Page 47: Previewing Your Printout
3. Make sure that the appropriate watermark is selected in the watermark list box, then make Color, Position, Density, Size, Font, Font Style and Angle settings. For details, please see the online help. Your settings are reflected in the display at the left side of the dialog box. - Page 48 When you send a print job to the printer, the Print Preview window opens, allowing you to make changes before printing. The Preview dialog box contains several icon buttons which you can use to perform the following functions. Selection Click this button to select and move watermarks.
- Page 49 Watermark Click this button to open the Watermark Settings dialog box, where you can change any of the current watermark settings. Reset Click this button to return all watermark watermark settings to what they were when the settings Print Preview window was first opened. If nothing has been changed, this feature is not available.
-
Page 50: Using The Printer Utilities
Remove Click this button to remove the page highlighted pages from the list of pages to be printed. After you have previewed the document, click Print to print the document, or click Cancel to cancel printing. Using the Printer Utilities EPSON printer utilities allow you to check the current printer status and to perform some printer maintenance from your computer. -
Page 51: Nozzle Check
Note: ❏ The letter in parentheses after the utility name indicates the shortcut key for that utility. Press Alt and the letter on the keyboard to open that utility. ❏ Do not use the Nozzle Check, Head Cleaning, and Print Head Alignment utilities if your printer is connected to your computer through a network. -
Page 52: Head Cleaning
Head Cleaning The Head Cleaning utility cleans the print head. You may need to clean the print head when you notice print quality has declined. Use the Nozzle Check utility first to confirm that the print head needs to be cleaned. You can access the Nozzle Check utility directly from the Head Cleaning utility. -
Page 53: Speed & Progress
Speed & Progress You can make settings related to print speed and progress in this dialog box. The available settings are as follows: High Speed Copies To print multiple copies of your document faster, select High Speed Copies. For more details, see “Making the High Speed Copies setting”... -
Page 54: Monitoring Preferences
Spooling RAW datatype requires less resources than EMF, so some problems (“Insufficient Memory/Disk Space to Print”, “Slow print speed”, etc.) can be solved by selecting the “Always spool RAW datatype” check box. When spooling RAW datatype, print progress as displayed by the Progress Meter may differ from actual print progress. -
Page 55: Getting Information Through Online Help
You can make the following settings: Select Displays the current error item notification settings. Notification In this area, you can designate whether to have general error messages, communication error messages, or ink status messages displayed during printing or copying. Select the appropriate check box to specify the error types for which you wish to receive notification. -
Page 56: Accessing Help From Your Application
Accessing help from the Windows Start menu Click the Start button, point to Programs and Epson (for Windows 98) or EPSON Printers (for Windows 2000), then click EPSON Stylus COLOR 580 Help. The help contents window opens. Increasing the Print Speed Follow the instructions in this section to increase the printing speed of your printer. - Page 57 However, even if your document requires the highest resolution and extensive use of color—for example, when you are printing a camera-ready composite that includes color photographs—it may still be possible to optimize the print speed by adjusting other printing conditions. Keep in mind that changing some conditions to increase the print speed may also lower print quality.
- Page 58 The table below shows the factors related to print speed only. Print speed Faster Slower Printer driver menu Printer driver Black Color Advanced settings dialog box, Main menu Flip Horizontal* Advanced dialog box Collate* Paper menu Reverse Order* Data Variety of Grayscale** Full color –...
-
Page 59: Making The High Speed Copies Setting
Making the High Speed Copies setting You can increase the print speed by selecting the High Speed Copies check box in the Speed & Progress dialog box. To make this setting, click the Speed & Progress button on your printer software’s Utility menu. - Page 60 2-34 Printing with Windows...
-
Page 61: Chapter 3 Checking Printer Status And Managing Print Jobs For Windows
Chapter 3 Checking Printer Status and Managing Print Jobs for Windows Using the Progress Meter When you send a print job to the printer, the Progress Meter opens, as shown in the illustration below. The Progress Meter indicates the progress of the current print job and provides printer status information when bidirectional communication between the printer and computer is established. - Page 62 Epson Printing Tips Tips for getting the most out of your EPSON printer driver appear in the text box at the bottom of the Progress Meter window. A new tip appears every 30 seconds. For more details on a tip which is currently displayed, click the Details button.
-
Page 63: Using Epson Spool Manager
Note: EPSON Spool Manager is not available for Windows 2000. After you send a print job, an EPSON Stylus COLOR 580 button appears on the taskbar. Click this button to open the EPSON Spool Manager. -
Page 64: Accessing Epson Status Monitor 3
Accessing EPSON Status Monitor 3 There are two ways to access EPSON Status Monitor 3. ❏ Double-click the printer-shaped shortcut icon on the Windows taskbar. See “Monitoring Preferences” on page 2-28 for details. ❏ Open the printer driver, click the Utility tab, then click EPSON Status Monitor 3. - Page 65 ❏ Technical Support: You can access the Problem Solver HTML manual from EPSON Status Monitor 3. If you encounter a problem, click Technical Support in the EPSON Status Monitor 3 window. Checking Printer Status and Managing Print Jobs for Windows...
- Page 66 Checking Printer Status and Managing Print Jobs for Windows...
-
Page 67: Chapter 4 Using The Printer Software For Macintosh
Chapter 4 Using the Printer Software for Macintosh Printer Software Introduction The printer software which comes with your printer includes a printer driver and printer utilities. The printer driver lets you choose from a wide variety of settings to get the best results from your printer. - Page 68 ❏ Background Printing dialog box (click the Background Printing icon button located in the Print dialog box) ❏ Preview dialog box (click the Preview icon button and then click Preview in the Print dialog box) The Mode settings in the Print dialog box are arranged to give you three levels of control over the printer driver, as explained below.
-
Page 69: Making The Media Type Setting
Making the Media Type setting The Media Type setting determines what other settings are available, so you should always make this setting first. In the Print dialog box, select the Media Type setting that matches the paper that is loaded in the printer. To find out what media type you are using, find your media in the list below, and refer to the corresponding media type under which it is grouped (shown in larger type). - Page 70 Photo Quality Ink Jet Paper EPSON Photo Quality Ink Jet Paper (A4) S041061 EPSON Photo Quality Ink Jet Cards (A6) S041054 EPSON Photo Quality Ink Jet Cards (5 × 8”) S041121 EPSON Photo Quality Ink Jet Cards (8 × 10”) S041122 EPSON Photo Quality Self Adhesive Sheets (A4) S041106 EPSON Ink Jet Note Cards A6 (with envelopes)
-
Page 71: Using The Automatic Mode
Ink Jet Transparencies EPSON Ink Jet Transparencies (A4) S041063 Note: The availability of special media varies by location. Using the Automatic mode When Automatic is selected as the Mode setting in the Print dialog box, the printer driver takes care of all detailed settings based on the current Media Type and Ink settings. -
Page 72: Using The Photoenhance Mode
Using the PhotoEnhance mode The Photo Enhance mode provides a variety of image-correction settings that you can apply to your photo images before printing. PhotoEnhance does not affect your original data. Note: ❏ This mode is only available when printing 32-bit color data. ❏... -
Page 73: Using The Custom Mode
Using the Custom mode Selecting Custom as the Mode setting enables the Custom Settings list, from which you can select ColorSync, a color-matching feature. The ColorSync feature automatically adjusts the colors produced by the printer to match the colors that appear on your screen. - Page 74 Making advanced settings Follow the instructions below to make advanced settings. 1. Select Custom as the Mode setting in the Print dialog box, then click the Advanced button. The Advanced dialog box opens. 2. Select the Media Type that is loaded in the printer. For details, see “Making the Media Type setting”...
- Page 75 ❏ Some settings may be unavailable, depending on the Print Quality, Media Type, and Ink settings that you make. 6. To save your advanced settings in the Custom Settings list for later use, see the next section. If you only wish to use these settings for the current print job, click OK to apply your settings and return to the Print dialog box.
-
Page 76: Changing The Page Setup
Using your saved settings To use your settings, select Custom as the Mode setting in the Print dialog box, then select your settings in the Custom Settings list, located to the right of the Custom radio button. Settings such as Print Quality and Color are made automatically, according to the selections that you made when you saved the advanced settings. - Page 77 Orientation Select Portrait (tall) or Landscape (wide) to change the orientation of your printout. If you need to print close to the bottom of the page, select the Rotate by 180 degrees check box. Reduce or Use this setting to reduce or enlarge the size of your Enlarge image from 25% to 400%.
- Page 78 2. To define a new paper size, click New. The dialog box updates to allow you to enter a name for the new size. 3. Type a unique name for the paper size in the Paper Size List. 4. Specify the measurement unit as either Inches or cm. 5.
-
Page 79: Modifying The Page Layout
3. Specify the margins by typing in the margin input boxes or by manipulating the preview image. 4. Click OK. Modifying the page layout You can modify the page layout of your document using the printer driver settings located in the Layout dialog box, shown below. -
Page 80: Fitting Your Document To The Paper Size
You can also specify the printing order for your print job. When printing multiple copies of your document, select Collate to print one complete document set at a time, or Reverse Order to print your documents in reverse order, starting with the last page. Fitting your document to the paper size You can proportionally enlarge or reduce the size of the image to make it fit the paper size you select in the Paper Size list. -
Page 81: Printing Posters
Page Order Allows you to specify the order in which the pages will be printed on the sheet of paper. Print page Allows you to print a frame around each page frames on the sheet of paper. Printing posters A single document page can be enlarged to cover 4, 9, or 16 printed sheets of paper. -
Page 82: Printing A Watermark On Your Document
If you only want to print a few of the panels without printing the entire poster, click Panel Selection, then click the panels you don’t wish to print, and then click OK. Only the panels that you did not click will be printed. Printing a watermark on your document To print a watermark in the background of your printed documents or images, select the Watermark check box in the Page... - Page 83 1. Click the Add/Del button beside the Name list. The following dialog box appears. 2. To use an image file as a watermark, click the Add PICT button. Specify the desired image file, then click Open. To create a text-based watermark, click the Add Text button. Type the text in the Text box, select a font and a text style, then click OK.
-
Page 84: Setting The Print Time
3. The image file name or the watermark text appears in the Mark Name list in the Watermark dialog box. To change the name of an image watermark, click it in the list, then type a new name. When a text watermark is selected in the Name list, you can edit the text and change the font and text style by clicking the Edit Text button. -
Page 85: Saving Spool Data As A File
3. Select Urgent, Normal, Print at, or Hold as the Print Time option. If you select Print at, use the arrows beside the date and time boxes to specify the date and time you want to print the document. Note: Make sure the computer and printer will be turned on at the date and time you specify. -
Page 86: Previewing Your Printout
3. Click the Save File button. The following dialog box appears. 4. Select the location where you want to save the file, then type a file name in the Save As box and click Save. When you want to print the document, double-click the file to open EPSON Monitor3, make sure that the correct document is selected, then click the Resume button to send the data to the... - Page 87 3. Click the Preview button. The Preview dialog box appears and displays a preview of your document. The Preview dialog box contains six icon buttons you can use to perform the following functions. Selection Click this button to select, move, and resize watermarks.
-
Page 88: Using The Printer Utilities
4. If you are satisfied with the previewed image, click Print. If you are not satisfied with the appearance of the image, click Cancel. The Preview and Print dialog boxes close with the current print settings preserved. Open the Print dialog box again to make additional changes to the print settings. -
Page 89: Nozzle Check
To use the StatusMonitor, click the EPSON StatusMonitor button in the Utility dialog box. For details, see “Using EPSON StatusMonitor” on page 5-1. Note: Do not use the Nozzle Check, Head Cleaning, Print Head Alignment, or Ink Cartridge Replacement utilities while printing is in progress; otherwise, your printout may be marred. -
Page 90: Ink Cartridge Replacement
Ink Cartridge Replacement The Ink Cartridge Replacement utility guides you through the process of replacing an old or damaged ink cartridge before it has run out of ink. Follow the on-screen instructions to use this utility. Configuration Clicking this button opens the Configuration dialog box, where you can change the way the StatusMonitor utility notifies you when the printer status changes. -
Page 91: Chapter 5 Checking Printer Status And Managing Print Jobs For Macintosh
Chapter 5 Checking Printer Status and Managing Print Jobs for Macintosh Using EPSON StatusMonitor EPSON StatusMonitor monitors the printer. If it detects a printer error, it will inform you with an error message. When the ink runs low or out, a How to button appears. Click How to and EPSON StatusMonitor will lead you step-by-step through the ink cartridge replacement procedure. -
Page 92: Accessing Epson Statusmonitor
Accessing EPSON StatusMonitor To access EPSON StatusMonitor, follow the steps below. 1. Click Print or Page Setup on the File menu of your application. The Print dialog box opens. 2. Click the StatusMonitor icon button or click the Utility icon button and then the EPSON StatusMonitor button in the Utility dialog box. - Page 93 3. Click the Configuration button. The Configuration Settings dialog box appears. In the Configuration Settings dialog box, you can make the following settings: Error notification Choose the method by which EPSON StatusMonitor will notify you in case of an error. Warning Choose the method by which EPSON StatusMonitor will notify you if a warning...
-
Page 94: Using Epson Monitor3
Check the ink level Select this check box to have the printer before starting to print. check the ink levels before starting to print. Using EPSON Monitor3 After you send a print job to the printer, you can use the EPSON Monitor3 utility to check, cancel, or change the priority of print jobs that are queued for printing. -
Page 95: Managing Print Jobs Using Epson Monitor3
Note: You can also open EPSON Monitor3 by double-clicking the EPSON Monitor3 icon in the Extensions folder. Managing print jobs using EPSON Monitor3 Using EPSON Monitor3, you can manage print jobs as described below: ❏ Use the buttons below to hold, resume, and delete print jobs. Select the print job that you wish to manage, then click the appropriate button. -
Page 96: Changing The Priority Of Print Jobs
❏ Click the Show details arrow to open an extension at the bottom of the EPSON Monitor3 dialog box, similar to the one below. The extension displays detailed information on a selected document’s printer driver settings. Changing the priority of print jobs To change the priority of print jobs in a print queue, follow the steps below. - Page 97 2. Click the Show details arrow to open an extension at the bottom of the EPSON Monitor3 dialog box, similar to the one below. 3. From the Priority list, select Urgent, Normal, Hold, or Print Time. Note: If you select Print Time, a dialog box opens where you can specify the date and time that the document will print.
- Page 98 Checking Printer Status and Managing Print Jobs for Macintosh...
-
Page 99: Chapter 6 Setting Up Your Printer On A Network
This section tells you how to set up your printer so that other computers on the network can use it. When using EPSON Stylus COLOR 580 as a shared printer, only the computer which is directly connected to the printer can be used to perform such operations as replacing ink cartridges and removing jammed paper. - Page 100 4. Select the I want to be able to allow others to print to my printer(s) check box and click OK. 5. In the Network dialog box, click OK. 6. In the Control Panel, double-click the Printers icon. Note: ❏ If a dialog box requesting the insertion of the Windows 98 CD-ROM appears, insert the CD in the CD-ROM drive and follow the on-screen instructions.
-
Page 101: Accessing The Printer Through A Network
8. Select Shared As, then type the printer information as required and click OK. Accessing the printer through a network To access your printer from other computers on a network, follow the steps below for each computer that will access the printer. Note: Your printer must be set up as a shared resource on the computer to which it is directly connected before you can access it from another... - Page 102 4. Select Network printer, then click Next. 5. Click Browse. 6. Double-click the icon of the computer that is directly connected to the printer. Then, click the icon for the appropriate printer. 7. Click OK and follow the on-screen instructions. Setting Up Your Printer on a Network...
-
Page 103: For Windows 2000 Users
This section tells you how to set up your printer so that other computers on the network can use it. When using EPSON Stylus COLOR 580 as a shared printer, only the computer which is directly connected to the printer can be used to perform such operations as replacing ink cartridges and removing jammed paper. -
Page 104: Accessing The Printer Through A Network
3. Click Shared and type the Share Name. 4. Click OK. Note: Do not select a driver from the Alternate Drivers list. Accessing the printer through a network To access your printer from other computers on the network, follow the steps in this section for each computer that will access the printer. - Page 105 3. Double-click the Printers icon. 4. Right-click the icon for your printer, then click Properties on the menu that appears. The printer driver opens. 5. Click the Ports tab, then click Add Port. Setting Up Your Printer on a Network...
- Page 106 6. In the Printer Ports dialog box, select Local Port, then click New Port. 7. In the Port Name dialog box, enter the path information for your printer using the format below: \\name of computer that is connected to the printer\name of the shared printer.
-
Page 107: For Macintosh Users
10. On the Ports menu, make sure that the new port is included in the list and that the corresponding check box is selected. Click OK to close the printer driver. For Macintosh Users This section tells you how to set up the printer so that you can use it on an AppleTalk network. - Page 108 1. Plug in the printer. 2. Choose Chooser from the Apple menu and click the icon for your printer. Then, select the port to which the printer is connected. 3. Click the Setup button. The Printer Sharing Setup dialog box appears.
-
Page 109: Accessing The Printer Through A Network
Accessing the printer through a network To access your printer from other computers on a network, follow the steps in this section for each computer that will access the printer. 1. Plug in your printer. 2. Install the printer driver from your software CD-ROM. 3. - Page 110 4. If the following dialog box appears, enter the password for the printer, then click OK. 5. Select the appropriate Background Printing radio button to turn background printing on or off. 6. Close the Chooser. 6-12 Setting Up Your Printer on a Network...
-
Page 111: Chapter 7 Replacing Ink Cartridges
Chapter 7 Replacing Ink Cartridges Replacing an Empty Ink Cartridge The Status Monitor 3 utility (for Windows), or the StatusMonitor utility (for Macintosh), lets you monitor the remaining ink levels from your computer and view on-screen instructions for replacing an empty or nearly empty ink cartridge. When an ink cartridge is empty or nearly empty, click the How to button in the Status Monitor window to move the print head to the ink cartridge replacement position. - Page 112 Warning: ❏ Keep ink cartridges out of reach of children. Do not allow children to drink from or otherwise handle the cartridges. ❏ If ink gets on your hands, wash them thoroughly with soap and water. If ink gets into your eyes, flush them immediately with water.
-
Page 113: Replacing An Old Or Damaged Ink Cartridge
Note: ❏ You cannot continue printing with one ink cartridge empty, even if the other cartridge still contains ink. Before printing, replace the empty cartridge. ❏ In addition to the ink used during document printing, ink is consumed during print head cleaning, ink cartridge replacement, and the self-cleaning cycle which is performed when the printer is turned on. -
Page 114: For Windows Users
Caution: ❏ Once you remove an installed ink cartridge from the printer, it becomes unusable and cannot be reinstalled, even if ink remains. ❏ Do not remove the used cartridge from the printer until you are ready to replace it with a new one. ❏... -
Page 115: For Macintosh Users
2. Click the Utility tab, then click the Ink Cartridge Replacement button. 3. Follow the on-screen instructions. For Macintosh users To use the Ink Cartridge Replacement utility, click the Utility icon button in the Print or Page Setup dialog box, then click the Ink Cartridge Replacement button. - Page 116 Replacing Ink Cartridges...
-
Page 117: Chapter 8 Maintenance
Chapter 8 Maintenance Checking the Print Head Nozzles If you find that the printed image is unexpectedly faint or dots in the printed image are missing, you may be able to identify the problem by checking the print head nozzles. You can check the print head nozzles from your computer using the Nozzle Check utility, accessed through the printer software. -
Page 118: Cleaning The Print Head
❏ Access the printer software and click the Utility tab, then click the Nozzle Check button. For details on accessing the printer software, see “Accessing the printer software” on page 2-2. After opening the utility, follow the on-screen instructions. For Macintosh users Follow the steps below to access the Nozzle Check utility. -
Page 119: Using The Head Cleaning Utility
Using the Head Cleaning utility Refer to the appropriate section below to use the Head Cleaning utility. Note: If the Status Monitor 3, Progress Meter, or StatusMonitor displays a message indicating that the ink cartridges need replacing, you cannot clean the print head. Replace the appropriate ink cartridge first. For Windows users There are two ways to access the Head Cleaning utility: ❏... - Page 120 In the check pattern, if you find that any segments are missing from the test lines, you may need to repeat the head cleaning and print the nozzle check pattern again. If print quality has not improved after repeating this procedure four or five times, unplug the power cord of your printer and leave it alone overnight.
-
Page 121: Aligning The Print Head
If the print quality still has not improved, one or both of your ink cartridges may be old or damaged and may need to be replaced. To replace an ink cartridge, see “Replacing an Old or Damaged Ink Cartridge” on page 7-3. If print quality remains a problem after replacing the ink cartridges, contact your dealer. -
Page 122: For Macintosh Users
After opening the utility, follow the on-screen instructions. For Macintosh users Follow the steps below to align the print head using the Print Head Alignment utility. 1. Access the printer software and click the Utility icon button in the Print or Page Setup dialog box, then click the Print Head Alignment button. -
Page 123: Transporting The Printer
Caution: ❏ Be careful not to wipe the carriage shaft. ❏ Never use alcohols or thinners to clean the printer; these chemicals can damage the components as well as the case. ❏ Be careful not to get water on the printer mechanism or electronic components. - Page 124 2. To remove the output tray, lift it and pull it out. 3. Disconnect the interface cable from the printer. 4. Remove the paper from the sheet feeder and remove the paper support. 5. Open the printer cover again. Secure the ink cartridge holder to the printer with tape as shown below, then close the printer cover.
- Page 125 Maintenance...
- Page 126 8-10 Maintenance...
-
Page 127: Chapter 9 Troubleshooting
Chapter 9 Troubleshooting Correcting USB Problems If you are having difficulty using your printer with a USB connection, read the information in this section. Make sure that your computer is a Windows 98 or Windows 2000 pre-installed model Your computer must be a Windows 98 pre-installed model, a Windows 2000 pre-installed model, or a Windows 98 pre- installed model that has been upgraded to Windows 2000. - Page 128 COLOR 580 appears, the printer driver is not installed correctly. If neither USB Printer nor EPSON Stylus COLOR 580 appears under Other Devices, click Refresh or unplug the USB cable from the printer, then plug it into the printer again.
-
Page 129: Printer Does Not Work Correctly With The Usb Cable
4. Under Other Devices, click USB Printer or EPSON Stylus COLOR 580, then click Remove and then OK. 5. When the following dialog box appears, click OK. Then, click OK to close the System Properties dialog box. 6. Turn off the PC and unplug both the printer and the PC. Then, reinstall the drivers from the beginning, following the instructions in the Setup Guide. -
Page 130: Diagnosing The Problem
❏ Use the USB cable (C83623✽) recommended in “System Requirements” on page A-10. ❏ If you use a USB hub, connect the printer to the first tier of the hub, or connect the printer directly to the computer’s USB port. ❏... -
Page 131: Cancelling Printing
When the ink is out, click the How To button in the Status Monitor 3, Progress Meter, or StatusMonitor window to have the Status Monitor lead you step-by-step through the cartridge replacement procedure. Cancelling Printing If the printouts are not what you expected and contain incorrect or garbled characters or images, you may need to cancel printing. -
Page 132: For Macintosh Users
Note: EPSON Spool Manager is not available for Windows 2000. After you send a print job, an EPSON Stylus COLOR 580 button appears on the taskbar. Click this button to open the EPSON Spool Manager. To cancel a print job, select the appropriate job and click Cancel. - Page 133 1. Select EPSON Monitor3 from the application menu. 2. Unplug the printer. 3. In the Document Name list, select the document which is printing, then click the Stop icon button to cancel the print job. When background printing is off Follow the steps below to cancel a print job.
-
Page 134: Print Quality Could Be Better
Print Quality Could Be Better If you are having print quality problems, try the solutions offered in this section. Horizontal banding Try one or more of these solutions: ❏ Make sure the printable side of the paper is face up in the sheet feeder. -
Page 135: Color Gaps
❏ Clear the High Speed check box in the Advanced dialog box of your printer driver. For Windows users, see “Making advanced settings” on page 2-10 for instructions. For Macintosh users, see “Making settings in the Advanced dialog box” on page 4-7. ❏... -
Page 136: Incorrect Or Missing Colors
Incorrect or missing colors Try one or more of these solutions: ❏ Change the Ink setting in your printer driver to Color. For instructions, see “Using the Automatic mode” on page 2-6 for Windows or “Using the Automatic mode” on page 4-5 for Macintosh. -
Page 137: Printouts Are Not What You Expected
❏ Run the Head Cleaning utility. ❏ Run the Print Head Alignment utility. ❏ Ink may have leaked inside the printer; wipe the inside of the printer with a soft, clean cloth. Wipe here Warning: Be careful not to touch the gears inside the printer. Caution: Be careful not to wipe the carriage shaft. -
Page 138: Incorrect Or Garbled Characters
Incorrect or garbled characters Try one or more of these solutions: ❏ Select your printer as the default printer in Windows. ❏ Clear any stalled print jobs from the Spool Manager. For instructions, see “Using EPSON Spool Manager” on page 9-6. ❏... -
Page 139: Blank Pages Print
Blank pages print Try one or more of these solutions: ❏ Select your printer as the default printer in Windows. ❏ For Windows, check the settings on the Paper menu. Make sure they are appropriate for the paper size that you are using. For Macintosh, check the settings in the Page Setup dialog box. -
Page 140: Printer Doesn't Print
❏ Select Automatic as the Mode setting on your printer driver’s Main menu (Windows) or in the Print dialog box (Macintosh) and then move the slider to Speed. For instructions, see “Using the Automatic mode” on page 2-6 for Windows or “Using the Automatic mode”... -
Page 141: Paper Doesn't Feed Correctly
If this does not work, replace the ink cartridges. See “Replacing an Empty Ink Cartridge” on page 7-1 for instructions. ❏ Make sure there are no error messages displayed. If an error message indicates that the ink cartridges need replacing, click the How To button and follow the on-screen instructions. -
Page 142: Multiple Pages Feed
❏ The black and/or color ink cartridges are not out. If one is, replace the appropriate cartridge. See “Replacing an Empty Ink Cartridge” on page 7-1 for details. Then, load the paper again. Make sure you follow any special loading instructions that came with your paper. See also “Paper Handling”... -
Page 143: Paper Isn't Ejected Fully Or Is Wrinkled
❏ The paper stack was fanned before loading. ❏ The paper isn’t loaded above the arrow on the left edge guide. ❏ The left edge guide is adjusted to fit your paper. Paper isn't ejected fully or is wrinkled If the paper doesn’t eject fully, click Stop on the Progress Meter, then open the printer cover and remove the paper. - Page 144 9-18 Troubleshooting...
-
Page 145: Chapter 10 Consumable Products
Chapter 10 Consumable Products Consumable products Ink cartridges You can use the following cartridges with your printer. Black ink cartridge T013 Color ink cartridge T014 Note: The product numbers of ink cartridges may vary by location. Media types EPSON offers specially-designed media for ink jet printers to meet most high-quality printing needs. - Page 146 EPSON Premium Ink Jet Plain Paper (A4) S041214 EPSON 360 dpi Ink Jet Paper (A4) S041059 EPSON Iron-On Cool Peel Transfer Paper (A4) S041154 EPSON Photo Quality Ink Jet Paper (A4) S041061 EPSON Photo Quality Ink Jet Cards (A6) S041054 EPSON Photo Quality Ink Jet Cards (5 ×...
- Page 147 EPSON Photo Quality Glossy Film (A4) S041071 EPSON Photo Quality Glossy Film (A6) S041107 EPSON Photo Stickers 16 (A6) S041144 EPSON Photo Stickers 4 (A6) S041176 EPSON Ink Jet Transparencies (A4) S041063 Note: The availability of special media varies by location. 10-3 Consumable Products...
- Page 148 10-4 Consumable Products...
-
Page 149: Appendix A Printer Specifications
Appendix A Printer Specifications Printing Printing method On-demand ink jet Nozzle configuration Monochrome (black) 48 nozzles Color (cyan, magenta, yellow) 45 nozzles (15 [each color] × 3) Maximum 1440 dpi × 720 dpi Resolution Print direction Bidirectional with logic seeking Control code ESC/P Raster EPSON Remote... -
Page 150: Paper Specifications
Paper specifications Single sheets: A4 (210 mm × 297 mm) Size A5 (148 mm × 210 mm) Letter (216 mm × 279 mm) Legal (216 mm × 356 mm) Paper types Plain bond paper, special paper distributed by EPSON Thickness 0.08 mm to 0.11 mm (0.003 to 0.004 inch) (for plain bond paper) - Page 151 Transparencies, Glossy Film: A4 (210 mm × 297 mm) Size Letter (216 mm × 279 mm) A6 (105 mm × 148 mm) for glossy film Paper types Special paper distributed by EPSON Self Adhesive Sheets: A4 (210 mm × 297 mm) Size Paper types Special paper distributed by EPSON...
-
Page 152: Printable Area
❏ Do not load curled or folded paper. ❏ Use paper under normal conditions: Temperature 15 to 25°C (59 to 77°F) Humidity 40 to 60% RH Printable area Single sheets (including panoramic size) and index cards Envelopes The minimum top margin is 3.0 mm (0.12"). When loading multiple sheets of EPSON Photo Quality Glossy Film, the minimum top margin is 30.0 mm (1.2"). - Page 153 B-L: The minimum left margin is 3.0 mm (0.12"). B-R: The minimum right margin is 3.0 mm (0.12"). The minimum bottom margin is 14.0 mm (0.55"). When printing near the minimum bottom margin, some colors may not be printed properly. If this occurs, try increasing the bottom margin.
-
Page 154: Ink Cartridges
Ink Cartridges Black ink cartridge (T013) Color Black Print capacity* 300 pages, comparable with 3.5% ECMA (ISO 10561) at 360 dpi 210 pages, 5% in calculation Cartridge life 2 years from production date (within 6 months after opening package, at 25°C [77°F]) Temperature Storage:... - Page 155 Color ink cartridge (T014) Color Cyan, magenta, and yellow Print capacity* 150 pages, 5% each CMY (total 15%) in calculation Cartridge life 2 years from production date (within 6 months of opening the package at 25°C [77°F]) Temperature Storage: -20 to 40°C (-4 to 104°F) 1 month at 40°C (104°F) Transit: -30 to 60°C (-22 to 140°F)
-
Page 156: Mechanical
Mechanical Paper feed method Friction Paper path Sheet feeder, rear entry Sheet feeder capacity About 100 sheets at 64 g/m² (17 lb) paper Dimensions Storage Width: 431 mm (17.0 inches) Depth: 210 mm (8.3 inches) Height: 160 mm (6.3 inches) Printing Width: 431 mm (17.0 inches) Depth: 476 mm (18.7 inches) -
Page 157: Environmental
Note: Check the label on the back of the printer for the voltage of your printer. Environmental Temperature Operation: 10 to 35°C (50 to 95°F) Storage: -20 to 40°C (-4 to 104°F) 1 month at 40°C (104°F) Transit:* -20 to 60°C (-4 to 140°F) 120 hours at 60°C (140°F) Humidity Operation:... -
Page 158: System Requirements
EMC: U.S. model FCC part 15 subpart B class B European model Directive 89/336/EEC EN 55022 (CISPR Pub. 22) class B EN 55024 EN 61000-3-2 EN 61000-3-3 Australian model AS/NZS 3548 class B System Requirements Refer to the appropriate section below for the minimum and recommended computer system requirements necessary to use this printer. -
Page 159: For Macintosh Computers
20 MB hard disk space for Windows 98 50 MB or more hard disk space for Windows 98 40 MB hard disk space for Windows 2000 100 MB or more for Windows 2000 VGA monitor VGA or better monitor Your computer dealer can help you update your system if it does not meet these requirements. - Page 160 A-12 Printer Specifications...
-
Page 161: Appendix B Customer Support
Appendix B Customer Support Technical Support Web Site EPSON's Technical Support Web Site provides help for problems that cannot be solved using the troubleshooting information in your printer documentation. If you have a Web browser and can connect to the Internet, access that site at: http://www.epson.com.tw/imaging/service/tech.htm Customer Support... -
Page 162: Regional Customer Services
Regional Customer Services If your EPSON product is not operating properly and you cannot solve the problem using the troubleshooting information in your product documentation, contact customer support services for assistance. If customer support for your area is not listed below, contact the dealer where you purchased your product. -
Page 163: Glossary
Glossary The following definitions apply specifically to printers. application A software program that helps you carry out a particular task, such as word processing or financial planning. ASCII American Standard Code for Information Interchange. A standardized coding system for assigning numerical codes to letters and symbols. banding The horizontal lines that sometimes appear when printing graphics. - Page 164 default A value or setting that takes effect when the equipment is turned on, reset, or initialized. Direct Memory Access. A data transfer feature that bypasses a computer’s CPU and allows direct communication between a computer and peripheral devices (like printers), and between one peripheral device and another. Dots per inch.
- Page 165 high speed printing Printing in which images are printed in both directions. This provides faster printing. ICM (Image Color Matching) The color-matching method used by Windows 95, 98, and 2000 to match the colors in your printout with the colors displayed on your screen. initialization Returns the printer to its defaults (fixed set of conditions).
- Page 166 operation check A method for checking the operation of the printer. When you perform a printer operation check, the printer prints the ROM version, code page, ink counter code, and a nozzle check pattern. parallel interface See interface. port An interface channel through which data is transmitted between devices. printable area The area of a page on which the printer can print.
- Page 167 spool manager The software program that converts print data into codes that your printer understands. See also spool. sRGB The color management method used to maintain color consistency between devices which adhere to the sRGB standard. Status Monitor The software program that allows you to check the printer’s status. subtractive colors Colors produced by pigments that absorb some colors of light and reflect others.
- Page 168 Glossary...
Need help?
Do you have a question about the Color 580 and is the answer not in the manual?
Questions and answers