Table of Contents
Advertisement
Quick Links
Color Ink Jet Printer
All rights reserved. No part of this publication may be reproduced, stored in a retrieval
system, or transmitted in any form or by any means, electronic, mechanical, photocopying,
recording, or otherwise, without the prior written permission of SEIKO EPSON
CORPORATION. The information contained herein is designed only for use with this EPSON
printer. EPSON is not responsible for any use of this information as applied to other printers.
Neither SEIKO EPSON CORPORATION nor its affiliates shall be liable to the purchaser of
this product or third parties for damages, losses, costs, or expenses incurred by the purchaser
or third parties as a result of: accident, misuse, or abuse of this product or unauthorized
modifications, repairs, or alterations to this product, or (excluding the U.S.) failure to strictly
comply with SEIKO EPSON CORPORATION's operating and maintenance instructions.
SEIKO EPSON CORPORATION shall not be liable for any damages or problems arising from
the use of any options or any consumable products other than those designated as Original
EPSON Products or EPSON Approved Products by SEIKO EPSON CORPORATION.
SEIKO EPSON CORPORATION shall not be held liable for any damage resulting from
electromagnetic interference that occurs from the use of any interface cables other than those
designated as EPSON Approved Products by SEIKO EPSON CORPORATION.
EPSON is a registered trademark and EPSON Stylus is a trademark of SEIKO EPSON
CORPORATION.
Copyright 2001 SEIKO EPSON CORPORATION. All rights reserved. Print Image Matching
is a trademark of SEIKO EPSON CORPORATION. The PRINT Image Matching logo is a
trademark of SEIKO EPSON CORPORATION.
Microsoft and Windows are registered trademarks of Microsoft Corporation.
Apple and Macintosh are registered trademarks of Apple Computer, Inc.
General Notice: Other product names used herein are for identification purposes only and
may be trademarks of their respective owners. EPSON disclaims any and all rights in those
marks.
i
Advertisement
Table of Contents

Subscribe to Our Youtube Channel
Related Manuals for Epson Stylus PHOTO 830 Series


Summary of Contents for Epson Stylus PHOTO 830 Series
- Page 1 EPSON Approved Products by SEIKO EPSON CORPORATION. EPSON is a registered trademark and EPSON Stylus is a trademark of SEIKO EPSON CORPORATION. Copyright 2001 SEIKO EPSON CORPORATION. All rights reserved. Print Image Matching is a trademark of SEIKO EPSON CORPORATION.
- Page 2 Copyright © 2002 by SEIKO EPSON CORPORATION, Nagano, Japan.
-
Page 3: Table Of Contents
Contents Printer Parts and Functions Unpacking the Printer........1 Printer Parts and Control Panel Functions . - Page 4 Introduction..........20 Borderless Printing.
- Page 5 Printer Software Introduction......85 Making Settings in the Print Dialog Box....86 Making the Media Type setting .
- Page 6 Chapter 7 Printing with PRINT Image Matching How is PRINT Image Matching used? ..... . 173 Media for which PRINT Image Matching is enabled ..173 Chapter 8 Exif Print Exif Print .
- Page 7 For Windows users........206 For Macintosh users ........208 Updating and Uninstalling Software .
- Page 8 Only the power light is on ......236 Error light is flashing or on ......237 Error light is on and power light is flashing .
- Page 9 Appendix B Customer Support Technical Support Web Site ....... .275 Contacting Customer Support.
-
Page 10: Printer Parts And Functions
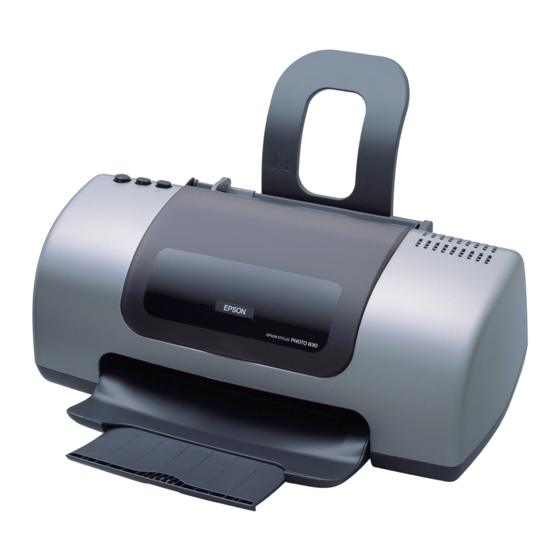
Printer Parts and Functions Unpacking the Printer Your printer box should include a CD-ROM containing printer software that runs your printer and the items shown in the illustration. printer paper support power cord ink cartridges In some locations, the power cord comes attached to the printer. The shape of the AC plug varies by country;... -
Page 11: Printer Parts And Control Panel Functions
Printer Parts and Control Panel Functions Printer parts paper support printer cover edge guides output tray output tray sheet feeder extension Paper support: Supports the paper loaded in the sheet feeder. Edge guides: Help load the paper straight. Adjust the left edge guide to fit the width of your paper. -
Page 12: Buttons
Output tray extension: Supports the ejected paper. ink cartridge clamps print head control panel Ink cartridge clamps: Hold the ink cartridges in place. Open only when installing or replacing ink cartridges. Print head: Delivers ink to the page. Control panel: Controls various printer functions. See the next section for details. -
Page 13: Lights
Loads or ejects paper if pressed and released within three seconds. maintenance Resumes printing if pressed and released after a paper out error. Performs print head cleaning if pressed for three seconds when the error light is off. Moves the print head to the ink cartridge replacement position when ink is out. -
Page 14: Important Safety Instructions
Safety Instructions Important Safety Instructions Read all of the instructions in this section before using your printer. Also, be sure to follow all warnings and instructions marked on the printer. When setting up your printer Observe the following when setting up the printer: ❏... -
Page 15: When Choosing A Place For The Printer
❏ If you use an extension cord with the printer, make sure that the total ampere rating of the devices plugged into the extension cord does not exceed the cord’s ampere rating. Also, make sure that the total ampere rating of all devices plugged into the wall outlet does not exceed the wall outlet’s ampere rating. -
Page 16: When Using The Printer
❏ When storing or transporting the printer, do not tilt it or put it vertically or turn it upside down. Otherwise ink may leak from the cartridge. ❏ Leave enough space in front of the printer for the paper to be fully ejected. -
Page 17: When Handling The Ink Cartridges
❏ Always turn the printer off using the P power button. When this button is pressed, the P power light flashes. Do not unplug the printer or turn off the power to the outlet until the P power light stops flashing. ❏... - Page 18 ❏ Do not dismantle the ink cartridges or try to refill them. This could damage the print head. ❏ After bringing an ink cartridge inside from a cold storage site, allow it to warm up at room temperature for at least three hours before using it.
-
Page 19: Information For United Kingdom Users
® The International NERGY Office Equipment Program is a voluntary partnership with the computer and office equipment industry to promote the introduction of energy-efficient personal computers, monitors, printers, fax machines, copiers, and scanners in an effort to reduce air pollution caused by power generation. -
Page 20: Warnings, Cautions, And Notes
❏ The green and yellow wire must be connected to the terminal in the plug which is marked with the letter E or the earth symbol ( G). ❏ The blue wire must be connected to the terminal in the plug marked with the letter N. -
Page 21: Chapter 1 Printing Basics
Chapter 1 Printing Basics For Windows Users Step 1. Choosing the data to print Choose an A4-size data to print. Any data, such as photo or text, is OK. Step 2. Preparing and loading paper After choosing the data, prepare the A4-size plain paper and load them into the printer. -
Page 22: Step 3. Making The Printer Driver Settings
3. Load the stack of paper in the sheet feeder with the printable side up and the right edge of the paper resting against the right edge guide. Then, slide the left edge guide against the left edge of the paper. Make sure that the paper stack is loaded under the tabs inside the edge guides. -
Page 23: Step 4. Printing Your Data
3. Click the Main tab, and then select Plain Paper and A4 as the Paper Options settings, and Text & Images as the Quality Type setting. 4. Click OK to close the window. Step 4. Printing your data Now, print the data from your application. Printing Basics... -
Page 24: For Macintosh Users
Click OK to print. This completes the basic printing procedure. If you would like to try advanced printing, see Various Printing Options. For Macintosh Users Step 1. Choosing the data to print Choose an A4-size data to print. Any data, such as photo or text, is OK. -
Page 25: Step 3. Making The Printer Driver Settings
To load the paper, follow the instructions below. 1. Lower the output tray and slide out the extension. Next, hold down the tab on the left edge guide and slide the guide so that the distance between the edge guides is slightly wider than the width of your paper. - Page 26 2. Select A4 as the Paper Size setting. Then, click OK to close the dialog box. 3. Click Print on the File menu of your application. 4. Select Plain Paper as the Media Type setting, and Automatic as the Mode setting. For Mac OS X users 1.
- Page 27 2. Select A4 as the Paper Size setting. Then, click OK to close the dialog box. 3. Click Print on the File menu of your application. 4. Select Print Settings from the pop-up menu in the Print dialog box. 5. Select Plain Paper as the Media Type setting, and Automatic as the Mode setting.
-
Page 28: Step 4. Printing Your Data
Step 4. Printing your data Now, print the data from your application. Click Print in the Print dialog box to start printing. This completes the basic printing procedure. If you would like to try using advanced printing settings, see Various Printing Options. -
Page 29: Chapter 2 Various Printing Options
Chapter 2 Various Printing Options Introduction This printer provides you with a variety of different printing options. You can print in various formats, or can print using many different types of paper. The following explains the procedure for each type of printing. Choose the appropriate one for your printing. - Page 30 “Fit to Page Printing” on page 27 Lets you automatically enlarge or reduce the size of your document to fit the paper size you selected. Pages Per Sheet Printing (Windows), N-up Printing (Macintosh) Lets you print 2 or 4 pages on a single sheet. Poster Printing Lets you enlarge a single document page to cover 4, 9, or 16 printed sheets of paper and put them together to make a poster.
- Page 31 Watermark Printing Lets you print a text or image as a watermark on your printout. For example, you can put "Confidential" on an important document. Printing on Single Sheets Lets you print on various sizes or kinds of single sheet paper. Various Printing Options...
-
Page 32: Borderless Printing
Printing on Envelopes Lets you print on envelopes. Borderless Printing This printer allows you to print with no margin on all four sides of the paper. Follow the steps below to print with no margins. Various Printing Options... -
Page 33: Available Paper
Note: This feature is not available with Mac OS X. Notice that not all kinds of paper are available for this option. Available paper You can use this option with single sheets of the paper types listed below. EPSON Photo Quality Ink Jet Paper EPSON Photo Paper EPSON Matte Paper-Heavyweight EPSON Premium Glossy Photo Paper... -
Page 34: Paper Loading
Paper loading After you select a media on which to print, load it onto your printer. Refer to the appropriate section below for your chosen media. Single Sheets Driver settings After you load the media, change the settings on your printer driver to the no-margin option. - Page 35 Media Type Settings For Macintosh, select the Paper Size that you want to use on the Page Setup dialog box and select the No Margins check box, and then select the desired Media Type on the Print dialog box. Various Printing Options...
-
Page 36: Printing
Media Type Settings 3. Click OK to close the driver setting dialog. Printing After finishing all above steps, start printing. We recommend you to print once as a test before printing large quantities. Fit to Page Printing Various Printing Options... -
Page 37: Paper Loading
You can print using Fit to page printing function, when, for example, you want to print a document that you made as A4 size on another size paper. You can print using Fit to page printing to fit the paper size you selected in the paper Size list on the Paper menu. - Page 38 On the Page Setup dialog box (Macintosh), select the desired Paper Size for the original print data. 4. On the Page Layout menu (Windows), select the Reduce/Enlarge Document check box and select the By Output Paper Size option. Various Printing Options...
- Page 39 Select Fit to Page check box on the Layout dialog box (Macintosh). 5. Under By Output Paper Size on the Page Layout menu (Windows), select the paper size that you loaded in your printer. Under Output Paper Size on the Layout dialog box (Macintosh), select the paper size that you loaded in your printer.
-
Page 40: Printing
6. Click OK to close the printer driver setting dialog. Printing After finishing all above steps, start printing. Pages Per Sheet Printing (Windows), N-up Printing (Macintosh) Pages Per Sheet Printing (Windows) or N-up printing (Macintosh) allows you to print two or four pages on single sheets of paper. - Page 41 “Accessing the Printer Software for Macintosh” on page 141 2. Select the desired Type setting under Paper Options on the Main menu (Windows). Select the desired Media Type on the Print dialog box (Macintosh). “Media Type Settings” on page 143 3.
- Page 42 For Macintosh, select the Multi-Page check box on the Layout dialog box, and then select N-up. 5. Make the following settings for Pages Per Sheet Printing (Windows) or N-up printing (Macintosh). 2, 4 Prints two or four pages of your document on a (Windows) single piece of paper.
-
Page 43: Printing
For Mac OS X users Select Layout from the pop-up menu as the Multi-Page setting to print multiple pages of your document on one sheet of paper. When Layout is selected, you can make the following settings: Pages per Sheet Prints a multiple pages of your document on a single piece of paper. -
Page 44: Poster Printing
Poster Printing Poster printing allows you to print poster-size images by enlarging one page to cover several sheets of paper. Note: This feature is not available with Mac OS X. Paper loading Load paper in your printer. “Loading single sheets” on page 131 Driver settings For Windows users 1. - Page 45 3. Under Paper Options on the Main menu, select the Size setting for the original print data. 4. Select the Poster Printing option under Multi-Page on the Page Layout menu, and then click the up or down arrow to select 2x2, 3x3 or 4x4. Various Printing Options...
- Page 46 5. Click the Settings button to adjust the way your poster will print. The Poster Settings dialog box opens. 6. Make the following settings for poster printing. Print Cutting Select this check box to turn the cutting guide Guides options on. Overlapping Slightly overlaps the images and prints alignment Alignment Marks...
- Page 47 Note: If you only want to print a few of the panels without printing the entire poster, click the panels that you do not wish to print. 7. Click OK to close the Poster Settings dialog box. For Macintosh users 1.
-
Page 48: Printing
5. Make the following settings for poster printing. 1 page covers xx sheets Specifies how many printed sheets of paper the enlarged document page is to cover. You can select 4, 9, or 16 sheets. Overlapping Alignment Slightly overlaps the images and prints Marks alignment markers so that they can be aligned more precisely. -
Page 49: Watermark Printing
Watermark Printing Watermark printing allows you to print a text-based or an image-based watermark on your document. Note: This feature is not available with Mac OS X. Printing the watermark 1. Load paper in the printer. “Single Sheets” on page 131 2. - Page 50 For Macintosh, select the desired Media Type on the Print dialog box, and then select the desired Paper size setting on the Page Setup dialog box. “Media Type Settings” on page 143 4. For Windows, select the desired watermark from the Watermark list on the Page Layout menu, and then click Settings.
- Page 51 For Macintosh, select the Watermark check box in the Layout dialog box, and then select the desired watermark from the Name list. Various Printing Options...
- Page 52 5. Specify the necessary settings for the watermark. You can change the position and size of the watermark by dragging it within the preview window at the left. 6. Click OK to close the driver settings dialog box. 7. Print the data from your application. Various Printing Options...
-
Page 53: Creating Your Own Watermark
Creating your own watermark You can add your own text-based or image-based watermarks to the watermark list. For Windows 1. Click Add/Del on the Page Layout menu. The following dialog box appears. 2. To use an image file as a watermark, select BMP. Click Browse to specify the bitmap file you want to use, and then click OK. - Page 54 3. Click OK to return to the Layout menu. For Macintosh 1. Click Add/Del beside the Name list. The following dialog box appears. 2. To use an image file as a watermark, click Add PICT. Specify the desired image file, and then click Open. Various Printing Options...
- Page 55 To create a text-based watermark, click Add Text. Type the text in the Text text box, select a font and a text style, and then click OK. 3. The image file name or the watermark text appears in the Mark Name list in the Watermark dialog box. To change the name of an image watermark, select it from the list, and then type a new name.
-
Page 56: Printing On Single Sheets
Printing on Single Sheets Handling single sheets Refer to the section mentioned below for details on loading single sheets. Single Sheets When using special media, refer to the section mentioned below. Single Sheets Printing on single sheets 1. Access the Printer driver. Accessing the Printer Software for Windows Accessing the Printer Software for Macintosh 2. - Page 57 Media Type Settings For Macintosh, select the desired Media Type on the Print Dialog box, and then select the desired Paper size setting on the Page Setup Dialog box. Media Type Settings Various Printing Options...
-
Page 58: Printing On Envelopes
3. Select Portrait (tall) or Landscape (wide) to change the orientation of your printout. 4. Click OK to close the driver settings dialog box. 5. Print your data. Printing on Envelopes When printing on envelopes, please note the following: ❏ You can load up to 10 envelopes at a time in the sheet feeder. Note: The folding quality and thickness of envelopes varies widely. - Page 59 ❏ Avoid using envelopes that are too thin as they may curl during printing. ❏ EPSON recommends the use of black ink when printing on envelopes. Should you decide to use another color of ink, set a wider margin in order to prevent ink from smearing across the bottom portion of the envelope.
-
Page 60: Loading Envelopes
✽: You can extend the minimum bottom margin to 3 mm by selecting the Minimize Margins check box under More Options on the printer driver's Page Layout menu (Windows) or the Maximum option for Printable Area in the Page Setup dialog box (Macintosh). - Page 61 6. Print your data. Various Printing Options...
-
Page 62: Chapter 3 Printer Software Functions
Chapter 3 Printer Software Functions For Windows Users Printer Software Introduction The printer software which comes with your printer includes a printer driver and printer utilities. The printer driver lets you choose from a wide variety of settings to get the best results from your printer. - Page 63 Getting more information For information on using the printer software, see “Making Settings on the Main Menu” on page 55 or “Making Settings on the Page Layout Menu” on page 69. For information on using the printer utilities, see “Making settings on the Maintenance Menu”...
-
Page 64: Making Settings On The Main Menu
2. In the dialog box that appears, click Printer, Setup, Options, or Properties. (Depending on your application, you may need to click a combination of these buttons.) The printer software opens. From the Start menu Follow the steps below to access the printer software. 1. - Page 65 Making Basic settings Quality Type Under Quality Type on the Main menu, five levels of control over the printer software are available. You can select one of the following quality types. Draft For economical, high-speed printing. Text For medium-quality, standard text printing. Text &...
- Page 66 The Type setting determines what other settings are available, so you should always make this setting first. On the Main menu, select the Type setting that matches the media that is loaded in the printer. To find out what media type you are using, find your media in the Media Type Settings list, and refer to the corresponding media type under which it is grouped (shown in larger type).
- Page 67 ❏ Printing with this feature selected takes longer than for normal printing. ❏ Because this feature enlarges the image to a size slightly larger than the paper size when Sheet Feeder is selected as the Paper Source setting, the portion of the image that extends beyond the edges of the paper will not be printed.
- Page 68 When you send a print job to the printer, the EPSON Print Preview window opens, allowing you to make changes before printing. The EPSON Print Preview toolbar contains several icon buttons which you can use to perform the following functions. Drag ’n’...
- Page 69 Printable Area Click this button to display or hide the On/Off borderlines which indicate the printable area. The printer cannot print anything which is outside of this area. Watermark Click this button to open the Watermark dialog box, where you can add watermarks to the document and change any of the current watermark settings.
- Page 70 ❏ View the individual pages that comprise a poster. The Poster window opens automatically when you send a print job while Poster Printing is selected as the Multi-Page option on the Page Layout menu. From this window, you can view the individual pages which make up a poster.
- Page 71 Show Settings When you click Show Settings, the Current Setting window appears. To hide the window, click Hide Settings or Close in the Current Settings window. Making Advanced settings The settings in the Advanced dialog box give you complete control over your printing environment. Use these settings to experiment with new printing ideas or to fine-tune a range of print settings to meet your individual needs.
- Page 72 1. Click Advanced on the Main menu. If the Note window as following appears, click Continue.The Advanced menu appears. 2. Select a Media Type setting that is appropriate for the media loaded in the printer. Media Type Settings Printer Software Functions...
- Page 73 3. Select color printing or monochrome printing. If you want monochrome printing, select the Black Ink Only check box under Print Options. 4. Specify a Print Quality setting under Paper & Quality Options. 5. Make other settings as necessary. For details, see the online help.
- Page 74 Save Setting To save your Advanced settings as a group with a unique name, click Save Setting in the Advanced menu. The Custom Settings dialog box appears. Type a unique name for your settings in the Name text box, then click Save.
- Page 75 Paper & Quality Options You can select media type, print quality, paper size and borderless printing. Note: The availability of the Print Quality setting depends on the Media Type setting. Therefore, select the Media Type before you set the Print Quality. Print Options Reverse order Lets you print your documents in reverse order, starting with the...
- Page 76 Edge Smoothing Improves the print quality of low-resolution images by smoothing jagged edges and lines. This setting has no effect on high-resolution images or on text. Color Management Color Controls For use with the color matching and image enhancement methods provided by the printer driver.
- Page 77 You can select from the following settings. Normal Applies EPSON standard tone adjustment to your document. Hard Prints in high contrast, which sharpens the printed image. Vivid Intensifies the colors and lightens the midtones and highlights of an image. Use this setting for presentation graphics, such as charts and graphs.
-
Page 78: Making Settings On The Page Layout Menu
Show this screen first Shows the Advanced menu when accessing the Main menu in the printer software. The Advanced menu also appears when accessing the printer software from applications. Basic Shows the Basic menu. Making Settings on the Page Layout Menu More Options Use the options in the More Options box to adjust the total area available for printing. - Page 79 You can make the following settings as the More Options: Centered Prints your document at an equal distance from all edges of the paper, directly in the center. Minimize Expands printable area at the bottom of the paper by Margins 11 mm, allowing you to print up to 3 mm from the bottom edge.
- Page 80 Multi-Page Under Multi-Page you can choose between the Pages Per Sheet and Poster Printing options. Refer to the appropriate section below. Pages Per Sheet Select the Pages Per Sheet option under the Multi-Page on the Page Layout menu to print two or four pages of your document on one sheet of paper.
- Page 81 Click the Settings button to adjust the way your poster will print. The Poster Settings dialog box opens. You can make the following settings. Print Cutting Select this check box to turn the cutting guide Guides options on. Overlapping Slightly overlaps the images and prints alignment Alignment Marks markers so that they can be aligned more precisely.
- Page 82 You can also add your own text-based or image-based watermarks to the Watermark list. To add a watermark, click Add/Del. The following dialog box appears. Refer to the appropriate section below to finish creating a custom watermark. Creating an image-based watermark Follow the steps below to create an image-based watermark.
- Page 83 1. Select Text. 2. Type your text in the Text text box. The text that you enter will also be used as the watermark name. 3. If you want to change the watermark name, type a new name in the Name text box, then click Save. Click OK to return to the Page Layout menu.
-
Page 84: Making Settings On The Maintenance Menu
3. Make sure that the appropriate watermark is selected in the Watermark list box, then make Color, Position, Density, Size, Font, Font Style, and Angle settings. (For details, see online help.) Your settings are reflected in the display at the left side of the dialog box. - Page 85 Note: ❏ The letter in parentheses after the utility name indicates the shortcut key for that utility. Press Alt and the letter on the keyboard to open that utility. ❏ Do not use the Nozzle Check, Head Cleaning, or Print Head Alignment utilities if your printer is connected to your computer through a network.
- Page 86 Head Cleaning The Head Cleaning utility cleans the print head. You may need to clean the print head if you notice print quality has declined. Use the Nozzle Check utility first to confirm that the print head needs to be cleaned. You can access the Nozzle Check utility directly from the Head Cleaning utility.
- Page 87 From each pattern on the printed test sheet, choose the vertical line that is aligned best. For each pattern, select the corresponding line number from the appropriate drop-down list box in the Print Head Alignment dialog box, then click Finish to put the new settings into effect.
- Page 88 Printer and option information This utility allows the printer driver to confirm printer configuration information. It also provides specific information regarding certain characteristics of the printer, such as the Printer Depending on the configuration of your system, the information displayed in the Printer and Option Information dialog box may be updated automatically, or may need to be entered manually.
- Page 89 2. Make sure the settings in the utility match the information on the printed Settings Sheet. If they do not match, correct the settings on the screen to match the information on the settings sheet. 3. Click OK to exit this menu and save your settings. Speed &...
- Page 90 High Speed Copies To print multiple copies of your document faster, select High Speed Copies. This speeds up printing by using your hard disk space as a cache when printing multiple copies of your document. EPSON Printer Port (Windows Me, 98, 95 only) For printer models that use the parallel port, you can speed up the data transfer rate by selecting EPSON Printer Port.
- Page 91 Monitoring Preferences Click this button to open the Monitoring Preferences dialog box, where you can make settings for EPSON Status Monitor 3. You can make the following settings: Select Displays the current error notification settings. Notification Select the check boxes of the error types for which you want to receive notification.
-
Page 92: Getting Information Through Online Help
Allow Select this check box to allow monitoring of a shared monitoring of printer by other computers. shared printers Getting Information Through Online Help Your printer software has an extensive online help feature, which provides you with instructions on printing, making printer driver settings, and using printer utilities. - Page 93 For Windows XP and 2000 users, select your printer, then click Printing Preferences on the File menu. For Windows NT 4.0 users, select your printer, then click Document Defaults on the File menu. The printer software opens. You can get specific help related to any item on a menu by right-clicking the item and then clicking the What 掇...
-
Page 94: For Users Of Mac Os 8.1 Or Later (Except Mac Os X)
For Users of Mac OS 8.1 or Later (Except Mac OS X) Printer Software Introduction The printer software which comes with your printer includes a printer driver and printer utilities. The printer driver lets you choose from a wide variety of settings to get the best results from your printer. -
Page 95: Making Settings In The Print Dialog Box
In addition, you can access the dialog boxes below from the Print dialog box. Dialog Box How to Access Background Click the Background Printing icon button in the Print Printing dialog box. Preview Click the Preview icon button in the Print dialog box and then click Preview. - Page 96 In the Print dialog box, select the Media Type setting that matches the paper that is loaded in the printer. To find out what media type you are using, find your media in the Media Type Settings list, and refer to the corresponding media type under which it is grouped (shown in larger type).
- Page 97 Using the Automatic mode When Automatic is selected as the Mode setting in the Print dialog box, the printer software takes care of all detailed settings based on the current Media Type and Ink settings. To make the Ink setting, see “Making the Ink setting” on page 93. To make the Media Type setting, see “Making the Media Type setting”...
- Page 98 Note: ❏ This mode is only available when printing 32-bit color data. ❏ Printing with PhotoEnhance selected may increase the time required for printing, depending on your computer system and the amount of data contained in your image. You can select from the following settings. Standard This setting provides standard image correction for most photos.
- Page 99 Using the Custom mode Selecting Custom as the Mode option enables the Custom Settings list, from which you can choose a ready-made setting designed for printing text and graphs. Or, you can select ColorSync, a color-matching method. You can also create and save your own custom settings.
- Page 100 3. Confirm that the Media Type and Ink settings in the Print dialog box are correct. For details, see “Making the Ink setting” on page 93 or “Making the Media Type setting” on page 86. Making Advanced settings The settings in the Advanced dialog box give you complete control over your printing environment.
- Page 101 5. Make other settings as necessary. For details, see online help. Note: ❏ The PhotoEnhance feature only affects images, not text or graphs. For example, if Monochrome is selected from the Tone list (enabled when PhotoEnhance is selected), only the images in a document will be printed in monochrome.
- Page 102 ❏ You cannot delete the ready-made settings or color-matching methods from the Custom Settings list. To delete a setting from the Custom Settings list, select it in the Custom Settings dialog box and click Delete. Using your saved settings To use your saved settings, select Custom as the Mode setting in the Print dialog box, then select your setting in the Custom Settings list.
- Page 103 1. Click the Background Printing icon button in the Print dialog box. The Background Printing dialog box opens. 2. Select On as the Background Printing option, if necessary. 3. Select Urgent, Normal, Print at, or Hold as the Print Time option.
- Page 104 Previewing your printout The Preview feature allows you to see how your document will look before actually printing it. Follow these steps to preview your document. 1. Make your printer driver settings. 2. Click the Preview icon button in the Print dialog box. The Print button changes into a Preview button.
- Page 105 The Preview dialog box contains several icon buttons that you can use to perform the following functions. Edit Click this button to select, move, and Watermark resize watermarks. Zoom Click this button to enlarge or reduce the size of the previewed page. Show/Hide Click this button to display or hide the Printable Area...
-
Page 106: Making Settings In The Page Setup Dialog Box
Note: Use the Preview icon button to toggle between the Print, Preview, and Save File modes. Click the icon button to select the mode you want. 1. Make your printer driver settings. 2. Click the Preview icon button in the Print dialog box repeatedly until the Print button changes into the Save File button. - Page 107 Choose Page Setup from the File menu of your application. The Page Setup dialog box appears. You can make the following settings in the Page Setup dialog box. Paper Size Select the paper size that you want to use. If you want to define a custom paper size, see “Defining a custom paper size”...
- Page 108 No Margins Check this box when you want to print with no margins. This feature prints to all four edges of the paper. You can use the following media with this feature. Photo Quality Ink Jet Paper: A4, Letter, 5 × 8” Matte Paper-Heavyweight: A4, Letter Photo Paper:...
- Page 109 Printable Area This feature is not available when No Margins is selected. To center the printout, select Centered. To increase the printable area, select Maximum. Do not select Maximum while using Premium Glossy Photo Paper. Note: The print quality may decline at the edges of the printout when Maximum is selected as the Printable Area setting.
- Page 110 2. To define a new paper size, click New. The dialog box updates to allow you to enter a name for the new size. 3. Type a unique name for the paper size in the Paper Size list. 4. Specify the measurement unit as either inch or cm. 5.
-
Page 111: Making Settings In The Layout Dialog Box
Copying a pre-existing paper size to use as a template Follow the steps below to copy an existing paper size to use as a template. 1. Select the existing paper size to copy and click Copy. 2. Specify the measurement unit as either inch or cm. 3. -
Page 112: Making The Fit To Page Setting
The Layout dialog box allows you to automatically match the document size to the paper size, print two or four pages on a single sheet of paper, print poster-size images by enlarging one page to cover several sheets, place watermarks on documents, or specify the printing order for your print job. - Page 113 You can also add your own text-based or image-based watermarks to the Name list. Follow these steps. 1. Click Add/Del beside the Name list. The following dialog box appears. 2. To use an image file as a watermark, click Add PICT. Specify the desired image file, then click Open.
- Page 114 3. The image file name or the watermark text appears in the Mark Name list in the Watermark dialog box. To change the name of an image watermark, click it in the list, then type a new name. When a text watermark is selected in the Name list, you can edit the text or change the font and text style by clicking Edit Text.
- Page 115 Making N-up settings Select the N-up option under Multi-Page in the Layout dialog box to print two or four pages of your document on one sheet of paper. When N-up is selected, you can make the following settings: 2 Pages Prints two or four pages of your document on a 4 Pages single piece of paper.
- Page 116 Making Poster settings A single document page can be enlarged to cover 4, 9, or 16 printed sheets of paper. Select the Poster option under Multi-Page to print a poster-size image. You can make the following settings. 1 page covers xx sheets Specifies how many printed sheets of paper the enlarged document page is to cover.
-
Page 117: Using The Printer Utilities
Making Print Order settings You can specify the printing order for your print job. When printing multiple copies of your document, select Collate to print one complete document set at a time. Select Reverse Order to print your documents in reverse order, starting with the last page. Using the Printer Utilities EPSON printer utilities allow you to check the current printer status and to perform printer maintenance from your computer. - Page 118 EPSON StatusMonitor The StatusMonitor utility monitors the printer status. If it detects a printer error, it will inform you with an error message. You can also use this utility to check how much ink is remaining before printing. To use the StatusMonitor, click the EPSON StatusMonitor button in the Utility dialog box.
- Page 119 Here are sample printouts. From each pattern on the printed test sheet, choose the vertical line that is aligned best. For each pattern, select the corresponding line number from the appropriate drop-down list box in the Print Head Alignment dialog box, then click Finish to put the new settings into effect.
-
Page 120: Getting Information Through Online Help
Getting Information Through Online Help Your printer software has an extensive online help feature, which provides you with instructions on printing, making printer driver settings, and using the printer utilities. To access online help, choose Print or Page Setup from the File menu of your application. -
Page 121: For Mac Os X Users
For Mac OS X Users Printer Software Introduction The printer software which comes with your printer includes a printer driver and printer utilities. The printer driver lets you choose from a wide variety of settings to get the best results from your printer. - Page 122 Making the Media Type setting The Media Type setting determines what other settings are available, so you should always make this setting first. In the Print dialog box with the Print Settings option selected, select the Media Type setting that matches the paper that is loaded in the printer.
- Page 123 The Mode settings are explained below: Automatic This mode provides the quickest and easiest way to start printing. See “Using the Automatic mode” on page 115 for details. Custom This mode lets you choose from a list of ready-made or personalized settings suited to the kind of document that you want to print.
- Page 124 Using the Automatic mode When Automatic is selected as the Mode setting in the Print dialog box in which the Print Settings option is selected, the printer software takes care of all detailed settings based on the current Media Type and Ink settings. To make the Ink setting, see “Making the Ink setting”...
- Page 125 Using the Custom mode Selecting Custom as the Mode option enables the Custom Settings list, from which you can choose a ready-made setting designed for printing text and graphs. Or, you can select ColorSync, a color-matching method. You can also create and save your own custom settings.
- Page 126 Follow the steps below to select a custom setting. 1. Confirm that the Media Type and Ink settings in the Print dialog box are correct. For details, see “Making the Ink setting” on page 119 or “Making Settings in the Page Setup Dialog Box”...
- Page 127 2. Select Advanced Settings as the Mode option in the Print dialog box. 3. Choose Color or Black as the Ink setting. 4. Specify a Print Quality setting. 5. Make other settings as necessary. For details, see online help. Note: Some settings may be unavailable, depending on the Media Type, Ink, and Print Quality settings that you make.
- Page 128 Making the Pages setting To make the Pages setting, select Copies & Pages from the pop-up menu, and then select either All or From and to. If you select From and to, enter the first page of the appropriate range of pages in the From text box and the last page in the to text box.
- Page 129 2. Click Preview in the Print dialog box. The Preview dialog box appears and displays a preview of your document. Note: Preview is a standard feature of Mac OS X.
- Page 130 Making N-up settings Select Layout from the pop-up menu as the Multi-Page setting to print multiple pages of your document on one sheet of paper. When Layout is selected, you can make the following settings: Pages per Sheet Prints multiple pages of your document on a single piece of paper.
- Page 131 1. Make your printer driver settings. 2. Select Output Options from the pop-up menu and select the Save as File check box. The Print button changes into the Save button. 3. Click the Save button. The following dialog box appears. 4.
- Page 132 1. Select Color Management from the pop-up menu in the Print dialog box. The following dialog box appears. 2. Make the settings as necessary. For details, see online help. Showing the current settings in the Print dialog box In the Print dialog box with the Summary option selected, you can confirm the current settings in the Print dialog box.
- Page 133 Select Summary from the pop-up menu. The following dialog box appears. The current settings of Copies & Pages, Layout, Output Options, and Print Settings are displayed in the list. Note: The Summary option is a standard feature of Mac OS X. Saving and using your settings in the Print dialog box Saving your settings in the Print dialog box To save your settings in the Print dialog box, select Save Custom...
-
Page 134: Making Settings In The Page Setup Dialog Box
Using your saved settings in the Print dialog box To use your saved settings, select Custom as the Saved Settings in the Print dialog box. If you change the Media Type or Ink settings while your customized setting is selected in the Saved Settings list, your saved setting is not affected by the change. - Page 135 You can make the following settings in the Page Setup dialog box. Settings Select Page Attributes or Summary. When Page Attributes is selected, the page setting items will be displayed. When Summary is selected, a list of the current settings will be displayed. For more information on Summary, see “Showing the current settings in the Print dialog box”...
-
Page 136: Using The Printer Utilities
Note: The Summary option is a standard feature of Mac OS X. Using the Printer Utilities EPSON printer utilities allow you to check the current printer status and to perform printer maintenance from your computer. To use the utilities, double-click the EPSON Printer Utility icon in the Applications folder in Macintosh HD (by default setting), and then click the button for the utility that you want to use. - Page 137 EPSON StatusMonitor The StatusMonitor utility monitors the printer status. If it detects a printer error, it will inform you with an error message. You can also use this utility to check how much ink is remaining before printing. To use the StatusMonitor, click the EPSON StatusMonitor button in the Utility dialog box.
-
Page 138: Getting Information Through Online Help
Here are sample printouts. From each pattern on the printed test sheet, choose the vertical line that is aligned best. For each pattern, select the corresponding line number from the appropriate drop-down list box in the Print Head Alignment dialog box, and then click Finish to put the new settings into effect. - Page 139 To access online help, choose Print from the File menu of your application. Next, select Print Settings or Color Management from the pop-up menu, and then click the Help button.
-
Page 140: Chapter 4 Paper Handling
Chapter 4 Paper Handling Single Sheets Loading single sheets Follow the steps below to load plain paper into the printer. 1. Lower the output tray and slide out the extension. Next, hold down the tab on the left edge guide and slide the guide so that the distance between the edge guides is slightly wider than the width of your paper. - Page 141 Note: ❏ Leave enough space in front of the printer for the paper to be fully ejected. ❏ Always load paper into the sheet feeder short edge first. ❏ Make sure that the paper stack fits under the arrow mark inside the edge guide.
- Page 142 ❏ If the paper is curled, flatten it or curl it slightly toward the opposite side before loading. Printing on curled paper may cause ink to smear on your printout, especially when printing with the Minimize Margins option selected under More Options (Windows) or the Maximum option selected for Printable Area (Macintosh).
- Page 143 Using special media You can achieve good results with most types of plain paper. However, coated paper results in higher quality printouts because these media absorb smaller amounts of ink. EPSON provides special media that are formulated for the ink used in EPSON ink jet printers.
- Page 144 Caution: ❏ Cleaning sheets packaged with EPSON special media should not be used with this printer. The cleaning function performed by these sheets is not necessary with this type of printer, and the sheets could jam in the printer. ❏ Load the media printable side up in the sheet feeder. See the instruction sheets packed with the media to determine which side is the printable side.
- Page 145 ❏ If the paper is curled, flatten it or curl it slightly toward the opposite side before loading. Printing on curled paper may cause ink to smear on your printout, especially when printing with the Minimize Margins check box selected under More Options (Windows) or the Maximum option selected for Printable Area (Macintosh).
- Page 146 Loading capacities for EPSON special media Refer to the chart below to find the loading capacities for EPSON special media. Media Type Loading Capacity 360 dpi Ink Jet Paper and Photo Up to 30 sheets. Quality Ink Jet Paper Up to 10 sheets at a time for legal sized Photo Quality Ink Jet Paper.
- Page 147 Panoramic Photo Paper One sheet at a time. Always place a support sheet* under the paper. Iron-On Cool Peel Transfer Paper One sheet at a time. Economy Paper Up to 20 sheets. Matte Paper-Heavyweight Up to 20 sheets. Always place a support sheet* under the stack of paper.
- Page 148 2. Load envelopes short edge first with the flap side down, as shown in the illustration. Note: ❏ The folding quality and thickness of envelopes vary widely. If the total thickness of the stack of envelopes exceeds 10 mm, press each envelope in the stack flat before loading.
-
Page 149: Chapter 5 Driver Settings
Chapter 5 Driver settings Accessing the Printer Software for Windows You can access the printer software from most Windows applications, or from the Windows Start menu. When you access the printer software from a Windows application, the settings that you make apply only to the application you are using. - Page 150 1. For users of Windows Me, 98, 95, 2000 and NT 4.0, click Start, point to Settings, and then click Printers. For Windows XP users, click Start, Control Panel, Printers and Other Hardware, then Printers and Faxes. 2. For Windows Me, 98, and 95 users, select your printer, and then click Properties on the File menu.
- Page 151 These dialog boxes can be accessed as described below. Dialog Box How to Access Print Click Print on the File menu of your application or click Options in the Page Setup dialog box. Page Setup Click Page Setup on the File menu of your application Layout Click the Layout icon button in the Print dialog box...
- Page 152 Print Common in all options: Printer, Presets Copies & Pages option: Copies, Collated, Pages Layout option: Pages per Sheet, Layout Direction, Border Output Options option: Save as File, Format Print Settings option: Media Type, Ink, Mode Color Management option: Color Management Summary option: Summary of current settings Page Setup...
- Page 153 Plain Paper Plain paper Envelopes EPSON Premium Ink Jet Plain Paper (A4) S041214 EPSON Bright White Ink Jet Paper (A4) S041442 360 dpi Ink Jet Paper EPSON 360 dpi Ink Jet Paper (A4) S041059 S041025 EPSON 360 dpi Ink Jet Paper (Letter) S041060 S041028 EPSON Iron-On Cool Peel Transfer Paper (A4)
- Page 154 EPSON Photo Quality Ink Jet Card (8 × 10") S041122 EPSON Photo Quality Self Adhesive Sheet (A4) S041106 EPSON Ink Jet Note Cards A6 (with envelopes) S041147 EPSON Ink Jet Greeting Cards 5 × 8" S041148 (with envelopes) EPSON Ink Jet Greeting Cards 8 × 10" S041149 (with envelopes) Driver settings...
- Page 155 Matte Paper-Heavyweight EPSON Matte Paper-Heavyweight (A4) S041256 S041258 S041259 EPSON Matte Paper-Heavyweight (Letter) S041257 Matte Paper-Heavyweight (8 × 10") S041467 Double-Sided Matte Paper (A4) S041569 S041570 Double-Sided Matte Paper (Letter) S041568 Photo Paper EPSON Photo Paper (A4) S041140 EPSON Photo Paper (Letter) S041141 EPSON Photo Paper (4 ×...
- Page 156 Premium Glossy Photo Paper EPSON Premium Glossy Photo Paper (A4) S041285 S041287 S041297 S041624 EPSON Premium Glossy Photo Paper (Letter) S041286 EPSON Premium Glossy Photo Paper (5 × 7") S041464 EPSON Premium Glossy Photo Paper (8 × 10") S041465 EPSON Premium Semigloss Photo Paper (A4) S041332 EPSON Premium Semigloss Photo Paper (Letter) S041331 EPSON Premium Luster Photo Paper (A4)
- Page 157 ColorLife Photo Paper EPSON ColorLife Photo Paper (A4) S041560 EPSON ColorLife Photo Paper (Letter) S041500 Note The availability of special media varies by location. For the latest information on media available in your area, contact EPSON customer services. See “Contacting Customer Support” on page 275. Driver settings...
-
Page 158: Chapter 6 Checking Printer Condition And Maintaining
Chapter 6 Checking Printer Condition and Maintaining Checking the Printer Status For Windows Using the Progress Meter When you send a print job to the printer, the Progress Meter appears, as shown in the illustration below. The Progress Meter indicates the progress of the current print job and provides printer status information when bidirectional communication between the printer and computer is established. - Page 159 Epson Printing Tips Tips for getting the most out of your EPSON printer software appear in the text box at the bottom of the Progress Meter window. A new tip appears every 30 seconds. For more details on the tip which is currently displayed, click Details. Error messages If a problem occurs during printing, an error message appears in the text box at the top of the Progress Meter window.
- Page 160 Note: EPSON Spool Manager is not available with Windows 2000, XP and NT 4.0. After you send a print job, an EPSON Stylus Photo 830 Series button appears on the taskbar. Click this button to open the EPSON Spool Manager.
- Page 161 Windows Me, 98, 95, 2000 and NT 4.0) or All Programs (for Windows XP users), then to EPSON or EPSON Printers, and then click EPSON Stylus Photo 830 Series Readme. Accessing EPSON Status Monitor 3 There are two ways to access EPSON Status Monitor 3: ❏...
-
Page 162: For Macintosh
❏ Current Status: EPSON Status Monitor 3 provides you with detailed printer status information, a graphic display, and status messages. If the ink runs low or out, the How to button appears in the EPSON Status Monitor 3 window. Clicking How to displays ink cartridge replacement instructions and moves the print head to the ink cartridge replacement position. - Page 163 When the ink runs low or out, a How to button appears. Click How to and EPSON StatusMonitor will lead you step-by-step through the ink cartridge replacement procedure. You can also use this utility to check ink levels before printing. When open, EPSON StatusMonitor displays the amount of ink remaining at the time it was opened.
- Page 164 2. Click the StatusMonitor icon button or click the Utility icon button, and then click the EPSON StatusMonitor button in the Utility dialog box. The StatusMonitor dialog box appears. For Mac OS X users 1. Double-click Macintosh HD (by default setting), double-click the Applications folder, and then double-click the EPSON Printer Utility icon.
- Page 165 3. Click the EPSON StatusMonitor button. The StatusMonitor dialog box appears. Using the Configuration Settings dialog box To change the way that the StatusMonitor utility monitors your printer, or to change the way that your printer handles print jobs, follow the steps below. Note: This feature is not available with Mac OS X.
- Page 166 3. Click Configuration. The Configuration Settings dialog box appears. In the Configuration Settings dialog box, you can make the following settings: Error notification Choose the method by which EPSON StatusMonitor will notify you in case of an error. Warning Choose the method by which EPSON StatusMonitor will notify you if a warning message becomes necessary.
- Page 167 Check the ink level Select this check box to have the printer before starting to print. check the ink levels before starting to print. Using EPSON Monitor3 After you send a print job to the printer, you can use the EPSON Monitor3 utility to check, cancel, or change the priority of print jobs that are queued for printing.
- Page 168 Note: You can also open EPSON Monitor3 by double-clicking the EPSON Monitor3 icon in the Extensions folder. Managing print jobs using EPSON Monitor3 Using EPSON Monitor3, you can manage print jobs as described below: ❏ Use the buttons below to hold, resume, and delete print jobs. Select the print job that you want to manage, and then click the appropriate button.
- Page 169 ❏ Click the Show details arrow to open an extension at the bottom of the EPSON Monitor3 dialog box similar to the one below. The extension displays detailed information on the selected document’s printer software settings. Changing the priority of print jobs To change the priority of print jobs in a print queue, follow the steps in this section.
-
Page 170: Checking The Print Head Nozzles
2. Click the Show details arrow to open an extension at the bottom of the EPSON Monitor3 dialog box, similar to the one below. 3. From the Priority list, select Urgent, Normal, Hold, or Print Time. Note: If you select Print Time, a dialog box appears, allowing you to specify the date and time that the document will be printed. -
Page 171: Using The Nozzle Check Utility
You can check the print head nozzles from your computer using the Nozzle Check utility in the printer software, or from the printer itself by using the printer’s control panel buttons. Using the Nozzle Check utility Refer to the appropriate section below to use the Nozzle Check utility. -
Page 172: Using The Control Panel Buttons
2. Follow the on-screen instructions. Using the control panel buttons Follow the steps below to check the print head nozzles using the control panel buttons. 1. Turn off your printer. 2. Make sure that A4 or Letter size paper is loaded in the sheet feeder. -
Page 173: Cleaning The Print Head
The printer prints an operation check page that includes your printer’s ROM version information, the ink counter code, and a nozzle check pattern. Below are sample printouts. Good sample Print head needs to be cleaned The above sample is in black and white, but the actual test prints in color (CMYK). -
Page 174: Using The Head Cleaning Utility
Note: ❏ Print head cleaning uses both color and black ink. To avoid wasting ink, clean the print head only if print quality declines; for example, if the printout is blurry or the color is incorrect or missing. ❏ Use the Nozzle Check utility first to confirm that the print head needs to be cleaned. - Page 175 Caution: Never turn off the printer while the P power light is flashing. Doing so may damage the printer. 4. When the P power light stops flashing, click Print Nozzle Check Pattern in the Head Cleaning dialog box to confirm that the head is clean and to reset the cleaning cycle.
- Page 176 If print quality remains a problem after replacing the ink cartridges, contact your dealer. Note: To maintain print quality, we recommend printing a few pages at least once every month. For Macintosh users Follow the steps below to clean the print head using the Head Cleaning utility.
- Page 177 Below are nozzle check patterns: Good sample Print head needs to be cleaned The above sample is in black and white, but the actual check pattern prints in color. If print quality has not improved after repeating this procedure four or five times, turn the printer off and leave it alone overnight. Then, do the nozzle check again, and repeat the head cleaning if necessary.
-
Page 178: Using The Control Panel Buttons
Using the control panel buttons Follow the steps below to clean the print head using the control panel buttons. 1. Make sure that the P power light is on and that the error light is off. Note: If the error light is flashing or on, you cannot clean the print head and this operation will start the ink cartridge replacement procedure. -
Page 179: Aligning The Print Head
The printer starts cleaning the print head and the P power light begins flashing. Caution: Never turn off the printer while the P power light is flashing. Doing so may damage the printer. 3. When the P power light stops flashing, print a nozzle check pattern to confirm that the head is clean and to reset the cleaning cycle. -
Page 180: For Windows Users
Note: Do not start the Print Head Alignment utility while printing is in progress; otherwise, your printout may be marred. For Windows users Follow the steps below to align the print head using the Print Head Alignment utility. 1. Make sure that A4- or Letter-size plain paper is loaded in the sheet feeder. - Page 181 Checking Printer Condition and Maintaining...
-
Page 182: Chapter 7 Printing With Print Image Matching
Chapter 7 Printing with PRINT Image Matching How is PRINT Image Matching used? This product supports PRINT Image Matching and PRINT Image Matching II. When used in combination, PRINT Image Matching or PRINT Image Matching II enabled digital still cameras, printers and software help photographers to produce images more faithful to their intentions. - Page 183 Plain Paper EPSON Matte Paper Heavyweight EPSON Photo Paper EPSON Premium Glossy Photo Paper EPSON Photo Quality Glossy Film EPSON ColorLife Photo Paper Printing with PRINT Image Matching...
-
Page 184: Chapter 8 Exif Print
Chapter 8 Exif Print Exif Print Exif2.2 is a new standard for digital cameras, is called "Exif Print." This standard has been established to simplify the use of digital photos. Exif Print... -
Page 185: Chapter 9 Setting Up Your Printer On A Network
Chapter 9 Setting Up Your Printer on a Network For Users of Windows Me, 98, and 95 This section tells you how to set up your printer so that other computers on a network can use it. First, you need to set up the printer as a shared printer on the computer to which the printer is connected. - Page 186 4. Select the I want to be able to allow others to print to my printer(s) check box and click OK. 5. In the Network dialog box, click OK. 6. In the Control Panel, double-click the Printers icon. Note: ❏ If a dialog box requesting the insertion of the Windows Me, 98 or 95 CD-ROM appears, insert the CD in the CD-ROM drive and follow the on-screen instructions.
-
Page 187: Accessing The Printer Through A Network
8. Select Shared As, then type the printer information as required and click OK. Accessing the printer through a network To use your printer from other computers on a network, you must first add the printer to each computer that will access it. Follow the steps below. - Page 188 4. Select Network printer, then click Next. 5. On the next screen, click Browse. 6. Double-click the icon of the computer that is directly connected to the printer. Then, click the icon for the appropriate printer. 7. Click OK and follow the on-screen instructions. Setting Up Your Printer on a Network...
-
Page 189: For Users Of Windows Xp, 2000 And Nt 4.0
Note: To monitor the status of a shared printer, you must install EPSON Status Monitor 3 on each computer that will access the printer. See “Installing EPSON Status Monitor 3” on page 180 for instructions. Installing EPSON Status Monitor 3 To monitor the status of a printer accessed through a network, you must install EPSON Status Monitor 3 on each computer that will access the printer. -
Page 190: Setting Up Your Printer As A Shared Printer
❏ To install software programs in Windows XP, it is necessary to log on with a Computer Administrator account. You cannot install software programs if you log on as a Limited account user. After you install Windows XP, the user account is set as a Computer Administrator account. -
Page 191: Accessing The Printer Through A Network
Note: Do not use spaces or hyphens in the printer name. If you want Windows XP, 2000 or NT 4.0 to automatically download printer drivers to computers that are running different versions of Windows, click Additional Drivers and select the environment and the operating systems for the other computers. - Page 192 Note: Your printer must be set up as a shared resource on the computer to which it is directly connected before you can access it from another computer. For instructions, see “Setting up your printer as a shared printer” on page 181. 1.
- Page 193 6. Double-click the icon of the computer that is directly connected to the printer. Then, click the icon for the appropriate printer. 7. Click Next and follow the on-screen instructions. Note: ❏ Depending on the operating system and the configuration of the computer to which the printer is connected, the Add Printer Wizard may prompt you to install the printer driver from the printer software CD-ROM.
-
Page 194: For Macintosh Users
1. Insert the printer software CD in the CD-ROM drive. If the Installer dialog box does not appear, double-click SETUP.EXE in the CD-ROM. 2. Select Install EPSON Software, and click 3. Click Advanced, select only EPSON Status Monitor3, and then click Install. 4. - Page 195 2. Choose Chooser from the Apple menu and click the icon for your printer. Then, select the port to which the printer is connected. 3. Click Setup. The Printer Sharing Setup dialog box opens. 4. Select the Share this Printer check box, then type the printer name and password information as necessary.
-
Page 196: Accessing The Printer Through A Network
Accessing the printer through a network To access your printer from other computers on a network, follow the steps in this section for each computer that will access the printer. 1. Turn on your printer. 2. Install the printer software from the printer software CD-ROM. - Page 197 If the following dialog box appears, enter the password for the printer, then click OK. 4. Select the appropriate Background Printing radio button to turn background printing on or off. 5. Close the Chooser. Setting Up Your Printer on a Network...
-
Page 198: Chapter 10 Increasing The Print Speed
Chapter 10 Increasing the Print Speed General tips Just as printing at a high resolution requires more processing time than printing at a low resolution, printing in color takes longer than printing in black-and-white because the volume of data in a color document is much greater. - Page 199 Data Image size Small Large – characteristic Resolution High The table below shows the factors related to print speed only. Print speed Faster Slower Menu or dialog box Printer Black Color Print dialog software (Macintosh) settings Flip Horizontal* Advanced (Macintosh) dialog box Edge Advanced...
-
Page 200: Using The Speed & Progress Dialog Box (Windows Only)
Using the Speed & Progress dialog box (Windows only) Windows users can make certain print speed settings in the Speed & Progress dialog box. Click the Speed & Progress button on your printer software’s Utility menu. The following dialog box appears. -
Page 201: Epson Printer Port (Windows Me, 98, 95 Only)
EPSON Printer Port (Windows Me, 98, 95 only) For printer models that use the parallel port, select this check box to enable the EPSON printer port, which is optimized for EPSON printers, instead of the Windows default printer port. This speeds up the data transfer rate to EPSON printers. - Page 202 Message Action (No message) Your system's parallel port setting does not allow DMA transfer. However, if you change the parallel port setting to ECP or Enhanced using your computer's BIOS Setup program, you may be able to use DMA transfer. Consult your computer manual or computer manufacturer for instructions.
- Page 203 4. Click the Resources tab, then clear the Use automatic settings check box. Write down the Input/Output Range settings shown in the resource settings box. 5. Select a basic configuration setting from the Setting based on list that uses the same Input/Output Range settings as those you wrote down in Step 4, and make sure that the Direct Memory Access channel and Interrupt Request numbers are allocated and displayed.
-
Page 204: Using Port Configuration (Windows Nt 4.0 Only)
Using Port Configuration (Windows NT 4.0 only) Note: Port settings are complicated and should only be made by an experienced user with administrative privileges. If your computer has a parallel port that supports ECP mode, you can make certain print speed settings in the Port Configuration dialog box. - Page 205 Note: If your printer is connected to LPT1, only the LPT1 tab is available. The available settings are as follows: Resource settings (IRQ and DMA) If you have connected your printer to LPT2 or LPT3, making IRQ and DMA settings here may speed up printing. Click Change setting and input the same configuration numbers for IRQ and DMA which you have made with your expansion board.
-
Page 206: Chapter 11 Replacing Ink Cartridges
Chapter 11 Replacing Ink Cartridges Introduction This printer uses ink cartridges equipped with IC chips. The IC chip accurately monitors the amount of ink used by each cartridge, so even if a cartridge is removed and later reinserted, all of its ink can be used. However, some ink is consumed each time the cartridge is inserted because the printer automatically checks reliability. - Page 207 This table describes the status of the lights on your printer and the actions you need to take. Lights Action Obtain a replacement black (T026) or color (T027) ink cartridge. Replace the empty black or color ink cartridge. O = on, F = flashing To find out which ink cartridge is empty, check EPSON Status Monitor 3 (for Windows) or EPSON StatusMonitor (for Macintosh).
- Page 208 Warning: ❏ Keep ink cartridges out of the reach of children. Do not allow children to drink from or otherwise handle the cartridges. ❏ Be careful when you handle the used ink cartridges, as there may be some ink around the ink supply port. If ink gets on your skin, wash the area thoroughly with soap and water.
- Page 209 For more information about ink cartridges, see “When handling the ink cartridges” on page 8. To replace an ink cartridge using the e ink cartridge replacement button, follow the steps below. 1. Make sure that the printer is on. The P power light should be on, but not flashing.
- Page 210 4. Lift up the ink cartridge clamp as far as it will go. The cartridge rises partly out of the cartridge holder. The illustration shows color ink cartridge replacement. To replace the black ink cartridge, lift up only the smaller clamp on the left.
- Page 211 6. Remove the new ink cartridge from its protective bag. Next, remove only the yellow tape seal from the cartridge. Do not touch the green chip on the side of the cartridge. black ink cartridge (T026) color ink cartridge (T027) Replacing Ink Cartridges...
- Page 212 Caution: ❏ You must remove the yellow tape seal from the cartridge before installing it; otherwise, the cartridge will become unusable and you will be unable to print. ❏ If you have installed an ink cartridge without removing the yellow tape seal, you must remove the cartridge and install a new one.
- Page 213 careful handling is recommended. Do not touch the supply port of the ink cartridge or its surrounding area. ❏ Be sure to always install an ink cartridge into the printer immediately following the removal of an old ink cartridge. Failure to promptly install the ink cartridge may cause the print head to dry out and render it unable to function properly.
-
Page 214: Using The Status Monitor
Caution: After you remove an ink cartridge from the printer, insert a new one immediately. If no cartridge is present, the print head may dry out and become unable to print. 9. Close the printer cover. 10. Press the e ink cartridge replacement button. The printer moves the print head and begins charging the ink delivery system. -
Page 215: Checking The Ink Supply
When an ink cartridge is low or empty, click How to in the EPSON Status Monitor window. Follow the on-screen instructions to replace the cartridge. For more information on using EPSON Status Monitor, see “Using EPSON Status Monitor 3” on page 151 for Windows, or “Using EPSON StatusMonitor”... - Page 216 A graphic display showing the amount of ink remaining appears. Note: For the color ink cartridge, the color with the least amount of ink remaining determines the level that is displayed for all of the colors in the cartridge. Progress Meter The Progress Meter dialog box appears automatically when you send a print job to the printer.
-
Page 217: For Macintosh Users
For Macintosh users You can check the amount of ink remaining in the ink cartridges using the StatusMonitor. Follow the steps below. For users of Mac OS 8.1 or later (except Mac OS X) 1. Click Print or Page Setup on the File menu of your application. - Page 218 For Mac OS X users 1. Double-click Macintosh HD (by default setting), double-click the Applications folder, and then double-click the EPSON Printer Utility icon. The Printer List window appears. 2. Select your printer, and then click OK. The EPSON Printer Utility dialog box appears.
-
Page 219: Updating And Uninstalling Software
Updating and Uninstalling Software See this section when upgrading your Windows operating system, updating the printer software under Windows Me, 2000 XP or NT 4.0, or when uninstalling the printer driver from Windows or Macintosh. Updating to Windows Me or 98 If you have upgraded your computer’s operating system from Windows 95 to Windows Me or 98, you must uninstall your printer software, and then install it again. - Page 220 EPSON Printer Software from the list. Then, click Add/Remove. For Windows XP and 2000, click Change/Remove. 4. Select the EPSON Stylus Photo 830 Series icon and click OK. 5. Click OK. Note: If you are using the USB port to connect the printer in Windows Me or 98, you need to uninstall an additional USB component.
- Page 221 2. If separate folders containing installer icon for several languages appear, double-click the folder for your preferred language. Double-click the Installer icon in Disk 1 folder inside Disk Package folder. 3. After the initial screen, click Continue. The following dialog box appears.
-
Page 222: Transporting The Printer
Transporting the Printer If you need to transport your printer, carefully prepare and repack it as described below using the original box (or a similar box that the printer fits snugly into) and packing materials. Follow the steps below. Caution: ❏... - Page 223 4. Open the printer cover again. Secure the ink cartridge holder to the printer with the protective material tape as shown below, and then close the printer cover. 5. Push in the output extension tray, and then raise the output tray.
-
Page 224: Chapter 12 Troubleshooting
Chapter 12 Troubleshooting Diagnosing the Problem If you are connecting via the USB interface and are having difficulty printing, the problem may be related to your USB connection. Refer to “Correcting USB Problems” on page 239 for details. If your problem is not USB related, troubleshooting printer problems is best handled in two easy steps: first diagnose the problem, then apply likely solutions until the problem is fixed. - Page 225 For Windows users The Problem Solver HTML manual provides you with tips to help solve any problems you may encounter when using your printer. If you encounter a problem, access the Problem Solver in one of the following ways: ❏ From the Windows Start menu Click Start, point to Programs (for users of Windows Me, 98, 95, 2000 and NT 4.0) or All Programs (for Windows XP users), then to EPSON, and then click ESP830 Problem Solver.
-
Page 226: Error Indicators
Error indicators You can identify many common printer problems using the lights on your printer’s control panel. If your printer stops working and the lights are on or flashing, use the following table of panel light patterns to diagnose the problem, then try the recommended solution. - Page 227 Ink out The black or color ink Replace the black (T026) or color cartridge is empty or not (T027) ink cartridge with a new installed. one. See “Replacing Ink Cartridges” on page 197 for details. Wrong cartridge The installed black or Use the appropriate black (T026) color ink cartridge or color (T027) ink cartridge.
-
Page 228: Epson Status Monitor
EPSON Status Monitor The EPSON Status Monitor utility provides status messages and a graphic display showing the current status of the printer. If a problem occurs while printing, an error message appears in the Progress Meter window. When the ink is out, click How To in the EPSON Status Monitor or Progress Meter window and EPSON Status Monitor will lead you step-by-step through the cartridge replacement procedure. - Page 229 If you use the USB interface, make sure that your PC is on when connecting the cable; otherwise, the PC may not recognize the printer. 3. Make sure that A4 or Letter size paper is loaded in the sheet feeder. Troubleshooting...
- Page 230 4. Hold down the maintenance button and press the P power button to turn on the printer. Then, release only the P power button. When the printer starts the operation check, release the maintenance button. The printer prints an operation check page which includes the version of your printer’s ROM, the ink counter code, and a nozzle check pattern.
-
Page 231: Print Quality Problems
If the test page does not print satisfactorily, there is a problem with the printer. For example, if bands appear in the check pattern as shown below, this could mean a clogged ink nozzle or a misaligned print head. The above sample is in black and white, but the actual check pattern prints in color. -
Page 232: Vertical Misalignment Or Banding
❏ Check the error light. If the light is flashing, replace the appropriate ink cartridge. See “Replacing Ink Cartridges” on page 197. ❏ Make sure that the Minimize Margins setting is not selected under More Options in the Page Layout menu (Windows) or that the Maximum setting is not selected as the Printable Area in your printer software (Macintosh). -
Page 233: Color Gaps
❏ Make sure that the MicroWeave check box is selected when available in the Advanced dialog box (Macintosh). Color gaps Try one or more of these solutions: ❏ Make sure that your paper is not damaged, dirty, or too old. Also, make sure that the printable side of the paper is face up in the sheet feeder. -
Page 234: Incorrect Or Missing Colors
Incorrect or missing colors Try one or more of these solutions: ❏ Change the Ink setting in your printer software to Color. ❏ Adjust the color settings in your application or in your printer software’s Advanced dialog box. ❏ Run the Head Cleaning utility. &... - Page 235 ❏ Make sure that your paper is dry and that the printable side is facing up. Also, make sure that you are using an acceptable paper type. & “Paper” on page 259 ❏ Clear all customized settings, and then select the Text & Image setting under Quality Type on your printer software’s Main menu (Windows) or select the Automatic setting under Mode in the Print dialog box (Macintosh).
- Page 236 ❏ Load and eject dry paper several times. If the problem persists, ink may have leaked inside the printer, so wipe the inside of the printer with a soft, clean cloth. Wipe here Warning: Be careful not to touch the gears inside the printer. Troubleshooting...
-
Page 237: Print Quality Does Not Improve After Head Cleaning
Caution: Be careful not to wipe the carriage shaft. Print quality does not improve after head cleaning If the quality of your printouts remains poor even after repeatedly cleaning and aligning the print head, one or some of the ink cartridges may be old or damaged and should be replaced. -
Page 238: Incorrect Or Garbled Characters
❏ Inverted image ❏ Blank pages print ❏ Printout has smears on the bottom edge ❏ Printing is too slow Incorrect or garbled characters Try one or more of these solutions: ❏ Make sure that you are using the appropriate printer driver for your printer. -
Page 239: Inverted Image
❏ Check the settings on the Main menu (Windows) or in the Page Setup dialog box (Macintosh). Make sure the settings are appropriate for the paper size you are using. Inverted image Clear the Flip Horizontal check box in the printer software (Macintosh), or turn off the “Mirror”... -
Page 240: Printout Has Smears On The Bottom Edge
Printout has smears on the bottom edge If the paper is curled toward the printable side, flatten it or curl it slightly toward the opposite side. Printing is too slow Try one or more of these solutions: ❏ Make sure that the Media Type setting in your printer software is correct. -
Page 241: Paper Does Not Feed Correctly
Paper Does Not Feed Correctly If one of the following problems has occurred, try the solutions listed for that problem. ❏ Paper does not feed ❏ Multiple pages feed ❏ The paper jams ❏ Paper is not ejected fully or is wrinkled ❏... -
Page 242: Multiple Pages Feed
❏ Paper is not jammed inside the printer. If it is, remove the jammed paper. ❏ The ink cartridges are not empty. Replace cartridges as necessary. & “Print quality does not improve after head cleaning” on page 228 After trying the solutions above, load the paper again. Make sure that you follow any special loading instructions that came with your paper. -
Page 243: Paper Jams
❏ If too many copies of a document are being printed, check the Copies setting on the printer software’s Page Layout menu (Windows) or in the Print dialog box (Macintosh) and in your application. & For Windows users, “Copies” on page 70 &... -
Page 244: Paper Is Not Ejected Fully Or Is Wrinkled
Single Sheets ❏ The left edge guide is adjusted to fit your paper. ❏ The printer is on a flat, stable surface that extends beyond the printer base in all directions. The printer will not operate properly if it is tilted. Paper is not ejected fully or is wrinkled Try one or more of these solutions: ❏... -
Page 245: All Lights Are Off
❏ Only the power light is on ❏ The error light is flashing or on ❏ One of the ink out lights is flashing or on ❏ Ink out lights are on and the other lights are flashing All lights are off Try one or more of these solutions: ❏... -
Page 246: Error Light Is Flashing Or On
❏ Make sure that there is no packing material in the printer. ❏ Turn off the printer and the computer and disconnect the printer’s interface cable. Then, print an operation check page. & “Running a printer operation check” on page 219. If the check page prints correctly, make sure that the printer software and your application are installed correctly. -
Page 247: Error Light Is On And Power Light Is Flashing
❏ If the error light is on and no paper is loaded, load more paper in the sheet feeder. ❏ If the error light is flashing, ink is low. Obtain a replacement cartridge of the appropriate type. To determine which cartridge is low, see “Replacing Ink Cartridges” on page 197. -
Page 248: Correcting Usb Problems
Correcting USB Problems If you are having difficulty using your printer with a USB connection, see if your problem is listed below, and take any recommended actions. USB connections USB cables or connections can sometimes be the source of USB problems. - Page 249 Checking printer software installation for Windows 2000 and When using Windows 2000 or XP, you must follow the steps in the Setup sheet packed with the printer to install the printer software. Otherwise, Microsoft’s Universal driver may be installed instead. To check if the Universal driver has been installed follow the steps below.
- Page 250 Note: The screens shown in this section are for Windows 98. Windows Me screens may differ slightly. 1. Click the Start button, point to Settings, and click Printers. Make sure that the icon for your printer appears in the Printers window.
- Page 251 2. Click the Details tab. If EPUSBX: (EPSON Stylus Photo 830) is displayed in the Print to the following port list box, then the USB printer device driver and printer software is installed correctly. If the correct port is not displayed, proceed to the next step.
- Page 252 If EPSON USB Printer Devices does not appear on the Device Manager menu, click the plus (+) sign beside Other devices to view the installed devices. If USB Printer or EPSON Stylus Photo 830 Series appears under Other devices, the printer software is not installed correctly. Proceed to step 5.
- Page 253 5. Under Other devices, select USB Printer or EPSON Stylus Photo 830 Series and click Remove. Then, click OK. When the following dialog box appears, click OK, then click OK to close the System Properties dialog box. 6. Uninstall the printer software as explained in “Uninstalling the printer driver”...
-
Page 254: Cancelling Printing
Cancelling Printing If you encounter problems while printing, you may need to cancel printing. To cancel printing, follow the instructions in the appropriate section below. For Windows Me, 98 and 95 users It is possible to cancel printing using either the Progress Meter or EPSON Spool Manager. - Page 255 After you send a print job, an EPSON Stylus Photo 830 Series button appears on the taskbar. Click this button to open the EPSON Spool Manager.
-
Page 256: For Users Of Windows 2000, Xp And Nt 4.0
For users of Windows 2000, XP and NT 4.0 When you send a print job to the printer, the Progress Meter appears on your computer screen. Click Stop to cancel printing. For Macintosh users The procedure for canceling printing for Macintosh varies depending upon whether background printing is on or off. - Page 257 1. Select EPSON Monitor3 from the application menu. 2. Press the P power button to turn off the printer. 3. In the Document Name list, select the document which is printing, then click the Delete icon button to cancel the print job.
- Page 258 1. Click the Print Center icon in Dock. 2. Press the P power button to turn off the printer. 3. In the Document Name list, select the document which is printing, and then click Delete to cancel the print job. Troubleshooting...
-
Page 259: Chapter 13 Options And Consumable Products
Chapter 13 Options and Consumable Products Options The following options are available for your printer. Interface cables EPSON supplies the following interface cables for your printer. However, you can use any interface cable that meets these specifications. See your computer manual for any additional requirements. -
Page 260: Consumable Products
Consumable products The following ink cartridges and EPSON special media are available for your printer. Ink cartridges You can use the following cartridges with your printer. Black ink cartridge T026 Color ink cartridge T027 Note: The product numbers of ink cartridges may vary by location. Media types EPSON offers specially-designed media for ink jet printers to meet most high-quality printing needs. - Page 261 Plain Paper Product Name Uses Finish Serial Number EPSON Premium Ink Jet Plain Reports, memos, Matte S041214 Paper (A4) newsletters and homework EPSON Bright White Ink Jet Reports, memos, Matte S041442 Paper (A4) newsletters and homework 360 dpi Ink Jet Paper Product Name Uses Finish...
- Page 262 EPSON Photo Quality Ink Jet Presentations Matte S041067 Paper (Legal) and newsletters S041048 with photos EPSON Photo Quality Ink Jet Invitation cards, Matte S041054 Card (A6) digital photos, fine arts EPSON Photo Quality Ink Jet Invitation cards, Matte S041121 Card (5 × 8") digital photos, fine arts EPSON Photo Quality Ink Jet...
- Page 263 Matte Paper-Heavyweight Product Name Uses Finish Serial Number EPSON Matte Enlargements Matte S041256 Paper-Heavyweight (A4) and framing of S041258 cherished S041259 photos EPSON Matte Enlargements Matte S041257 Paper-Heavyweight (Letter) and framing of cherished photos EPSON Matte Printing, Matte S041467 Paper-Heavyweight (8 × 10") enlarging, framing favorite matte photos...
- Page 264 EPSON Photo Paper Reprints and Glossy S041254 (200 × 300 mm) everyday photos EPSON Panoramic Photo Paper Create photos, Glossy S041145 (210 × 594 mm) banners and panoramic enlargements for home or studio EPSON Photo Paper Cards (A4) 8 pre cut Glossy S041177 business sized...
- Page 265 Premium Glossy Photo Paper Product Name Uses Finish Serial Number EPSON Premium Glossy Photo Enlargements High S041287 Paper (A4) and framing of Gloss S041297 cherished S041285 photos EPSON Premium Glossy Photo High quality High S041624 Paper (A4) photos for glass Gloss frames, photo albums and...
- Page 266 EPSON Photo Quality Glossy Report covers, High S041072 Film (Letter) color proofs, Gloss certificates and scanned images EPSON Photo Quality Glossy Report covers, High S041107 Film (A6) color proofs, Gloss certificates and scanned images EPSON Photo Stickers 16 (A6) Create stickers Glossy S041144 using photos and...
- Page 267 Ink Jet Transparencies Product Name Uses Finish Serial Number EPSON Ink Jet Transparencies Report covers, Finish S041063 (A4) overlays and overheads EPSON Ink Jet Transparencies Report covers, Finish S041064 (Letter) overlays and overheads ColorLife Photo Paper Product Name Uses Finish Serial Number EPSON ColorLife Photo Paper...
-
Page 268: Appendix A Printer Specifications
Appendix A Printer Specifications Printing Printing method On-demand ink jet Nozzle configuration Monochrome (black) 48 nozzles Color (cyan, magenta, yellow, light cyan, light magenta) 240 nozzles (48 [each color] × 5) Maximum 2880 dpi × 720 dpi Resolution Control code ESC/P Raster EPSON Remote Print direction... -
Page 269: Paper Specifications
Paper specifications Single sheets: A4 (210 mm × 297 mm) Size A5 (148 mm × 210 mm) A6 (105 mm × 148 mm) Letter (216 mm × 279 mm) Half letter (139.7 mm × 215.9 mm) Legal (216 mm × 356 mm) Executive (184.2 mm ×... - Page 270 Index Cards: A6 (105 mm × 148 mm) Size 5 × 8” (127 mm × 203 mm) 8 × 10” (203 mm × 254 mm) Paper types Special paper distributed by EPSON Iron-On Cool Peel Transfer Paper: A4 (210 mm × 297 mm) Size Letter (216 mm ×...
- Page 271 Photo Paper: A4 (210 mm × 297 mm) Size Letter (216 mm × 279 mm) Panorama (210 mm × 594 mm) 4 × 6” (114 mm × 175 mm) 4 × 6” (102 mm × 152 mm) No perforations 100 mm × 150 mm 200 mm ×...
- Page 272 ColorLife Photo Paper: A4 (210 mm × 297 mm) Size Letter (216 mm × 279 mm) Paper types Special paper distributed by EPSON Photo Stickers: A6 (105 mm × 148 mm) with 4 or 16 Size frames Paper types Special paper distributed by EPSON Matte Paper-Heavyweight: A4 (210 mm ×...
-
Page 273: Printable Area
❏ EPSON Photo Quality Glossy Film and Self Adhesive Sheets should be stored under the following conditions: Temperature 15 to 30°C (59 to 86°F) Humidity 20 to 60% RH Printable area Single sheets (including panoramic size) and index cards ✽✽ Normal No Margins Envelopes... - Page 274 The minimum top margin is 3.0 mm (0.12"). When loading multiple sheets of EPSON Photo Quality Glossy Film, the minimum top margin is 30.0 mm (1.2"). B-L: The minimum left margin is 3.0 mm (0.12"). B-R: The minimum right margin is as follows: 3.0 mm (0.12") for single sheets and C6 envelopes.
-
Page 275: Ink Cartridges
Ink Cartridges Black ink cartridge (T026) Color Black Print capacity* 540 pages, comparable with 3.5% ECMA (ISO10561) at 360 dpi, 190 pages, 5% in calculation Cartridge life 2 years from production date (within 6 months after opening package, at 25°C [77°F]) Temperature Storage: -20 to 40°C (-4 to 104°F) - Page 276 Color ink cartridge (T027) Color Cyan, Yellow, Magenta, Light Cyan, and Light Magenta Print capacity* 220 pages/A4 (360dpi, 5% duty each color) Cartridge life 2 years from production date (within 6 months of opening the package at 25°C [77°F]) Temperature Storage: -20 to 40°C (-4 to 104°F) 1 month at 40°C (104°F)
-
Page 277: Mechanical
Caution: ❏ EPSON recommends the use of original EPSON ink cartridges only. Other products not manufactured by EPSON may cause damage to your printer not covered by EPSON's warranties. ❏ Do not use an ink cartridge if the date on the package has expired. -
Page 278: Electrical
Electrical Input voltage 90 to 264 V range Rated frequency 50 to 60 Hz range Input frequency 49.5 to 60.5 Hz range Rated current 0.2 to 0.4 A Power Approx. 18 W (ISO10561 Letter pattern) consumption Approx. 4 W in standby mode Approx. -
Page 279: Environmental
Environmental Temperature Operation: 10 to 35°C (50 to 95°F) Storage: -20 to 40°C (-4 to 104°F) 1 month at 40°C (104°F) Transit:* -20 to 60°C (-4 to 140°F) 120 hours at 60°C (140°F) Humidity Operation: 20 to 80% RH Storage:*,** 5 to 85% RH * Stored in a shipping container ** Without condensation... -
Page 280: System Requirements
EMC Directive 89/336/EEC EN 55022 Class B EN 55024 EN 61000-3-2 EN 61000-3-3 Australian model: AS/NZS 3548 Class B System Requirements Refer to the appropriate section below for the minimum and recommended computer system requirements necessary to use this printer. For Windows computers ®... -
Page 281: For Macintosh Computers
Pentium 150 MHz processor for Pentium 150 MHz or higher Windows Me processor for Windows Me Pentium processor for Windows 98, 95 Pentium or higher processor and NT 4.0 for Windows 98 and 95 Pentium 133 MHz processor for Pentium 133 MHz or higher Windows 2000 processor for Windows 2000 Pentium 233 MHz processor for... - Page 282 Your Macintosh must also meet the following system requirements. Minimum System Requirements Recommended System Mac OS 8.1 Mac OS 9.0 or later (except Mac OS 14 MB of available memory 29 MB of available memory or more 16 MB of available memory when 48 MB of available memory or more background printing is turned on.
- Page 283 In addition to these system and memory requirements, you need 15 MB of free hard disk space to install your printer software. To print, you also need extra hard disk space amounting to about twice the size of the file that you want to print. Printer Specifications...
-
Page 284: Appendix B Customer Support
Appendix B Customer Support Technical Support Web Site EPSON's Technical Support Web Site provides help with problems that cannot be solved using the troubleshooting information in your printer documentation. If you have a Web browser and can connect to the Internet, access that site at: http://support.epson.net/StylusPhoto830/ Contacting Customer Support If your EPSON product is not operating properly and you cannot... -
Page 285: For Users In The United States And Canada
❏ Your computer operating system name and version ❏ Names and versions of the software applications you normally use with your product For users in the United States and Canada EPSON provides technical assistance 24 hours a day through the electronic support services and automated telephone services listed below. - Page 286 Automated Telephone Services A variety of automated help services are available 24 hours a day, seven days a week. To use these services, you must have a touch tone telephone and call (800) 922-8911. EPSON Accessories You can purchase ink cartridges, paper, manuals, and accessories from EPSON at (800) 873-7766 or visit our web site at http://www.epsonstore.com (U.S.
-
Page 287: For Users In The Middle East
Support Via Telephone 08705 133 640 The Republic of Ireland 01 679 9016 Pre-Sales Enquiries, Literature Requests and Nearest Dealer Home Page: http://www.epson.co.uk Email: info@epson.co.uk Telephone: UK 0800 220 546 The Republic of Ireland 1 800 409 132 Fax: UK 01442 227271 The Republic of Ireland 00 44 1442 227 271 For users in the Middle East Some of these services may be available in English only. -
Page 288: For Users In Scandinavia
❏ Chat directly with a support technician on-line ❏ Email Technical Support Technical Support Via Email and Telephone Email: epson_support@compubase.co.ae Telephone: +971 4 351 7777 Fax: +971 4 351 6617 Pre-Sales Enquiries, Literature Requests and Nearest Dealer Select your country from our Internet home page at http://www.epson.com. -
Page 289: For Users In South Africa
❏ Email Technical Support Support Via Telephone Denmark 80 88 11 27 Finland 0800 523 010 Norway 800 11 828 Sweden 08 445 12 58 Pre-Sales Enquiries Literature Requests and Nearest Dealer Denmark Home Page: http://www.epson.dk Telephone: 38 48 71 37 Finland Home Page: http://www.epson.fi... -
Page 290: For Users In Australia
http://www.epson.co.za Visit our Internet home page for a full list of support and warranty services including: ❏ Register your product on-line ❏ Free access to the latest EPSON software drivers ❏ Easy access to frequently asked questions ❏ Interactive web based support tool to help you quickly resolve support issues ❏... - Page 291 Your Dealer Don’t forget that your dealer can often help identify and resolve problems. The dealer should always be the first call for advise on problems; they can often solve problems quickly and easily as well as give advise on the next step to take. Internet URL http://www.epson.com.au Access the EPSON Australia World Wide Web pages.
-
Page 292: For Users In Singapore
We encourage you to have all the relevant information on hand when you ring. The more information you prepare, the faster we can help solve the problem. This information includes your EPSON product documentation, type of computer, operating system, application programs, and any information you feel is required. -
Page 293: For Users In Indonesia
Epson Hotline (Phone: (66)2-670-0333) Our Hotline team can help you with the following over the phone: ❏ Sales enquiries and product information ❏ Product usage questions or problem ❏ Enquiries on repair service and warranty For users in Indonesia Contacts for information, support, and services are: World Wide Web (http://www.epson.co.id) ❏... -
Page 294: For Users In Hong Kong
EPSON Support Center Jakarta Wisma Bisnis Indonesia 3rd floor Jl. Letjen S.Parman Kav. 12, Slipi-Jakarta Phone/Fax: (62) 21-5357159 Bandung Lippo Center 8th floor Jl. Gatot Subroto No.2 Bandung Phone/Fax: (62) 22-7303766 Surabaya Gedung Koko Perdana 3rd floor Jl. Jend. Basuki RakhmatNo. 105-107 Surabaya Phone/Fax: (62) 31-5458562 Yogyakarta... -
Page 295: For Users In Malaysia
❏ Latest versions of EPSON product drivers Users can access our World Wide Web home page at: http://www.epson.com.hk Electronic Bulletin Board System An electronic bulletin board system (BBS) is also available to obtain product information and the latest versions of product drivers. -
Page 296: For Users In India
Epson Trading (M) SDN. BHD Head Office. Phone: 603-56288288 Fax: 603-56212088 Epson Helpdesk ❏ Sales enquiries and product information (Infoline) Phone: 603-56288222 ❏ Enquiries on repair services & warranty, product usage and technical support (Techline) Phone: 603-56288333 For users in India Contacts for information, support, and services are: World Wide Web (http://www.epson.co.in) Information on product specifications, drivers for download,... - Page 297 Epson India Head Office - Bangalore: Phone: 5321 266-70 Fax: 5581799/5321095 Epson India Regional Offices: Mumbai Phone: 8261516-17 Fax: 8257287 Delhi Phone: 6447201-06 Fax: 6447205 Chennai Phone: 8203940/41 Fax: 8272463 Kolkata Phone: 2871355/56 Fax: 2871357 Hyderabad Phone: 6329335/36 Cochin Phone: 361638/362677 Fax: 352940 Pune Phone: 4335460-ext 214...
-
Page 298: For Users In The Philippines
For users in the Philippines To obtain technical support as well as other after sales services, users are welcome to contact the EPSON Philippines Corporation at the telephone and fax numbers and e-mail address below: Phone: (63) 2-813-6567 Fax: (63) 2-813-6545 E-mail: customersupport@epc.epson.com.ph World Wide Web (http://www.epson.com.ph) Information on product specifications, drivers for download,... -
Page 299: Glossary
Glossary The following definitions apply specifically to printers. application Software that helps you carry out a particular task, such as word processing or financial planning. ASCII American Standard Code for Information Interchange. A standardized coding system for assigning numerical codes to letters and symbols. banding The horizontal lines that sometimes appear when printing graphics. - Page 300 ColorSync Macintosh software that is designed to help you get WYSIWYG (what you see is what you get) color output. This software prints colors as you see them on your screen. See characters per inch (cpi). default A value or setting that takes effect when the equipment is turned on, reset, or initialized.
- Page 301 ESC/P Abbreviation for EPSON Standard Code for Printers, the system of commands your computer uses to control your printer. It is standard for all EPSON printers and is supported by most applications for personal computers. ESC/P 2 The enhanced version of the ESC/P printer command language. Commands in this language produce laser-like features, such as scalable fonts and enhanced graphics printing.
- Page 302 interface The connection between the computer and the printer. A parallel interface transmits data one character or code at a time. A serial interface transmits data one bit at a time. interface cable The cable that connects the computer to the printer. local printer The printer connected to the computer’s port directly by an interface cable.
- Page 303 printer driver See driver. printer software The printer software which comes with your printer includes a printer driver and printer utilities. The printer driver lets you choose from a wide variety of settings to get the best results from your printer. The printer utilities help you check the printer and keep it in top operating condition.
- Page 304 spool The first step in printing, in which the printer software converts the print data into codes that your printer understands. This data is then sent directly to the printer or to the print server. spool manager The software that converts print data into codes that your printer understands. See also spool.
Need help?
Do you have a question about the PHOTO 830 Series and is the answer not in the manual?
Questions and answers