Table of Contents
Advertisement
Quick Links
Advertisement
Table of Contents
Troubleshooting

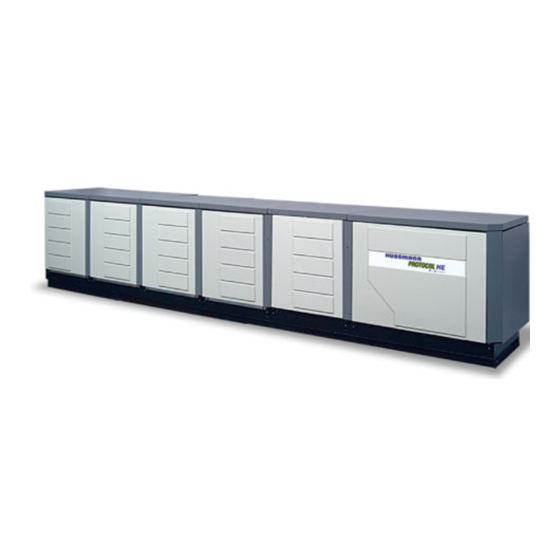
Related Manuals for Hussmann Proto-Aire


Summary of Contents for Hussmann Proto-Aire
- Page 1 9/20/2005 Installation Manual, Hussmann Part # 0385841...
-
Page 2: Table Of Contents
Installation ... 1 Overview... 1 Shipping Damage... 1 Apparent Loss or Damage ... 1 Concealed Loss or Damage ... 1 On Site Damage Control... 1 Dimensions and Weights... 2 data plate for each unit Dimensions and Weights ... 3 Field Supplied and Installed Water Components... 3 Accessibility... - Page 3 Balancing the Water Flow for Each Protocol™ ... 53 Balancing the System for Piping Head Loss... 55 Presetting the Degree of Closure ... 57 Electrical ... 59 Field Wiring ... 59 Main Power Wiring... 65 208V Two Wide Protocol™ ... 65 208V 5 or 6 Compressor Protocol™...
- Page 4 Auxiliary Systems... 104 3-Pipe Gas Defrost... 105 Electric Defrost ... 105 Offtime Defrost... 106 Sensor Applications ... 106 Suction Pressure Sensor... 106 Suction Pressure Input ... 106 Temperature Input... 107 All Additional Pressure/Temperature Inputs ... 107 Programming the Optional In-store Alarm and Auto Dialer ... 107 Troubleshooting Guide ...
-
Page 5: Installation
Protocol™ Installation and Service Manual Installation Overview This section is limited to the information needed to set the Protocol™ Unit. Auxiliary equipment information is found in the sections devoted to them or in the manuals accompanying them. Related information is contained in Protocol™ Planning Data and the Pumping Station Planning Data. -
Page 6: Data Plate For Each Unit Dimensions And Weights
VOLTAGE K=208/230; M= 460/3/60; P= 575/3/60; U= 380/3/50 REFRIGERANT J=134a; P=R507; V=R22; S=404a # OF PARALLEL COMPRESSORS # OF SATELLITE COMPRESSORS FRAME TYPE V=Vertical H=Horizontal A= AIR COOLED W= WATER COOLED P=PROTOCOL L=LOW PROFILE H=HIGH EFFICIENCY PROTOCOL PROTO-AIRE DESIGNATION Service Manual... -
Page 7: Dimensions And Weights
Receiver Capacities are based on 80% liquid fill at 105 °F. Vertical – 55 lb Horizontal– 72 lb (Standard) 3 & 4 Fan Proto-Aire™ - 72 lb (Standard) 6 Fan Proto-Aire™ - 145 lb (Standard) Field Supplied and Installed Water Components The Protocol™... -
Page 8: Panel Removal
Protocol™ Installation and Service Manual Panel Removal Vertical Units At the top, a bracket in a channel supports each panel. At the bottom, each panel is held in place by two nuts. Remove the nuts at the bottom of the panel, then lift up and out. Horizontal Units At the top, a bracket in a channel supports each panel. -
Page 9: Horizontal Units - Top Removal
Protocol™ Installation and Service Manual Horizontal Units – Top Removal To remove the top assembly, first remove the front panels. Then remove the bracket screw at top center of each panel opening and above the control panel. Slide the top assembly forward until the back clips disengage. -
Page 10: Vibration Pads
Protocol™ Installation and Service Manual Rigging and Hoisting The installer is responsible for ensuring that the equipment used to move the Protocol™ is operated within its limits. Under no circumstances should the top of the unit or the outer panels be used for lifting or moving the unit. For strap rigging, run the straps under the top level of compressor mounting channel. -
Page 11: Typical Piping & Electrical Hookup
Protocol™ Installation and Service Manual TYPICAL PIPING & ELECTRICAL HOOKUP Vertical Units... - Page 12 Protocol™ Installation and Service Manual...
- Page 13 Protocol™ Installation and Service Manual...
- Page 14 Protocol™ Installation and Service Manual...
- Page 15 Protocol™ Installation and Service Manual...
- Page 16 Protocol™ Installation and Service Manual...
- Page 17 Protocol™ Installation and Service Manual...
- Page 18 Protocol™ Installation and Service Manual...
- Page 19 Protocol™ Installation and Service Manual...
- Page 20 Protocol™ Installation and Service Manual...
- Page 21 Protocol™ Installation and Service Manual...
- Page 22 Protocol™ Installation and Service Manual...
- Page 23 Protocol™ Installation and Service Manual...
-
Page 24: Horizontal Units
Protocol™ Installation and Service Manual Horizontal Units... - Page 25 Protocol™ Installation and Service Manual...
- Page 26 Protocol™ Installation and Service Manual...
- Page 27 Protocol™ Installation and Service Manual...
- Page 28 Protocol™ Installation and Service Manual...
- Page 29 Protocol™ Installation and Service Manual...
- Page 30 Protocol™ Installation and Service Manual...
- Page 31 Protocol™ Installation and Service Manual...
- Page 32 Protocol™ Installation and Service Manual...
- Page 33 Protocol™ Installation and Service Manual...
- Page 34 Protocol™ Installation and Service Manual...
- Page 35 Protocol™ Installation and Service Manual...
- Page 36 Protocol™ Installation and Service Manual...
-
Page 37: Proto_Aire Units
Protocol™ Installation and Service Manual Proto_Aire Units... - Page 38 Protocol™ Installation and Service Manual...
- Page 39 Protocol™ Installation and Service Manual...
- Page 40 Protocol™ Installation and Service Manual...
- Page 41 Protocol™ Installation and Service Manual...
- Page 42 Protocol™ Installation and Service Manual...
- Page 43 Protocol™ Installation and Service Manual...
-
Page 44: Refrigeration Piping
REFRIGERATION PIPING Important: Since Hussmann has no direct control over the installation, providing freeze-burst protection is the responsibility of the installing contractor. Always use a pressure regulator with a nitrogen tank. Do not exceed 2 pisg and vent lines when brazing. Do not exceed 350 psig for leak testing high side. Do not exceed 150 psig for leak testing low side. -
Page 45: Refrigeration Cycle
Liquid Line 1. Take-offs to evaporators must exit the bottom of the liquid line. Provide an expansion loop for each evaporator take-off (minimum 3-inch diameter). 2. Offtime and Electric Defrost may be reduced by one size after one half the case load. -
Page 46: Protocol™ With 3-Pipe Gas Defrost
Protocol™ with 3-Pipe Gas Defrost Oil Return System Not shown When 3-pipe gas defrost is used, hot gas is piped from the discharge line, after the oil separator, to the cases. Solenoid valves are placed in both the suction and hot gas line so that each system can be tuned on or off by the controller. -
Page 47: Protocol™ With Heat Reclaim
Protocol™ with Heat Reclaim Oil Return System Not shown When heat reclaim (for water or air) is used with the Protocol™ a 3-Way Heat Reclaim Valve should be installed after the oil separator. A bleed line should be installed from the heat reclaim valve to the angle valve found in the suction header. -
Page 48: Protocol™ With Split Suction
Protocol™ with Split Suction Oil Return System Not shown Split suction is used when two temperatures are required from the same Protocol™ unit. The use of split suction allows for greater efficiency due to the fact that the compressors are operating closer to the desired suction temperature. -
Page 49: Oil Cycle
Oil Cycle Discharge refrigerant carries droplets of oil from the compressor’s outlet. The Turba-Shed separates the oil from the refrigerant. The oil is stored in the Turba-shed until needed. The oil returns to the system through the high-pressure line and oil filter. The oil filter removes impurities from the oil. -
Page 50: Liquid Injection
Liquid Injection When operating at high compression ratios, injecting liquid partway through the compression process is a method of cooling the scroll compressor. Hussmann applies liquid injection on all units operating below 0 °F evaporating temperature, with the exception of the Low-temp high efficiency Protocol™. Each compressor has its own shutoff valve, injection solenoid valve, and supply hose. -
Page 51: Vapor Injection
Vapor Injection Another method of cooling the scroll compressor is to use vapor injection. Vapor Injection takes a small portion of liquid refrigerant from the main liquid line and runs it through a thermostatic expansion valve and a heat exchanger, which helps to ensure vapor is sent to the compressor as well as sub-cooling the main refrigerant before it goes to the TXV and evaporator in the case. -
Page 52: Field Piping
Field Piping Field Fabricated Headers are not required with Protocol™ Installations. Example of Improper Field Piping Produce Room Example of Proper Field Piping Produce Room Protocol™ Installation and Protocol™ Produce Cases Produce Islands Produce Islands Protocol™ Produce Cases Produce Islands Produce Islands Service Manual... -
Page 53: Water Loop Piping
Important: Since Hussmann has no direct control over the installation, providing freeze-burst protection is the responsibility of the installing contractor. mandatory that glycol be added to the water loop before startup to prevent freezing. Use only non-ferrous metal or PVC for water loop piping. -
Page 54: Air Vent Valves
Air Vent Valves Manual air vent valves are recommended. Air vent valves should be located at piping high points where air will tend to collect. Momentarily open these vents and release trapped air a few times during startup. Tie-Ins to Supply Headers Branch supply pipes SHOULD NOT tie into the bottom of main supply pipes. -
Page 55: Balance Valve Adjustment
Protocol™ Installation and Service Manual can provide corrosion protection. For most installations, 30% glycol by volume will also provide BURST protection to –20 °F. If the store location has particularly hard water, with a total hardness greater than 100 ppm, the water used to fill the loop should be softened or distilled. -
Page 56: Balancing The Water Loop
Protocol™ Installation and Service Manual Balancing the Water Loop Balancing the Water Loop for Direct Return Piping Several factors must be accounted for when balancing the water loop of a Protocol™ installation using direct return piping. Two major factors stand out: 1 –... -
Page 57: Balancing The Water Flow For Each Protocol
Protocol™ Installation and Service Manual Balancing the Water Flow for Each Protocol™ If the store were designed so that each Protocol™ condenser was supplied from and returned to a Very Large Box, and the piping to each condenser was identical; then flow rate (GPM) would be proportional to the Degrees of Closure on each Circuit Setter. - Page 58 Very Large Water Cooled Condenser Protocol™ Installation and Pump Station Very Large Service Manual...
-
Page 59: Balancing The System For Piping Head Loss
Balancing the System for Piping Head Loss If the store were designed so that each Protocol™ condenser was identical; the flow rate (GPM) for each condenser could be set from a simple table. Balancing Head Loss for Length of Piping Run could be equated to Degrees of Closure on each Circuit Setter. By accounting for Head Loss and Flow Rate (GPM) for each Protocol™... - Page 60 Table 2 shows a proportional Closure for the Circuit Setter based on Length of Piping Run. Length of Run 50 and below Protocol™ Installation and Table 2 ° Closure 1000 Service Manual...
-
Page 61: Presetting The Degree Of Closure
Presetting the Degree of Closure Look up flow rate (GPM) for each Protocol™. Find the closest GPM in Table 1. Log the listed °Closure Value for each Protocol™ in the Table 1 Value row. Establish Length of Run for each Protocol™. Find the closest Length of Run in Table 2. Log the listed °Closure Value for each Protocol™... - Page 62 Protocol™ Installation and Service Manual...
-
Page 63: Electrical
Electrical Field Wiring Maximum Field Wire Size Based on the total load amperes, the largest connectable wire sizes for the terminals on the convenience switch are listed below. (Wire size is based on the serial plate minimum circuit ampacity.) Total Connected 200 A (max) 400 A (max) Refer to National Electric Code for temperature derating factors. - Page 64 One 240/1 or 3/60-50 connection to 240V convenience switch in panel One derived neutral from transformer For 380-460/3/60-50 Compressor Units without Remote Mounted Transformer: To each Protocol™ provide One 380-460/3/60-50 branch circuit One ground wire to earth ground One 208-240/1 or 3/60-50 branch circuit One 120/1/60-50 neutral For 575/3/60 Compressor units without Remote Mounted Transformer: To each Protocol™...
- Page 65 Evaporator Mounted Refrigeration Solenoid Power for refrigeration solenoids at the evaporator comes from the Protocol™ case electrical terminal pins located in the main control panel. Cooler Door Switch Wiring Check the store legend for door switch kits the cooler doorframe, and controls the field installed liquid line solenoid and evaporator fans.
- Page 66 NOTE: The current draw required by an analog meter (Volt-Ohm Meters or VOMs) can permanently damage electronic equipment. Never use a VOM to check computer components or computer controlled systems. Use a Digital Multimeter (DMM) to measure voltage, amperage, milliamperes, or ohms. If a range is exceeded the display will show OL (overload).
- Page 67 Protocol™ Installation and Service Manual Typical wiring diagram for Temperature Sensor and Klixon wiring. Individual wiring may vary. See page 102 for details on control types.
- Page 68 Protocol™ Installation and Service Manual Electrical Legend...
-
Page 69: Main Power Wiring
Protocol™ Installation and Service Manual Main Power Wiring 208V Two Wide Protocol™... -
Page 70: Or 6 Compressor Protocol
Protocol™ Installation and Service Manual 208V 5 or 6 Compressor Protocol™... -
Page 71: Two Wide Protocol
Protocol™ Installation and Service Manual 460V Two Wide Protocol™... -
Page 72: Or 6 Compressor Protocol
Protocol™ Installation and Service Manual 460V 5 or 6 Compressor Protocol™... -
Page 73: Two Wide Protocol With Factory Installed Transformer
Protocol™ Installation and Service Manual 460V Two Wide Protocol with Factory installed transformer... -
Page 74: Two Wide Protocol™ With Field Supplied Transformer
Protocol™ Installation and Service Manual 460V Two Wide Protocol™ with Field supplied transformer... -
Page 75: Or 6 Compressor Protocol™ With Field Supplied Transformer
Protocol™ Installation and Service Manual 460V 5 or 6 Compressor Protocol™ with Field supplied transformer... -
Page 76: Two Wide Protocol
Protocol™ Installation and Service Manual 600V Two Wide Protocol™... -
Page 77: Or 6 Compressor Protocol
Protocol™ Installation and Service Manual 600V 5 or 6 Compressor Protocol™... -
Page 78: Two Wide Protocol™ With Field Supplied Transformer
Protocol™ Installation and Service Manual 600V Two Wide Protocol™ with Field supplied transformer... -
Page 79: Terminal Connections
Terminal Connections Protocol™ units carrying 5 and 6 compressors, or an oversized Control Panel, do not use a single-phase bussbar. Wire number assignments and corresponding terminal number assignments in the Power Distribution Box differ from the smaller panel arrangement. 120V Circuit Logic The Protocol™... -
Page 80: Satellite Short Cycle Control Relay
Protocol™ Installation and Service Manual Satellite Short Cycle Control Relay The Satellite short cycle control relay is intended to prevent rapid cycling when the compressor goes into pumpdown mode. It is a single-shot time-delay relay. When the low pressure control opens on a decrease in pressure, the short cycle control relay becomes energized and starts timing. -
Page 81: Control And Compressor Wiring
Protocol™ Installation and Service Manual Control and Compressor Wiring PCS without Vapor Wiring... -
Page 82: Pcs With Vapor Wiring
Protocol™ Installation and Service Manual PCS with Vapor Wiring... -
Page 83: Cpc, Danfoss, Comtrol Without Vapor Wiring
Protocol™ Installation and Service Manual CPC, Danfoss, Comtrol without Vapor Wiring... -
Page 84: Cpc, Danfoss, Comtrol With Vapor Wiring
Protocol™ Installation and Service Manual CPC, Danfoss, Comtrol with Vapor Wiring... -
Page 85: Controller Wiring
Protocol™ Installation and Service Manual Controller Wiring... -
Page 86: Cpc
Protocol™ Installation and Service Manual... -
Page 87: Cpc Einstein
Protocol™ Installation and Service Manual CPC Einstein... -
Page 88: Danfoss
Protocol™ Installation and Service Manual Danfoss... -
Page 89: Comtrol
Protocol™ Installation and Service Manual Comtrol... -
Page 90: Liquid Injection
Liquid Injection When operating at high compression ratios, injecting liquid partway through the compression process is a method of cooling the scroll compressor. Hussmann applies liquid injection on all units below 0 °F evaporating temperature. Each compressor has its own Direct Thermal Control (DTC) valve, which is an all-in-one injection solenoid that allows for a more energy efficient use of liquid. - Page 91 Protocol™ Installation and Service Manual will re-energize the solenoid when the condensing temperature reaches 65 °F. Consult Engineering representative if adjustment of the T-STAT control is required. FIELD PIPING & TXV SIZING Besides standard discharge lines, the liquid return line from the condenser must also be piped back to the unit when remote air-cooled units are used with low temp cases.
-
Page 92: Refrigeration Circuit Control
Protocol™ Installation and Service Manual Defrost Schedule Refrigeration Circuit Control The following circuits show the electrical connections during the refrigeration cycle. Power comes into the control board from X1A. The refrigeration solenoid valve and thermostat (if needed) are wired to the terminal pin. The unit cooler circuit is the same as a simple refrigeration circuit but it has an additional fan control circuit. -
Page 93: Hot Gas
Hot Gas Control Board energizes the Aux Relay Coil, which de-energizes the Main Liquid Line Pressure Differential Solenoid. The valve reduces liquid supply line pressure. The Control Board also energizes the Defrost Relay coil, which open Hot Gas Solenoid valves and closes the Suction Solenoid valves. -
Page 94: Special Case Of Heat Reclaim With Hot Gas Defrost
Protocol™ Installation and Service Manual Special Case of Heat Reclaim with Hot Gas Defrost When you have the special case of heat reclaim with hot gas it is necessary to interlock the Main Liquid Line solenoid wiring with the heat reclaim valve wiring. This wiring will ensure that heat reclaim does not take place while defrost is occurring. -
Page 95: Lighting Control
Protocol™ Installation and Service Manual Lighting Control Control Board energizes one output relay for each lighting circuit (PCO control can have up to two lighting circuits.) Each lighting circuit has a schedule which determines when the output is turned on and when the output turns off. -
Page 96: Unit Cooler Fan Wiring
Protocol™ Installation and Service Manual Unit Cooler Fan Wiring The following drawing shows the wiring to control the fans in a unit cooler. Defrost termination by klixon may connect back to the controller relay board based on individual customer specs. See job specific board layout sheets and wiring diagrams for your individual installation. -
Page 97: Protocol™ Remote Condenser Fan Wiring
Protocol™ Installation and Service Manual Protocol™ Remote Condenser Fan Wiring The installer must wire the condenser fan to the terminal pin that corresponds to the correct board point in order to ensure proper control of the condenser fans. The following diagram shows the wiring for a typical Protocol™... - Page 98 Protocol™ Installation and Service Manual Proto-Aire™ Fan Wiring The following diagram shows the fan electrical wiring present in a Proto-Aire™. At the bottom of the diagram the receiver and crankcase heaters are shown, which are common to each type of Proto-Aire™.
- Page 99 Protocol™ Installation and Service Manual...
- Page 100 Protocol™ Installation and Service Manual...
-
Page 101: Powerlink™ Operation
Protocol™ Installation and Service Manual POWERLINK™ Operation... -
Page 102: Wiring Optional Auto Dialer And In-Store Alarm
Protocol™ Installation and Service Manual Wiring Optional Auto Dialer and In-Store Alarm When the In-Store Alarm box and Auto dialer are used together, the correct method for wiring the alarm signals from each Protocol™ is a continuous current loop fed around the store. -
Page 103: Startup
Important: Since Hussmann has no direct control over the installation, providing freeze-burst protection is the responsibility of the installing contractor. Know whether or not a circuit is open at the power supply. Remove all power before opening control panels. Note: SOME EQUIPMENT HAS MORE THAN ONE POWER SUPPLY. - Page 104 Protocol™ Installation and Service Manual Open Power Supply Compressors – Open circuit breakers to all compressors. Isolate Compressors – Front seat service valves on suction and discharge. Pressure Transducers – Close angle valves. Open Valves – to condenser, heat reclaim, receiver. Liquid Line Solenoid Valve(s) –...
- Page 105 Pull a vacuum to 1500 microns. If the vacuum fails to hold, determine the cause and correct. Begin again and pull a vacuum to 1500 microns. Break the vacuum with refrigerant vapor to a pressure of about 2 psig. Do not exceed the micron gauge transducer’s maximum pressure surge to the transducer of the micron gauge.
-
Page 106: Oil Charge
Because the HFC refrigerants are less dense than the refrigerants they replace, they will tend to “flash” or bubble more easily, even when the correct charge is in the system. Therefore, charge only until the sight glass on the receiver is covered with refrigerant when the system is operating in a balanced refrigeration mode. -
Page 107: Electronic Oil Level Control
7. Momentarily turn ON compressor breaker #1 and verify correct pumping direction. Check all compressors before switching any wires. If all compressors are rotating backwards, change two legs at the field side of the convenience switch. For individual compressor, change the Legs on the load side of the compressor contactor. -
Page 108: Auxiliary Systems
Protocol™ Installation and Service Manual Electronic oil regulators monitor oil levels. The units are powered by a 24V power supply. When the oil level in the compressor drops below ½ sightglass, the fill light comes on and the oil solenoid is energized. If after 90 seconds the oil level does not rise above ½ sightglass, the unit opens the compressor control circuit. -
Page 109: 3-Pipe Gas Defrost
3-Pipe Gas Defrost Application 3-pipe gas defrost is designed to operate with different defrost schedules and durations. Only one lineup or no more than 20 percent of the load should go into defrost at one time. As a lineup goes into defrost, the other cases will be fed liquid from the Protocol™ and from the lineup in defrost. -
Page 110: Offtime Defrost
The control board will de-energize the solenoid (suction or liquid) when a defrost occurs while simultaneously energizing the relay controlling the defrost breakers. When the defrost relay is energized the POWERLINK™ breakers will receive a momentary charge or pulse from a capacitor in its POWERLINK™ Power Supply (PPS). -
Page 111: Temperature Input
Protocol™ Installation and Service Manual Under split suction configuration, this input provides the electronic controller pressure signal used to cycle compressors on and off. The split suction configuration may contain multiple compressors (2 or more) or a single compressor (low or high end satellite). When tow or more compressors are attached to the second suction header, you will need to program the following: Split Suction Operation (Enabled/Disabled), Number of Compressors, Split Suction Setpoint, High Alarm, Low Alarm, Range. -
Page 112: Troubleshooting Guide
Program the ID# for the Auto Dialer. This ID# will be used to indicate which store is in alarm. If the customer wishes the auto dialer to be muted during the verbal alarm message, the MUTE key must be pressed first and then the store ID# will follow (see page 21 and 22 in Owners Manual). -
Page 113: Electrical Questions
Electrical Questions Problem A: The compressor will not turn ON or will not run. Step A1 Visually observe if the Alarm on the control board is ON. If it ON, go to step A2. If it is OFF, go to Step A9. Step A2 Access the protocol and enter the Force Comp On submenu. - Page 114 Step A9 At this point, it is assumed that the electronic control board is in switchback (see page 6-6 for details describing switchback). If the compressor you are trying to turn ON is not wired to the switchback control circuit (refer to the supplied customized wiring diagram), you will need to investigate the cause of this switchback condition and correct the existing problem.
- Page 115 N/A, go to the Protocol™ configuration menu and access the Protocol Setup submenu. Enter the DEFR Setup program the control with the correct number of defrost circuits. Repeat this step to verify that the circuit is activated. Step B7 Verifying the defrost circuit configuration. Check the number of defrosts per day, the defrost length and defrost start times to ensure proper configuration.
- Page 116 Supply. If 24 VDC is not present, replace the POWERLINK™ Power Supply. If 24 VDC is present, go to Step B14. Step B13 Check fuse on defrost relay board. Replace fuse if it is blown. If fuse is good, measure the voltage present at the white connector on the defrost relay board.
-
Page 117: Trouble Shooting Alarms
meter to the two outside pins. The voltage present at these two pins should be between 20 and 27 VAC. If the secondary voltage is within limits replace the control board. If the secondary voltage is out of limits, investigate supply voltage to the control transformer. Problem D: Temperature Sensor is not reading properly. - Page 118 Step 2 Proceed to the Status Menu for this Protocol™. Observe the operation of compressors turning ON, and watch for suction pressure to come down. If the suction pressure does not come down when a compressor comes on, it is an indication that some external device is keeping the compressors off line (high pressure safety, oil safety, phase monitor, etc.) You will need to go to this Protocol™...
-
Page 119: Service
Service and Maintenance IMPORTANT: Since Hussmann has no direct control over the installation, providing the freeze-burst protection is the responsibility of the installing contractor. Refer to Page 2-4 Know whether or not a circuit is open at the power supply. Remove all power before opening control panels. -
Page 120: Recommended Maintenance
Replace. Pressurized, leak test and bring back on line. Recommended Maintenance Hussmann recommends the following maintenance for Protocol™ systems: Twice a Month 1. Review store operating data. a. Graph the various temperatures and pressures for each unit; look for unusual trends. - Page 121 1. Check freezing point of glycol in closed loop; add water or glycol as required. 2. Replace Liquid, Oil, and Suction Filters. 3. Check the Alarm functions on the pumping station. The low fluid pressure, high fluid temperature, and automatic pump switching functions should be checked. 4.
-
Page 122: Sample Protocol™ Checklist
Store: Joe’s Market Date: 6/7/2004 Unit Model Number PH06PK-MEMEMEMEMEMF Serial Number Factory Order Number 06542 Manufacture Date 08/31/98 Defrost Circuit NO. Type No./Day Length 40m 45m Superheat 42° Suction Set Point 52 psig Suction Pressure 52.0 psig / 17°F Saturated Suction Temperature 59 °... - Page 123 Protocol™ Installation and Service Manual Protocol™ Checklist Store: Location: Date: Time: Unit Model Number Serial Number Factory Order Number Manufacture Date Defrost Circuit NO. Type No./Day Length Superheat Suction Set Point Suction Pressure Suction Temperature Turba-Shed Pressure Differential Condenser Head Pressure Water Temperature In Water Temperature Out Refrigerant...
- Page 124 On Hussmann refrigeration systems, an additional (4) year extended warranty for the motor/compressor assembly is available, but must be purchased prior to shipment to be in effect. Hussmann reserves the right to inspect the job site, installation and reason for failure.
Need help?
Do you have a question about the Proto-Aire and is the answer not in the manual?
Questions and answers