Table of Contents
Advertisement
Quick Links
Advertisement
Table of Contents

Related Manuals for Pulsar Measurement Greyline AVFM 6.1


Summary of Contents for Pulsar Measurement Greyline AVFM 6.1
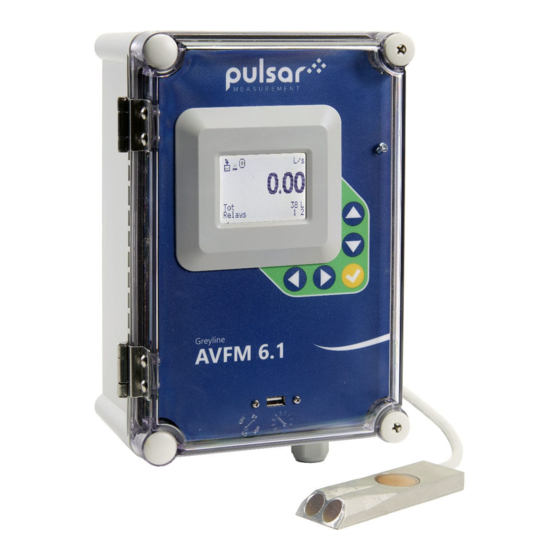
- Page 1 PULSAR MEASUREMENT Greyline AVFM 6.1 Instruction Manual Rev 2.0...
- Page 2 Note: This page has been left blank intentionally.
-
Page 3: Table Of Contents
PULSAR MEASUREMENT CONTENTS CONNECTIONS ......................................... 4 FUNCTION TEST: ....................................... 4 KEYPAD SYSTEM ....................................... 6 CALIBRATION MENU ...................................... 7 ICONS ........................................... 8 MESSAGE ICON ......................................... 9 STATUS ..........................................9 PASSWORD ........................................10 MENU SELECTIONS ....................................... 11 UNITS/MODE ........................................11 CALIBRATION ........................................13 RELAY PARAMETERS ..................................... -
Page 4: Connections
AVFM 6.1 INSTRUCTION MANUAL CONNECTIONS POWER INPUT: 100 to 240 VAC 50/60Hz. No adjustments are necessary for voltages within this range. Connect L (Live) N (Neutral) and AC Ground. Optional DC: 9-32 VDC. Connect to + and - terminals. Optional Thermostat and Heater modules are available rated for 115 VAC or 230 VAC. IMPORTANT NOTE: To comply with CSA/UL electrical safety standards, AC power input and relay connection wires must have conduit entry to the instrument enclosure. - Page 5 PULSAR MEASUREMENT CONNECTIONS SENSOR SERIAL COMMUNICATION OPTION RS-485 Output 4-20mA 4-20mA VELOCITY LEVEL – – EXTRA RELAYS OPTION RLY3 RLY4 RLY5 RLY6 POWER INPUT – 4-20mA FLOW HEATER OPTION RLY2 RLY1 SENSOR...
-
Page 6: Keypad System
AVFM 6.1 INSTRUCTION MANUAL KEYPAD SYSTEM The AVFM 6.1 uses a menu system. Arrows show the four directions to leave a menu box. Pressing a corresponding keypad arrow will move to the next item in the direction shown. Move the cursor (underline) under numerals and increase or decrease numerals with the ... -
Page 7: Calibration Menu
PULSAR MEASUREMENT CALIBRATION MENU... -
Page 8: Icons
AVFM 6.1 INSTRUCTION MANUAL ICONS Message waiting. Press Data logging Data logging USB file download. File download completed. Download Error. Echo OK. Dry sensor. No water in pipe/channel. Echo loss Echo OK (PZxx series level sensor option). No Echo (PZxx series level sensor option). -
Page 9: Message Icon
PULSAR MEASUREMENT MAIN DISPLAY USG/m 0.000 The main display shows the units selected from the Units/Mode menu, Flow or Velocity rate being measured, TOTALIZER and RELAY states. The AVFM 6.1 will start-up with this display. 20130.8 USG Relays 1 2 3 4 5 6... -
Page 10: Password
AVFM 6.1 INSTRUCTION MANUAL STATUS (cont.) --Status------------ Level 0.00 ft Velocity 0.00ft/s Displays the confidence of level measurement Echo Confidence Flow 0.000 ft/s received from the QZ02L submerged sensor, or Min Flow 0.000USG PZ15 level sensor, on a 0-100% scale. This value Signal Strength Signal Cutoff is a reflection of the percent of echoes received... -
Page 11: Menu Selections
PULSAR MEASUREMENT MENU SELECTIONS --Menu-------------- Units / Mode Calibration The Menu selections page is used to navigate to specific menus which are Relay Parameters Data Logging described in more detail on the following pages. Communication Special Functions Press or to navigate to different menus, and to enter the selected Simulation menu. - Page 12 AVFM 6.1 INSTRUCTION MANUAL UNITS/MODE (cont.) Flow, press the and then the or to select the --Units/Mode-------- Mode Flow engineering units for flow rate. Press to store your selection then Linear to the next menu item. Volume Multiplier Decimal...
-
Page 13: Calibration
PULSAR MEASUREMENT CALIBRATION --Calibration------- Range 180.00 in Range 8.00 in Level Only shown when the level sensor used is a through-air 180.00 in 1.00 in PZ type. Max range should be set as the distance from 20mA 180.00 in 0.00 in... - Page 14 AVFM 6.1 INSTRUCTION MANUAL CALIBRATION (cont.) --Calibration------- Range 180.00 in Level 8.00 in Level For QZ02L (submersible, default) level sensor, set the 180.00 in 1.00 in maximum height the level should reach in the system, in 20mA 180.00 in units configured in the Units/Mode menu.
- Page 15 PULSAR MEASUREMENT CALIBRATION (cont.) --Calibration------- Range 180.00 in Should the level reading be lost because of air or LOE Time 8.00 in debris in the system, the LOE Time will cause the meter Level 180.00 in to hold the last valid level reading until the LOE Time is 1.00 in...
- Page 16 AVFM 6.1 INSTRUCTION MANUAL CALIBRATION (cont.) --Calibration------- Range 180.00 in Set the 20mA value for the velocity analog output, in 20mA 8.00 in units configured in the Units/Mode menu. Level 180.00 in 1.00 in Set the 4mA value for the velocity analog output, in 20mA 180.00 in 0.00 in...
- Page 17 PULSAR MEASUREMENT CALIBRATION (cont.) --Calibration------- Range 180.00 in Flow 8.00 in Level Only shown when Mode = Flow in the Units/Mode 180.00 in 1.00 in menu. When measured flow is less than the Min Flow, 20mA 180.00 in the reading on the LCD display and output signals will 0.00 in...
- Page 18 AVFM 6.1 INSTRUCTION MANUAL CHANNEL SETUP Channel Setup- ----- Type Round Pipe ID 8.00 in Select Round for open pipes. Set Pipe ID to Round the inner diameter of the pipe. Select Rectangle for rectangular channels. Enter Rectangle the channel width. Select Trapezoid for trapezoidal shaped Trapezoid channels.
- Page 19 PULSAR MEASUREMENT CUSTOM CHANNELS Custom Channel ----- Type Custom Reset Data Old data MUST be removed before entering data for a Reset Data Max Height 0.75 ft new channel. Press then press to Yes and Division 0.05 ft Increment # press ...
-
Page 20: Relay Parameters
AVFM 6.1 INSTRUCTION MANUAL RELAY PARAMETERS --Relay Parameters-- Relay Function Flow Press and or to select a relay (2 relays are Relay 1000 USG standard, 4 additional are optional). 0.000 USG Press or to select Off, Pulse, Flow, Function Velocity or Level. -
Page 21: Data Logging
Press or to select the logging interval. Press to Interval store the setting. Pulsar Measurement recommends choosing an interval which will give you as much resolution as required and no more. Choosing too often of an interval for what is required will result in larger data files, which may take a long time to download to USB. - Page 22 AVFM 6.1 INSTRUCTION MANUAL Important Note: You MUST Delete an old log and Start a new log AFTER having made changes to Log Site ID, Mode, Date, Time and/or Interval for those changes to be applied. Important Note: Changing any of the parameters in the Units/Mode menu will start a new log.
- Page 23 Install Greyline Logger on your PC or laptop. Select File/Open/Instrument Log (.log) to open the log file from your USB flash drive. Greyline Logger software is available for download on the Pulsar Measurement website, www.pulsarmeasurement.com/downloads. Data can also be converted to .CSV via Greyline Logger software.
-
Page 24: Communication (Optional)
AVFM 6.1 INSTRUCTION MANUAL COMMUNICATION (Optional) --Communication----- Protocol Modbus Address Press or to position curser at Communication, and to enter. Use or 9600 Parity Even to position cursor before each menu item and to enter. When settings are Stop Bits completed press ... -
Page 25: Special Functions
USB drive into the USB port to transfer the parameters. This function should only be used when instructed by a Capture Pulsar Measurement representative to do so. The function captures the ultrasonic signal so that it can be evaluated by Pulsar Measurement. - Page 26 AVFM 6.1 INSTRUCTION MANUAL SPECIAL FUNCTIONS (cont.) --Special Functions- Language English Analog Out 4-20mA Select US to erase all user settings and return Restore Defaults Backlight High Reset Totalizer the instrument to factory default settings with Neg. Totals US units. Select Metr to return the Rev.
-
Page 27: Installation - Sensor Location
PULSAR MEASUREMENT INSTALLATION – SENSOR LOCATION For the most accurate flow measurement possible, careful consideration should be made to the placement of the sensor in relation to flow disturbances. In general, the best accuracy will occur where flow is evenly distributed across the channel/pipe and free of turbulence. - Page 28 FLOW Hydraulic Dams When the QZ02 sensor is to be mounted in front (upstream) of a hydraulic dam, or a Pulsar Measurement VD pipe dam, the sensor should be placed at least 20 inches in front of the dam: Pipe Grade...
- Page 29 PULSAR MEASUREMENT INSTALLATION - (cont.) Flow Profile Distortion The pipe/channel in which the QZ02 sensor is mounted should be free of bends, tees, sudden changes in slope, and there should not be objects in the pipe/channel which disturb the flow profile in front of the sensor.
- Page 30 AVFM 6.1 INSTRUCTION MANUAL QZ02L VELOCITY-LEVEL SENSOR MOUNTING QZ02L TOP VIEW VELOCITY/LEVEL SENSOR Mount the QZ02L sensor with the stainless steel MB-QZ 0.2" MOUNTING LEVEL FLOW bracket and hardware supplied. Ensure that the (5 mm) SENSOR BRACKET sensor is parallel to the water surface (check with a level).
- Page 31 PULSAR MEASUREMENT GOOD END VIEW SENSOR SENSOR FLOW FLOW SENSOR SENSOR SENSOR SENSOR END VIEW END VIEW...
- Page 32 AVFM 6.1 INSTRUCTION MANUAL OPTIONAL PIPE BAND MOUNTING WITH QZ02L SENSOR Install the stainless steel pipe band with the sensor mounting bracket at the invert (bottom) of the pipe. Ensure that the sensor bracket is parallel to the water surface (check with a level). Mount so the tapered end of the sensor will point upstream and the sensor cable will point downstream.
- Page 33 PULSAR MEASUREMENT OPTIONAL PZ15-LP LEVEL SENSOR MOUNTING Mount the PZ15-LP non-contacting ultrasonic level sensor in an unobstructed position at least 8” (203.2 mm) above the high water level. Install the stainless steel mounting bracket in a horizontal position (check with a level) and then insert the PZ15-LP sensor.
-
Page 34: Enclosure Installation
AVFM 6.1 INSTRUCTION MANUAL ENCLOSURE INSTALLATION Locate the enclosure within 20 ft (6 m) of the sensor (up to 500 ft -150 m optional). The enclosure can be wall mounted with the four mounting screws (included) or panel mounted with Option PM Panel Mount kit from Pulsar Measurement. -
Page 35: Field Troubleshooting
PULSAR MEASUREMENT FIELD TROUBLESHOOTING The AVFM 6.1 uses an ultrasonic level sensor to determine flow area and an ultrasonic Doppler sensor to measure flow velocity. The QZ02L sensor combines both sensors in one housing. An optional configuration uses the PZ15-LP “down-looking” level sensor and a QZ02L-B velocity sensor. - Page 36 AVFM 6.1 INSTRUCTION MANUAL SENSOR CABLE RESISTANCE TEST Unplug the 4-pin green sensor terminal from the Doppler board and connect the sensor wires as shown. With a multimeter, perform resistance checks for each set of wires. One single loose terminal may cause false readings. Test across shield and core of each wire: TMTR (black/white) and RCVR (black).
- Page 37 PULSAR MEASUREMENT Resistance vs. Temperature...
-
Page 38: Applications Hotline
Obtain an RMA Number from Pulsar Measurement - Before shipping a product to the factory please contact Pulsar Measurement by telephone, fax or email to obtain an RMA number (Returned Merchandise Authorization). This ensures fast service and correct billing or credit. - Page 39 If a product manufactured by Pulsar should prove defective within the first year, return it freight prepaid to Pulsar Measurement along with a copy of your invoice. This warranty does not cover damages due to improper installation or handling, acts of nature, or unauthorized service.
-
Page 40: Appendix A - Options
AVFM 6.1 INSTRUCTION MANUAL APPENDIX A – OPTIONS EXTRA SENSOR CABLE (OPTION VXC) Each AVFM 6.1 flow meter includes 25 ft. (7.6 m), 50 ft. (15 m) or 100 ft. (30 m) tri-coaxial sensor cable. This cable is shielded from electrical interference and is watertight with a polyurethane jacket. Additional cable and Cable Junction Box (Option JB2X or JB4X) may be ordered with the flow meter, or the cable may be spliced and extended up to 500 ft (152 m) total length as required during installation. - Page 41 PULSAR MEASUREMENT COAXIAL CABLE PREPARATION VXC AVFM sensor cable can be cut and spliced up to a maximum length of 500 ft (152 m). Cable ends must be prepared as illustrated below. GOOD BLACK BLACK (CONDUCTIVE) (CONDUCTIVE) SLEEVE SLEEVE HAS BEEN...
- Page 42 AVFM 6.1 INSTRUCTION MANUAL JUNCTION BOX - OPTION JB2X & JB4X NEMA4X (IP66) polycarbonate Junction Box with terminal strips is available from Pulsar Measurement. Includes compression fittings for watertight coaxial cable entries.
- Page 43 PULSAR MEASUREMENT SS PIPE MOUNTING BAND – OPTION VSJ Use optional VSJ stainless steel Pipe Mounting Bands for easy Sensor installation in round pipes. Each Pipe Band includes: Band Adjustment Jack allowing ±0.5" (13 mm) adjustment from the nominal band size.
- Page 44 AVFM 6.1 INSTRUCTION MANUAL SENSOR INTRINSIC SAFETY When connected through Intrinsic Safety Barriers, the sensor model QZ02L and PZ series are CSA certified for installation in a hazardous location rated: Class I, Division 1, Groups C,D Class II, Division 1, Groups E,F,G Class III Intrinsic Safety Barriers may be ordered with the instrument and are supplied mounted in the electronics enclosure.
- Page 45 PULSAR MEASUREMENT GN SPEC ISB The intrinsic safety barrier assemblies installed in the AVFM limit the voltage and current supplied to the transducers to the values listed under ‘Barrier Specifications’. To safely install Greyline transducer(s) certified for use in hazardous...
-
Page 46: Modbus® Communication
AVFM 6.1 INSTRUCTION MANUAL MODBUS® COMMUNICATION MODBUS® serial interface connections are made at the RS485 card’s terminal block if your AVFM 6.1 was ordered with this card, or if one was added after installation. Card location: SENSOR SERIAL COMMUNICATION RS-485 Output EXTRA RELAYS OPTION RLY3... - Page 47 PULSAR MEASUREMENT Transceiver: 2-wire, half-duplex MODBUS Address (MAC address) range: 1-255 (Default: 001) BAUD rates: 4800, 9600, 19200, 38400, 57600, 76800 or 115200 (Default: 9600) Data Bits: Parity: None, Even, Odd (Default: Even) Stop Bits: 1, 2 (Default: 1) Termination: 120 Ohms or none (Default: None) Jumper JP1 position 1 &...
- Page 48 AVFM 6.1 INSTRUCTION MANUAL MODBUS® MEMORY MAP Register Description Register Data Over Read/ Comments Address Type Range Range Write Reset Volume Coil Read/ Turn coil ON (1) to reset total on AVFM 6.1. Total Write Turn coil to OFF (0) once reset is complete. Register Description Register...
- Page 49 PULSAR MEASUREMENT Register Description Register Type Format Type Comments Address 30114 Flow Rate - USG/day Input Register Floating Point Register (2 of 2) 30115 Flow Rate - ft Input Register Floating Point Register (1 of 2) 30116 Flow Rate - ft...
- Page 50 AVFM 6.1 INSTRUCTION MANUAL Register Description Register Type Format Type Comments Address 30140 Flow Rate - m /day Input Register Floating Point Register (2 of 2) 30141 Flow Rate - IG/sec Input Register Floating Point Register (1 of 2) IG = Imperial Gallons 30142 Flow Rate - IG/sec Input Register...
- Page 51 PULSAR MEASUREMENT Register Description Register Type Format Type Comments Address 30165 Previous day Average Input Register Floating Point Register (1 of 2) Flow Rate - GPM (USG/min) 30166 Previous day Average Input Register Floating Point Register (2 of 2) Flow Rate - GPM...
- Page 52 AVFM 6.1 INSTRUCTION MANUAL Register Description Register Type Format Type Comments Address 30188 Previous day Average Input Register Floating Point Register (2 of 2) USMG = US Million Gallons Flow Rate - USMG/min 30189 Previous day Average Input Register Floating Point Register (1 of 2) USMG = US Million Gallons Flow Rate - USMG/hr 30190...
- Page 53 PULSAR MEASUREMENT Register Description Register Type Format Type Comments Address 30212 Previous day Average Input Register Floating Point Register (2 of 2) IG = Imperial Gallons Flow Rate - IG/day 30213 Previous day Average Input Register Floating Point Register (1 of 2)
- Page 54 AVFM 6.1 INSTRUCTION MANUAL Register Description Register Type Format Type Comments Address 30308 Volume Total - m Input Register Floating Point Register (2 of 2) 30309 Volume Total - USMG Input Register Floating Point Register (1 of 2) USMG = US Million Gallons 30310 Volume Total - USMG Input Register...
- Page 55 PULSAR MEASUREMENT Register Description Register Type Format Type Comments Address 30332 Previous day Volume Input Register Floating Point Register (2 of 2) bbl = US Oil Barrel = 42 Total - bbl Gallons 30501 Sensor Range - inches Input Register...
- Page 56 AVFM 6.1 INSTRUCTION MANUAL Register Description Register Type Format Type Comments Address 30923 Sensor Status Input Register Index (0-10) 0 = Sensor Good 4 = Sensor Open 5 = Sensor Short 7 = Low Signal 30925 Logging Status Input Register Index (0-2) 0 = Stopped 1 = Active...
- Page 57 PULSAR MEASUREMENT Register Description Register Type Format Type Comments Address 30948 Flow Units Input Register Index (0 to 31) 0 = US Gallons per Minute 1 = Litres per Second 2 = Cubic Feet per Minute 3 = Cubic Meters per Hour...
- Page 58 AVFM 6.1 INSTRUCTION MANUAL Register Description Register Type Format Type Comments Address 30964 Direction Input Register Integer Tech’s Menu Value 30965 Pot 1 Input Register Integer Tech’s Menu Value 30966 Peak to Peak Input Register Integer Tech’s Menu Value 30967 Correlation Strength Input Register Integer...
- Page 59 PULSAR MEASUREMENT ENCLOSURE HEATER AND THERMOSTAT - Option TH Instruments can be factory-equipped with an Enclosure Heater and Thermostat or the module can be customer- installed. The Thermostat is factory set to turn ON at 40°F (4.5°C) and OFF at 60°F (15.5°C). Power consumption is 15 Watts.
- Page 60 AVFM 6.1 INSTRUCTION MANUAL POWER INPUT OPTION 9-32VDC AVFM 6.1 Flow Meters may be ordered factory-configured for 9-32VDC power input. CONNECTIONS: POWER INPUT: Connect 9-32VDC to the + and - terminals. The Power Input GND terminal must be connected to the nearest Ground pole.
-
Page 61: Specifications
PULSAR MEASUREMENT SPECIFICATIONS Channel Types: Round pipe, Rectangular, trapezoid, egg or custom shapes Electronics Enclosure: Watertight and dust tight NEMA4X (IP 66) polycarbonate with clear, shatterproof cover Accuracy: Level: ± 0.25% of reading or ±0.08”, whichever is greater. Repeatability & Linearity 0.1% Velocity: ±... - Page 62 AVFM 6.1 INSTRUCTION MANUAL QZ02L Sensor Velocity Measurement Range: 0.1 to 20 ft/sec (0.03 to 6.2 m/sec) and reverse flow to -5 ft/sec (-1.5 m/sec) in fluids containing bubbles or solids with a minimum size of 100 microns and a minimum concentration of 75 ppm to act as acoustic reflectors.
- Page 63 PULSAR MEASUREMENT Optional (Level only) Sensor PZ15-LP Maximum Range: 15 ft (4.57 m) Minimum Range: 8" (203.2 mm) Beam Angle: 8° Operating Temperature: -40 to 150°F (-40 to 65°C) Exposed Materials: Sensor – PVC; Mounting Bracket - 316 Stainless Hazardous Rating: Standard: Certified non-incendive for Class 1 Div 2, Groups A,B,C,D hazardous locations.
- Page 64 AVFM 6.1 INSTRUCTION MANUAL CONNECTIONS Dual Sensor Configuration SENSOR PZxx Level SERIAL COMMUNICATION OPTION RS-485 Output 4-20mA 4-20mA VELOCITY LEVEL – – EXTRA RELAYS OPTION RLY3 RLY4 RLY5 RLY6 POWER INPUT – 4-20mA HEATER OPTION RLY2 RLY1 SENSOR...
- Page 65 PULSAR MEASUREMENT PZ15 FLANGE SENSOR MOUNTING METHODS IN ROUND PIPES Notes: Sunscreen 1. Use the ¾” NPT “Isolation Coupling” supplied and hand tighten only. Do Level Sensor not clamp sensor body or stem. Min Range PZ15 8" (203.2m m ) ...
- Page 66 AVFM 6.1 INSTRUCTION MANUAL www.pulsarmeasurement.com service@pulsarmeasurement.com Copyright © 2020 Pulsar Measurement Ltd.. Registered Address: 1 Chamberlain Square CS, Birmingham B3 3AX Registered No.: 3345604 England & Wales Rev 2.0...
Need help?
Do you have a question about the Greyline AVFM 6.1 and is the answer not in the manual?
Questions and answers