
Related Manuals for CIMLINE MAGMA 110


Summary of Contents for CIMLINE MAGMA 110
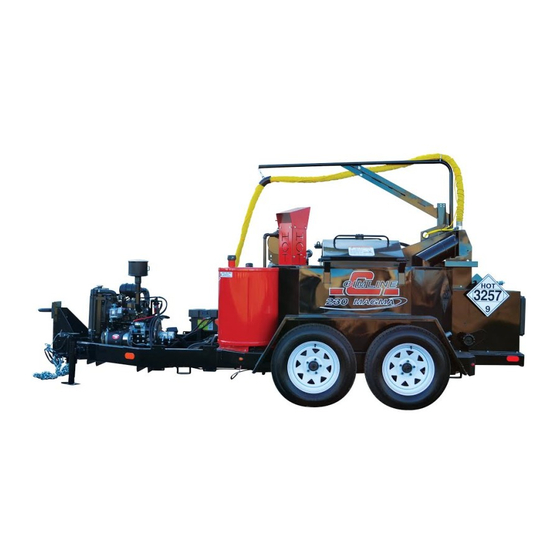
- Page 1 Melter Applicator Model 110/230/410 Melter Applicator Owner / Operator Manual 2601 Niagara Lane · Plymouth, MN 55447 · (763) 557-1982 · (800) 328-3874 · Fax (763) 557-1971 Part # 160921 Revised 11/02...
-
Page 2: Table Of Contents
Table of Contents Shipping Papers and Information ..................4 Safety Notes ........................5 Operating Sequence ......................6 Diesel Units ..........................6 Propane Units ..........................8 Controls and Their Functions ..................10 Fuel System Air Bleeding ....................12 Bottle Hookup and Ignition (LP Units only) ..............13 Starting the Engine...................... - Page 3 Trouble Shooting Guide ....................44 Hydraulic Schematic ......................46 Wiring Diagrams ....................... 47 Components ..........................48 Trailer Wiring Diagram ......................49 Engine and Burner Wiring Diagram ..................50 Relay Panel ..........................51 Temperature Control Wiring Diagram ..................52 Primary Control ........................53 Micro Panel/Generator ......................
-
Page 4: Shipping Papers And Information
CIMLINE Melter you have purchased. The use of this manual insures accurate adjustments, operation and proper lubrication of your equipment. Please keep it handy. Any parts orders or service problems relating to CIMLINE equipment should be directed to the CIMLINE Parts Department at either (763) 557-1982 or (800) 328-3874. When ordering parts, please have the following information available. -
Page 5: Safety Notes
Safety Notes PLEASE READ AND UNDERSTAND ENTIRE OPERATORS MANUAL BEFORE PROCEEDING WARNING: Protective clothing must be worn. Refer to ANSI Regulations: Wear gloves with wristlets. Wear long sleeve shirt with sleeves rolled down and cuffs buttoned. Wear a face shield. Load Melter from ground level. -
Page 6: Operating Sequence
Operating Sequence Diesel Units NOTE: This step by step procedure is only an outline. Refer to the page(s) indicated for complete instructions. PROCEDURE: PAGE Refer to fuel system air bleeding before starting. Start engine per engine operating instructions. Set temperature controller(s). Make sure tank outlet, sealing hose, and air cleanout valves are closed. - Page 7 Operating Sequence NOTE: When leaving reheatable material in tank, allow the agitator to run until the oil and material temperatures are the same. PROCEDURE: PAGE Turn the temperature control box off and shut off engine. 14,16 Coil sealing hose and place in cabinet along with wand (Non-heated hose models only).
-
Page 8: Propane Units
Operating Sequence Propane Units NOTE: This step by step procedure is only an outline. Refer to the page(s) indicated for complete instructions. PROCEDURE: PAGE Hook up LP bottle(s). Turn on gas and adjust regulator. Set temperature controller(s). Make sure tank outlet, sealing hose, and air cleanout valves are closed. 10-11 Open Thermal Regulating Gate and close stack diverter if cabinet heating is required. - Page 9 Operating Sequence (LP Units cont.) PROCEDURE: PAGE Clean out Melter. 25-27 NOTE: When leaving reheatable material in tank, allow the agitator to run until the oil and material temperatures are the same. Turn the temperature control box off and shut off engine. Turn LP bottle(s) off.
-
Page 10: Controls And Their Functions
Controls and Their Functions NOTE: This general outline will only familiarize you with the machine. Read through the entire manual before putting this machine into operation. (Refer to Dia- gram 1 on page 11) Tank Outlet Valve: Allows melted material from the tank to flow into the pumping system. - Page 11 Controls and Their Functions Air Cleanout Valve (optional): Connect air line or solvent line to this connector to flush out system. This valve should remain closed at all times other than cleanout. Temperature Control Box: This control allows the operator to set the desired oil and material temperatures.
-
Page 12: Fuel System Air Bleeding
Fuel System Air Bleeding This section only pertains to Diesel engines. The engine and burner are pretested and bled during factory run in. If the fuel tank is permitted to run dry or when changing filters, bleed- ing may be necessary to restart the burner. Your fuel tank is equipped with a visual fuel level gauge (diagram 3). -
Page 13: Bottle Hookup And Ignition (Lp Units Only)
Bottle Hookup and Ignition (LP Units only) NOTE: Liquid withdrawal requires optional hose adapters and engine vaporizer (Diagram 4). Place 100 lb. propane bottle(s) in rack and secure in place with chain binder(s). Connect hoses (A) to bottle(s). NOTE: POL fittings are left hand thread. All connections must be air tight. Close hand torch supply valve (B). -
Page 14: Starting The Engine
Starting the Engine NOTE: Read the engine instruction manual before starting. Engine RPM is factory set and fixed at 2200 RPM. Diesel Engine: Your Isuzu Diesel Powered Melter is equipped with an electronic shutdown system (see page 38). If the system detects excessive water temperature, low alternator output, or low oil pres- sure, the engine will automatically shut down. -
Page 15: Propane Engine
Starting the Engine NOTE: Read the Kohler engine instruction manual before starting. The Engine RPM is factory set and fixed. Propane Engine: NOTE: Allow oil thermometer (mounted on tank) to reach 250º F. before starting this procedure. Place the pump drive (A) and agitation control (B) levers in the neutral (center detent) position (Diagram 9). -
Page 16: Automatic Temperature Control Setting
Automatic Temperature Control Setting NOTE: On diesel units, the engine must be running before activating temperature control. The automatic temperature control system monitors the heat transfer oil temperature and material temperature (Refer to diagram 11). Set the oil controller (A) to 550º F (See Setting Temperature Controllers, pg. 17) Set the material controller (B) to the recommended material working temperature which is typically listed on the material container. -
Page 17: Setting Temperature Control
Setting Temperature Controllers Press set button (A). Light (B) will flash while in the setting mode. Press "UP" or "DOWN" button until desired temp is shown. After a few seconds, light (B) will quit flashing and the readout will display actual temperature. -
Page 18: Cabinet Pre-Heating (Diesel Units)
Cabinet Pre-Heating WARNING: Always wear gloves when adjusting the damper. The burner exhaust is equipped with an adjustable Thermal Regulating Gate (A) to help regu- late the amount of heat diverted to the cabinet for hose, wand and plumbing preheating. At the end of each day after cleaning out the system, the hose should be coiled and placed in the cabinet. -
Page 19: Cabinet Pre-Heating (Propane Units)
Cabinet Pre-Heating (Propane Units) WARNING: Always wear gloves when adjusting the damper. The burner exhaust is equipped with an adjustable Thermal Regulating Gate (A) and a damper (B) to help regulate the amount of heat diverted to the cabinet for hose, wand and plumbing preheating. -
Page 20: Agitation Start-Up
Agitation Start-up Loading Empty Tank Start agitation by rotating knob (A) counterclockwise. Tank outlet valve must be in the "off" position. All material must be clean. Keep all foreign matter out of melting tank. Open the material door (1) and place slab or biscuit (2) on the open door against the holder (3). -
Page 21: Circulation And Pumping Procedure
Circulation and Pumping Procedure Refer to Diagram 12 on page 22 When sufficient material has melted (approximately 4-6 inches liquid on tank bottom) or gone through the heating cycle required for liquid type sealants, begin circulation procedure. *Close air cleanout valve (if equipped) and sealing hose valve (A). Turn pressure valve (B) counterclockwise to the full "decrease"... -
Page 22: Sealing Procedure
Sealing Procedure *Turn wand valve (A) "off" and remove the wand from the access port until you can see the sealing tip. Open wand valve to the full "on" position and observe the material as it flows into the tank through the access port. Adjust the pressure valve (B) until the flow rate appears to be correct for the size crack or joint to be filled. -
Page 23: Unplugging A Clogged Hose (Non-Heated Hose Models)
Unplugging a Clogged Hose (Non-Heated Hose Models) Regardless of how you store your hose, the residue tends to settle at the bottom of the coils overnight. Each day when the unit is started, the hose must be coiled up and placed in the cabinet during the preheating process, as shown in the picture below. - Page 24 Unplugging a Clogged Hose If the unit is not full of material, add material to lower the tank temperature enough so the control box will fire the burner. Keep adding material until the cabinet temperature is high enough to unplug the hose. NOTE: Be sure to open the thermal regulating gate to the full open position.
-
Page 25: Material System Cleanout
Material System Cleanout Approximately 10-15 minutes before the end of the work period, turn the temperature control knob(s) "off". There are three methods of cleaning that can be used; reverse flow, air and solvent flushing. NOTE: The material loading doors and wand access port must be closed at all times. REVERSE FLOW CLEANOUT METHOD (Diagram 13) To clean out the machine at the end of the day, return the wand to the wand return and open the wand valve (F). - Page 26 Material System Cleanout AIR CLEANOUT METHOD (OPTIONAL) Refer to Diagram 13 on pg 25 Place material pump in neutral. Remove sealing tip and return wand to access port.. Open wand valve (F) and sealing hose valve (A). Close tank outlet valve (D). Increase (close) pressure valve (B) to maximum.
- Page 27 Material System Cleanout FLUSHING REHEATABLE MATERIALS (Solvent Tank Option) To save material, proceed through the five steps of the Reverse Flow Cleanout Method and then: Remove wand from access port and place end into waste container. Open sealing hose valve and wand valve. Connect solvent tank hose to air cleanout connection and open solvent tank flow valve.
-
Page 28: Material Pump Adjustment
Material Pump Adjustment Operate the pump under normal conditions for a short run-in period. Examine the packing for leakage. If leakage is excessive, tighten the locknuts evenly until there is only slight leakage from the packing rings. This slight leakage is a necessary and normal condition for packing and allows for expansion and proper seating. -
Page 29: Diesel Burner - Electric Eye And Fuse Inspection
Diesel Burner - Electric Eye and Fuse Inspection Diesel Burner - Electric Eye Inspection The diesel burner is equipped with an electronic eye which detects the presence of a flame. If the eye does not detect a flame after ignition, it will shut down the burner. Periodically this eye will get covered with soot or dirt from the burner. -
Page 30: Burner Motor Brush Inspection
Burner Motor Brush Inspection Due to the high current draw of the burner motor, it is advised to inspect the brushes for exces- sive wear every 100 hours of operation. If the brushes are worn out completely it will stop the motor and typically damage or destroy the ignition transformer assembly. -
Page 31: Chamber Lining Inspection
Chamber Lining Inspection After each 200 hours of operation, the chamber lining should be inspected. Remove (8) burner mount securing bolts (A) and pull out burner and mount. Inspect lining (B) for excessive cracking. Also check the condition of retainer (C). Lining cracks are acceptable as long as they are not large enough to allow flame to contact the combustion chamber walls. -
Page 32: Adjusting Replacement Burner
Adjusting Replacement Burner The excess air adjustments on the Beckett ADC burner are essential to prevent the potential damage to the burner and the burner combustion chamber. Excess air is required to insure that the carbon and hydrogen are supplied with enough oxygen to burn completely. If there is not enough excess air, the unit will smoke inside the combustion chamber and eventually lead to unburned fuel residue left in the chamber. -
Page 33: Adjusting Fuel Pump Pressure
Adjusting Fuel Pump Pressure The fuel pressure is factory set @ 140 PSI. As the pump wears, it may require adjustment as follows: If your unit is not already equipped with a fuel pressure gauge, remove plug (H) and insert a 0-200 psi gauge. With the pump running, loosen jamnut (J) and turn screw (K) clockwise to increase the pressure, CCW to decrease pressure. -
Page 34: Adjusting Burner Nozzle, Electrode And Head Position
Adjusting Burner Nozzle, Electrode and Head Position Your CIMLINE 110, 230 or 410 Melter is equipped with a model ADC burner. Each unit comes with a nozzle, electrode and head position gauge. For optimum performance, the steps below should be performed periodically. The burner must be removed from the combus- tion chamber. - Page 35 Adjusting Burner Nozzle, Electrode and Head Position Step 3: Setting Electrode Position Insert gauge as shown below. The electrode tip should be in line with the intersection of the cross hairs labeled "DC". If not, you must remove the head, then loosen the electrode retain- ing screw just enough to allow you to slide the electrodes into the proper location.
-
Page 36: Remote Wand Option
Remote Wand Option How it Works: The remote wand operates on a 12-volt DC circuit. When the engine is started, hydraulic pressure from the manifold (A) is sent to the valve-actuating cylinder (B) through lower hose (C). The cylinder will extend fully and CLOSES the sealing hose valve to stop material flow to the hose. - Page 37 Remote Wand Option If you have power at the solenoid, turn off engine and disconnect upper hose (F). Hold the end in a container and start the engine. No oil should be flowing from the hose. Depress the trigger switch momentarily. Oil should flow out of the hose each time you press the trigger. If you determine you have a broken wire inside the hose, the easiest repair is to run new wires on the outside of the hose and secure them in place with plastic ties.
-
Page 38: Lofa Shutdown System
Lofa Shutdown System The Lofa Shut Down System activates the glow plugs for approximately 30 seconds each time the switch is turned to the on position. The glow plugs are rated to handle the current from 45 to 60 seconds. If you cycle the switch repeatedly (for demonstration, testing, or repairing) the plugs may overheat. -
Page 39: Maintenance
Maintenance Engine: The operation and life of the engine depends on you and your operator. Do not start engine until the engine precheck is complete. The engine precheck consists of checking the oil, the fuel level, the hydraulic oil level and the air filter. The 110/230/410 M/A has the option of (2) different engines. - Page 40 Maintenance t r i l i f & l i f t r i t r i l i f l i f Table 1 - 40 -...
-
Page 41: Fluid And Components Specifications
Fluid and Components Specifications c i l y t i o l l c i l y t i o l l e l t e l t y t i e l t e l t y t i o l l o l l o l l... -
Page 42: Heat Transfer Oil Specifications
To conform to most government bids and to supply a readily available product, Cimline typically uses brands manufactured by Conoco or Phillips 66 that meet the ISO Grade 68 Heat Transfer Oil specifications listed. -
Page 43: Material Tank Capacity
Material Tank Capacity MATERIAL CAPACITY (Tank cutaway) MODEL 110 MODEL 230 Material Vat 4.56 Gallons per inch 9.37 Gallons per inch MODEL 410 13.90 Gallons per inch Insulation " " " " " " " " " " " " "... -
Page 44: Trouble Shooting Guide
Trouble Shooting Guide l l i f i r ¹ . f i r ² . ² . l l i l l i t l i - 44 -... - Page 45 Trouble Shooting Guide l l i l l u o " " n f i r f i r . y r o " " f f y l i ¹ . y l ² . y l - 45 -...
-
Page 46: Hydraulic Schematic
Hydraulic Schematic - 46 -... -
Page 47: Wiring Diagrams
Wiring Diagrams Complete Wiring Diagram 153491 Trailer Pigtail See page 49 Junction 153449 404394s Engine and Relay Panel Burner Harness See Page 51 See Page 50 153447 Cord - 10 153490 Conductor Trailer Harness See page 49 Temp Control Wiring See Page 52 - 47 -... -
Page 48: Components
Wiring Diagrams (Refer to Individual Wiring Diagrams for Details) - 48 -... -
Page 49: Trailer Wiring Diagram
Wiring Diagrams Trailer Wiring Diagram - 49 -... -
Page 50: Engine And Burner Wiring Diagram
Wiring Diagrams Engine and Burner Wiring Harness - 50 -... -
Page 51: Relay Panel
Wiring Diagrams Relay Panel - 51 -... -
Page 52: Temperature Control Wiring Diagram
Wiring Diagrams Temperature Control Wiring Diagram - 52 -... -
Page 53: Primary Control
Wiring Diagrams Primary Control - 53 -... -
Page 54: Micro Panel/Generator
Wiring Diagrams LOFA Engine Shutdown Heated Hose Generator - 54 -... -
Page 55: Electrical Components Parts List
Electrical Components h t i l l u l l u t l e t l e h t i " 1 - 55 -... -
Page 56: Isuzu 3Lb1 Diesel Engine And Pump Parts List
Isuzu 3LB1 Diesel Engine and Pump Parts List l i F r e t l l i r l i F r e t l i F r e t t l e c i l i l p l i F r e t o t t t a i... -
Page 57: Lp Engine And Pump Parts List
16 HP OHC LP Engine and Pump Parts List e t I i r c i t p r e l n i g n i l t f a l i F r e t l i F r e t e l E t n e e l c... -
Page 58: Plumbing System Parts List
Plumbing System Parts List " 2 " 3 i t c t e l " 4 " 0 r e t " 3 i l p " 1 i l p ) d ' l l a " 1 c i l i r a p i r i r a... - Page 59 Plumbing System Parts List Single Wand Dual Wand - 59 -...
-
Page 60: Gear Pump Parts List
Gear Pump Parts List " " p i l - 60 -... -
Page 61: Sealing Hose And Accessories (Standard Hose)
Sealing Hose and Accessories Standard Hose l a t , r e . t f , r e . t f t n i , e l " 1 , e l " 4 " 4 " 4 , e l "... -
Page 62: Sealing Hose And Accessories (Heated Hose With Remote)
Sealing Hose and Accessories Heated Hose with Remote r e t t l o i r t y l l , r e . t f e t i ) e t - 62 -... -
Page 63: Sealing Hose And Accessories (Heated Hose)
Sealing Hose and Accessories Heated Hose , t l i r t y l l , r e . t f , p i , t l , p i , l e t a t - 63 -... -
Page 64: Sealing Attachments
Sealing Attachments ITEM / PART # FEATURES * 2 1/2" wide band * 3/4" NPT inlet * Open shoe design for clear visibility of material * Pivoting inlet tube maintains contact with the road PIVOTING SHOE / 403137 * 3/4" NPT inlet * 3/8"... -
Page 65: Agitation System Parts List
Agitation System Parts List i r c i t p i r c i t p , r o a t i o i t , r o a t i o i t , r o a t i o i t a t i r o t... -
Page 66: Lp Components
LP Components n i l " 4 " 4 t a l e r i t i n e r i o t i t i n c i l , . t c i l , . t o f i i f i l l a "... - Page 67 LP Components to Torch Option ¬ to Bottle #2 Torch option ¬- Dual Bottle Option - Part #403493 Standard on Model 225 P - 67 -...
-
Page 68: Oil Burner Parts List
Oil Burner Parts List ) y l ) y l ) y l r i r c i f c i f c i f o i t & t e l c i r - 68 -... -
Page 69: Combustion Chamber Parts List
Combustion Chamber Parts List - 69 -... -
Page 70: Hydraulic Reservoir Components
Hydraulic Reservoir Components c i l r i o c i l r i o l i F r e t l i F r e t l i F r e t l i F r e t l i F r e l i t c a r t... -
Page 71: Fuel Tank Components (Diesel Engine)
Fuel Tank Components (Diesel Engine) " 8 i t t i i t t i " 0 e r i " 4 i t t i - 71 -... -
Page 72: Hydraulic Manifold Parts List
Hydraulic Manifold Parts List f e i f e i t i g i t a h t i o f i o f i t i g i t a f e i t i k e r i r t n - 72 -... -
Page 73: Control Box
Control Box P/N - 404377s r t n r e l a r t e i l t f e r t n r t n r e t l a i r t n s l a r t n e t I , 2 , ) l e... -
Page 74: Miscellaneous Parts
Miscellaneous Parts r e t " 4 e l t " 2 e l t c t i " 3 l l a c t i " 2 ) y l l l a " 6 e t t , y r . - Page 75 Miscellaneous Parts - 75 -...
- Page 76 Miscellaneous Parts i r c i t p r e t " 4 p i r i s n u r t i t c - 76 -...
- Page 77 - 77 -...
- Page 78 2601 Niagara Lane · Plymouth, MN 55447 · (763) 557-1982 · (800) 328-3874 · Fax (763) 557-1971...
Need help?
Do you have a question about the MAGMA 110 and is the answer not in the manual?
Questions and answers