Table of Contents
Advertisement
Quick Links
Advertisement
Table of Contents

Related Manuals for Monmouth Scientific Cleanroom Kit 4M


Summary of Contents for Monmouth Scientific Cleanroom Kit 4M
- Page 1 Cleanroom Kits Issue 03 – June 2018...
- Page 2 Installation Guide Issue 03 – June 2018...
- Page 3 Issue 03 – June 2018...
-
Page 4: Table Of Contents
Guide Contents Introduction: ............................6 Tools that you will need: ........................6 Safety & Disclaimer Notice ......................... 7 Complete Parts List ..........................8 Unions? ..............................15 Union Parts............................15 How does the Union Work? ......................16 The Union in the Monmouth Cleanroom: .................... 17 Joining two pieces: .......................... - Page 5 Changing the pre-filters ........................ 51 Changing the HEPA filter ....................... 51 CAM1000 Replacement Filter Part Numbers ................51 CAM2250............................52 Introduction ............................52 Installation ............................ 53 System Set-up ..........................54 CAM Module Connections ......................54 Setting the fan speed ........................55 Calibration of the low-airflow alarm .....................
-
Page 6: Introduction
Introduction: IMPORTANT: PLEASE READ AND UNDERSTAND THESE INSTRUCTIONS IN FULL BEFORE STARTING ANY ASSEMBLY. Welcome to the Cleanroom Kits installation guide. This document will take you through the set-up and installation of your cleanroom. Please remember that handing of doors is possible and that positions of doors, windows and lights are all interchangeable so it is impossible to give a ‘screw by screw’... -
Page 7: Safety & Disclaimer Notice
All personnel must be suitably trained in the use of any equipment used during the installation of this Cleanroom Kit. It is the customer’s responsibility to ensure the safety of all colleagues and personnel carrying out this task. Monmouth Scientific Limited does not accept responsibility for any injury or damage howsoever caused. -
Page 8: Complete Parts List
Complete Parts List 970mm 12 11 15 13 17 30100-PA-970 Lower Wall Bar 970mm 12 11 15 13 17 30100-2PA-970 Mid Wall Bar 970mm 10 10 12 12 14 14 16 3050-PA-FS-970 Top Wall Bar with side filler strip 970mm 3050-PA-970 Top Wall Bar (for internal walls) 1045mm 26 36 34 44 42 56 50 64... - Page 9 2350mm 3 3030D-S-FT-2350 Double faced post with foot (& additional 25mm slot) 2350mm 0 3030D-2S-FT-2350 Double faced post with foot (& two additional 25mm slots) 2350mm 1 3030D-S-FT-2350 Double faced post with foot and door runner (& additional 25mm slot) 2350mm 0 3030D-2S-FT-2350 Double faced post with foot and door...
- Page 10 1970mm 1 3050-FS-1970 Main Ceiling Beam (full width of room) 2970mm 0 3050-FS-2970 Main Ceiling Beam (full width of room) 3050-FS-2970/30100- 3024mm 0 3030 Main Reinforced Ceiling Beam (full width of room) 970mm 3050-FS-970-0 Standard Ceiling Beam 0° Connectors 970mm 3050-FS-970-90 Standard Ceiling Beam 90°...
- Page 11 MW-04473-419.5 622mm 4* 4* (*only with CAM1000 in ISO8 6M or 6M+) Ceiling Support Rail MW-04473-622 469.5mm 0 4* 4* (*only with CAM2250 in ISO7 6M or 6M+) Ceiling Support Rail MW-04473-419.5 1072 4* 4* 4* 4* (*only with CAM1000 in ISO8 9M,9M+, 12M or 12M+) Ceiling Support Rail...
- Page 12 1970mm 1 Door Runner Cover & end caps 1042mm 11 15 14 18 17 22 20 25 x 980mm Standard White Wall Panel 1042mm x 980mm Standard Clear Window Panel 731mm x 980mm Clear Window Panel – adjacent to door 980mm x 203mm Part Clear Window Panel...
- Page 13 960mm x (*only with CAM1000 in 2* 2* 612mm ISO8 6M or 6M+) White Ceiling Panel 960mm x (*only with CAM2250 in 2* 2* 460mm ISO7 6M or 6M+) White Ceiling Panel (*only with CAM1000 in 960mm x 2* 2* 2* 2* ISO8 9M,9M+, 12M or 1112mm 12M+)
- Page 14 ISO8 K-CAM1000 ISO7 CAM1000 Clean Air Module with support brackets (4) and power leads ISO8 ISO7 CAM1000 Control Panel ISO8 K-CAM2250 *Optionally 2no. ISO7 1* 1* CAM2250 Clean Air Module with support brackets (4) and power leads ISO8 ISO7 CAM2250 Control Panel 4mm Allen Key (Colours vary) 3mm Allen Key (Colours vary) White Rubber Mallet...
-
Page 15: Unions
Unions? The unions are the 4 part connectors that provide the basis for joining the aluminium extrusions making up your cleanroom. There are two primary different union types, one at 0˚ and one at 90˚. 0˚Union 90˚ Union A third ‘double’ union (to join mitres) is used on the doors, but the doors are pre-assembled for your convenience. -
Page 16: How Does The Union Work
How does the Union Work? The unions all work in the same way. When the union is assembled into the aluminium correctly, the grub screw is tightened which pushes the point of the grub screw into the dimple on the draw bar and pulls the head of the drawbar toward the end of the Aluminium profile. -
Page 17: The Union In The Monmouth Cleanroom
The Union in the Monmouth Cleanroom: Every joint of two aluminium profiles follows the same principle. In most (if not all) the union is supplied fitted into the Aluminium profile, however for the sake of clarity we will describe how to fit a union into the Monmouth profile. - Page 18 Insert the grub screw and using a 4mm allen hex When the point of the grub screw enters the key, tighten the grub screw. dimple of the barrel, you can release the barrel and it will stay assembled. You should only tighten the grub screw so that at It is quite possible to over tighten making least 3mm of draw bar is visible behind the head attachment to the next piece of aluminium...
-
Page 19: Joining Two Pieces
Joining two pieces: There are two simple methods of joining the aluminium using the union: The first is to slide the aluminium into place Slide to the desired position. Be careful to keep down the connector. both pieces square as you may mark the aluminium. - Page 20 Then rotate the whole piece back 90° slowly into Hold the two pieces in the desired position the required position. Be careful to keep both pieces square as you may mark the aluminium. If the piece will not easily rotate, relax the grub screw slightly.
-
Page 21: Fitting A Panel
Fitting a panel: The same principles apply for panel fitting whether it is solid or clear. Ensure the slots in the aluminium line up. Adjust Horizontal slots will be fitted with the sloped by loosening the grub screw if necessary. reducer strip however vertical surfaces will need a plastic 8mm to 6mm reducer strip. - Page 22 OPTIONAL: Should you wish the structure to be more permanent, then in each channel you can add a SMALL bead of clear silicone sealant (not supplied) before inserting the panel. This will stop any movement in the panel once fitted however it will be more difficult to take apart Carefully check the size of the required sheet should you wish to relocate the room.
-
Page 23: Fitting A Ceiling Tile Support
Fitting a ceiling tile support: The same principles apply for panel fitting whether it is solid or clear. Tilt the ceiling support before offering to the Move the leading edge of the ceiling support slot. toward the slot ensuring the two pieces are parallel. -
Page 24: Standard Wall Panel
Standard Wall Panel Issue 03 – June 2018... -
Page 25: Door Panels
Door Panels Issue 03 – June 2018... -
Page 26: Door
Door Door is supplied fully assembled – however for reference exploded view below: Issue 03 – June 2018... -
Page 27: Ceiling Assembly
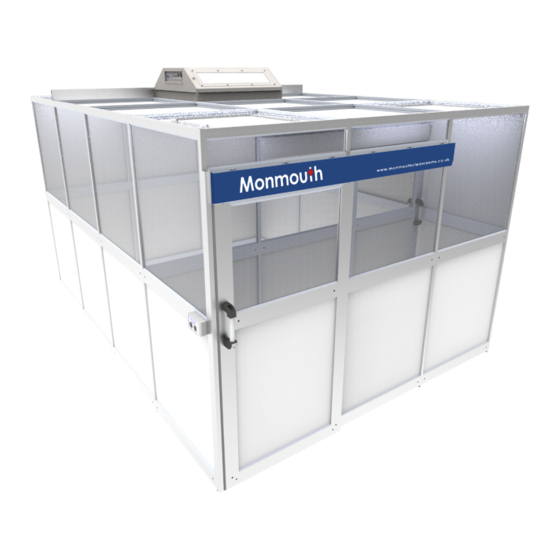
Ceiling Assembly 4M – 2m x 2m room Issue 03 – June 2018... -
Page 28: 4Mplus - 2M X 2M Room With 1M X 2M Atrium
4Mplus – 2m x 2m room with 1m x 2m atrium Issue 03 – June 2018... -
Page 29: 3M X 2M Room
6M – 3m x 2m room Issue 03 – June 2018... -
Page 30: 6Mplus - 3M X 2M Room With 1M X 2M Atrium
6Mplus – 3m x 2m room with 1m x 2m atrium Issue 03 – June 2018... -
Page 31: 3M X 3M Room
9M – 3m x 3m room If using the CAM1000 and not the CAM2250, please see the additional parts included on page 34 Issue 03 – June 2018... -
Page 32: 9Mplus - 3M X 3M Room With 1M X 3M Atrium
9Mplus – 3m x 3m room with 1m x 3m atrium If using the CAM1000 and not the CAM2250, please see the additional parts included on page 34 Issue 03 – June 2018... -
Page 33: 4M X 3M Room
12M – 4m x 3m room If using the CAM1000 and not the CAM2250, please see the additional parts included on page 34 Issue 03 – June 2018... -
Page 34: 12Mplus - 4M X 3M Room With 1M X 3M Atrium
12Mplus – 4m x 3m room with 1m x 3m atrium If using the CAM1000 and not the CAM2250, please see the additional parts included on page 34 Issue 03 – June 2018... -
Page 35: Using Cam1000 In 9M, 9M+, 12M & 12M
Using CAM1000 in 9M, 9M+, 12M & 12M+ Issue 03 – June 2018... -
Page 36: Top Door Runner Assembly
Top Door Runner Assembly Issue 03 – June 2018... -
Page 37: Hanging The Door(S)
Care should be taken when attaching the door rails. The rail will fit onto the slotted door header and door rail support . You may need to slide the brackets on the rail to match up with the slots. Insert the channel nuts into the slot already fixed Use M5x12 Button Screws , M5 Washers loosely to the bracket. -
Page 38: Bottom Door Runner Assembly
Bottom Door Runner Assembly Bottom door runner will need adjustment. Loosen three retaining fixings and slide up/down ensuring that the runner locates in the bottom groove of the door. You should ensure the weight of the door is NOT resting on the runner. Once the door runner is adjusted, tighten the three retaining screws. -
Page 39: Soft Close Door Adjustment
Soft Close Door Adjustment Fixtures on top of door are fitted with M5 Channel T-Nuts & M5 Screws & Issue 03 – June 2018... - Page 40 Issue 03 – June 2018...
-
Page 41: Room Assembly
All personnel must be suitably trained in the use of any equipment used during the installation of this Cleanroom Kit. It is the customer’s responsibility to ensure the safety of all colleagues and personnel carrying out this task. Monmouth Scientific Limited do not accept responsibility for any injury or damage howsoever caused. - Page 42 Start in a corner without a door. Add the lower bar on each side of the corner post to give immediate stability to the structure. Start adding to the first two panels evenly and It is important that the slots at the top of the build up the corner panels to ensure and double faced profiles used in the mid wall...
- Page 43 Continue building the walls in an even construction until two panels are either side of the corner. Minor imperfections in the floor can be taken up with the adjustment of the feel on all upright poles. Use a spirit level throughout to ensure the room is level and straight. Ensure the room is square at all times.
- Page 44 Continue the build of the sides evenly adding If you have an atrium (Plus models) do not forget ceiling cross members as you go. This will brace to use the single faced upright at this point to the structure from side to side. allow the internal walls to connect.
- Page 45 Add in the ceiling tile support bars to the slots in the upper bars. Two 969.5mm and two 919.5mm angle bars are generally required per tile space (in some of the smaller rooms different size tiles are used and the 919.5mm bar is to be substituted with .
- Page 46 The room may now be validated if required prior to any usage. For UK based installations, Monmouth Scientific will be happy to quote for validation if not already selected. If you have already selected validation please contact us on 01278 458090 to arrange a convenient date.
-
Page 47: Installing Clean Air Modules (Cam)
It is the customer’s responsibility to ensure the safety of all colleagues and personnel carrying out this task. Monmouth Scientific Limited do not accept responsibility for any injury or damage howsoever caused. -
Page 48: Cam1000
CAM1000 Introduction CAUTION: Weight approximately 40kg. Follow all correct lifting techniques. Use lifting equipment when handling. The CAM1000 units are self-contained filtration units designed to fit into the aluminium grid system with your cleanroom. On spans of 3m or more, they will sit in between the larger reinforced ceiling cross members. -
Page 49: Installation
Installation The control panel should be mounted at a convenient point near to the entrance of the cleanroom. It is fixed to the aluminium frame using the provided self-drilling screws. To access the mounting points, open the flaps either side of the panel to find suitable holes. Do not fix to the door itself, nor anywhere within the pathway/travel of the door. -
Page 50: Setting The Fan Speed
Setting the fan speed To accurately set the fan speed this requires the use of a calibrated Ø100mm rotating vane anemometer with readings taken from 150mm from filter face. Turn the system on and set the fan speed using the speed control knob (located next to main HEPA filter outlet and DOP test port –... -
Page 51: Maintenance
7. Check the airflow and adjust if necessary (as detailed in the setup section) 8. Filter should be DOP tested to verify filter integrity and results recorded. CAM1000 Replacement Filter Part Numbers Replacement filters are available from Monmouth Scientific: Pre-Filter Part No- PF-0081 HEPA –... -
Page 52: Cam2250
CAM2250 Introduction CAUTION: Weight approximately 50kg. Follow all correct lifting techniques. Use lifting equipment when handling. The CAM2250 units are self-contained filtration units designed to fit into the aluminium grid system with your cleanroom. On spans of 3m or more, they will sit in between the larger reinforced ceiling cross members. -
Page 53: Installation
Installation The control panel should be mounted at a convenient point near to the entrance of the cleanroom. It is fixed to the aluminium frame using the provided self-drilling screws. To access the mounting points, open the flaps either side of the panel to find suitable holes. Do not fix to the door itself, nor anywhere within the pathway/travel of the door. -
Page 54: System Set-Up
System Set-up CAM Module Connections 230v 13A 230v 13A 230v 13A Control Control ac supply ac supply ac supply cable cable Control Panel Issue 03 – June 2018... -
Page 55: Setting The Fan Speed
Setting the fan speed Once the room is room is complete, you will need to set the fan speed of the unit. To perform accurately this requires the use of a calibrated Ø100mm rotating vane anemometer. Turn the system on and set the fan speed to the required level on each CAM using a vane anemometer to measure the air velocity from the HEPA filter. -
Page 56: Calibration Of The Low-Airflow Alarm
9. Remove the thumb screws securing each of the pre-filter retaining frames. 10. Withdraw the filters and fit a replacements 11. Replace the retaining frame and re start the system Replacement filter part numbers Replacement filters are available from Monmouth Scientific: Pre-Filters Part No: PF-0033 2 off per unit... -
Page 57: Colour Coded Aluminium Framework - Without Panels
Colour Coded Aluminium Framework – without panels 4M – 2m x 2m room 4Mplus – 2m x 2m room with 1m x 2m atrium Issue 03 – June 2018... -
Page 58: 3M X 2M Room
6M – 3m x 2m room Issue 03 – June 2018... -
Page 59: 6Mplus - 3M X 2M Room With 1M X 2M Atrium
6Mplus – 3m x 2m room with 1m x 2m atrium Issue 03 – June 2018... -
Page 60: 3M X 3M Room
9M – 3m x 3m room Issue 03 – June 2018... -
Page 61: 9Mplus - 3M X 3M Room With 1M X 3M Atrium
9Mplus – 3m x 3m room with 1m x 3m atrium Issue 03 – June 2018... -
Page 62: 4M X 3M Room
12M – 4m x 3m room Issue 03 – June 2018... -
Page 63: 12Mplus - 4M X 3M Room With 1M X 3M Atrium
12Mplus – 4m x 3m room with 1m x 3m atrium Issue 03 – June 2018... -
Page 64: Complete Cleanroom Layouts
Complete Cleanroom Layouts - 4M – 2m x 2m room 4Mplus – 2m x 2m room with 1m x 2m atrium Issue 03 – June 2018... -
Page 65: 3M X 2M Room
6M – 3m x 2m room Issue 03 – June 2018... -
Page 66: 6Mplus - 3M X 2M Room With 1M X 2M Atrium
6Mplus – 3m x 2m room with 1m x 2m atrium Issue 03 – June 2018... -
Page 67: 3M X 3M Room
9M – 3m x 3m room Issue 03 – June 2018... -
Page 68: 9Mplus - 3M X 3M Room With 1M X 3M Atrium
9Mplus – 3m x 3m room with 1m x 3m atrium Issue 03 – June 2018... -
Page 69: 4M X 3M Room
12M – 4m x 3m room Issue 03 – June 2018... -
Page 70: 12Mplus - 4M X 3M Room With 1M X 3M Atrium
12Mplus – 4m x 3m room with 1m x 3m atrium Issue 03 – June 2018... -
Page 71: Questions And Support
We want to ensure you are happy with your purchase. Therefore should you have any questions or require any support on the assembly or operation of your new cleanroom please contact Monmouth Scientific by any of the methods below: Telephone:... - Page 72 Monmouth Scientific Limited Units 5 & 6 Kilnside, East Quay Bridgwater Somerset TA6 4DB info@monmouthscientific.co.uk www.monmouthscientific.co.uk +44 (0)1278 458090 Issue 03 – June 2018...
Need help?
Do you have a question about the Cleanroom Kit 4M and is the answer not in the manual?
Questions and answers