
Related Manuals for VALERE Power BC Series

Summary of Contents for VALERE Power BC Series
- Page 1 BC Series Controller Operation Manual 24 x7 Installation and Technical Support 1-866-240-6614 Page 1 of 47 Version 2.0 DO600000191 November, 2006...
-
Page 2: Table Of Contents
Table of Contents Overview.......................3 Controller Connections ................3 Temperature Probes ...................... 4 Alarm Cable Connection ....................4 Auxiliary Input Alarms ....................5 Expansion Controller Connection................... 6 Remote/Computer Interface................... 7 Controller Insertion & Setup ...............8 Navigation ....................12 Controller Login..................13 Presets......................13 Controller Configuration Menu..............13 Language ........................ -
Page 3: Overview
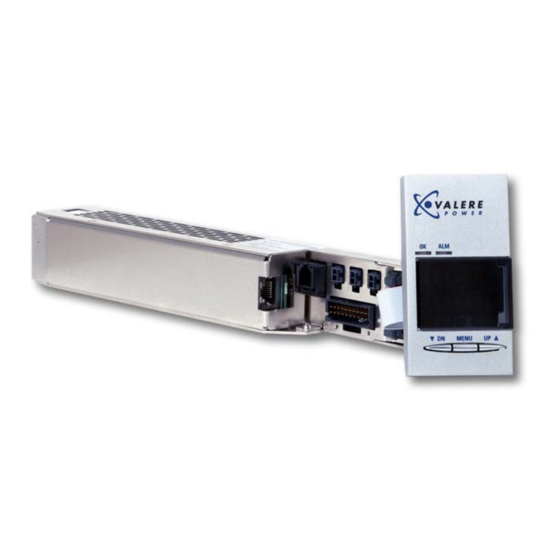
LAN - powered by shelf bias BC1011 3 buttons & display Table 1 - Controller list 2 Controller Connections The BC series controller has several external connections. These connections are discussed in the following sections. Expansion (3) Temperature controller Probe/AUX... -
Page 4: Temperature Probes
(3) Temperature RS232 Probe/AUX COM port alarm inputs Display connection Alarm cable connection Figure 2 - Controller connections (BC502 shown) Temperature Probes Up to three, battery temperature probes (sold separately) may be installed for battery temperature compensation. Attach the probe (either a ring terminal or paddle style) to a battery and insert the cable connector end into the mating end of the probe;... -
Page 5: Auxiliary Input Alarms
different and can be determined by accessing the main menu. The main menu can be accessed by pressing the MENU button down for 5 seconds. The controller will then display “WELCOME PN XX”; this is your profile number. Contact Valere tech support at 1-866-240-6614 for a copy of your company’s controller settings if different from profile # 01. -
Page 6: Expansion Controller Connection
or T3). When the relay closes an Aux alarm will be triggered, on the controller. In addition, a fourth alarm is available via the black (I-NEG) and white (I- POS) wires on the output alarm cable. This input will accept either a contact closure or a voltage between 5Vdc and 60Vdc to trigger an alarm. -
Page 7: Remote/Computer Interface
Ethernet LAN port. Communication with the LAN port is via an Ethernet cross-over cable or straight through cable a router. This cable is not supplied by Valere Power. For the BC1001, with the modem connection, refer to Application Bulletin 202, “Modem User Manual”... -
Page 8: Controller Insertion & Setup
3 Controller Insertion & Setup Install the controller by sliding the controller into the shelf, tightening the mounting screw, and attaching the display to the shelf. Once DC power is applied to the shelf, either by the rectifiers or batteries, the controller will power up. - Page 9 12 Volt 24 Volt 48 Volt Nominal Nominal Nominal Valere Valere Valere Parameter Description Default Default Default The language in which the controller will LANGUAGE display English English English The voltage to which the rectifiers will FLOAT V regulate the plant during float mode 12 Vdc 27 Vdc 54 Vdc...
- Page 10 12 Volt 24 Volt 48 Volt Nominal Nominal Nominal Valere Valere Valere Parameter Description Default Default Default BD TEST status Enables or Disables the battery test Disabled Disabled Disabled BDT TIME Sets the length of time (minutes) that the battery test will run. 30 min 30 min 30 min...
- Page 11 12 Volt 24 Volt 48 Volt Nominal Nominal Nominal Valere Valere Valere Parameter Description Default Default Default The voltage to which the rectifiers will reduce T RUNAWY V for temperatures above T RUNAWY T 11 V 25 V 50 V Selects the units the temperature readings are TEMP IS given in.
-
Page 12: Navigation
4 Navigation Figure 5 shows the controller front display and three button keypad for assistance with navigation the controller Appendix A contains the complete menu tree for the controller. The UP and DN buttons are used to scroll through the functions and the MENU button is used to select and/or drop down into a sub- menu. -
Page 13: Controller Login
5 Controller Login The following is a step by step process for logging into the controller as an administrator. All setpoints and features require login to change values or enable features. Tests such as battery discharge test, boost test, and lamp test do not require logging in to execute, provided the feature has been enabled. -
Page 14: Language
to CHOOSE: EXIT and press the MENU button to exit back to the SYSTEM OK menu. 7.1 Language The language menu allows you to select the controller’s displayed language. This menu can be accessed by pressing the MENU button at the CHOOSE: LANGUAGE menu. -
Page 15: Setpoints
Setpoints The setpoints menu allows you to adjust controller setpoints such as float voltage, rectifier current limit, and battery current limit. Please note that some features require a low voltage disconnect (LVD) or shunt to be visible. This menu can be accessed by pressing the MENU button at the CONFIG SETPOINTS menu. - Page 16 Press the UP button to scroll to RECT CL I = xx. Press the MENU button and the screen will display CHOOSE: I = xx. The value can then be adjusted by pressing the UP and DN buttons in the corresponding directions.
-
Page 17: Alarms
then be adjusted by pressing the UP and DN buttons in the corresponding directions. This value can be adjusted in .05 V increments. Once the desired value is reached, press the MENU button to accept the new value. This value must be less than the 1 < HVSD setpoint and greater than the LVD OPEN setpoint. - Page 18 Press the UP button to move to the next setpoint or scroll to EXIT ALARMS and press MENU. 7.4.2 High Voltage Alarm (HVA) HVA is the DC voltage at which the controller will trigger an alarm if exceeded. This is your warning before the system will shutdown, due to HVSD.
-
Page 19: Tests
Once the desired value is reached, press the MENU button to accept the new value. Press the UP button to move to the next setpoint or scroll to EXIT ALARMS and press MENU. 7.4.5 Capacity Alarm (Capacity) Capacity alarm is the alarm that is triggered when N+1 redundancy is lost. This is your warning that the system will be on battery back up if another rectifier is lost. - Page 20 review menu if it has already been enabled. An Admin login is required to enable or adjust any values. This menu can be accessed by pressing the MENU button at the CONFIG TESTS menu. The first test displayed will be lamp test. Press the UP button to continue scrolling thru the tests menu.
- Page 21 To enable the boost feature, scroll to BOOST DISABLED, press the MENU button, and the screen will display BOOST ENABLED. Press the UP button to scroll to BOOST V = xx.xx. To adjust this value press the MENU button and the screen will change to CHOOSE V = xx.xx. The value can then be adjusted by pressing the UP and DN buttons in the corresponding directions.
- Page 22 To enable the battery discharge test, scroll to BD TEST DISABLED, press the MENU button, and the screen will display BD TEST ENABLED. Press the UP button to scroll to BDT TIME MNT = xx. To adjust this value, press the MENU button and the screen will change to CHOOSE MNT = xx.
-
Page 23: Thermal
is connected correctly. See section 2.2 for help with connecting your alarm cable. To enable the relay test, scroll to RLY TEST DISABLED, press the MENU button, and the screen will display RLY TEST ENABLED. Press the UP button to scroll to RELAY A INACTIVE. To activate the test, press the MENU button and the screen will change to RELAY A ACTIVE. - Page 24 Thermal 12V (Volts) 24V (Volts) 48V (Volts) Thermal Compensation State enabled or disabled enabled or disabled enabled or disabled High temperature start value 25 to 60 (°C) 25 to 60 (°C) 25 to 60 (°C) High temperature slope value 0 to 250 (mV/°C) 0 to 250 (mV/°C) 0 to 250 (mV/°C) High temperature stop value...
- Page 25 The value can then be adjusted by pressing the UP and DN buttons in the corresponding directions. This value can be adjusted in 0.25 V increments. Once the desired value is reached, press the MENU button to accept the new value. Press the UP button to scroll to T SENSE INTERNAL (temperature sensor internal to controller).
- Page 26 range between 0 and 255 mV/°C. Once the desired value is reached, press the MENU button to accept the new value. Press the UP button to scroll to STOP VLT V = xx.xx. To adjust this value press the MENU button and the screen will change to CHOOSE V = xx.xx. The value can then be adjusted by pressing the UP and DN buttons in the corresponding directions.
-
Page 27: Lvd Menu
Press the UP button to scroll to T RUNAWY V = xx.xx. To adjust this value press the MENU button and the screen will change to CHOOSE V = xx.xx. The value can then be adjusted by pressing the UP and DN buttons in the corresponding directions. - Page 28 back to LVD1 CLOSED once the end has been reached. LVD1 is used as an example here, but sequential LVD menus will be identical. To exit this menu press the UP button until EXIT LVD is displayed on the screen, and press MENU to exit. This will take you back to the configuration menu.
-
Page 29: Ringer
Press the UP button to move to the next setpoint or scroll to EXIT LVD1 and press MENU. Ringer The ringer menu allows you to adjust the ringer setpoints. An “Admin” login is required to enable or adjust any values. If a ringer is not present in the system, the RINGER menu will not be visible. - Page 30 Press the UP button to move to the next setpoint or scroll to EXIT RINGER and press MENU. 7.8.3 Ringer AC voltage (RING AC) This setpoint allows the user to set the ringer’s AC output voltage. To adjust the ringer AC output voltage, scroll to RING AC V = xxx.xx, press the MENU button, and the screen will display CHOOSE: V = xxx.xx.
-
Page 31: Troubleshooting
8 Troubleshooting The modular, plug-n-play nature of this system makes diagnostics and repair very easy. For all conditions listed in Table 10, the controller will display the indicated alarm. The corresponding Form C relay will also toggle to the alarm state. - Page 32 SYSTEM ALARM** V = xx.xx I = xx A BATT. DIS* I = xx A SUMMARY A summary alarm is a ALARM Major or Minor alarm SPECIFIC Any and ALARM all active alarms will show ADDITIONAL here ALARMS N.C. if no probe BATTERY is connected T1=xx C...
- Page 33 No Failures Single Module Failure Multi Module Failure Single Module Failure with only one working module left in system Battery on Discharge AC Fail LVD Warning LVD Open Distribution Alarm System Communication Alarm Rectifier Current Share Alarm System Redundant Capacity Alarm Auxiliary Alarm System Over Temperature BD Test Fail...
- Page 34 Alarm Problem Solutions Minor Alarm Summary for multiple alarms See specific alarm for solution including Single Rectifier Failure, Single Ringer Failure, Auxiliary Alarm, etc. Major Alarm Summary for multiple alarms See specific alarm for solution including Multiple rectifier failure , multiple ringer failure, single rectifier failure leaving only one rectifier left working, LVD Open, etc.
- Page 35 Alarm Problem Solutions T Runawy Alarm Temperature of batteries has Float voltage has automatically exceeded the Thermal Runaway been lowered in an attempt to temperature. lower the temperature of batteries. If this has not solved the problem, disconnect batteries from the system.
- Page 36 Alarm Problem Solutions Aux Alarm Indicates a contact closure at the Check the input contact closure 0010 0000 AUX INPUT on the LVD you attached to this Auxiliary controller card position 2 Alarm (Integrated system only) Aux Alarm Indicates a contact closure at the Check the input contact closure 0100 0000 AUX INPUT on the LVD...
- Page 37 Appendix A Controller Menu Tree – Basic PRESS AND HOLD MENU BUTTON FOR SYSTEM OK 5 SECONDS TO ENTER MAIN MENU V = xx.xx I = xx A BATT. DIS* I = xx A N.C. if no probe BATTERY is connected T1=xx C N.C.
- Page 38 Appendix A Controller Menu Tree – Main *This menu is accessed from the MAIN Basic Menu by holding the MENU MENU* button for 5 seconds Welcome will appear for about 5 WELCOME seconds. To enter Review CHOOSE: menu press the >REVIEW MENU button CHOOSE:...
- Page 39 Appendix A Controller Menu Tree – Review CHOOSE: >REVIEW >VERSION xx.xx.xx >REVIEW To enter menu press LANGUAGE the MENU button >REVIEW To enter menu press MODULE the MENU button >REVIEW To enter menu press SETPOINT the MENU button To enter menu press >REVIEW the MENU button ALARMS...
- Page 40 Appendix A Controller Menu Tree – Review >REVIEW >REVIEW LANGUAGE SETPOINT LANGUAGE FLOAT ENGLISH V = xx.xx >EXIT BATT. CL PRESS MENU TO EXIT LANGUAGE DISABLE** BATT. CL I = XX A** >REVIEW MODULE RECT. CL A solid rectangle indicates DISABLE the rectifier currently I=xx A...
- Page 41 Appendix A Controller Menu Tree – Review >REVIEW >REVIEW ALARM TESTS HVSD EXECUTE V = xx.xx LAMPTEST PRESS MENU MENU HIGH V EXECUTE START TO BEGIN V= xx.xx BOOST*** BOOST BOOST TEST PRESS MENU MENU BD ALARM EXECUTE START TO BEGIN V = xx.xx BD TEST*** BD TEST...
- Page 42 Appendix A Controller Menu Tree – Review >REVIEW LVD1-4** >REVIEW THERMAL LVD1-4 CLOSED** T COMP: DISABLED LVD OPEN V = xx.xx** T START T= xx C*** LVD RCNT V = xx.xx** T SLOPE T=xx MV / C*** LVD RCNT SEC: XX** STOP VLT V = xx.xx*** >EXIT...
- Page 43 Appendix A Controller Menu Tree – Logon & Preset CHOOSE: >LOG IN CHOOSE: PRESET See controller section on instructions for PASSWORD ->0000<- Admin Login PRESET PRESS MENU TO SET AS PRESET PASSWORD SHOWN BRIEFLY AT TIME THE PROPER OK: ADMIN PASSWORD HAS BEEN ENTERED PRESET PRESS MENU TO...
- Page 44 Appendix A Controller Menu Tree – Administration CHOOSE: >CONFIG >VERSION xx.xx.xx >REVIEW To enter menu press LANGUAGE the MENU button >REVIEW To enter menu press MODULE the MENU button >CONFIG To enter menu press SETPOINT the MENU button >CONFIG To enter menu press ALARMS the MENU button >CONFIG...
- Page 45 Appendix A Controller Menu Tree – Administration >CONFIG >CONFIG LANGUAGE SETPOINT MENU PRESS UP/DOWN TO MENU PRESS UP/DOWN TO LANGUAGE CHOOSE: FLOAT CHOOSE: CHANGE VALUE CHANGE VALUE ENGLISH ENGLISH V = xx.xx V = xx.xx PRESS MENU TO ENTER PRESS MENU TO ENTER VALUE VALUE PRESS MENU TO...
- Page 46 Appendix A Controller Menu Tree – Administration >CONFIG TESTS >CONFIG ALARM EXECUTE PRESS UP/DOWN TO LAMPTEST MENU HVSD CHOOSE: CHANGE VALUE V = xx.xx V = xx.xx PRESS MENU TO ENTER VALUE PRESS MENU TO BOOST CHANGE TO PRESS UP/DOWN TO DISABLE MENU HIGH V...
- Page 47 Appendix A Controller Menu Tree – Administration >CONFIG LVD1-4** >CONFIG THERMAL LVD1-4 PRESS MENU TO PRESS MENU TO CLOSED** CHANGE TO OPEN T COMP: CHANGE TO DISABLED ENABLE PRESS UP/DOWN TO MENU LVD OPEN CHOOSE: CHANGE VALUE PRESS UP/DOWN TO MENU V = xx.xx** V = xx.xx**...
Need help?
Do you have a question about the BC Series and is the answer not in the manual?
Questions and answers