Advertisement
Quick Links
About the Wood and Finish
This product has been carefully crafted of: MDF, solid pine
wood and/or pine veneers. These materials derive from
plantations, a renewable and well managed forest, therefore,
not endangering the environment. The highest quality
standards have been implemented to assure a sturdy and
reliable product. Due to the natural variances in the
graining of wood, you may notice
subtle differences in the
shading and tone of the
color stain, warp, holes,
wood knots and also small
cracks. This is not a defect.
But rather a result of the
natural beauty of the wood itself.
Care and
maintenance:
Dust when needed using
a smooth, dry cloth.
Household furniture
polish can be used
occasionally to restore luster.
Advertisement

Related Manuals for Acme Furniture 39235


Summary of Contents for Acme Furniture 39235
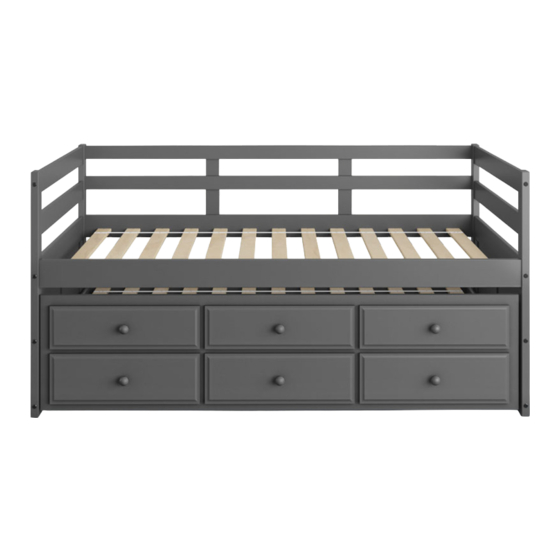
- Page 1 About the Wood and Finish This product has been carefully crafted of: MDF, solid pine wood and/or pine veneers. These materials derive from plantations, a renewable and well managed forest, therefore, not endangering the environment. The highest quality standards have been implemented to assure a sturdy and reliable product.
- Page 2 ASSEMBLY INSTRUCTIONS ACME #39235 Compare with the parts list to be sure that all parts are included. 1:30 h...
- Page 3 Part List: 39235 - Twin Captains Bed Manufacturer Label (x3)
- Page 4 8 x 25 Wood dowel 10 x 40 Wood Dowel 1 ⁹⁄ " Wooden Dowel (10 x 40mm) 1" Wooden Dowel (8 x 25mm) 7,0 x 100 Screw 3 ¹⁵⁄ " Bolt (7 x 100mm) Ø17 1/4 x 80 Screw ¹⁄...
- Page 5 HEADBOARD / FOOTBOARD Insert wooden dowels (A) into the holes, as shown in the diagram. (x4) (x2) INSIDE 10 x 40 Wood dowel 1 ⁹⁄ " Wooden Dowel Attach crossbars 5 and bottom panel 6 at the legs 1,2,3 and 4 with bolts (C) using the allen wrench (O), as shown in the diagram.
- Page 6 Fix the stopper 7 to legs 2 and 3 with screws (I), as shown in the diagram. (x2) PRE-DRILLED HOLES 4,0 x 30 Screw 1 ³⁄ " Screw BED RAILS / GUARDRAILS Insert wooden dowels (A) into the holes, as shown in the diagram. (x2) 10 x 40 Wood dowel 1 ⁹⁄...
- Page 7 First, x one of the headboard/footboard to the rail 8 and then the other headboard, with bolts (D) and elliptical nuts (G), using the allen wrench (O). Do not tighten the bolts until step # 07, in order to attach the other rail and guardrails. INSERT AND ATTACH BOLTS AND NUTS (D&G), BUT DO NOT TIGHTEN UNTIL...
- Page 8 Attach guardrails 9 to the headboard/footboard with bolts (E) using the allen wrench (O), as shown in the diagram. At this time, tighten all bolts. AFTER ATTACHED BOLTS ’’E’’ AT THIS TIME, PLEASE TIGHTEN ALL BOLTS! 7,0 x 70 Bolt Allen wrench 2 ³⁄...
- Page 9 Attach the supports 11 to the guardrails 9 using the screws (I). 4,0 x 30 Screw 1 ³⁄ " Screw TRUNDLE COMPONENTS (x3) Insert wooden dowels (B) into the holes, as shown in the diagram. SPECIAL ATTENTION AFTER THIS STEP because it has back and front sides. Please check the measurements between the holes to iden fy front and back sides.
- Page 10 Insert wooden dowels (B) into the holes, as shown in the diagram. 8 x 30 Wood dowel 1" Wooden Dowel Attach support 12 to the part 14 with screws (I), as shown in the diagram. THIS STEP IS VERY IMPORTANT, the part 12 have a chamfer on end that need to be assembled to the front .
- Page 11 Insert wooden dowels (B) into the holes. Attach the casters (M), about 2" away from edge, to the sides 15 and 16 using the screws (K), as shown in the diagram. 2 " 2 " 2 " 2 " 2 " 8 x 30 Wood dowel Caster 1"...
- Page 12 Attach the front of the trundle 17 to the sides 15, 16 and supports 12 using the screws (I). 4,0 x 30 Screw 1 ³⁄ " Screw Attach the back panel 18 of the trundle to the sides 15 and 16 whith bolts (F) using the allen wrench (O).
- Page 13 SLATS Attach the rst slat aligned with the rail support with the screws (I). Stretch the set and secure all slats. 0mm= 4,0 x 30 Screw 1 ³⁄ " Screw Align first slat with rail support. KNOBS Insert the knobs (N) into the holes and attach with the screws (I), as shown in the diagram. 4,0 x 30 Screw 1 ³⁄...
- Page 14 Drawers (x3) 4 ¹⁄ " 4.¹³⁄ " 4 ¹⁄ " 4.¹³⁄ " Attach the back part 20 to the side part 19 Attach the front part 21 to the side part 19 using the screws (I). using the screws (I). Align the base of the back part Align the base of the front part with the groove of the side part...
- Page 15 Attach the side part 19 to the front part 21 Insert the bottom part 22 using the grooves on the sides parts 19, and back part 20 using the screws (I). aligning with the front part 21 and Align the base of the back and front parts the back part 20, using the nails (L) to x.
- Page 16 Insert the knobs (N) into the holes and attach with the screws (I), as shown in the diagram. (x3) 4,0 x 30 Screw 1 ³⁄ " Screw Knob Attach one drawer at a time, tting the slide to the center rail.
Need help?
Do you have a question about the 39235 and is the answer not in the manual?
Questions and answers