Advertisement
Quick Links
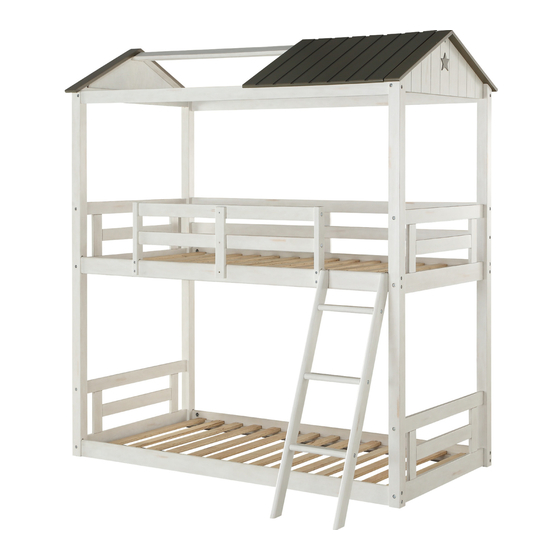
ASSEMBLY INSTRUCTIONS
ACME
FURNITURE
Item No: #37665
*** Thank you for purchasing this quality product. Be sure to check all packing materials carefully for
small parts which may have come loose inside the carton during shipment. Identify and count all
parts and compare with parts list below.
*** Assemble product on a flat, soft surface such as a carpet or cloth to prevent scratching the finish.
Read all instruction and study the drawings carefully before starting the assembly process.
IMPORTANT: Do not tighten bolts completely until all
bolts are completely lined up and inserted into holes
PAGE 1 OF 13
Advertisement

Related Manuals for Acme Furniture Nadine 37665


Summary of Contents for Acme Furniture Nadine 37665
- Page 1 ASSEMBLY INSTRUCTIONS ACME FURNITURE Item No: #37665 *** Thank you for purchasing this quality product. Be sure to check all packing materials carefully for small parts which may have come loose inside the carton during shipment. Identify and count all parts and compare with parts list below.
-
Page 2: Parts List
PARTS LIST HARDWARE LIST DIAGRAM PART NAME Q'Ty DIAGRAM PART NAME Q'Ty Leg Headboard 1 pc Long Bolt 7 x 100 (mm) 30 pcs Leg Headboard 2 pcs Wood Dowel 10 x 40 (mm) 24 pcs Leg Headboard 1 pc Short 6.3 x 100 (mm) 16 pcs Half Roud Nut... - Page 3 STEP 1: HEADBOARD (LEFT+ RIGHT) ASSEMBLY 20 pcs 1 pc 20 PLACES PAGE 3 OF 13...
- Page 4 STEP 2: HEADBOARD (LEFT+ RIGHT) ASSEMBLY 6 pcs 12 pcs 8 pcs 8 pcs 6 PLACES 1 pc 4 PLACES PAGE 4 OF 13...
- Page 5 STEP 3: HEADBOARD (LEFT+ RIGHT) ASSEMBLY 3 pcs 3 PLACES PAGE 5 OF 13...
- Page 6 STEP 4: HEADBOARD (LEFT+ RIGHT) ASSEMBLY 2 pcs 4 pcs 8 pcs 2 PLACES 8 pcs 1 pc 4 PLACES PAGE 6 OF 13...
- Page 7 STEP 5: HEADBOARD (LEFT+ RIGHT) ASSEMBLY 2 pcs 8 pcs 2 pcs 1 pc PAGE 7 OF 13...
- Page 8 STEP 6: HEADBOARD (LEFT+ RIGHT) ASSEMBLY 3 pcs 2 pcs 1 pc PAGE 8 OF 13...
- Page 9 STEP 7: HEADBOARD (LEFT+ RIGHT) ASSEMBLY 8 pcs 1 pc 8 PLACES STEP 8: HEADBOARD (LEFT+ RIGHT) ASSEMBLY 2 pcs 2 PLACES 1 pc PAGE 9 OF 13...
- Page 10 STEP 9: HEADBOARD (LEFT+ RIGHT) ASSEMBLY 3 pcs PAGE 10 OF 13...
- Page 11 STEP 10: HEADBOARD (LEFT+ RIGHT) ASSEMBLY HEADBOARD (LEFT+ RIGHT) ASSEMBLY 2 pcs PAGE 11 OF 13...
- Page 12 STEP 11: HEADBOARD (LEFT+ RIGHT) ASSEMBLY 60 pcs 56 PLACES PAGE 12 OF 13...
- Page 13 STEP 12: ASSEMBLY IS COMPLETED WARNING !!! To help prevent serious or fatal injuries from entrapment or falls: 1. Follow the information on the warning label appearing on the upper bunk end structure and on the carton. Do not remove warning label from bed. 2.
Need help?
Do you have a question about the Nadine 37665 and is the answer not in the manual?
Questions and answers