Advertisement
Quick Links
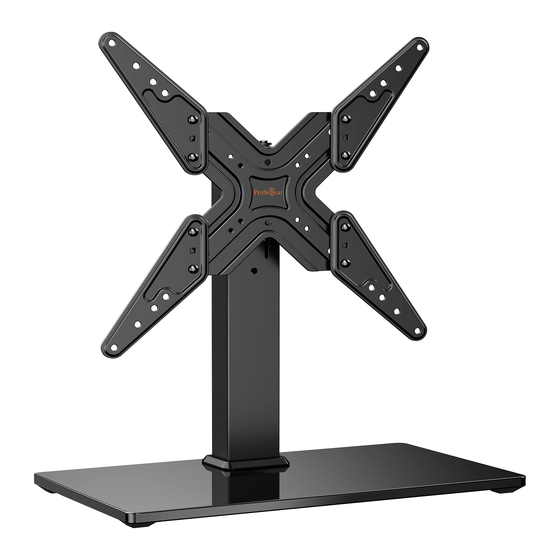
Table Top TV Stand Instruction Manual
V1.0
Model: PGTVS16
Thank you for choosing this Perlegear product! At Perlegear we strive to
provide you with the best quality products and services in the industry.
Should you have any issues, please don't hesitate to contact us at
Technical Support:
(US/CA)1-800-456-5231 Mon-Fri 8am - 8pm(CST)
(UK)44-808-196-4165 Mon-Fri 2pm - 10pm(UTC)
Other Info:
support@perlegear.com
Advertisement

Related Manuals for Perlegear PGTVS16


Summary of Contents for Perlegear PGTVS16
- Page 1 Table Top TV Stand Instruction Manual V1.0 Model: PGTVS16 Thank you for choosing this Perlegear product! At Perlegear we strive to provide you with the best quality products and services in the industry. Should you have any issues, please don't hesitate to contact us at...
-
Page 2: Important Safety Instructions
If your TV VESA is greater than 200x200 mm/8x8 in. or less than VESA 75x75mm/3x3 in., this TV stand is NOT compatible. If this TV stand is NOT compatible, please contact customer service at support@perlegear.com to find a compatible product. - Page 3 Before starting assembly, verify all parts are included and undamaged. Do not use damaged or defective parts. lf you require replacement parts, contact our customer service at support@perlegear.com. • Please note: Not all hardware included in this package will be used.
- Page 4 [TV3] x4 [TV4] x4 M6 x 15mm M6 x 35mm Bolt Bolt [TV5] x4 [TV6] x4 M8 x 15mm M8 x 35mm Bolt Bolt Note: The washer and spacers are shown [06] Washer [07] Spacers in actual size If necessary If necessary [TV7] x4 [TV8] x4...
-
Page 5: Step 1 Assemble The Base
Step 1 Assemble the Base Place foot pad [E] on the bottom of the tempered glass Step 1-1 base [01] in the corners. Note:Kindly note that the tempered glass base is designed to show the shiny glass side facing up Attach the support pillar [02] to tempered glass base [01] using Step 1-2 plastic cover [03], washers [C], bolts [B] and small Allen key [G]... - Page 6 When using the spacers it is important to note that they can be used in multi-layers (meaning stacked). If you have any difficulty understanding how to install the TV bolts or spacers, please contact customer service at support@perlegear.com. 200mm(8 in.) 100mm(4 in.) 75mm(3 in.)
- Page 7 CAUTION: Ensure the faceplate [04] is EQUALLY CENTERED on your TV and securely fastened in place. Please note: The bolt hole locations on your TV may vary in accordance of the manufacturers design of the TV. We are only illustrating possible locations of the bolt holes.
- Page 8 Option C (For TV with A “Bump”) TV2/TV4/TV6 (if needed) TV8/TV9 TV8/TV9 (if needed) Alternate Spacer Setups Option D For cable interference or inset holes, use spacers [TV8] and [TV9] to create extra space between the TV and faceplate (if needed) TV2/TV4 TV8/TV9 TV8/TV9...
- Page 9 Step 3 Connect the Faceplate to Support Pillar HEAVY! You may need Note: There are three choices assistance with this for height adjustment step. 3-1 Hang the TV to the support pillar [02] First Choice for Height Adjustment Second Choice for Height Adjustment Third choice for height Adjustment...
- Page 10 Manage the wires Step 4 Swivel Adjustment If necessary, the faceplate or TV can be swivelled manually...
- Page 12 Thank you again for choosing this Perlegear product! All of us at Perlegear do appreciate your product purchase. We hope that you are as happy with your product as we designing and manufacturing it for you. We strive to provide you with the best quality products and services in the industry.
Need help?
Do you have a question about the PGTVS16 and is the answer not in the manual?
Questions and answers