Table of Contents
Advertisement
INSTALLATION
AND
OPERATING
INSTRUCTIONS
Save these
instructions
for future use
Note: Please read these instructions
thoroughly before attempting to install
this unit. Failure to follow installation
instructions will result in costly service
calls.
NOTE: Clock must be set or your
oven will not function!
The oven door thermometer
does not sense temperature. It is
for aesthetics only and is
nonfunctional.
Model 9730
CONVECTION SELF CLEAN AND HALF WALL OVEN
Manual #9716
0042605
© 2005 HEARTLAND APPLIANCES INC.
ATTENTION INSTALLER: Leave this manual with appliance
1050 Fountain St N.
Cambridge, Ontario,
Canada N3H-4R7
Business (519) 650-5501
Fax (519) 650-3773
Toll Free Phone: 1-800-361-1517
Toll Free Fax: 1-800-327-5609
®
C
US
Advertisement
Table of Contents

Related Manuals for Heartland 9730

Summary of Contents for Heartland 9730
- Page 1 Model 9730 CONVECTION SELF CLEAN AND HALF WALL OVEN Manual #9716 0042605 © 2005 HEARTLAND APPLIANCES INC. ATTENTION INSTALLER: Leave this manual with appliance 1050 Fountain St N. Cambridge, Ontario, Canada N3H-4R7 Business (519) 650-5501...
- Page 2 HEARTLAND warrants the oven heating elements against defects in material or workmanship for an additional two years. These parts will be repaired or replaced at the option of Heartland without charge, but you pay for labour and transportation subject to the terms and conditions set out below.
-
Page 3: Table Of Contents
25. Standard Cooking ... 17 26. Standard Broiling ... 17 27. Convection ... 18 THE OVEN THERMOMETER DOES NOT SENSE TEMPERATURE The thermometer on the oven door is for aesthetics only and is Contents 28. Convection Cooking ... 18 28. Convection Roasting ... 18 29. - Page 4 Do not use aluminium foil. 11. Allow at least 1" of space all around pots, pans or cookie sheets in the oven to permit convection air flow. To fully enjoy your new oven, it is important that you read this manual thoroughly.
-
Page 5: Installation
Unpacking With unit sitting on the floor, cut banding, and remove wooden crating. Cut plastic wrap and remove foam packing. Have someone on the left and the right side of the unit lifting it up from the bottom, remove all packaging materials around and under the unit. Set unit on a table or some other supporting platform, so that the face of the unit overhangs but is not supporting any weight. -
Page 6: Prepare For Installation
Dimensions are shown in inch measurement and metric centimeter measurement. For best cooking results your oven must be level. This can be checked at the final installation stage with a carpenters level across the top of the appliance front. If levelling is required, shim the oven between the bottom of the cabinet opening and the oven bottom. -
Page 7: Beginning Installation
Beginning installation Once the location of the unit has been determined construct an enclosure with dimensions as shown on page 4. Be sure to take your time and measure accurately. At this point you will have to create the opening for the power supply box. The power supply box (included with the unit) must be mounted in the cupboard under the appliance opening. -
Page 8: Final Installation
Before turning the unit on please read “Before you Start” under the Operation section on page Note: The oven face should not go inside the opening. Following these directions the face-plate will over lap the cabinet by 1/4" top and bottom and on the sides. The flange will extend 1 1/2" off the face of the cabinet when mounted. -
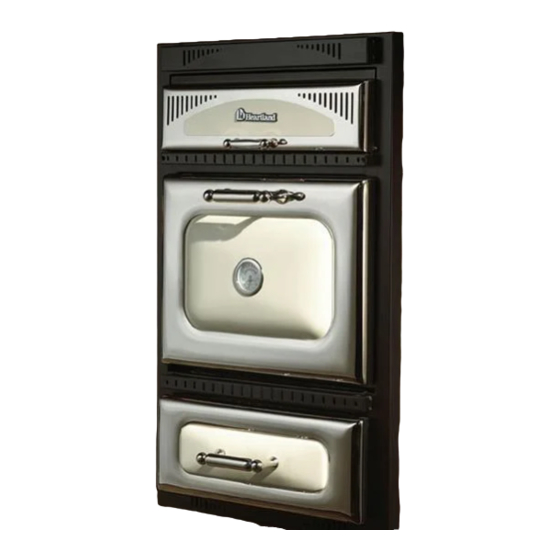
Page 9: Features
Self clean oven reset button (self clean only) Rocker Switch, controls self clean function (see page 14) Oven light on/off switch. Up position is "Off" Main Oven Temperature Control in Fahrenheit and Celsius with - bake indicator broil indicator On / off switch - Controls convection fan for regular baking/broiling and convection baking/ broiling. -
Page 10: Dual Oven Features
Features Dual Oven Features door slides up into the unit to reveal control panel with timer, light switches, oven indicators and controls. Also houses self clean control. Main Oven: baking, broiling timed baking, broiling convection baking, broiling timed convection baking,... -
Page 11: Important Safety Instructions
Other surfaces of the appliance may become hot enough to cause burns. For example, oven vent opening surfaces near these openings and oven doors. Do not set cooking utensils directly on oven floor! Note: In the lower oven the bake element is contained under the oven floor. This facilitates easier cleaning and more usable space in the oven. -
Page 12: Operation
See pages 19 and 22 for recommended baking and roasting times and temperatures. Note: Do not engage the self clean oven door latch when not in self clean mode, as it is possible the oven door safety interlock will activate at high oven temperatures. -
Page 13: Oven Bake Broil Control
Main Oven: To bake, push down and turn the oven control counter clockwise to any desired temperature. When baking is selected, the indicator under the bake symbol lights up, and the bake element will activate. After the oven has reached the temperature you have selected, the element will cycle on and off to maintain temperatures. -
Page 14: Clock / Timer Function
Minute minder Duration of bake or S/C time Time of Day Setting NOTE: Clock must be set or your main oven will not function! 1. To set the time of day: a) the clock read-out will be flashing "... -
Page 15: Time Bake
" " and “ “ to set the actual time of the day you want the oven to shut off. After 5 seconds the display will return to time of day mode. The “ symbol will shut off, indicating the oven is off until the timer activates the oven. -
Page 16: How To Self Clean
The recommended self clean time is 3 hours. The cycle can be set however, anywhere from 1 hour 30 minutes for light soiling, to 3 hours maximum for heavy soiling. Please note that the lower oven is disabled and will not function during the self clean mode of operation. -
Page 17: Time Delay Self Clean
9. The safety interlock is active until the oven has cooled to a safe temperature (approximately 1 hour) You will not be able to unlock the oven door during this cool down period. Please do not attempt to open door while locked, or damage to locking mechanism may occur. - Page 18 10. At the end of the cycle the oven will shut off and the clock will flash "P0.00" and the symbol "AUTO" alternately.
-
Page 19: How To Select Cooking Methods
Place meat on the broiler pan (add water to the bottom of the pan to reduce smoking). Place the broiler pan on the third or fourth rack in the main oven, and first or second rack in the lower oven, depending on the food and your personal tastes. -
Page 20: Convection
Place the cut of meat directly on the third oven rack position with the broiler pan on the rack below to catch any drippings. Poultry should be placed breast down for the first half of the cycle then turned over, this keeps the breast moist. -
Page 21: Roasting Times And Temperature Guide
Rare 140 to160 60 to 70 Operation Regular Oven 20 -25 min. / lb (45 - 50 min. / kg) 25 - 30 min. / lb (55 - 60 min / kg) 30 -35 min. / lb (65 - 70 min. / kg) 40 - 45 min. -
Page 22: Broiling Tips
5. Place the oven rack in the desired position near the top of the oven. 6. Hook the grease filter (provided) on to the fan shield to prevent grease build-up when roasting or broiling. -
Page 23: Broiling Guide
All times are approximate since variables such as thickness , temperature and individual preferences will affect the cooking time. Broil meat on rack of broiler pan placed on oven shelf in fourth or fifth position , about 4 - 5 in (10 -12 cm ) below the top element. Turn meat with tongs, not a fork so as not to pierce meat and loose juices. -
Page 24: Baking Times And Temperature Guide
OVEN TEMPERATURES: Unless otherwise indicated preheat standard oven to 325°F /160°C. Convection oven does not need to be preheated but temperatures are generally reduced by 25°F /15°C or set at 300°F /150°C. If more browning is preferred set the convection temperature at 325°F /160°C. -
Page 25: Poultry Times And Temperature Guide
Chicken ,quarters Internal Thigh Approximate Temperature Cooking Time in when cooked Regular Oven °F °C 30 min. / lb (60 min. / kg) 23 min. / lb (45 min. / kg) 15 min. / lb (30 min. / kg) 25 min. / lb (50 min / kg) 18 min. -
Page 26: Care And Cleaning
Oven Light Replacement Before replacing the light bulb, disconnect the power at the main fuse or circuit breaker panel. When replacing light bulbs, wait until the oven and bulb are cool. Remove oven light lens by simply unscrewing it counter clockwise. -
Page 27: Standard Oven Cleaning
When cleaning the oven, make sure the oven is turned “Off” and oven is cool. For simple spills, clean the oven with a strong solution of detergent, then wipe with a clean damp cloth and dry. -
Page 28: Self Clean Oven Cleaning
2. Wipe up heavy soil on the oven bottom. 3. Clean spills on oven front frame (A) and the oven door outside of the gasket area (B) with hot soapy water and a damp cloth. These areas are outside the self cleaning area and soil will become baked on. -
Page 29: Main Oven Door Removal
At times you may want to remove the oven door for thorough cleaning of the oven. Removal of the oven door is easy: 1) Open oven door, and latch the brass catches on to the upper leg of the hinge. (see below). Make sure the catch is securely hinged. -
Page 30: Lower Oven Door Removal
Care & Cleaning Removal of Lower Oven Door At times you may wish to remove one or both oven doors for thorough cleaning of the oven. Removal of the lower oven door is easy: 1) Open oven door and remove the two screws directly in line with the hinges about half way up the panel. -
Page 31: Interior Oven Rack Removal
To install, place the rack "feet" on the rack support and push the oven rack backward along the rack support (see 1 ). Push the oven rack all the way to the back until the oven rack slips off the end of the rack support (see 2 ). -
Page 32: Range Problem Solver
20 - 22 minutes. If you still require help... Heartland Ranges contain standard electrical components available from your dealer or Heartland Appliance Inc. In case repair is required, consult your Dealer for an appliance repair depot near you. For warranty service, please call your dealer, or call Heartland: Bus. -
Page 33: Parts Chart / List
ORDERING COLORED PANELS, BOTH THE COLOR AND SERIAL NUMBER MUST BE PROVIDED. Please order part by number. Parts may be ordered from your dealer or direct from Heartland Appliances Inc. prices and ordering instruction. Call 519-650-5775 and ask for the order desk. -
Page 34: Wiring Diagrams
Wiring Diagrams Wiring Diagrams Technical Data for model 9730 - Voltage 240 V/ 60 Hz North America - Load 6.3 kW NOTE: Service amperage should be calculated by a qualified electrician. -
Page 35: Products
3635 Metro. Cooktop versions for both Metro 3825 and Legacy 3820 models are available. 9730 (Built-in)- Dual oven, one convection, one standard radiant, with self clean oven feature. 4210- 30" Gas / Electric kitchen range - 4 sealed gas burners, electric convection self clean oven fits in a 30"...
Need help?
Do you have a question about the 9730 and is the answer not in the manual?
Questions and answers