Table of Contents
Advertisement
Quick Links
Advertisement
Table of Contents

Related Manuals for PhaseOne DJI M600


Summary of Contents for PhaseOne DJI M600
- Page 1 Phase One iX Cameras Installation Guide for DJI M600 & M600 PRO...
-
Page 2: Table Of Contents
Contents Legal Notice ................................3 Contact Support ..............................3 Required items for complete configuration ....................3 What’s In the Box? ..............................4 Recommended Reading List ..........................4 Introduction ................................5 Step 1: Installing the DJI UAV ..........................5 Step 2: Configuring the UAV for Communication with the Phase One Camera ...... 6 Step 3: Connecting the iX Camera –... -
Page 3: Legal Notice
You can contact Phase One Technical Support directly by creating a support case at http:// industrial.phaseone.com/support.aspx Required items for complete configuration The following items are required for installing Phase One iX Camera on DJI M600 & M600 Pro drone: • DJI M600 / M600 Pro drone •... -
Page 4: What's In The Box
1 x HDMI (Male to Female) Provides HDMI streaming from Phase One iX Camera to the DJI drone extender cable (see step 6). Recommended Reading List • DJI M600 / M600 Pro Installation Manuals • DJI Ronin Manual • DJI Assistant 2 Manual... -
Page 5: Introduction
The following section describes the installation work flow that is required for assembling / mounting the Phase One iX Camera on the DJI M600 / M600 PRO UAV: Note: Assembly of the DJI M600 / M600 Pro and Ronin-MX should be implemented according to their assembly manuals. -
Page 6: Step 2: Configuring The Uav For Communication With The Phase One Camera
Step 2: Configuring the UAV for Communication with the Phase One Camera Download DJI Assistant 2 from the DJI website and install it on a PC. Connect a USB cable between the PC and the UAV micro USB port. Turn ON the drone. Start the Assistant 2 application. -
Page 7: Step 3: Connecting The Ix Camera - Dji Communication Cable
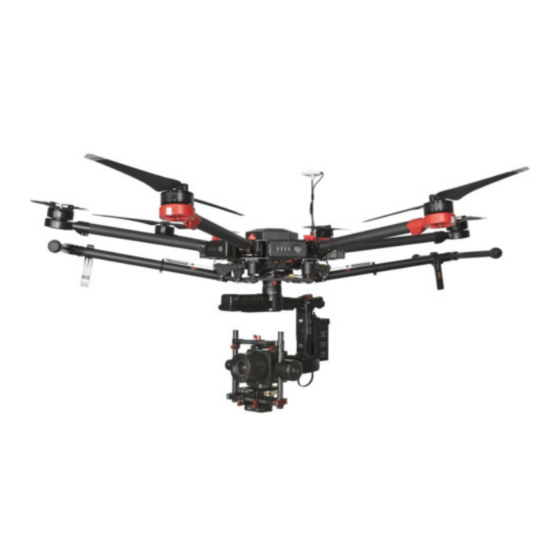
Step 3: Connecting the iX Camera – DJI Communication Cable iX Camera – DJI Communication box Communication cable DJI 4-pin connector iX Camera Lemo connector With the UAV standing the right way up, start the installation by removing the top cover from the UAV. -
Page 8: Step 4: Assembling The Ronin-Mx Vibration Absorber
Step 4: Assembling the Ronin-MX Vibration Absorber Position the UAV on its back and connect the Ronin-MX Vibration Absorber to the UAV according to the Ronin-MX user manual. Step 5: Assembling the Phase One iX Camera into the Ronin-MX Gimbal Mounting the Camera Insert the four M4 screws with four spring washers and four flat washers into the Phase One Camera mount. - Page 9 Attach the Camera Upper Mounting Plate (part of the DJI Gimbal kit) to the DJI mount top section using the 2 small screws under the flash hot shoe cover. Upper Mounting Plate Facing outward on the tuning stand, slide the Phase One iX Camera into the receiver of the Ronin MX, until the safety-locks engage.
-
Page 10: Step 6: Connecting The Cables
Step 6: Connecting the Cables Connect the Lemo Right Angle connector of the iX Camera – DJI Communication cable to port B of the Phase One iX Camera (see iXM / iXU Installation Guides). Connect the Lemo Right Angle connector of the iX Camera – DJI Power cable to the power port of the Phase One iX Camera. -
Page 11: Step 7: Assembly Completion With Ziptie
Step 7: Assembly Completion with ZipTie Secure the appropriate cables with a zip tie to ensure free movement with Ronin-MX rotation angles. Note: Make sure all cables are secured. Step 8: Configuring Phase One iX Camera to work with DJI UAV In order for Phase One iX Camera to work properly with DJI UAV perform the following procedures: iXU Camera... -
Page 12: Step 9: Activation Process
Step 9: Activation process Using a DJI drone and Phase One iX Camera combination for the fisrt time requires an initial activatation. The activation is done via an internet connection and a Remote Control unit connected to a mobile device running DJI GO. To link Phase One iX Camera with DJI UAV perform the following procedures: Using a USB cable, connect the Remote Control unit to a mobile device with an Internet access (iOS or Android) - Page 13 Phase One Support: industrial.phaseone.com/support.aspx The content is subject to change. Download the latest version from industrial.phaseone.com/downloads.aspx If you have any questions about this document, please contact Phase One by sending a message to support@phaseone.com Visit the website for additional information...
Need help?
Do you have a question about the DJI M600 and is the answer not in the manual?
Questions and answers