Advertisement
Quick Links
Dyson Customer care
www.dyson.com
UK
(+44) 0800 345 7788
CY
(+357) 24 532 220
www.dyson.co.uk
www.dyson.cy
ROI
(+353) 01 401 8300
CZ
00800 777 55 777
www.dyson.ie
www.dyson.cz
AE
(+971) 4 507 6000
DE
(+49) 0800 3131 319
www.dyson.ae
www.dyson.de
AR
(+1) 855 720 6378
DK
(+45) 7025 2323
www.dyson.com.ar
www.dyson.dk
AT
(+43) 0800 8866 7343
ES
(+34) 900 803 650
www.dyson.at
www.dyson.es
AU
(+61) 1800 426 337
FI
(+358) 010 321 5080
www.dyson.com.au
www.fi.dyson.com
BE
(+32) 0800 39 209
FR
(+33) 0800 945 802
www.dyson.be
www.dyson.fr
BG
(+359) 2 968 1111
GR
(+30) 800 111 3500
www.dyson.bg
www.gr.dyson.com
BH
(+971) 4 507 6000
GT
(+1) 855 720 6378
www.dyson.ae
www.dyson.gt
BR
(+1) 855 720 6378
HK
(+852) 2102 5503
www.dyson.com.br
www.dyson.hk
CA
(+1) 877 397 6622
HU
00800 777 55 777
www.dysoncanada.ca
www.dyson.hu
CH
(+41) 0848 807 817
ID
(+65) 6643 2999
www.dyson.ch
www.dyson.co.id
CL
(+1) 855 720 6378
IL
(+972) 03 612 9401
www.dyson.cl
www.dyson.co.il
CN
(+86) 21 6020 0502
IN
(+65) 6643 2999
(+86) 138 1790 3027
www.dyson.in
www.dyson.cn
IT
(+39) 800 976 027
CO
(+1) 855 720 6378
www.dyson.it
www.dyson.co
JM
(+1) 855 720 6378
CR
(+1) 855 720 6378
www.dyson.com
www.dyson.cr
JP
(+81) 0120 295 731
PT
(+351) 800 784 355
www.dyson.co.jp
www.dyson.pt
KR
(+82) 70 4066 0073
QA
(+971) 4 507 6000
www.kr.dyson.com
www.dyson.ae
KW
(+971) 4 507 6000
RO
(+40) 031 432 6140
www.dyson.ae
www.dyson.com.ro
LB
(+961) 1 252 474
RU
(+7) 88 001 001 002
www.lb.dyson.com
www.dyson.com.ru
LU
(+32) 0800 62452
SA
(+966) 920 005 759
www.dyson.lu
www.sa.dyson.com
MO
(+86) 21 6020 0502
SE
(+45) 70 25 48 23
(+86) 138 1790 3027
www.dyson.se
www.dyson.cn
SG
(+65) 6643 2999
MX
(+1) 855 720 6378
www.dyson.com.sg
www.dyson.mx
SK
00800 777 55 777
MY
(+603) 7710 5877
www.dyson.sk
www.dyson.my
SI
(+385) 01 3818 139
NL
(+31) 0800 020 6204
www.dyson.si
www.dyson.nl
TH
(+66) 2 628 2200
NO
(+47) 32 829 940
www.dyson.co.th
www.dyson.no
TR
(+90) 850 532 11 44
NZ
(+64) 0800 397 667
www.dyson.com.tr
www.dyson.co.nz
TW
(+886) 2 8751 0599
OM
(+971) 4 507 6000
www.dyson.tw
www.dyson.ae
UA
(+ 38) 0 800 504-1800
PA
(+1) 855 720 6378
www.dyson.com.ua
www.dyson.com.pa
US
(+1) 855 720 6378
PE
(+1) 855 720 6378
www.dyson.com
www.dyson.com.pe
PH
(+63) 2 243 1931
www.dyson.ph
PL
(+48) 227 383 481
www.dyson.pl
1
2
+
=
Ση ειωσει για την
Installation notes
Инструкции за монтаж
εγκατασταση
Observações sobre
Szerelési útmutató
a instalação
Napomene za instalaciju
Consignes d'installation
Catatan pemasangan
Poznámky k instalaci
Athugasemdir vegna
Installationshinweise
uppsetningar
Installationsnoter
Note di installazione
取り付けについて
Guía de instalación
Asennusohjeita
Nota pemasangan
Instructions d'installation
1
Opmerkingen voor
Opombe za montažo
installatie
Opmerkingen voor
Kurulum notlari
installatie
Uwagi dotyczące
Примітки щодо
montażu
встановлення
Notas de instalação
Guía de instalación
Ghid de instalare
Примечания к установке
Installationsnoteringar
Poznámky k montáži
WD04
WD05
Advertisement

Related Manuals for Dyson Airblade Wash+Dry


Summary of Contents for Dyson Airblade Wash+Dry
- Page 1 Dyson Customer care www.dyson.com (+44) 0800 345 7788 (+357) 24 532 220 (+81) 0120 295 731 (+351) 800 784 355 www.dyson.co.uk www.dyson.cy www.dyson.co.jp www.dyson.pt (+353) 01 401 8300 00800 777 55 777 (+82) 70 4066 0073 (+971) 4 507 6000 www.dyson.ie...
-
Page 2: Mt Ph Sg
GB/ROI/IN/JM/ TW/HK/MO MT/PH/SG AU/NZ IT/CH USEN USES/AR/CL/GT/ MX/PA CAFR DE/AT/CH/LU RO/MD SA/UAE FR/BE/CH/LU GR/CY... -
Page 4: Table Of Contents
GB/ROI/IN/JM/MT/PH/SG Contents Important Safety Instructions In the box Pre-installation checks Installation Step-by-step Test installation Troubleshooting... -
Page 5: Important Safety Instructions
DO NOT USE ANY JET WASH EQUIPMENT FOR CLEANING ON OR ALL INSTALLATION AND REPAIR WORK (PLUMBING AND NEAR THIS UNIT ELECTRICAL) SHOULD BE CARRIED OUT BY A QUALIFIED PERSON OR DYSON SERVICE ENGINEER IN ACCORDANCE WITH CURRENT LOCAL CODES OR REGULATIONS. WARNING RISK OF ELECTRIC SHOCK! -
Page 6: In The Box
In the box Tools required: Small Phillips screwdriver 7mm slotted screwdriver 2.5mm slotted screwdriver Torx T15 screwdriver Tape measure and pencil Hand drill Suitable drill bit Pliers/wire strippers Knife Adjustable spanner... -
Page 7: Pre-Installation Checks
Pre-installation planning enclose the motor bucket and hose in a Minimum of 6° ramp angle from the edge The Dyson Airblade Wash+Dry hand dryer cleanable housing or have the motor bucket Fig. F of the drain hole of the sink will result in... - Page 8 Ensure electricity and mixed water supplies water supply systems (such as that supplied to and drainage connections are available for the Dyson Airblade Wash+Dry hand dryer) to connection. Suitable isolation of the power be subjected to regular cleaning to minimise and water supplies must be in place to switch any biological growth.
- Page 9 Step-by-step Fig. 4 Water entry Water connection is made on the left hand side of the backplate. The water connection Preparing for installation of backplate can not be rotated within the backplate Remove the motor bucket from the backplate Fig. Fig.
- Page 10 Fig. 11 Fig. 13 Remove the 2 x Phillips screws and unclip the solenoid from the backplate Fig. Connecting the mixed water supply Assembling the motor bucket Attach the water hose to the solenoid Fig. NOTE: Ensure water feed has been Hook the motor to the top of the electrics completely flushed of debris, copper cover.
- Page 11 – Ensure there is no plug in the sink and – Inspect filter and change if required. Contact Dyson Customer Care for further remove if plug is present. – Ensure that the hose is securely attached to support and information or online at –...
-
Page 12: Installation Step-By-Step
AU/NZ Contents Important Safety Instructions In the box Pre-installation checks Installation Step-by-step Test installation Troubleshooting... - Page 13 ALL INSTALLATION AND REPAIR WORK (PLUMBING AND ELECTRICAL) SHOULD BE CARRIED OUT BY A QUALIFIED PERSON DO NOT USE ANY JET WASH EQUIPMENT FOR CLEANING ON OR OR DYSON SERVICE ENGINEER IN ACCORDANCE WITH CURRENT NEAR THIS UNIT LOCAL CODES OR REGULATIONS.
- Page 14 In the box Tools required: Small Phillips screwdriver 7mm blade screwdriver Small bladed screwdriver Torx drive T15 Tape measure and pencil Hand drill Suitable drill bit Pliers/wire strippers Knife Adjustable spanner...
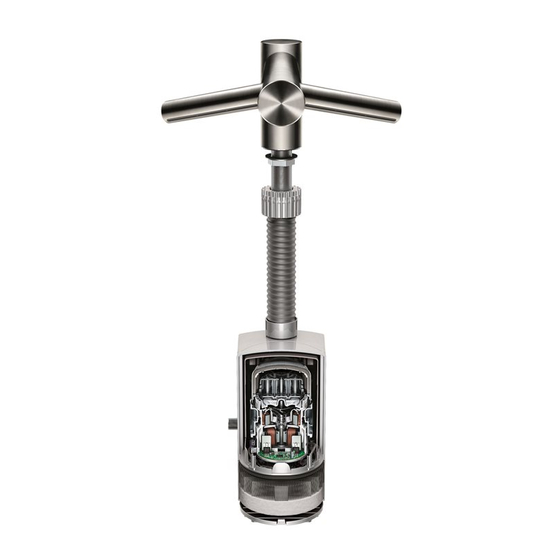
- Page 15 Fig. Dyson engineers tested a wide range of the installer. Make sure that the unit is sinks to assess their compatibility with the It should also be located at least 60mm installed in compliance with all building Dyson Airblade Wash+Dry hand dryer.
- Page 16 The water supply to this product must be with product. when using hot water or chemicals. Dyson fitted with a temperature control device in Water pressure required: 1-8 bar. 1⁄2” BSP will not be responsible for any injury caused accordance with local regulations.
- Page 17 Step-by-step Fig. 4 Water entry Water connection is made on the left hand side of the backplate. The water connection Preparing for installation of backplate can not be rotated within the backplate Remove the motor bucket from the Fig. Fig. 1 A= 1mm rubber seal backplate by pressing the red release catch B= Tap stem...
- Page 18 Fig. 11 Fig. 13 Remove the 2 x Phillips screws and unclip the solenoid from the backplate Fig. Attach the water hose to the solenoid Connecting the mixed water supply Assembling the motor bucket Fig. NOTE: ensure water feed has been Hook the motor to the top of the electrics completely flushed of debris, copper filings cover.
- Page 19 – Turn the unit off and on. any obstructions. Contact Dyson Customer Care for further – Ensure there is no plug in the sink and – Inspect filter and change if required. support and information: remove if plug is present.
- Page 20 取り付け図 Installation Drawings Schémas D’installation Схеми За Монтаж Σχεδια Για Την Installationsritningar Εγκατασταση Esquema Da Instalação Lukisan Pemasangan Slike Za Montažo Schémas D’installation Szerelési Rajzok Installatietekeningen Nákresy K Montáži Instalacijski Nacrti Installasjonstegninger Instalační Výkresy Gambar Pemasangan Rysunki Montażowe Kurulum Çizimleri Installationszeichnungen Desenhos De Instalação Installationstegninger...
- Page 21 A(i)
- Page 22 A(ii) Clear zone 85mm min 3.3inch min 100mm min 3.9inch min...
- Page 23 350mm min 13.7inch min 580mm min 290mm min 22.8inch min 11.4inch min 155mm max 6.1inch max 100mm min 3.9inch min 60mm 2.3inch 60mm 60mm 2.3inch 2.3inch 60mm 60mm 2.3inch 2.3inch 60mm 2.3inch...
- Page 24 6° 60mm 60mm 60mm 60mm 2.3inch 2.3inch 2.3inch 2.3inch...
- Page 26 0.19inch...
- Page 27 100mm 3.9inch...
- Page 28 clik clik...
- Page 30 clik clik...
- Page 31 Dyson Customer care www.dyson.com (+44) 0800 345 7788 (+357) 24 532 220 (+81) 0120 295 731 (+351) 800 784 355 www.dyson.co.uk www.dyson.cy www.dyson.co.jp www.dyson.pt (+353) 01 401 8300 00800 777 55 777 (+82) 70 4066 0073 (+971) 4 507 6000 www.dyson.ie...
Need help?
Do you have a question about the Airblade Wash+Dry and is the answer not in the manual?
Questions and answers