Table of Contents
Advertisement
Quick Links
Advertisement
Table of Contents

Related Manuals for JB-Lighting P9 Beamspot

Summary of Contents for JB-Lighting P9 Beamspot
- Page 1 P9 Beamspot Operating instructions Version 1.04 Software >= 1.0.0...
- Page 2 - 02 -...
-
Page 3: Table Of Contents
7.1.2 DMX channel functions P9 Beamspot ........ - Page 4 - 04 -...
-
Page 5: Introduction
1. Introduction 1.1 P9 Beamspot models The P9 beam spot is available in the light color HP (High Power). It can also be operated without any problems in the light colors 5800K (CRI> 90) and 3200K. Specification HP - High Power... -
Page 6: Dimensions
2. Dimensions 223,6 223,6 223,6 223,6 223,6 Farbe: Lichtanlagentechnik GmbH Oberfläche: Material: Sallersteig 15, 89134 Blaustein Farbe: Farbe: Tel.: 07304 / 9617-0 Blechdicke: Abmessung: Fax.: 07304 / 9617-99 Lichtanlagentechnik GmbH Lichtanlagentechnik GmbH Oberfläche: Material: Oberfläche: Datum Name Sallersteig 15, 89134 Blaustein Sallersteig 15, 89134 Blaustein kuehngruen Erstellt... -
Page 7: Product Overview
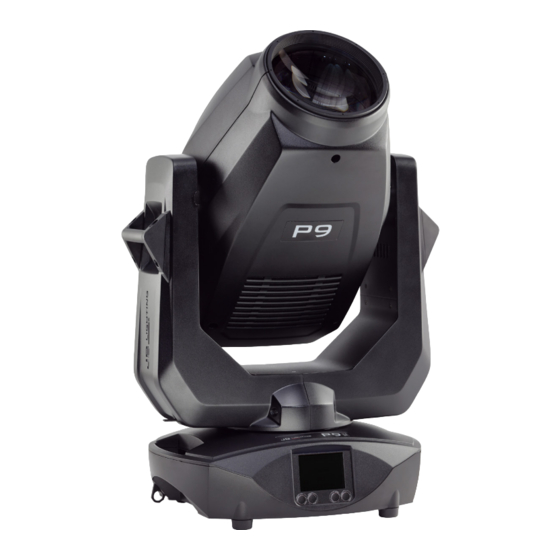
3. Product overview Bottom cover Top cover Arm cover Handles LCD display Function keys Farbe: Lichtanlagentechnik GmbH Oberfläche: Material: Sallersteig 15, 89134 Blaustein Tel.: 07304 / 9617-0 Blechdicke: Abmessung: Fax.: 07304 / 9617-99 Datum Name Head kuehngruen Erstellt Allgemeintoleranzen Prisma Front lens Art.-Nr.: ISO 2768-m... -
Page 8: Safety Instructions
ATTENTION: This device is only suitable for professional use! Protection class IP 20 - only for use in dry environments (indoors)! ATTENTION: JB-Lighting Lichtanlagentechnik GmbH does not authorise the use of its devices in life support systems. Life-supporting systems are systems whose purpose is to maintain or stabilise life and whose defect or malfunction may result in death or injury to persons. - Page 9 If the P9 Beamspot is operated below 0°, gobo/prism swapping and gobo/prism rotation are reduced in speed. This is a protective mechanism of the P9 Beamspot, as at low temperatures the lubricant is relatively viscous in the rotational mechanism and can therefore cause the effect to be slurred.
-
Page 10: Installation
The P9 Beamspot is supplied with an assembled Schuko power cable with the powerCON- TRUE1 plug (only the powerCON-TRUE1 plug is included in the US version). The installation of the power connection of the P9 Beamspot to the power supply (100-240 Volt, 50 - 60 Hertz) must be carried out by an authorised specialist. -
Page 11: Mains Connection
Connection outside Europe: The P9 Beamspot may only be operated on the following power supply systems: Mains ATTENTION: In Canada, the P9 Beamspot may 2 wires, 1 phase only be operated in a 2-wire, 1 phase network with a maximum voltage of... -
Page 12: Signal Connections
Special cables with etherCON connectors are recommended by Neutrik. The two sockets on the P9 Beamspot are connected to each other via a switch. Up to 10 devices can be connected in series without any delay. Of course, the spotlights can also be supplied in a star configuration via an external switch. -
Page 13: Mounting The Devices
Omegabracket distance 223,65 mm ✔ To mount the unit on a trussing system use two of the original JB-Lighting omega brackets with original Camloc-connectors. You have following four possibilities to mount the omega brackets. 223,65 The Camlocs must snap in to be locked properly. Ensure that the structure (truss) to which you are attaching the fixture is secure. -
Page 14: Control Panel
6. Control panel The P9 Beamspot has a graphic colour touch display that can be rotated 180° when installed in a suspended position. The display can be rotated in the PERSONALITY MENU or via shortcut ENTER + UP in the main screen. - Page 15 If errors occur again and again contact the dealer / distributor or our service department. If the P9 Beamspot receives a DMX signal, the display illumination goes out after 30 seconds. Further settings for the display illumination see page 20 BACKLIGHT MODE.
-
Page 16: Menu Overview P9 Beamspot
6.1 Menu overview P9 Beamspot grey - corresponds to the default setting ENTER ENTER ENTER FACTORY DEF. LOAD DEFAULTS SURE? USER DEFAULTS LOAD DEFAULTS SURE? SAVE DEFAULTS SURE? PASSWORD DMX / NET ADDR DMX ADDRESS ADDRESS +/- ARTNET ADDRESS ADDRESS +/-... - Page 17 SERVICE RESET FIXTURE SURE? ERROR LIST LIST PAN TIMEOUT COUNT: 1 CLEAR? CLEAR SURE? FUNCTION TEST START TEST TEST RUNNING DMX TEST DMX CHANNEL CH 001: --- INIT PAN/TILT SURE? DISPLAY CONTR. D. CONTR: +000 +/- FINE ADJUST OFS PAN OFS PAN +/- OFS TILT OFS TILT +/-...
-
Page 18: Factory Defaults - Factory Settings
RESET? 6.2 FACTORY DEFAULTS - Factory settings To reset P9 Beamspot to the factory settings, go to the menu item FACTORY DEFAULTS, LOAD DEFAULTS. After confirming the security prompt SURE? with pressing “ENTER” for 2 seconds, all parameters are reset to the factory settings. - Page 19 The P9 Beamspot has 2 operating modes (see channel assignment for P9 Beamspot on page 24). All parameters of P9 Beamspot can be operated via mode 1. However, all channels (except pan/tilt) are controlled with 8 bits. By selecting Mode 2 - 16 Bit the gobo, prism rotation, CMY/ CTO(CTB), dimmer, focus, zoom, the complete shutter slide unit as well as pan/tilt are controlled...
- Page 20 There is no danger to the life of the device in any mode, as the P9 Beamspot has a temperature safety shutdown. In addition, the LED module is switched off from an ambient temperature of 60°C! PAN TILT SPEED - setting pan/tilt speed In the PAN TILT SPEED menu you can set the maximum speed, the acceleration and thus also the movement volume of the P9 Beamspot.
-
Page 21: Standalone Operation
The images can be saved in two ways. Either you program the desired DMX values directly on P9 Beamspot and save them, or you set the DMX values via a connected DMX console and then store them in the P9 Beamspot. -
Page 22: Info-Menu
Operation via master-slave function: Connect the P9 Beamspot via DMX lines and activate the REMOTE menu item for all slave devices. To do this, navigate in the STANDALONE menu to the REMOTE sub-menu. Activate the REMOTE function by pressing and holding “ENTER”, and also pressing “ESC”. The spotlight is in slave mode when the display shows the status REMOTE INACTIVE or REMOTE ACTIVE. -
Page 23: Control Options
7. Control options 7.1 DMX 7.1.1 Operating modes P9 Beamspot The P9 Beamspot has 2 different DMX modes. The respective mode can be set in the PERSONALITY, DMX MODE menu item. The set mode is displayed in the main menu. Mode 1(M1) -
Page 24: Dmx Channel Functions P9 Beamspot
7.1.2 DMX channel functions P9 Beamspot M3 Function Pan (X) movement 546,74° 000-255 Pan (X) fine (16 Bit) 000-255 Tilt (Y) movement 281,16° 000-255 Tilt (Y) fine (16 Bit) 000-255 Control channel To enable uniform dimming manually via faders for all light mixing consoles, 5 diffe- rent settings for the DMX smoothing are available. - Page 25 Setting for maximum DMX smoothing Dimmer fade out via fader (fast - slow) 128-135 DIMMER CURVE - selection of dimmer curve LINEAR - linear dimmer curve 136-136 SQUARE - exponential dimmer curve 137-137 SQUARE INVERSE - exponential inverse dimmer curve 138-138 not used 139-139...
- Page 26 Shutter Shutter closed 000-015 Shutter open 016-095 Open pulsing shutter >20Hz (rapid - slow) 096-110 Shutter open 111-111 Fade effect with dimmer (slow - rapid) 112-125 Shutter open 126-126 Shutter closed 127-126 Open pulsing shutter <20Hz (rapid - slow) 128-142 Shutter open 143-143 Close pulsing shutter >20Hz (rapid - slow)
- Page 27 Gobo 2 016-023 Gobo 3 024-031 Gobo 4 032-039 Gobo 5 040-047 Gobo 6 048-055 Gobo 7 056-063 Gobo 8 064-071 Gobo 9 072-079 Gobo 10 080-087 Gobo 11 088-191 Gobo wheel rotation (fast - slow) 192-223 Gobo wheel rotation (fast - slow) 224-255 Gobo wheel 2 - rotating gobos Gobo 0...
- Page 28 Gobo 4 032-039 Gobo 5 040-047 Gobo 6 048-055 Gobo 7 056-191 Gobo wheel rotation (fast - slow) 192-223 Gobo wheel rotation (fast - slow) 224-255 Gobo positioning/rotation 2 Gobo positioning 0° - 540° 000-191 Gobo rotation, right (rapid - slow) 192-222 Stop gobo rotation 223-224...
- Page 29 Magenta (8 Bit) 0-100% 000-255 Fine magenta (16 Bit) 000-255 Yellow (8 Bit) 0-100% 000-255 Fine yellow (16 Bit) 000-255 CTO (8 Bit) 0-100% model HP, HC / CTB (8 Bit) 0-100% model WW 000-255 CTO fine (16 Bit) / CTB fine (16 Bit) model WW 000-255 Sparkle - Glitter effect Sparkle effect inactive...
-
Page 30: Control Channel
CAMERA MODE - sets the LED refresh rate RESET - a basic reset of the headlight is performed For details, see DMX Channel Functions for the P9 Beamspot on page 24. 7.1.4 Sparkle effect, sparkle speed Animation effects can be created via this channel in connection with the focus. Depending on the intensity, the projection can be made to shake more or less. -
Page 31: Streaming Acn
ADDRESS. Further details and setting options can be found on page 18 7.4 Wireless-DMX The P9 Beamspot is equipped with a Lumen Radio CRMX receiver for wireless DMX. The receiv- er can process both DMX and RDM. If there is a cable and wireless connection to the P9 Beam- spot, the cable connection has priority! The received signal can be output via the DMX connec- tion. -
Page 32: Standard Rdm Parameter Ids
7.5.3 Standard RDM parameter IDs RDM parameter ID DISCO- Note VERY RDM identification DISC_UNIQUE_BRANCH is used for fixture identification ✔ DISC_MUTE is used for fixture identification ✔ DISC_UN_MUTE is used for fixture identification ✔ RDM status determination QUEUED_MESSAGE ✔ STATUS_MESSAGES ✔... -
Page 33: Rdm Sensor Ids
All error messages are displayed with the respective frequency and can be deleted. FUNCTION TEST This function allows you to test all functions of the P9 Beamspot without using a light mixer. The pan/tilt reset is deactivated in the process. DMX TEST This menu item is used to test the DMX input. -
Page 34: Changing Gobos
Now open the two knurled screws (4) and remove the gobo insert. The following figure (1) shows the gobo insert of the P9 Beamspot. Check that the focus is moved direction to the front lense... -
Page 35: Gobo Size
USB stick. Then press and hold the right key below the display, switch on the power of the P9 Beamspot as soon as the message “Insert USB stick” appears on the display release the key. Now plug in the USB stick on the back of the device below the signal connections and follow the instructions on the display. -
Page 36: Cleaning The Device
8.7 Service and maintenance On the P9 Beamspot, the zoom / focus guide rails and the rotating gobos should be checked for sufficient lubrication at regular intervals - once a year. To do this, open the head cover (4x camlocks with half a turn), the zoom cover (3 Phillips screws) see (4) and remove the gobo insert (2 knurled screws). -
Page 37: Overview Of Error Codes For All Fixtures
9. Overview of error codes for all fixtures PAN TIMEOUT TILT TIMEOUT Tilt GOBO1 TIMEOUT Gobo wheel 1 position GROT1 TIMEOUT Gobo wheel 1 rotation GOBO2 TIMEOUT Gobo wheel 2 position GROT2 TIMEOUT Gobo wheel 2 rotation COLOR TIMEOUT Color wheel CYAN TIMEOUT Cyan MAGENT TIMEOUT... - Page 38 TSENS BPS ER Sensor Error Base Power Supply AC/DC TSENS BLCD ER Sensor Error Base LCD TSENS BAIR ER Sensor Erroe Base Air SPARX ONLY TSENS HMAIN ER Sensor Error Head Main PCB TSENS HDRV ER Sensor Error Head LED Driver PCB TSENS HLED ER Sensor Error Head LED TSENS HAIR ER...
-
Page 39: Specifications
10. Specifications Dimensions and weight Length ..............265 mm Width . -
Page 40: Declaration Of Conformity
Directive: 2014/30/EU Electromagnetic compatibility (Directive 2014/30/EU of the European Parliament and of the Council of 26/02/2014 to approximate the laws of the Member States relating to electromagnetic compatibility) The manufacturer, JB-Lighting Lichtanlagentechnik GmbH Sallersteigweg 15 89134 Blaustein-Wippingen declares that the product: complies with the essential protection requirements of the directives. - Page 41 - 41 -...
- Page 42 - 42 -...
- Page 43 - 43 -...
- Page 44 JB-Lighting Lichtanlagentechnik GmbH Sallersteig 15 89134 Blaustein Tel. +49 7304 9617-0 Fax. +49 7304 9617-99 info@jb-lighting.de www.jb-lighting.de...
Need help?
Do you have a question about the P9 Beamspot and is the answer not in the manual?
Questions and answers