Table of Contents
Advertisement
Quick Links
Wingspan: 25 in [635mm]
Wing Area: 141 sq in [9.1 dm
Weight: 24–25 oz [680–710g]
Wing Loading: 24.5–25.5 oz/sq ft [75–78 g/dm
Length: 31 in [785mm]
Radio: 3-Channel Minimum
WARRANTY
Flyzone
®
guarantees this kit to be free from defects in both material and workmanship at the date of purchase. This warranty does not cover
any component parts damaged by use or modification. In no case shall Flyzone's liability exceed the original cost of the purchased kit.
Further, Flyzone reserves the right to change or modify this warranty without notice.
In that Flyzone has no control over the final assembly or material used for final assembly, no liability shall be assumed nor accepted for any
damage resulting from the use by the user of the final user-assembled product. By the act of using the user-assembled product, the user
accepts all resulting liability.
If the buyer is not prepared to accept the liability associated with the use of this product, the buyer is advised to return this kit immediately
in new and unused condition to the place of purchase.
For warranty claims contact Flyzone Product Support:
Flyzone Product Support:
3002 N Apollo Drive Suite 1
Champaign, IL 61822 USA
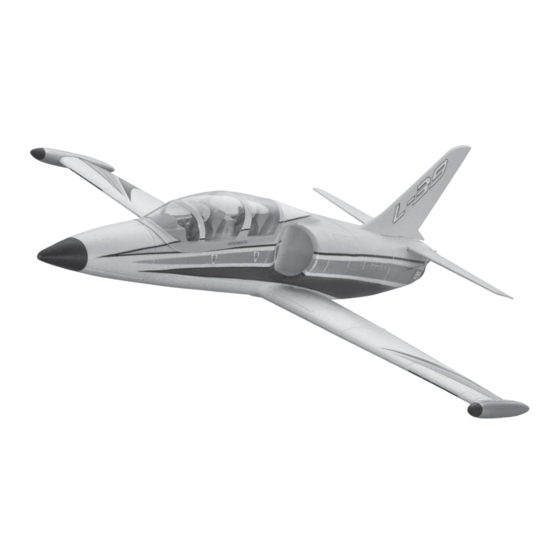
Thank you for purchasing the latest version of the Flyzone L-39. A more powerful motor is now included which will enable speeds
approaching 100mph! The L-39 flies like it's on rails and the vibrant color scheme looks great as it cuts across a blue horizon. Durable EPO
foam construction resists damage from bumpy landings and repairs easily with regular CA glue. A display stand is included to show off your
model on your trophy shelf when it's not busy carving up the skies above your flying field!
For the latest technical updates or manual corrections to the L-39 visit the Flyzone web site at www.flyzoneplanes.com. Open the "Airplanes"
link, then select the L-39. If there is new technical information or changes to this model a "tech notice" box will appear in the upper left
corner of the page.
READ THROUGH THIS MANUAL BEFORE STARTING ASSEMBLY.
IT CONTAINS IMPORTANT INSTRUCTIONS AND WARNINGS
CONCERNING THE ASSEMBLY AND USE OF THIS MODEL.
© 2015 Flyzone, a Hobbico company.
2
]
2
]
FLZA3634Mnl
Telephone: (217) 398-8970 ext. 6
Fax: (217) 398-7721
E-mail: airsupport@hobbico.com
flyzoneplanes.com
™
Advertisement
Table of Contents

Related Manuals for Flyzone Rx-R L-39


Summary of Contents for Flyzone Rx-R L-39
- Page 1 Further, Flyzone reserves the right to change or modify this warranty without notice. In that Flyzone has no control over the final assembly or material used for final assembly, no liability shall be assumed nor accepted for any damage resulting from the use by the user of the final user-assembled product. By the act of using the user-assembled product, the user accepts all resulting liability.
-
Page 2: Decisions You Must Make
WARNING! The L-39 requires advanced flying skills and is not suitable for beginning or intermediate pilots. It reaches speeds of over 90 mph (145 km/h) and should be flown only at the flying site of an AMA-chartered club. Because it can quickly disappear from sight, pilots should remain focused on the plane at all times. -
Page 3: Assemble The Airplane
ASSEMBLE THE AIRPLANE ❏ ❏ 1. Attach a 6" [152mm] servo extension to the ESC receiver 2. Route the motor wires and ESC lead along the underside lead. Secure the extension with tape or heatshrink tubing (not of the fuselage and through the hole into the radio compartment. included). - Page 4 ❏ 5. Position the parts onto the fuselage, making sure that the vertical fin is being glued square to the horizontal stabilizer. The parts can be taped in place while the epoxy cures. ❏ 6. Insert the 90° bend (at the aft end) into the outer hole of the elevator control horn. Secure it using the 90° pushrod connector. Make a small, upward bend in the elevator pushrod as shown.
- Page 5 ❏ 9. Assemble and glue the display stand together as shown using foam-safe glue. The long slots in the two large pieces interlock and the four cross braces are glued into the small slots. ❏ ❏ 10. Fit the wing tip tanks in place. They are held on magnetically. 11.
-
Page 6: Get The Model Ready To Fly
GET THE MODEL READY TO FLY Check the Control Directions ❏ 3-CHANNEL RADIO SETUP 1. Turn on the transmitter and receiver and center (STANDARD MODE 2) the trims. RIGHT AILERON MOVES UP ❏ 2. With the transmitter and receiver still on, check LEFT AILERON all the control surfaces to see if they are centered. - Page 7 Balance the Model More than any other factor, the C.G. (balance point) can have the greatest effect on how a model flies, and may determine whether or not your first flight will be successful. If you value this model and wish to enjoy it for many flights, DO NOT OVERLOOK THIS IMPORTANT PROCEDURE.
- Page 8 PREFLIGHT IMPORTANT: If you are an inexperienced modeler we strongly urge you to seek the assistance of a competent, experienced R/C pilot to check your model for airworthiness AND to teach you how to fly. The L-39 is a model designed for pilots with inter- mediate to advanced piloting skills.
-
Page 9: Safety Precautions
REPLACEMENT PARTS Replacement parts may be purchased from your local hobby dealer or on-line. For assistance with defective or missing parts or purchasing replacement parts, contact Flyzone Product Support at the contact information on the front cover of this manual. FLZA6535... - Page 10 DUCTED FAN BREAK-IN Before you run the fan make sure that: • An appropriate LiPo battery is being used. • All the fan parts are properly attached to the fan and to the airframe. • If any part of this fan should become damaged, replace all parts. Never attempt to repair damaged parts.
Need help?
Do you have a question about the Rx-R L-39 and is the answer not in the manual?
Questions and answers