Table of Contents
Advertisement
Quick Links
Advertisement
Table of Contents

Related Manuals for Fröling Lambdamat LM 650 KOM


Summary of Contents for Fröling Lambdamat LM 650 KOM
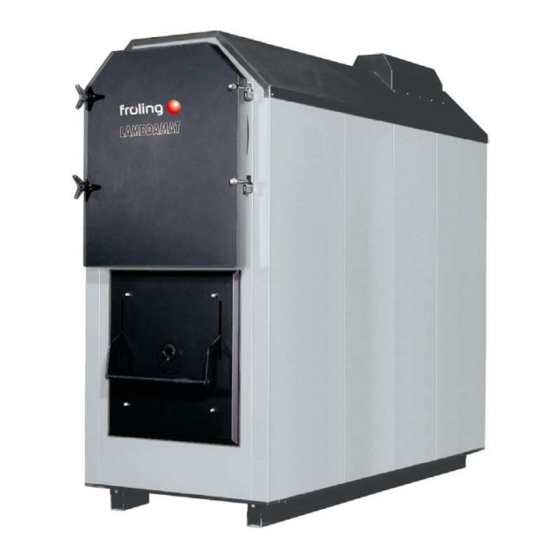
- Page 1 Installation instructions Lambdamat LM 650-750 KOM Translation of original German version of installation instructions for technicians. Read and follow all instructions and safety instructions. All errors and omissions excepted. M2510022_en | Edition 18/08/2022...
-
Page 2: Table Of Contents
Table of contents 1 General ................................. 2 Safety................................2.1 Hazard levels of warnings ........................2.2 Qualification of assembly staff ......................2.3 Personal protective equipment for assembly staff ................3 Design Information............................3.1 Overview of standards .......................... 3.1.1 General standards for heating systems ..................3.1.2 Standards for structural and safety devices................ - Page 3 Table of contents 5.6.14 Installing the combustion chamber overpressure and temperature sensors ......39 5.6.15 Fitting the Lambda probe and various sensors................40 5.6.16 Installing the servo-motors......................41 5.6.17 Fitting the combustion air fan..................... 42 5.6.18 Fitting the automatic ignition (optional) ..................43 5.6.19 Fitting an additional ignition for hydraulic stoker unit (optional) ..........
-
Page 4: General
1 | General 1 General Thank you for choosing a quality product from Froling. The product features a state-of- the-art design and conforms to all currently applicable standards and testing guidelines. Please read and observe the documentation provided and always keep it close to the system for reference. -
Page 5: Safety
Safety | 2 2 Safety 2.1 Hazard levels of warnings This documentation uses warnings with the following hazard levels to indicate direct hazards and important safety instructions: DANGER The dangerous situation is imminent and if measures are not observed it will lead to serious injury or death. -
Page 6: Qualification Of Assembly Staff
2 | Safety 2.2 Qualification of assembly staff CAUTION Assembly and installation by unqualified persons: Risk of personal injury and damage to property During assembly and installation: r Observe the instructions and information in the manuals r Only allow appropriately qualified personnel to work on the system Assembly, installation, initial startup and servicing must only be carried out by qualified personnel: ▪... -
Page 7: Design Information
Design Information | 3 3 Design Information 3.1 Overview of standards Perform installation and commissioning of the system in accordance with the local fire and building regulations. Unless contrary to other national regulations, the latest versions of the following standards and guidelines apply: 3.1.1 General standards for heating systems EN 303-5 Boilers for solid fuels, manually and automatically fed combustion... -
Page 8: Regulations And Standards For Permitted Fuels
3 | Design Information 3.1.4 Regulations and standards for permitted fuels 1. BImSchV First Order of the German Federal Government for the implementation of the Federal Law on Emission Protection (Ordinance on Small and Medium Combustion Plants) in the version published on 26 January 2010, BGBl. -
Page 9: Chimney Connection/Chimney System
Design Information | 3 3.4 Chimney connection/chimney system Connection line to the chimney Measuring port Draught limiter Explosion flap (for automatic boilers) Thermal insulation NOTICE! The chimney must be authorised by a smoke trap sweeper or chimney sweep. The entire flue gas system (chimney and connection) must be laid out as per ÖNORM / DIN EN 13384-1 or ÖNORM M 7515 / DIN 4705-1. -
Page 10: Connection Line To The Chimney
3 | Design Information 3.4.1 Connection line to the chimney Requirements for the connection line: ▪ this should be as short as possible and follow an upward incline to the chimney (30 - 45° recommended) ▪ thermally insulated MFeuV (Germany) EN 15287-1 and EN 15287-2 3 x D (min. -
Page 11: Measuring Port
Design Information | 3 3.4.2 Measuring port For emissions measurement on the system, a suitable measuring port must be installed in the connection line between the boiler and chimney system. Upstream of the measuring port (M) there should be a straight run-in section with a length about twice the diameter (D) of the connection line. -
Page 12: Domestic Hot Water
3 | Design Information 3.5 Domestic hot water Unless contrary to other national regulations, the latest versions of the following standards and guidelines apply: Austria: ÖNORM H 5195 Switzerland: SWKI BT 102-01 Germany: VDI 2035 Italy: UNI 8065 Observe the standards and also follow the recommendations below: r Aim for a pH value of between 8.2 and 10.0. -
Page 13: Pressure Maintenance Systems
Design Information | 3 Additional requirements for Switzerland The filling and make-up water must be demineralised (fully purified) ▪ The water must not contain any ingredients that could settle and accumulate in the system ▪ This makes the water non-electroconductive, which prevents corrosion ▪... -
Page 14: Storage Tank
3 | Design Information 3.7 Storage tank NOTICE In principle it is not necessary to use a storage tank for the system to run smoothly. However we recommend that you use the system with a storage tank, as this ensures a continuous supply of fuel in the ideal output range of the boiler. -
Page 15: Technology
Technology | 4 4 Technology 4.1 Dimensions Dimensi Description Unit LM 650-750 Height, safety heat exchanger connection 3730 Height, flow/return connection 3,655 Height, flue pipe connection 3250 Height of stoker including burn back protection system 1315 (wood chips BBF 300) Height of hydraulic slide-on duct connection 1,035 Minimum height, base... -
Page 16: Components And Connections
4 | Technology 4.2 Components and connections Item Description LM 650-750 Boiler flow connection DN100 / PN 6 Boiler return connection DN100 / PN 6 Safety heat exchanger connection 1” ET Flue gas pipe connection 400 mm FGR (flue gas recirculation) connection 300 mm Broadband probe connection Flue gas temperature sensor connection... -
Page 17: Technical Specifications
Technology | 4 4.3 Technical specifications Description LM 650 LM 750 Nominal heat output Output range 195-650 225 - 750 Nominal fuel heating efficiency (wood chips) Efficiency at nominal load / partial load (wood chips) 90.0 / 90.3 Quantity of wood chips required at nominal load kg/h Electrical connection 400 V / 50 Hz... - Page 18 4 | Technology Boiler data for planning the flue gas system Description LM 650 LM 750 Flue gas temperature at nominal load / partial load °C 220 / 160 Draught requirement at ID fan outlet at 5 / 2 nominal load / partial load mbar 0.05 / 0.02 - volume concentration at nominal load / partial...
-
Page 19: Installation
Installation | 5 5 Installation WARNING Risk of falling when working at a height Therefore: r Implement appropriate measures in accordance with the applicable national industrial safety guidelines to protect against the risk of falling (e.g. ladders, platforms, etc.) 5.1 Transport NOTICE Possibility of damage to components if handled incorrectly r Follow the transport instructions on the packaging... -
Page 20: Fit The Ash Duct For Ash Removal Of The Combustion Chamber (Only With Lambdamat 750)
5 | Installation 5.3.1 Fit the ash duct for ash removal of the combustion chamber (only with Lambdamat 750). NOTICE! If ash is to be removed from the boiler via an ash screw, a base must be provided by the customer beneath the boiler. Dimensions If an ash screw (optional) is provided for removing ash from the combustion chamber, the ash duct should be fitted as follows when the combustion chamber is being positioned. -
Page 21: Positioning At The Installation Site
Installation | 5 5.4 Positioning at the installation site 5.4.1 Moving the boiler in the boiler room r Position a lifting device with a suitable load-bearing capacity at the base frame. r Lift and transport to the intended position in the installation room. Ä... -
Page 22: Laying Firebricks In The Combustion Chamber
5 | Installation 5.5 Laying firebricks in the combustion chamber 5.5.1 General Use Carathin K65-2 mortar where normal bricks and expansion joint bricks of AK60 quality are being laid. ≥12mm NOTICE! Caution: Expansion joints must be at least 12mm wide. NOTICE! Ceramic fibre mats (16) must always be placed between expansion joint bricks and crossbars / between two expansion joint bricks. -
Page 23: Laying Firebricks
Installation | 5 5.5.2 Laying firebricks The included fireclay diagram shows the exact layout of all firebricks, ceramic fibre mats and insulating panels. For the sake of simplicity, all normal bricks and expansion joint bricks of AK60 quality appear slightly darker in the fireclay diagram. M2510022_en | Installation instructions Lambdamat LM 650-750 KOM... -
Page 24: Installing The Boiler
5 | Installation 5.6 Installing the boiler 5.6.1 General information NOTICE Reduction in performance due to air leakage The use of flanges without sealing cords can result in a reduction in performance due to air leakage Therefore: r Sealing cords or the surface sealant provided must be used on all the flanged connections on the following components: loading;... -
Page 25: Installing The Hydraulic Stoker Unit
Installation | 5 5.6.3 Installing the hydraulic stoker unit r Fit hydraulic stoker unit to slide-on duct. r Align the entire stoker unit with the adjustable feet. 5.6.4 Fitting the burn back slide valve The burn back slide valve can be positioned as shown below depending on the space available in the installation room –... -
Page 26: Installing The Air Controllers
5 | Installation 5.6.5 Installing the air controllers r Remove the blanking plate from the two secondary air boxes (A) and the primary air box (B). r Insert the air damper in the air box. Ä Short air damper shaft: secondary air box (A) Ä... -
Page 27: Fitting The Immersion Sleeves For The Thermal Discharge Valve And Undergrate Sensor
Installation | 5 5.6.6 Fitting the immersion sleeves for the thermal discharge valve and undergrate sensor r Seal the immersion sleeves for the thermal discharge valve in top of heat exchanger. r Seal the immersion sleeve for the undergrate sensor on the same side of the boiler as the combustion air fan. -
Page 28: Fitting The Insulation Base Frame
5 | Installation 5.6.8 Fitting the insulation base frame Overview: Front left corner rod L = 4158 mm 10 Bottom right lengthways strut L = 3733 mm Front right corner rod L = 4158 mm 11 Bottom cross-piece L = 1638 mm Back left corner rod L = 4158 mm 12 Top cross-piece... - Page 29 Installation | 5 r Position the four corner rods (1-4) on the boiler Ä Distinctive feature: the front ones have a cut-out for ring bolts (B), the back ones have extra lugs (A) – see overview r Join the corner rods (1-4) to the bottom cross-piece (11) at the front and back of the boiler 9,10 r Join the front corner rods (1-2) and back corner rods (3-4) to the bottom lengthways...
- Page 30 5 | Installation r Fit the top two cross-pieces (12) to the back of the boiler r Fit the short cross-pieces (13) to the corner rods (1, 2) r Fit the lengthways strut (8) to the corner rods and the central rods r Place eight top cover plates (A) on the boiler as shown in the diagram and secure to the lengthways strut (8) Note the layout:...
-
Page 31: Fitting The Side Panels
Installation | 5 5.6.9 Fitting the side panels Use the supplied countersunk head screws with slit and cup washers to fit the side panels. NOTICE! Only hand-tighten screws to avoid damage and deformation to the side panels! r Cut out all the pre-cut perforations required for the boiler on the side panels. r Fit the side panels as shown to the left and right-hand side of the boiler. - Page 32 5 | Installation r Take out the perforations for the brackets and remove the burrs using a half-round file. r Fit the side panels as shown to the left and right-hand side of the boiler. r Fit the frame sections to the flue gas chamber insulation as shown. r Fit the flue gas chamber insulation to the side of the corner rods and beneath the cross-piece.
- Page 33 Installation | 5 r For stoker unit with screw: Cut out the perforation (A) on the back panels and tilt the parts angled by hand (B) back 90°. r Insert and fit the two back panels on the stoker. r For stoker unit with screw: fit the cover plates (A) to the left and right of the stoker duct.
-
Page 34: Fitting Various Covers
5 | Installation 5.6.10 Fitting various covers r Fit the covers to the flow and return connection and to the safety valve connection r Installing the cover of the safety heat exchanger Fit all the covers: r Supply air box (A) r Entire FGR piping (B) r Door frame (C) r Primary air and two secondary air dampers... -
Page 35: Fitting The Door Contact Switch
Installation | 5 5.6.11 Fitting the door contact switch Before fitting the insulation panels, check that the tunnel door and the combustion chamber door are tight as explained below. r Open the door. r Insert a sheet of paper at both the top and the bottom between the door and the boiler. r Close the door. - Page 36 5 | Installation r Stick the stickers provided (irritant, hot surface) to the centre of the insulation sheet. r Fit the trigger plate (A) to the insulation sheet using two screws. r Secure the mounting bracket (B) to the front part. Ä...
-
Page 37: Fitting The Combustion Chamber Ash Removal Unit (Optional)
Installation | 5 5.6.12 Fitting the combustion chamber ash removal unit (optional) The ash container for removing ash from the combustion chamber by ash screw can be fitted to the right or left-hand side of the boiler. The following steps show how to fit it to the right-hand side of the boiler. - Page 38 5 | Installation r Fit the torque support (1) to the geared motor (2) r Fit the geared motor (2) onto the shaft stub Ä Ensure that the key slot the shaft stub is aligned with the key slot in the geared motor r Slide the key (3) into the groove and install the shaft retainer (4) r Press the clamp (1) forwards and remove the cover plate of the ash cans...
-
Page 39: Installing The Underpressure Controller
Installation | 5 5.6.13 Installing the underpressure controller The underpressure controller should be fitted to the same side of the boiler as the FGR blower fan. r Assemble the double thread nipple (1), reduction union (2) and hose nipple (3). r Screw the assembled unit onto the side of the combustion chamber from which the blanking plug was previously removed. -
Page 40: Fitting The Lambda Probe And Various Sensors
5 | Installation 40-50mm r Screw in the flanged pipe (4). r Fit the counter flange (5). r Insert the combustion chamber temperature sensor (6) so that it projects by approx. 40 - 50 mm into the combustion chamber (7). r Fix in position on the counter flange with the clamping screws by hand. Connecting the combustion chamber temperature sensor: r Unscrew the connector box cover (7). -
Page 41: Installing The Servo-Motors
Installation | 5 Insert the following sensors into the respective immersion sleeves: r A: Return sensor r B: Capillary of high-limit thermostat (STL) r C: Sensor of thermal discharge safety device r D: Sensor of thermal discharge safety device r E: Boiler sensor r F: Undergrate temperature sensor (on same side of boiler as combustion air fan) r Fit STL housing to side panel using screws provided... -
Page 42: Fitting The Combustion Air Fan
5 | Installation r Plug the servo-motors for primary air and secondary air into the pneumatic rods on the side where the respective air controllers were previously fitted. Ä Picture shows servo-motor for secondary air on right-hand side of boiler. 5.6.17 Fitting the combustion air fan r Stick seal cord (A) to connection flange. -
Page 43: Fitting The Automatic Ignition (Optional)
Installation | 5 5.6.18 Fitting the automatic ignition (optional) The automatic ignition is fitted to the left or right-hand side of the boiler, therefore, perform the following steps on both sides. r Remove the blanking plate (1). r Screw in the igniter tube (2) and seal. r Place the double wire hose clip (3) on the igniter tube (2). -
Page 44: Fitting The Compressed Air Cleaner (Optional)
5 | Installation 5.6.20 Fitting the compressed air cleaner (optional) The compressed air cleaner is fitted to the stop side of the reversing chamber door. The following steps show how to fit it to the right-hand side of the boiler. The procedure for fitting it to the left-hand side is the same, just on the opposite side. -
Page 45: Fitting The Ash Sliding System (Optional)
Installation | 5 5.6.21 Fitting the ash sliding system (optional) An ash sliding system is required if the boiler is operated with underfloor ash removal and the room in which the ash is removed is not airtight. r Fit the gravity shaft (1) with seal to the underside of the combustion chamber. r Fit the top brackets (2) to the ceiling. -
Page 46: Installing Flue Gas Recirculation Fgr (Optional)
5 | Installation 5.6.22 Installing flue gas recirculation FGR (optional) r Grease the air damper (A) and pressure spring (B) of the T-piece with copper paste. r Fit the T-piece with seal to the pipe. r Use the adjustable feet to support the T-piece on the floor (not pictured). r Fit the pipe with seal to the T-piece. - Page 47 Installation | 5 r Seal the guard (B) as shown with high temperature silicon (C) and insert in the flue pipe clip (A). r Remove the U-sheets (A) from the FGR blower fan. Ä These are no longer required. r Stick on the seal cord (B) and fit the transition piece (C). r Remove the drive assembly (D) from the FGR blower fan.
- Page 48 5 | Installation r Position the pipes at the side of the boiler and at the secondary air box and calculate the required length. r Remove the pipes and shorten accordingly. NOTICE! Twist the pipe bends provided to 90° and seal the connections with high temperature silicon as shown.
- Page 49 Installation | 5 r Connect the secondary air box piping behind the boiler. r Fit the support (A) to the pipe bend with the flange, adjust the height and anchor to ground. r Finish the piping. NOTE: All of the piping and FGR blower fan must be insulated by the customer. Make sure the drive assembly of the blower fan can be removed.
-
Page 50: Flue Gas Piping
5 | Installation 5.7 Flue gas piping r Fit the multicyclone (1) and ID fan (2) according to the installation diagram provided and connect the pipes to the boiler. The ID fans can be fitted to different brackets. The following steps explain how to fit the induced draught fan to a wall bracket. -
Page 51: Hydraulic Connection
Installation | 5 5.8 Hydraulic connection 5.8.1 Thermal discharge safety device connection Thermal discharge valve ▪ The thermal discharge safety device must be connected in accordance with ÖNORM/ DIN EN 303-5 and as shown in the diagram above ▪ The discharge safety sensor must be connected to a pressurised cold water mains supply (temperature ≤... - Page 52 5 | Installation ▪ The diaphragm pressurised expansion tank must conform to EN 13831 and hold at least the maximum expansion volume of the heated water in the system, including a water seal ▪ Its size must comply with the design information in EN 12828 - Appendix D ▪...
- Page 53 Installation | 5 105°C click r Secure rotary drive to zone valve Ä The rotary drive must audibly engage! r Connect the cable of the rotary drive to the “Valve thermal discharge safety device” contact in the control cabinet, observing the circuit diagram of the boiler! r Set the high-limit thermostat (STL) to 105 °C and install it according to the installation manual for the boiler M2510022_en | Installation instructions Lambdamat LM 650-750 KOM...
-
Page 54: Connecting Up The Slide-On Duct Cooling
5 | Installation 5.8.2 Connecting up the slide-on duct cooling 1 Boiler flow 2 Boiler return 3 Slide-on duct for the flow 4 Thermometer (recommended) 5 Drain cock 6 Slide-on duct for the return 7 Gate valve / ball valve 8 Slide-on duct for the loading pump: ▪... -
Page 55: Power Connection And Wiring
Installation | 5 5.9 Power connection and wiring DANGER When working on electrical components: Risk of electrocution! When work is carried out on electrical components: r Always have work carried out by a qualified electrician r Observe the applicable standards and regulations Ä... -
Page 56: Commissioning
6 | Commissioning 6 Commissioning 6.1 Before commissioning / configuring the boiler The boiler must be configured to the heating system during initial start-up! NOTICE Optimum efficiency and efficient, low-emission operation can only be guaranteed if the system is set up by trained professionals and the standard factory settings are observed. Take the following precautions: r Initial startup should be carried out with an authorised installer or with Froling customer services... -
Page 57: Compressed Air Cleaner (Optional)
Commissioning | 6 6.1.1 Compressed air cleaner (optional) If there is a compressed air cleaner installed for the heat exchanger, check the following settings: r Maximum pressure: 4 bar Ä Set mechanically on pressure reducer r Compressed air monitor setting: 2 bar Set the following parameters on the mecair controller of the compressed air cleaner: r Pulse time: 0.5 secs. - Page 58 6 | Commissioning Wood pellets Wood pellets made from natural wood with a diameter of 6 mm Note on standards Fuel acc. to EN ISO 17225 - Part 2: Wood pellets class A1 / D06 and/or: ENplus / DINplus certification scheme General note: Before refilling the store, check for pellet dust and clean if necessary.
-
Page 59: Non-Permitted Fuels
Commissioning | 6 6.2.2 Non-permitted fuels The use of fuels other than those defined in the "Permitted fuels" section, and particularly the burning of refuse, is not permitted NOTICE In case of use of non-permitted fuels: Burning non-permitted fuels increases the cleaning requirements and leads to a build-up of aggressive sedimentation and condensation, which can damage the boiler and also invalidates the guarantee! Using non-standard fuels can also lead to serious problems with combustion! -
Page 60: Screed Drying
6 | Commissioning The individual steps for initial start-up are explained in the operating instructions for the controller. NOTICE! See operating instructions for the SPS 4000 NOTICE! Fissures in the fireclay are normal and do not indicate a fault. NOTICE If condensation escapes during the initial heat-up phase, this does not indicate a fault. r Tip: If this occurs, clean up using a cleaning rag. -
Page 61: Decommissioning
Decommissioning | 7 7 Decommissioning 7.1 Out of service for long periods The following measures should be taken if the boiler is to remain out of service for several weeks (e.g. during the summer): r Clean the boiler thoroughly and close the doors fully. r Place approx. - Page 62 M2510022_en | Installation instructions Lambdamat LM 650-750 KOM...
- Page 63 M2510022_en | Installation instructions Lambdamat LM 650-750 KOM...
- Page 64 Manufacturer’s address Froling srl Froling SARL Fröling Heizkessel- und Zweigniederlassung Behälterbau GesmbH Aschheim Industriestraße 12 Max-Planck-Straße 6 Via J. Ressel 2H 1, rue Kellermann A-4710 Grieskirchen 85609 Aschheim I-39100 Bolzano (BZ) F-67450 Mundolsheim +43 (0) 7248 606 0 +49 (0) 89 927 926 0 +39 (0) 471 060460 +33 (0) 388 193 269 info@froeling.com...
Need help?
Do you have a question about the Lambdamat LM 650 KOM and is the answer not in the manual?
Questions and answers