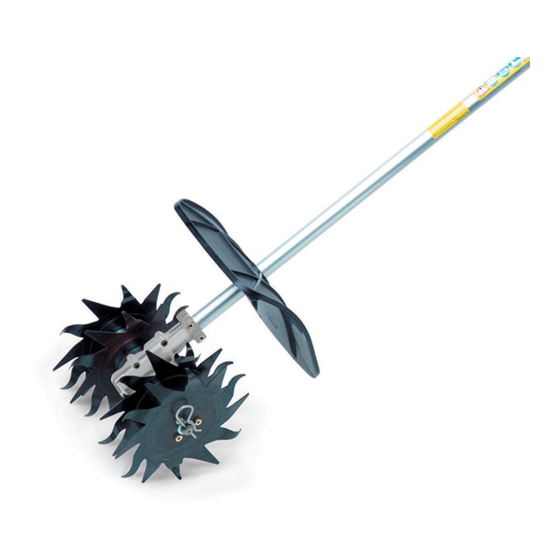
Stihl BF Instruction Manual
Hide thumbs
Also See for BF:
- Instruction manual (45 pages) ,
- Instruction manual (48 pages) ,
- Instruction manual (20 pages)
Table of Contents
Advertisement
Quick Links
Advertisement
Table of Contents

Summary of Contents for Stihl BF
- Page 1 2 - 16 Instruction Manual...
-
Page 2: Table Of Contents
Caution where there is a risk of damaging the machine or its individual components. Engineering improvements STIHL's philosophy is to continually improve all of its products. For this reason we may modify the design, engineering and appearance of our products periodically. - Page 3 Only mount rotor blades and accessories that of a resistant material (e. g. leather). are explicitly approved for this power tool by STIHL or are technically identical. If you have any questions in this respect, consult your STIHL offers a comprehensive range of personal dealer.
- Page 4 English 3 Safety Precautions and Working Techniques To prepare for emergencies when using a har‐ ness: Practice setting down the machine quickly. To avoid damage, do not throw the machine to the ground when practicing. Holding and Guiding the Tool Make sure you always have a firm and secure footing.
- Page 5 – there is otherwise a risk of injury! STIHL recommends that you have servicing and repair work carried out exclusively by an author‐ Opening the throttle while the rotor blades are ized STIHL servicing dealer.
-
Page 6: Using The Unit
(1) and backward (2) directions, from left to right or vice versa (3) or in a circular motion. STIHL recommends the use of genuine STIHL replacement parts. They are specifically Choose the best method to suit your purpose, designed to match your model and meet your i.e. -
Page 7: Approved Basic Power Tools
FS 120, FS 130, FS 200, FS 240, FS 250 – Switch off the cultivator and wait until the – STIHL HL 75, HL 95, HL 100 The BF attach‐ blades come to a complete standstill. ment is not approved for use on machines with –... -
Page 8: Mounting The Attachment
The following machines must be retrofitted with a loop handle and, if necessary, a carrying ring for a harness/shoulder strap: – STIHL HL 75, HL 95, HL 100, all versions with 0° gearbox. The BF attachment is not approved for use on machines with a short drive tube. - Page 9 6 Mounting the Attachment English SP 10 ► Loosen but do not remove the clamp screws (arrows) on the gearbox housing. ► Pull the gearbox off the shaft. If the drive shaft slips out of the tube when you pull off the gearbox: ►...
-
Page 10: Fitting The Carrying Ring
English 7 Fitting the Carrying Ring Adjusting the loop handle WARNING ► Loosen the screws on the loop handle. ► Continue with "Mounting the Loop Handle". Check that the deflector cannot rotate on the shaft anymore. Mounting the Rotor Blades Take care not to lose the two washers on the Installing the gearbox gearbox output shaft. -
Page 11: Mounting The Loop Handle
► Slide the sleeve (2) so that it is in front of the carrying ring (3). 8.1.3 Position of Handle Hose on SP 81 A movable handle hose (2) is fitted on the drive tube of the STIHL SP 81. 0458-504-0121-B... -
Page 12: Fitting The Harness
English 9 Fitting the Harness Adjusting and Securing the ► Slide the handle hose (2) so that it is in front of the carrying ring (3). Loop Handle If a loop handle is already fitted: ► Align the loop handle and secure it in position –... - Page 13 9 Fitting the Harness English Shoulder Strap ► Put on the harness (1) and close the locking plate (3). ► Adjust the length of the strap – with the machine attached, the carabiner (2) must be about a hand's width below your right hip. Attaching Machine to Harness ►...
-
Page 14: Starting / Stopping The Engine
English 10 Starting / Stopping the Engine Throwing Off the Machine NOTICE WARNING Do not stand or kneel on the drive tube. The machine must be quickly thrown off in the event of imminent danger. To throw off the WARNING machine, use the procedure described under The blades may begin to rotate as soon as the "Detaching Machine from Harness". -
Page 15: Main Parts
If these maintenance operations cannot be performed by the owner, they should be performed by a servicing dealer. STIHL recommends that you have servicing and repair work carried out exclusively by an author‐ ized STIHL servicing dealer. STIHL dealers are... -
Page 16: Maintenance And Repairs
15.4 REACH REACH is an EC regulation and stands for the Registration, Evaluation, Authorization and ► Take STIHL products including packaging to a Restriction of Chemical substances. suitable collection point for recycling in accord‐ ance with local regulations. For information on compliance with the REACH ►... - Page 17 17 Disposal English 0458-504-0121-B...
- Page 18 English 17 Disposal 0458-504-0121-B...
- Page 19 17 Disposal English 0458-504-0121-B...
- Page 20 *04585040121B* 0458-504-0121-B...


Need help?
Do you have a question about the BF and is the answer not in the manual?
Questions and answers