Advertisement
Quick Links
1. About Your Camera
About this Manual
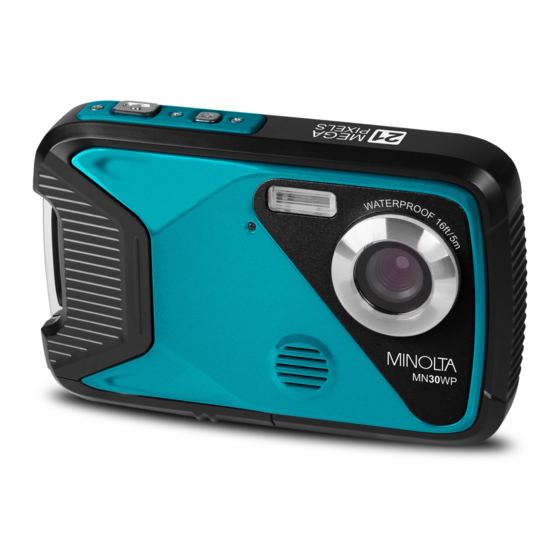
Congratulations on purchasing the Minolta MN30WP Waterproof Camera!
The contents of this manual are subject to change without notice. Note that the
example screens and product illustrations shown in this User's Guide may differ
somewhat from the screens and configuration of the actual camera.
Copyright
This manual contains proprietary information protected by copyright. All rights
are reserved. No part of this manual may be reproduced by any mechanical,
electronic or other means, in any form, without prior written permission of Elite
Brands Inc. © 2022.
FEDERAL COMMUNICATIONS COMMISSION INTERFERENCE
STATEMENT
This equipment has been tested and found to comply with the limits for a Class
B digital device, pursuant to Part 15 of the FCC Rules. These limits are
designed to provide reasonable protection against harmful interference in a
residential installation. This equipment generates, uses and can radiate radio
frequency energy and, if not installed and used in accordance with the
instructions, may cause harmful interference to radio communications.
However, there is no guarantee that interference will not occur in a particular
installation. If this equipment does cause harmful interference to radio or
television reception, which can be determined by turning the equipment off and
on, the user is encouraged to try to correct the interference by one or more of
the following measures:
• Reorient or relocate the receiving antenna.
• Increase the separation between the equipment and receiver.
• Connect the equipment into an outlet on a circuit different from that to which
the receiver is connected.
• Consult the dealer or an experienced radio/TV technician for help.
CAUTION:
Any changes or modifications not expressly approved by the party responsible
for compliance could void the user's authority to operate the equipment.
This device complies with Part 15 of the FCC Rules. Operation is subject to the
following two conditions:
(1)
This device may not cause harmful interference and
(2)
This device must accept any interference received, including interference
that may cause undesired operation.
RF Exposure Warning
This equipment complies with FCC RF radiation exposure limits set forth for an
uncontrolled environment. This equipment must be installed and operated in
accordance with provided instructions and must not be co-located or operating
in conjunction with any other antenna or transmitter. End-users and installers
3
Advertisement

Related Manuals for Minolta MN30WP


Summary of Contents for Minolta MN30WP
- Page 1 1. About Your Camera About this Manual Congratulations on purchasing the Minolta MN30WP Waterproof Camera! The contents of this manual are subject to change without notice. Note that the example screens and product illustrations shown in this User’s Guide may differ somewhat from the screens and configuration of the actual camera.
- Page 2 1. About Your Camera must be provided with antenna installation instructions and transmitter operating conditions for satisfying RF exposure compliance. FCC: SAR standard Value: 1.6 W/Kg, Maximal Measure: 0.4 W/kg CE Mark Warning This is a Class B product, in a domestic environment, this product may cause radio interference, in which case the user may be required to take adequate measures.
- Page 3 1. About Your Camera • If the battery's color or shape changes in any way, stop using the battery immediately. USB Adaptor Information • Do not expose the adapter to high temperatures or moisture places. Otherwise, it may cause fire or electric shock. •...
- Page 4 1. About Your Camera • Do not use the camera in hot springs. Before Using the Camera Underwater Check the items below before using the camera underwater. • Make sure that there are no foreign substances inside the battery cover. •...
- Page 5 1. About Your Camera the image sensor to deteriorate or produce a white blur effect in photographs. Turn the Product Off before Removing or Disconnecting the Power Source or Memory Card Do not remove the battery while the product is on, or while images are being saved or deleted.
- Page 6 1. About Your Camera • The battery temperature may increase during charging. However, this is not a malfunction. Using the Battery When Cold On cold days, the capacity of batteries tends to decrease. If an exhausted battery is used at a low temperature, the camera may not turn on. Keep spare batteries in a warm place and exchange as necessary.
- Page 7 1. About Your Camera • Place exposed to temperatures above 50°C (122°F) or below -10°C (14°F). • Place next to equipment that produces strong electromagnetic field, such as television or radios. To prevent mold or mildew, take the camera out of storage at least once a month, and turn it on and release the shutter a few times before putting it away again.
- Page 8 3. Using Your Camera 1.1 Camera Interface 1. Shutter 2. Power 3. LED Flash 4. Lens 5. Speaker 6. Self-Timer Indicator 7. LCD Screen 8. Menu 9. Mode 10. Charging Indicator 11. Zoom In / Up 12. Flash / Right 13.
- Page 9 3. Using Your Camera 1.2 Button Function Description Function Description Power Tap to power on or off. Menu Tap to access the settings menu. In Video or Photo: Press to zoom-out. Zoom Out | In Settings: Press to select desired setting. Down In Playback: Press to view multiple images on the screen.
-
Page 10: First Use
3. Using Your Camera Built-in speaker output for playback of video files Speaker when audio recording is enabled. Lens Front capture device for all video and photo. 2. First Use 2.1 To Open the Battery Door Unlock the battery door by sliding the battery door notch toward the back of the camera. - Page 11 3. Using Your Camera 2. Insert the memory card. Ensure that the metal contacts are inserted first. Push the memory card down until you hear an audible click. The memory card can only be inserted in one way. Do not force the card in if it will not go in smoothly.
- Page 12 3. Using Your Camera 2.4 To Lock the Battery Door 1. Press the battery door down firmly until it is completely flat. 2. While the battery door is pressed down, slide the door to the closed position, the battery door is fully locked once the latch clicks into place. 2.5 Charging the Battery Connect your camera to the included AC adaptor with the USB cable provided for charging.
- Page 13 3. Using Your Camera 2.9 Using the Zoom Function This camera has a digital zoom function. To operate the zoom function, press the ZOOM-IN button to zoom in closer to the subject, and press the ZOOM-OUT button zoom away from the subject.
- Page 14 3. Using Your Camera 2.10 Photo Mode Press the MODE button to switch to Photo Mode. The meaning of each icon within Photo Mode is explained in the table below: 1) Photo Mode 7) Pictures Remaining 13) Image Quality 2) Image Size (Resolution) 8) Zoom 14) ISO 3) Scene...
- Page 15 3. Using Your Camera 2.11 Video Mode Press the MODE button to switch to Video Mode. The meaning of each icon within Video Mode is explained in the table below: 1) Video Mode 6) Exposure 2) Video Size (Resolution) 7) White Balance 3) Video Time Remaining 8) Video Sharpness 4) Zoom...
- Page 16 3. Using Your Camera 2.12 Audio Recording Mode Press the MODE button to switch to Audio Recording Mode. The meaning of each icon within Video Mode is explained in the table below: 1) Audio Recording Mode 2) Recording Time Remaining 3) Battery Level 4) Memory Card Inserted...
-
Page 17: Using The Camera
3. Using Your Camera 3. Using the Camera 3.1 Photo Shooting Power the camera on and it will be ready to take pictures right away. You may press the MODE button to switch to another mode. 1. Line up your shot by looking at the LCD screen to see what is in the shot. 2. - Page 18 3. Using Your Camera 3. Press the UP or DOWN buttons to navigate the menu, and press the OK button to confirm your selected option (Off, On). 4. Press the MENU button to exit the settings menu without making a selection.
- Page 19 3. Using Your Camera 1. In Photo Mode press the MENU button. 2. Select ‘Shooting’ using the LEFT or RIGHT buttons. 3. Select ‘Panorama’ using the UP or DOWN buttons and press OK to enter the Panorama menu. 4. Press the UP or DOWN buttons to navigate the menu, and press the OK button to confirm your selected option (Off, Right).
- Page 20 3. Using Your Camera 5. To set the current date and time use the UP or DOWN buttons to select Set Date, and press the OK button to enter the Set Date menu. 6. Use the UP or DOWN buttons to change the highlighted field. 7.
- Page 21 3. Using Your Camera button to confirm your selected option (60 Hz, 50 Hz) the default frequency for the United States is 60Hz. 5. Press the MENU button to exit the settings menu without making a selection. 3.1.13 Image Setting – Image Quality The Photo Quality function determines the level of compression the camera uses when saving photos to a memory card.
- Page 22 3. Using Your Camera selection. 3.1.16 Image Setting – Saturation This function adjusts the intensity of the color in the photo. 1. In Photo Mode press the MENU button. 2. Select ‘Image Setting’ using the LEFT or RIGHT buttons. 3. Select ‘Saturation’ using the UP or DOWN buttons and press OK to enter the Saturation menu.
- Page 23 3. Using Your Camera the Language menu. 4. Press the UP or DOWN buttons to navigate the menu, and press the OK button to confirm your selected language. 5. Press the MENU button to exit the settings menu without making a selection.
- Page 24 3. Using Your Camera 3.2 Video Recording Power the camera on and press the MODE button to switch to Video mode. A camcorder icon will appear in the top left hand corner of the screen when you are in Video mode. 1.
- Page 25 3. Using Your Camera 4. Press the UP or DOWN buttons to navigate the menu, and press the OK button to confirm your selected option (Auto, Daylight, Cloudy, Incandescent, Florescent). 5. Press the MENU button to exit the settings menu without making a selection.
- Page 26 3. Using Your Camera 3.2.7 Image Setting – Effect This function sets the color filter effect of a photograph. 1. In Video Mode press the MENU button. 2. Select ‘Image Setting’ using the LEFT or RIGHT buttons. 3. Select ‘Effect’ using the UP or DOWN buttons and press OK to enter the Effect menu.
- Page 27 3. Using Your Camera Select ‘Setup’ using the LEFT or RIGHT buttons. Select ‘Sound Effect’ using the UP or DOWN buttons and press OK to enter the Sound Effect menu. 4. Press the UP or DOWN buttons to navigate the menu, and press the OK button to confirm your selected option (Off, On).
- Page 28 3. Using Your Camera 3.2.14 Setup – Format (Memory Card) The format setting erases all photos, videos and data stored on your memory card. 1. In Video Mode press the MENU button. 2. Select ‘Setup’ using the LEFT or RIGHT buttons. 3.
- Page 29 3. Using Your Camera 3.3 Audio Recording Mode Power the camera on and press the MODE button twice to switch to Audio Recording mode. A microphone icon will appear in the top left-hand corner of the screen when you are in Video mode. 1.
- Page 30 3. Using Your Camera 3.4 Playback Mode Photos, videos and audio recordings captured on your camera can be easily played back. 1. Press the PLAYBACK button to enter Playback mode. 2. Press the LEFT or RIGHT buttons to cycle through the captured photos, videos and audio recordings stored on the memory card.
- Page 31 3. Using Your Camera 4. Press the MENU button to exit the settings menu without making a selection. 3.4.3 Delete This function is used to delete photos and videos. Photos and videos can be deleted singly or all at once. 1.
- Page 32 3. Using Your Camera 4.1 Technical Specifications Model Number Minolta MN30WP Fixed Focus • f=5.3mm • F/2.4 Lens Zoom 4X Digital Zoom Electronic • Anti-Shake Image Stabilization Shutter JPEG: 21 MP • 16 MP • 12 MP • 8 MP • 5 MP • 3 MP •...
- Page 33 Minolta is a registered trademark of JMM Lee Properties, LLC and is used in the United States by Elite Brands Inc. under license. 40 Wall Street, 61st Floor, New York, NY 10005 USA • Tel: 800-441-1100 www.minoltadigital.com • www.elitebrands.com Copyright © 2022 Elite Brands Inc.
Need help?
Do you have a question about the MN30WP and is the answer not in the manual?
Questions and answers