
Subscribe to Our Youtube Channel
Related Manuals for Digital Watchdog MEGApix DWC-MT95WiATW


Summary of Contents for Digital Watchdog MEGApix DWC-MT95WiATW
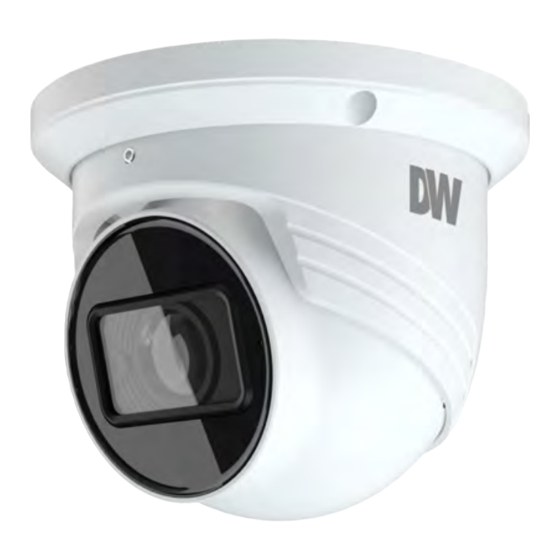
- Page 1 MEGApix ® 5MP Turret IP Camera DWC-MT95WiATW User’s Manual Ver. 01/22 Before installing and using the camera, please read this manual carefully. Be sure to keep it handy for future reference.
- Page 2 Safety Notes This product is intended to be supplied by a Listed Power Unit, marked with 'Limited Power Source', 'LPS' on the unit, output rated minimum 12V/2 A or POE 48V/ 350mA or AC24V (depending on models), no more than 2000m altitude of operation and 60 degrees C.
- Page 3 Regulatory Information FCC Information FCC compliance The products have been tested and found in compliance with the council FCC rules and regulation’s part 15 subpart B. These limits are designed to provide reasonable protection against harmful interference. This equipment generates uses and can radiate radio frequency energy and, if not installed and used following the instruction manual, may cause harmful interference to radio communication.
-
Page 4: Table Of Contents
Table of Contents Introduction ..........................1 Product and Accessories ....................................1 Parts identification ......................................1 Installation ..........................2 Installation....................................2 Cabling .............................................3 Managing the SD Card ....................................3 Network Setup ........................4 IP Finder ..........................................4 Live View ..........................6 Network Camera Configuration ..................8 System Configuration .................................... -
Page 5: Introduction
1 Introduction 1.1 Product and Accessories Number Description Number Description Network Cable Rotation Screw Audio Input Built-in Microphone Power Cable Micro SD Card Slot Mounting Base Reset Button... -
Page 6: Installation
2 Installation 2.1 Installation The mounting surface must be able to bear at least five times the weight of your camera. Do not let the cables get caught in improper places or the electric line cover be damaged. This may cause a breakdown or fire. Using the mounting template sheet or the camera itself, mark and drill the necessary holes in the wall or ceiling. -
Page 7: Cabling
into place to complete the installation. 2.2 Cabling When using a PoE Switch or PoE Injector, connect the camera using an Ethernet cable for both data and power. When not using PoE Switch or PoE Injector, connect the camera to the switch using an Ethernet cable for data transmission and use a power adapter to power the camera. -
Page 8: Network Setup
3 Network Setup 3.1 IP Finder Use the DW® IP Finder™ software to scan the network and detect all MEGApix® cameras, set the camera’s network settings or access the camera’s web client. Network Setup To install the DW IP Finder, go to http://www.digital-watchdog.com. Enter “DW IP Finder”... - Page 9 When connecting to the camera for the first time, a password must be set. To set up a password for your new camera: Check the box next to your new camera from the IP Finder’s search results. You can select multiple cameras. Click “Bulk Password Assign”...
-
Page 10: Live View
4 Live View Once the camera’s network settings have been setup properly, you can access the camera’s web viewer. To open the camera using the DW IP Finder: Find the camera using the DW IP Finder. Double-click on the camera’s view in the results table. Press the ‘View Camera Website’. - Page 11 Icon Description Icon Description Original size Zoom in and out AZ control (only available for Fit correct scale the model with motorized zoom lens) Auto (fill the window) SD card recording indicator Sensor alarm (on supported Fullscreen models) Motion alarm (on supported Start/stop live view models) Start/stop two-way audio...
-
Page 12: Network Camera Configuration
5 Network Camera Configuration In the camera’s web client, click on the “Config” tab on the top right to go to the setup menu. Note: Where applicable, click the “Save” button to save changes to the settings. 5.1 System Configuration 5.1.1 Basic Information Basic Information lists the system information of the device including model, name, firmware version, Mac address and more. -
Page 13: Local Config
5.1.3 Local Config To set up the storage path for images and videos on the local PC, go to Config > System > Local Config. Users can also enable or disable the bitrate display in the recorded files. If “Local smart snapshot storage” is enabled, captured pictures triggered by smart events (line crossing, perimeter intrusion, etc.) will be saved to the local 5.1.4 Storage Go to Config >... - Page 14 below. 2. Set record stream, pre-record time, cycle writing. Pre Record Time: Set the time to record before the actual recording begins. 3. Set schedule recording. Check “Enable Schedule Record” and set the schedule. Weekly schedule Set the alarm time from Monday to Sunday for a single week. Each day is divided into one-hour increments.
-
Page 15: Image Configuration
Note: Holiday schedule takes priority over weekly schedule. Snapshot Settings Go to Config System Storage Snapshot to go to the interface as shown > > > below. Set the format, resolution and quality of the image saved on the SD card and the snapshot interval and quantity and the timing snapshot here. - Page 16 contrast, hue and saturation and so on for common, day and night mode can be set up separately. The image effect can be quickly seen by switching the configuration file. Brightness: Set the brightness level of the camera’s image. Contrast: Set the color difference between the brightest and darkest parts. Hue: Set the total color degree of the image.
- Page 17 Lens Distortion Correction: When the image appears distorted to some extent, please enable this function and adjust the level according to the actual scene to correct the distortion. (On supported models.) Auto Iris: If your camera is auto Iris, please enable it. Backlight Compensation (BLC): Off: disables the backlight compensation function.
-
Page 18: Video / Audio Configuration
Schedule Settings of Image Parameters: Click the “Schedule” tab as shown below. Set a full schedule for common, day, night mode and specified schedule for day and night. Choose “Schedule” in the drop-down box of schedule as shown below. Drag “ ” icons to set the time of day and night. Blue means daytime and blank means nighttime. - Page 19 Three video streams can be adjustable. Resolution: Adjust the stream’s resolution from the available options in the drop-down menu. Frame rate: The higher the frame rate, the video is smoother. Bitrate type: CBR and VBR are optional. Bitrate is related to image quality. CBR means that no matter how much change is seen in the video scene, the compression bitrate will be kept constant.
-
Page 20: Osd Configuration
5.2.3 OSD Configuration Go to Image > OSD interface as shown below. Set time stamp, device name, OSD content and picture overlap here. After enabling the corresponding display and entering the content, drag them to change their position. Then click the “Save” button to save the settings. Picture Overlay Settings: Check “OSD Content1”, choose “Picture Overlay”... -
Page 21: Roi Configuration
To set up a video mask: 1. Enable video mask. 2. Click the “Draw Area” button and then drag the mouse to draw the video mask area. 3. Click the “Save” button to save the settings. 4. Return to the live to verify that the area has been drawn as shown as blocked out in the image. -
Page 22: Zoom/Focus
1. Check “Enable” and then click the “Draw Area” button. 2. Drag the mouse to set the ROI area. 3. Set the level. 4. Click the “Save” button to save the settings. 5.2.6 Zoom/Focus This function is only available for models with a motorized zoom lens. Within this section, zoom and focus can be controlled. -
Page 24: Alarm Configuration
5.3 Alarm Configuration 5.3.1 Motion Detection Go to Alarm > Motion Detection to set a motion detection alarm. 1. Check the “Enable” check box to activate motion-based alarms. If unchecked, the camera will not send out any signals to trigger motion-based recording to the NVR or CMS, even if there is motion in the video. -
Page 25: Other Alarms
Move the “Sensitivity” scroll bar to set the sensitivity. A higher sensitivity value means that motion will be triggered more easily. Select “Add” and click “Draw”. Drag the mouse to draw the motion detection area; Select “Erase” and drag the mouse to clear the motion detection area. After that, click the “Save”... - Page 26 2. Click “Enable” and set the alarm holding time. 3. Set alarm trigger options. Trigger alarm out, Email and FTP. The setup steps are the same as motion detection. Please refer to the motion detection chapter for details. IP Address Conflict This function is only available for models with alarm output.
-
Page 27: Alarm In
2. Click “Enable” and set the alarm holding time. 3. Trigger alarm out. When the camera is disconnected, the system will trigger the alarm out. 5.3.3 Alarm In This function is available for cameras with alarm input support. To set sensor alarm (alarm in): Go to Config >... - Page 28 Alarm Out Mode: Alarm linkage, manual operation, day/night switch linkage and timing are optional. Alarm Linkage: Select an alarm out name, alarm holding time at the “Alarm Holding Time” pull-down list box and alarm type. Manual Operation: Select the alarm type and click “Open” to trigger the alarm out immediately;...
-
Page 29: Event Configuration
5.4 Event Configuration For more accuracy, here are some recommendations for installation. Cameras should be installed on stable surfaces, as vibrations can affect the accuracy of detection. Avoid pointing the camera at the reflective surfaces (like shiny floors, mirrors, glass, lake surfaces and so on). -
Page 30: Line Crossing
2. Set the alarm holding time and alarm trigger options. The setup steps are the same as motion detection. Please refer to the motion detection chapter for details. 3. Click the “Save” button to save the settings. 4. Set the sensitivity of the Video Tampering detection. Click the “Sensitivity” tab to go to the interface as shown below. - Page 31 1. Detection Target: Human: Select it and then alarms will be triggered if someone crosses the pre-defined alarm lines. Motor Vehicle: Select it and then alarms will be triggered if a vehicle with four or more wheels (e.g., a car, bus, or truck) crosses the pre-defined alarm lines. 2.
-
Page 32: Perimeter Intrusion
line from B to A. Click the “Draw Area” button and then drag the mouse to draw a line in the image. Click the “Stop Draw” button to stop drawing. Click the “Clear” button to delete the lines. Click the “Save” button to save the settings. 6. - Page 33 1. Detection Target: Human: Select it and then alarms will be triggered if someone intrudes into the pre-defined area. Motor Vehicle: Select it and then alarms will be triggered if a vehicle with four or more wheels (e.g., a car, bus, or truck) intrudes into the pre-defined area. 2.
-
Page 34: Network Configuration
6. Make sure cameras can view objects for at least 2 seconds in the detected area for accurate detection. 7. Adequate light and clear scenery are crucial to perimeter intrusion detection. 5.5 Network Configuration 5.5.1 TCP/IP Go to Config > Network > TCP/IP interface as shown below. There are two ways to setup the network connection. -
Page 35: Port
Click “IP Change Notification Config” to go to the interface as shown below. Trigger Email: when the IP address of the device is changed, the new IP address will be sent to the email address that has been set up. Trigger FTP: when the IP address of the device is changed, the new IP address will be sent to an FTP server that has been set up. - Page 36 2. Apply for a domain name. Take www.dvrdyndns.com for example. Enter www.dvrdydns.com in the IE address bar to visit its website. Then click the “Registration” button. Create domain name. After the domain name is successfully applied, the domain name will be listed below.
-
Page 37: Snmp
3. Enter the username, password, domain you apply for in the DDNS configuration interface. 4. Click the “Save” button to save the settings. 5.5.4 SNMP To get camera status, parameters and alarm information and remotely manage the camera, the SNMP function can be used. Before using SNMP, please install an SNMP management tool and set the parameters of the SNMP, such as SNMP port, trap address. - Page 38 Select “Enable” to enable the RTSP function. Port: Access port of the streaming media. The default number is 554. RTSP Address: The RTSP address (unicast) format that can be used to play the stream in a media player. Multicast Address Mainstream: The address format is “rtsp://IP address: rtsp port/profile1?transportmode=mcast”.
-
Page 39: Upnp
5.5.7 UPNP If this function is enabled, the camera can be quickly accessed through the LAN. Go to Config > Network > UPnP. Enable UPNP and then enter UPnP name. 5.5.8 Email If you need to trigger an email when an alarm is triggered or the IP address is changed, please set the Email here first. -
Page 40: Ftp
to 60 seconds and multiple motion detection alarms are triggered within 60 seconds, they will be considered as only one alarm event and only one email will be sent. If one motion alarm event is triggered and then another motion detection alarm event is triggered after 60 seconds, two emails will be sent. - Page 41 There is a certificate installed by default as shown above. Enable this function and save it. Then the camera can be accessed by entering https://IP: https port via the web browser (e.g., https://192.168.226.201:443). A private certificate can be created if users don’t want to use the default one. Click “Delete”...
-
Page 42: Qos
Click “Create” to create the certificate request. Then download the certificate request and send it to the trusted certificate authority for signature. After receiving the signed certificate, import the certificate to the device. 5.5.11 QoS QoS (Quality of Service) function is used to supply different quality of services for different network applications. - Page 43 2. Enter the username in the “Username” textbox. 3. Enter the password in the “Password” and “Confirm Password” textbox. Please set the password according to the requirement of the password security level (Go to Config > Security > Security Management > Password Security interface to set the security level).
-
Page 44: Online User
3. Enter the old password of the user in the “Old Password” text box. 4. Enter the new password in the “New password” and “Confirm Password” text boxes. 5. Enter the computer’s MAC address as necessary. 6. Click the “OK” button to save the settings. Note: To change the access level of a user, the user must be removed and added again with the new access level. -
Page 45: Security Management
The setup steps are as follows: Check the “Enable address filtering” check box. Select “Block/Allow the following address”, IPv4/IPv6/MAC and then enter the IP address or MAC address in the address box and click the “Add” button. 5.6.4 Security Management Go to Config >... -
Page 46: Maintenance Configuration
numbers, special characters, upper case letters, lower case letters. Strong Level: 9~15 characters. Numbers, special characters, upper case letters and lower-case letters must be included. For your account security, it is recommended to set a strong password and change your password regularly. 5.7 Maintenance Configuration 5.7.1 Backup and Restore Go to Config >... -
Page 47: Reboot
5.7.2 Reboot Go to Config > Maintenance > Reboot. Click the “Reboot” button to reboot the device. Timed Reboot Setting: If necessary, the camera can be set up to reboot at a time interval. Enable “Time Settings”, set the date and time and then click the “Save” button to save the settings. -
Page 48: Search
6 Search 6.1 Image Search Click Search to go to the interface as shown below. Images that are saved on the SD card can be found here. Local Image Search Choose “Picture”— “Local”. Set time: Select date and choose the start and end time. Click to search the images. - Page 49 Click to return to the earlier interface. SD Card Image Search Choose “Picture”— “SD Card”. Set time: Select date and choose the start and end time. Choose the alarm events at the bottom of the interface. Click to search the images. Double click a file name in the list to view the captured photos.
-
Page 50: Video Search
Icon Description Icon Description Close: Select an image and Close all: Click this button to click this button to close the close all images. image. Save: Click this button to Save all: Click this button to select the path for saving select the path for saving all the image on the PC. -
Page 51: Sd Card Video Search
Icon Description Icon Description Play button. After pausing the video, click Pause button this button to continue playing. Stop button Speed down Speed up Watermark display Enable/disable audio; drag the slider to adjust the volume after enabling audio. 6.2.2 SD Card Video Search Click Search to go to the interface as shown below. - Page 52 Select the alarm events at the bottom of the interface. Select mix stream (video and audio stream) or video stream as needed. Double click on a file name in the list to start playback. The timetable can be shown in 24H/12H/2H/1H format by clicking the corresponding buttons.
- Page 53 Click to download the video file on the PC. Click “Set up” to set the storage directory of the video files. Click “Open” to play the video. Click “Clear List” to clear the downloading list. Click “Close” to close the downloading window.
-
Page 54: Appendix
7 Appendix 7.1 Troubleshooting How to find the password? A: Reset the device to the default factory settings. Default IP: 192.168.226.201; Username: admin; Password: 123456 Fail to connect devices through IE browser. A: Network is not well connected. Check the connection and make sure it is connected well. - Page 55 No sound can be heard. A: Audio input device is not connected. Please connect and try again. B: Audio function is not enabled at the corresponding channel. Please enable this function.
-
Page 56: Dimensions
7.2 Dimensions... -
Page 57: Specifications
7.3 Specifications DWC-MT95WW2 DWC-MT95Wi2 DWC-MT95Wi3 DWC-MT95WiATW IMAGE Image sensor 5MP 1/2.7" CMOS Total pixels 2592 × 1944 0.02 lux (color) 0.01 lux (color) Minimum scene 0.0 lux (B/W) illumination 0.0 lux (B/W) ≥50dB S/N ratio LENS Focal length 2.8mm, F1.0 2.8mm, F1.6 3.6mm, F1.6 2.8 ~ 12mm, F1.4... - Page 58 OS: Windows® Web viewer Browser: Internet Explorer Video management DW Spectrum® IPVMS software ENVIRONMENTAL Operating temperature -22°F ~ 140°F (-30°C ~ 60°C) Operating humidity 0–95% RH (non–condensing) IP rating IP67-rated IK rating IK10 impact-resistant Other certifications FCC, CE, ROHS, POE, ONVIF ELECTRICAL Power requirement DC 12V, PoE IEEE 802.3af Class 3.
-
Page 59: Warranty
Go to https://digital-watchdog.com/page/rma-landing-page/ to learn more about Digital Watchdog’s warranty and RMA. To obtain warranty or out of warranty service, please contact a technical support representative at: 1+ (866) 446-3595, Monday through Friday from 9:00 AM to 8:00 PM EST. -
Page 60: Limits And Exclusions
If the problem is not handled to your satisfaction, then write to the following address: Digital Watchdog, Inc. ATTN: RMA Department 16220 Bloomfield Ave Cerritos, CA 90703 Service calls that do not involve defective materials or workmanship as determined by the Warrantor, in its sole discretion, are not covered. - Page 61 DW® East Coast office and warehouse: 5436 W Crenshaw St, Tampa, FL USA 33634 DW® West Coast office and warehouse: 16220 Bloomfield Ave, Cerritos, CA USA 90703 PH: 866-446-3595 | FAX: 813-888-9262 www.Digital-Watchdog.com technicalsupport@dwcc.tv Technical Support PH: USA & Canada 1+ 866-446-3595 International 1+ 813-888-9555 French Canadian: + 1-904-999-1309 Technical Support Hours: Monday-Friday 9 a.m.
Need help?
Do you have a question about the MEGApix DWC-MT95WiATW and is the answer not in the manual?
Questions and answers