Table of Contents
Advertisement
Quick Links
Advertisement
Table of Contents

Related Manuals for YASKAWA VIPA HMI PPC021 ES


Summary of Contents for YASKAWA VIPA HMI PPC021 ES
- Page 1 VIPA HMI PPC021 ES PPC | 67S-PNL0 | Manual HB160 | PPC | 67S-PNL0 | GB | 15-26...
- Page 2 VIPA GmbH Ohmstr. 4 91074 Herzogenaurach Telephone: +49 9132 744-0 Fax: +49 9132 744-1864 Email: info@vipa.com Internet: www.vipa.com 67S-PNL0_000_PPC021ES,3,GB - © 2015...
-
Page 3: Table Of Contents
VIPA HMI PPC021 ES Table of contents Table of contents General..................4 1.1 Copyright © VIPA GmbH ........... 4 1.2 About this manual.............. 5 1.3 Safety information.............. 6 Hardware description.............. 8 2.1 Safety information for users..........8 2.2 Properties................9 2.3 Structure................ -
Page 4: General
General VIPA HMI PPC021 ES Copyright © VIPA GmbH General 1.1 Copyright © VIPA GmbH All Rights Reserved This document contains proprietary information of VIPA and is not to be disclosed or used except in accordance with applicable agree- ments. -
Page 5: About This Manual
VIPA HMI PPC021 ES General About this manual Trademarks VIPA, SLIO, System 100V, System 200V, System 300V, System 300S, System 400V, System 500S and Commander Compact are registered trademarks of VIPA Gesellschaft für Visualisierung und Prozessautomatisierung mbH. SPEED7 is a registered trademark of profichip GmbH. -
Page 6: Safety Information
General VIPA HMI PPC021 ES Safety information Guide to the document The following guides are available in the manual: An overall table of contents at the beginning of the manual References with page numbers Availability The manual is available in:... - Page 7 VIPA HMI PPC021 ES General Safety information CAUTION! The following conditions must be met before using or commissioning the components described in this manual: – Hardware modifications to the process control system should only be carried out when the system has been disconnected from power! –...
-
Page 8: Hardware Description
Hardware description VIPA HMI PPC021 ES Safety information for users Hardware description 2.1 Safety information for users Handling of electro- VIPA modules make use of highly integrated components in MOS- static sensitive modules Technology. These components are extremely sensitive to over-vol- tages that can occur during electrostatic discharges. -
Page 9: Properties
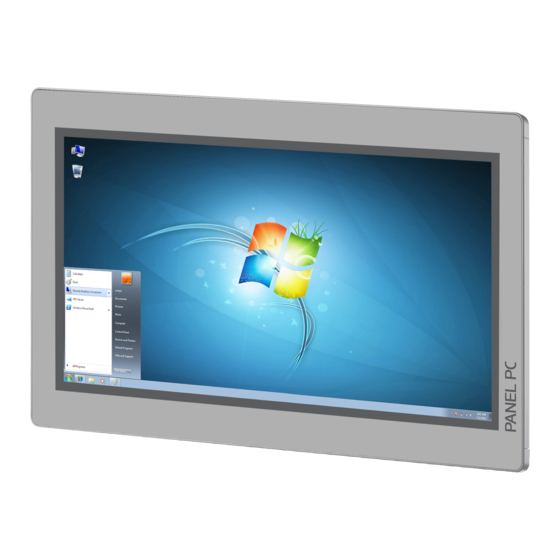
VIPA HMI PPC021 ES Hardware description Properties 2.2 Properties General The VIPA Panel PC is a combination of industrial PC with state of the art performance features and a touch panel with ideal display capabil- ities. The Panel PC is a compact and modular embedded PC based Ò... -
Page 10: Structure
Hardware description VIPA HMI PPC021 ES Structure > Overview 2.3 Structure 2.3.1 Overview Front view Slot for voltage supply (DC 12-30V) VGA interface Reset button RS232/RS422/RS485 interface COM 2 RS232/RS422/RS485 interface COM 1 4x"Host"-USB-A interface RJ45 jack for Ethernet communication LAN 2 RJ45 jack for Ethernet communication LAN 1 3.5mm Audio Line out... - Page 11 VIPA HMI PPC021 ES Hardware description Structure > Overview Bottom view 1 Slot for voltage supply (DC 12-30V) 2 VGA interface 3 Reset button 4 RS232/RS422/RS485 interface COM 2 5 RS232/RS422/RS485 interface COM 1 6 4x"Host"-USB-A interface 7 RJ45 jack for Ethernet communication LAN 2 8 RJ45 jack for Ethernet communication LAN 1 9 3.5mm Audio Line out...
-
Page 12: Interfaces
Hardware description VIPA HMI PPC021 ES Structure > Interfaces 2.3.2 Interfaces RS232/RS422/RS485 The 9-pin male SubD connector may be switched in the BIOS. Here interface (switchable) also the termination resistor of the RS422 and RS485 interface may be activated or deactivated. - Page 13 VIPA HMI PPC021 ES Hardware description Structure > Interfaces HB160 | PPC | 67S-PNL0 | GB | 15-26...
-
Page 14: Memory Management
Hardware description VIPA HMI PPC021 ES Structure > Memory management VGA interface VGA SubD HD15 jack to connect a second display. Line out 3.5 mm stereo jack to connect an active speaker system or an ear- phone. "Host"-USB-A Using the "Host"-USB-A interface USB mouse, keyboard, stick or USB hard discs can be connected. -
Page 15: Dimensions
VIPA HMI PPC021 ES Hardware description Dimensions Assignment Assignment n.c. SATA_TX1+ SATA_TX1- CFAST_LED1_C CFAST_LED2_C SATA_RX1+ PC10 n.c. SATA_RX1- PC11 n.c. PC12 n.c. CFAST_CDI PC13 VCC3 PC14 VCC3 n.c. PC15 n.c. PC16 n.c. PC17 CFAST_CDO Prior to removing the CFast card, make sure the unit's power is off and disconnected from the power supply. - Page 16 Hardware description VIPA HMI PPC021 ES Dimensions 21.5" - 67S-PNL0-... Front panel thickness 3 ... 12mm Installation cutting (W x H) 547 x 367mm Front panel (W x H x T) 562.40 x 382.40 x 6.70mm Rear panel (W x H x D) 542 x 362 x 54.20mm...
-
Page 17: General Data
VIPA HMI PPC021 ES Hardware description General data 2.5 General data Conformity and approval Conformity 2006/95/EG Low-voltage directive 2004/108/EG EMC directive Approval UL 508 Approval for USA and Canada others RoHS 2011/65/EU Product is lead-free; Restriction of the use of... -
Page 18: Technical Data
Hardware description VIPA HMI PPC021 ES Technical data > 67S-PNL0-JB Mounting conditions Mounting place In the control cabinet Mounting position Horizontal and vertical Standard Comment Emitted interfer- EN 61000-6-4 Class A (Industrial area) ence Noise immunity EN 61000-6-2 Industrial area... - Page 19 VIPA HMI PPC021 ES Hardware description Technical data > 67S-PNL0-JB Order no. 67S-PNL0-JB Operating system Windows embedded Standard 7 User software Movicon 11 Win Standard Work memory 2 GB User memory 16 GB Available memory (user data) 9 GB SD/MMC Slot...
- Page 20 Hardware description VIPA HMI PPC021 ES Technical data > 67S-PNL0-JB Order no. 67S-PNL0-JB Audio connections Line out, stereo jack 3.5 mm Technical data power supply Power supply (rated value) DC 24 V Power supply (permitted range) DC 20.4...28.8 V Reverse polarity protection ü...
-
Page 21: Pnl0-Jx
VIPA HMI PPC021 ES Hardware description Technical data > 67S-PNL0-JX 2.6.2 67S-PNL0-JX Order no. 67S-PNL0-JX Type Panel PC PPC021 ES Display Display size (diagonal) 21.5 " Display size (width) 478 mm Display size (height) 269 mm Resolution 1920 x 1080... - Page 22 Hardware description VIPA HMI PPC021 ES Technical data > 67S-PNL0-JX Order no. 67S-PNL0-JX COM1 connector Sub-D, 9-pin, male Serial, COM2 RS232 / RS422 / RS485 COM2 connector Sub-D, 9-pin, male Number of USB-A interfaces USB-A connector USB-A (host) Number of USB-B interfaces...
- Page 23 VIPA HMI PPC021 ES Hardware description Technical data > 67S-PNL0-JX Order no. 67S-PNL0-JX Minimum 3 mm Maximum front panel thickness 12 mm Weight 9.1 kg Environmental conditions Operating temperature 0 °C to 50 °C Storage temperature -20 °C to 75 °C...
-
Page 24: Deployment Panel Pc
Deployment Panel PC VIPA HMI PPC021 ES Installation Deployment Panel PC 3.1 Installation Overview The Panel PC is suitable for the installation in operating tables and control cabinet fronts. The installation happens via the back. The Panel PC is provided with a fixing technique with not losable screws that allows an easy connection with a crosstip screwdriver. -
Page 25: Installation Of The Cfast Card
VIPA HMI PPC021 ES Deployment Panel PC Installation of the CFast card Connect power supply For the cabling of the power supply DC 12-30V a green plug is used. The connector is a plug with screw contacts. The plug has the fol-... -
Page 26: Commissioning
Deployment Panel PC VIPA HMI PPC021 ES Commissioning > VIPA Startup-Manager 3.3 Commissioning CAUTION! – Before commissioning the device must be brought to room temperature. – At condensation the device must be absolutely dry before connected to power. – To avoid overheat during operation the device must not be laid open to direct sun light. - Page 27 VIPA HMI PPC021 ES Deployment Panel PC Commissioning > VIPA Startup-Manager Backup Exit Back Settings In [Settings] under Change Settings you can set a password for the Startup-Manager. The password will be requested when interrupting the start countdown. By default, no password is defined. In [Settings] the system settings can be set exactly like via Windows ‘Start...
- Page 28 Deployment Panel PC VIPA HMI PPC021 ES Commissioning > VIPA Startup-Manager Via "Program start" with [+] you can add programmes, which have to start automatically. Select "start" and assign a name for the program. Upload your program with [...]. You can optionally set parameters.
-
Page 29: Connection To A Plc System
VIPA HMI PPC021 ES Deployment Panel PC Operating system Windows Embedded Standard 7 > General 3.4 Connection to a PLC system Overview For the inclusion into your PLC system several HMI/SCADA project- engineering platforms are at your disposal that has to be installed at an external PC. - Page 30 Deployment Panel PC VIPA HMI PPC021 ES Operating system Windows Embedded Standard 7 > General Ò Differences to the Please regard that for the deployment of Windows Embedded Ò Ò standard Windows Standard 7 a thorough knowledge of operating Windows operation assumed.
-
Page 31: Structure
VIPA HMI PPC021 ES Deployment Panel PC Operating system Windows Embedded Standard 7 > Structure 3.5.2 Structure Icon Via icons on the desktop you gain direct access to the application related to the icon. Ò Desktop The desktop is the screen that is shown after login at Windows It contains e.g. - Page 32 Deployment Panel PC VIPA HMI PPC021 ES Operating system Windows Embedded Standard 7 > Structure Network connection As soon as your Panel PC is connected via Ethernet you can see here the Ethernet address. If there is no connection via Ethernet, the symbol is displayed crossed out.
- Page 33 VIPA HMI PPC021 ES Deployment Panel PC Operating system Windows Embedded Standard 7 > Structure Control Panel The description of the Control Panel components relevant for oper- ating the Panel PC can be found in the following: Change display language Per default, the PC is delivered with the display language "Eng-...
- Page 34 Deployment Panel PC VIPA HMI PPC021 ES Operating system Windows Embedded Standard 7 > Structure In the opening dialog window check the box ‘User must enter a user name and password to use this computer.’ and confirm with [Apply]. You can also change the password in this section under [Reset Password] at any time.
- Page 35 VIPA HMI PPC021 ES Deployment Panel PC Operating system Windows Embedded Standard 7 > Structure The next start-up takes place without requesting the log-in data. Enhanced Write Filter The ‘Enhanced Write Filter’ is a tool which can be used to disable permanent writing accesses to the internal drive "C:".
-
Page 36: Bios Setup
BIOS setup VIPA HMI PPC021 ES Overview BIOS setup 4.1 Overview In this chapter you will find information, required for calling the BIOS setup and the possible settings. The BIOS (Basic Input and Output System) setup program is a menu driven utility that enables you to make changes to the system configu- ration and tailor your system to suit your individual work needs. -
Page 37: Main
VIPA HMI PPC021 ES BIOS setup Main Selection boot medium Powering on the computer and immediately pressing [F7] allows you, as long as the loading screen is shown, to change to the boot medium selection. Legends Function ßà Moves the highlight left or right to select a menu áâ... -
Page 38: Advanced
BIOS setup VIPA HMI PPC021 ES Advanced Intel RC Version Display the Intel Reference Code version. System Date The date format is day month/date/year an. Day displays a day, from Monday to Sunday. Month displays the month, from January to December. - Page 39 VIPA HMI PPC021 ES BIOS setup Advanced Launch LAN1/2 PXE Enables or disables the boot option for legacy network devices con- OpROM nected to LAN1 or LAN2. Disabled - Starts no PXE OpROM Enabled - Starts the PXE OpROM, to be able to boot about PXE Submenu "CPU Config-...
- Page 40 BIOS setup VIPA HMI PPC021 ES Advanced Limit CPUID Maximum The CPUID instruction of some newer CPUs will return a value greater than 3. The default is disabled because this problem does not exist in the Windows series operating systems. If you are using an operating system other than Windows, this problem may occur.
- Page 41 VIPA HMI PPC021 ES BIOS setup Advanced Legacy USB Support Due to the limited space of the BIOS ROM, the support for legacy USB keyboard (in DOS mode) is by default set to disabled. With more BIOS ROM space available, it will be able to support more advanced features as well as provide compatibility to a wide variety of periph- eral devices.
- Page 42 BIOS setup VIPA HMI PPC021 ES Advanced Serial Port Enables or disables the serial port. Disabled - Serial port is not available Enabled - (default) Serial port is available Change Settings Selects an optimal setting for the super IO device.
-
Page 43: Chipset
VIPA HMI PPC021 ES BIOS setup Chipset 4.4 Chipset This section is used to configure the system based on the specific features of the chipset. CAUTION! Setting incorrect field values may cause the system to malfunction. Host Bridge Display the memory information. - Page 44 BIOS setup VIPA HMI PPC021 ES Chipset IGFX-Boot Type This field is used to configure which video device will be activated during POST. This has no effect if external graphics present. The options are CRT, LVDS, DP-LVDS + CRT. Backlight Control Select The available options are ‘Pyroelectric sensor’...
-
Page 45: Boot
VIPA HMI PPC021 ES BIOS setup Boot Fixed Graphics Memory This field is used to configure the memory size of the fixed graphics, Size the options are 128MB and 256MB. Submenu "South This field is used to configure the south bridge chipset. -
Page 46: Security
BIOS setup VIPA HMI PPC021 ES Security Setup Promt Timeout This section configures the number of seconds to wait for the setup activation key. Bootup NumLock State This allows you to determine the default state of the numeric keypad. On - (default) The function of the numeric keypad is the number keys. -
Page 47: Save And Exit
VIPA HMI PPC021 ES BIOS setup Save and exit If ONLY the User's If only the User's password is set, then this is a power on password password is set and must be entered to boot or enter setup. In Setup the user will have administrator rights. - Page 48 BIOS setup VIPA HMI PPC021 ES Save and exit Discard Changes and To exit the Setup utility without saving the changes, select this field Exit then press [Enter]. You may be prompted to confirm again before exiting. The BIOS setup exits and the POST continued.
-
Page 49: Installation Guidelines
VIPA HMI PPC021 ES Installation guidelines Basic rules for the EMC-equitable assembly of installations Installation guidelines 5.1 Basic rules for the EMC-equitable assembly of installations General The installation guidelines contain information about the interference free deployment of a PLC system. There is the description of the... - Page 50 Installation guidelines VIPA HMI PPC021 ES Basic rules for the EMC-equitable assembly of installations Coupling mechanisms The following table shows the four different coupling mechanisms, and interference their causes and possible interference sources. sources Coupling mechanism Cause Typical source Galvanic coupling...
-
Page 51: Emc-Equitable Assembly
VIPA HMI PPC021 ES Installation guidelines EMC-equitable assembly Basic rules for EMC In the most times it is enough to take care of some elementary rules to guarantee the EMC. Please regard the following basic rules when installing your PLC. -
Page 52: Emc-Equitable Cabling
Installation guidelines VIPA HMI PPC021 ES EMC-equitable cabling Grounding means the conducting connection of all inactive metal parts. The sum of all interconnected inactive parts is called ground. Inactive parts are all conductive parts electrically separated from all active parts by means of a basic isolation and that may only get voltage in case of an error. - Page 53 VIPA HMI PPC021 ES Installation guidelines EMC-equitable cabling Group A Group B Group C Group D Group A Group B Group C Group D The lines may be installed in common bundles or cable trusses. The lines have to be installed in different bundles or cable trusses (without min.
- Page 54 Installation guidelines VIPA HMI PPC021 ES EMC-equitable cabling Equipotential bonding Potential differences can occur between different sections when con- trollers and peripheral equipment are connected by means of non-iso- lated connections or the screens of screened cables are connected at both ends and grounded on different sections of the plant.
-
Page 55: Special Precautions Providing High Noise Immunity
VIPA HMI PPC021 ES Installation guidelines Special precautions providing high noise immunity You should always use metallic or metallised covers for serial data lines. Connect the screen of the data line to the cover. Do not con- nect the screen to PIN 1 of the connector! In case of stationary opera-... - Page 56 Installation guidelines VIPA HMI PPC021 ES Special precautions providing high noise immunity Connections of DC-activated Connections of AC-activated inductors inductors using a diode using a Z-diode using a varistor using RC-net- work Power outlet for PGs Every cubicle must be provided with a power outlet for the PU. These outlets must be wired to the distribution system, which is also used to connect the neutral conductor for the cubicle.
-
Page 57: Checklist For The Emc-Compliant Installation Of Controllers
VIPA HMI PPC021 ES Installation guidelines Checklist for the EMC-compliant installation of controllers 5.5 Checklist for the EMC-compliant installation of controllers EMV-measures Space for Notes Connection of the inactive parts You should take special care to check the connections of:...
Need help?
Do you have a question about the VIPA HMI PPC021 ES and is the answer not in the manual?
Questions and answers