Advertisement
Available languages
Available languages
Quick Links
RiverRidge
®
RiverRidge
es una marca comercial registrada de Sourcing Solutions, Inc., Hudson, WI 54016, USA
RiverRidge
®
RiverRidge
ist ein eingetragenes Warenzeichen der Sourcing Solutions, Inc. mit Sitz in Hudson, WI 54016, USA
ASSEMBLY INSTRUCTIONS
INSTRUCCIONES DE ENSAMBLAJE
INSTRUCTIONS D'ASSEMBLAGE
MONTAGEANLEITUNGEN
RiverRidge
Torre de almacenamiento RiverRidge
RiverRidge
®
La Crosse Tour de rangement de 54"
RiverRidge
®
La Crosse Aufbewahrungsmöbel – 137,16 cm
06-187 - White, Blanco, Blanc, Weiß
®
is a registered trademark of Sourcing Solutions, Inc., Hudson, WI 54016, USA
®
est une marque déposée de Sourcing Solutions, Inc., Hudson, WI 54016, USA
®
La Crosse 54" Storage Tower
®
La Crosse 137 cm
Advertisement

Related Manuals for RiverRidge La Crosse 06-187


Summary of Contents for RiverRidge La Crosse 06-187
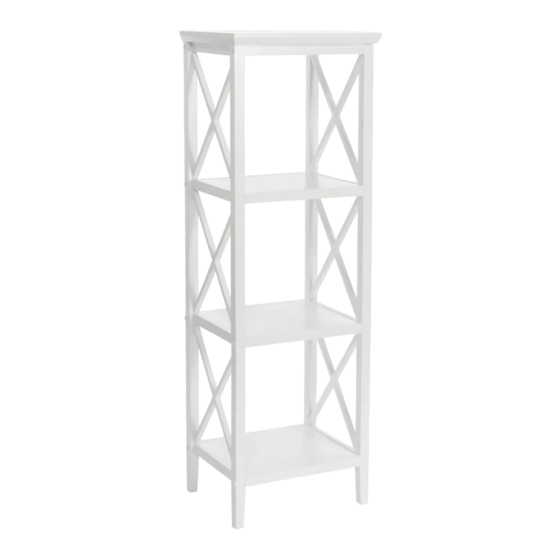
- Page 1 ASSEMBLY INSTRUCTIONS INSTRUCCIONES DE ENSAMBLAJE INSTRUCTIONS D’ASSEMBLAGE MONTAGEANLEITUNGEN ® RiverRidge La Crosse 54" Storage Tower ® Torre de almacenamiento RiverRidge La Crosse 137 cm RiverRidge ® La Crosse Tour de rangement de 54" RiverRidge ® La Crosse Aufbewahrungsmöbel – 137,16 cm 06-187 - White, Blanco, Blanc, Weiß...
- Page 2 WARNING ADULT ASSEMBLY REQUIRED: This product requires assembly by an adult because of small parts. Care should be taken in unpacking and assembling this item to keep small parts away from children. During assembly children should be kept away from the product due to possible risk of injury. SERIOUS OR FATAL INJURIES CAN OCCUR FROM FURNITURE TIP-OVER.
- Page 3 ADVERTENCIA REQUIERE QUE UN ADULTO REALICE EL ENSAMBLAJE: Este producto requiere que un adulto lleve a cabo el ensamblaje debido a las piezas pequeñas. Debe tener cuidado al desempacar y ensamblar este artículo para mantener las piezas pequeñas alejadas de los niños. Los niños deben mantenerse alejados del producto durante el ensamblaje debido al posible riesgo de lesiones.
- Page 4 AVERTISSEMENT L’ASSEMBLAGE DOIT ÊTRE EFFECTUÉ PAR UN ADULTE : Ce produit doit être assemblé par un adulte à cause de la présence de petites pièces. Lorsque vous déballez et assemblez cet article, veillez à tenir les petites pièces hors de portée des enfants.
- Page 5 WARNUNG MONTAGE DURCH ERWACHSENE ERFORDERLICH: Dieses Produkt muss wegen der kleinen Teile von einem Erwachsenen zusammengebaut werden. Beim Auspacken und Zusammenbau dieses Artikels ist darauf zu achten, dass Kleinteile von Kindern ferngehalten werden. Während der Montage sollten Kinder wegen möglicher Verletzungsgefahr vom Produkt ferngehalten werden.
-
Page 6: Parts List
PARTS LIST DESCRIPTION Top Board 2PCS Side Frame 3PCS Shelf Back Cross Bar Front Cross Bar... - Page 7 PARTS LIST PARTS DESCRIPTION 16PCS Screw (5x45mm) 4PCS Screw (4x35mm) 16PCS Plastic Cap 2PCS Screw (4x55mm) 2PCS Plastic Anchor Allen Wrench TOOLS NEEDED FOR ASSEMBLY: FLAT & PHILLIPS SCREWDRIVER (NOT INCLUDED) THE USE OF A POWER SCREWDRIVER IS NOT RECOMMENDED FOR ASSEMBLY DO NOT USE ITEM IF ANY PARTS ARE MISSING OR DAMAGED To order replacement parts at no cost to you, email customer.service@ssi-rr.com, call 1-(844)-223-5201 or order parts online at www.riverridgehome.com.
- Page 8 STEP 1 1. Place top board (1) upside down on soft padded surface. 2. Attach back cross bar (4) to top board (1) by inserting 2 screws (B) through holes on back cross bar (4), then tighten to top board (1). 3.
- Page 9 STEP 3 1. Attach other side frame (2) to top board (1) and 3 shelves (3) by inserting 2 screws (A) through holes on side frame (2) and tighten to front and back cross bars (4 & 5). 2. Insert 6 screws (A) through holes on side frame (2) and tighten screws (A) into each shelf (3). STEP 4 1.
-
Page 10: Care Instructions
STEP 5 Option #1: Securing to Drywall Position shelf against wall in desired location. Using a pencil, make 2 small marks on wall through holes on back cross bar (4). Move shelf away from wall and screw 2 plastic anchors (E) into wall on pencil marks. -
Page 11: Lista De Piezas
LISTA DE PIEZAS N.° DESCRIPCIÓN CANT. Tablero superior Marco lateral Repisa Barra transversal trasera Barra transversal delantera Tornillo (5x45mm) Tornillo (4x35mm) Tapa de plástico Tornillo (4x55mm) Anclaje plástico Llave allen HERRAMIENTAS NECESARIAS PARA EL ENSAMBLAJE: DESTORNILLADOR PLANO Y PHILLIPS (NO INCLUYEN). NO SE RECOMIENDA EL USO DE UN DESTORNILLADOR ELÉCTRICO PARA EL ENSAMBLAJE. - Page 12 PASO 4 1. Presione 16 tapas de plástico (C) en los agujeros de los tornillos en ambos bastidores laterales (2). *Consejo: Si se necesita más presión para mantener las tapas de plástico en su sitio, cubra las tapas con un trozo de papel y golpee ligeramente con un martillo para asegurar la tapa. PASO 5 Opción n.º...
-
Page 13: Liste Des Pièces
LISTE DES PIÈCES Nº DESCRIPTION QTÉ Plaque supérieure Cadre latéral Étagère Barre transversale arrière Barre transversale avant Vis (5x45mm) Vis (4x35mm) Capuchon en plastique Vis (4x55mm) Ancrage en plastique Clé Allen OUTILS NÉCESSAIRES POUR L’ASSEMBLAGE : TOURNEVIS À TÊTE PLATE ET À POINTE CRUCIFORME (NON FOURNIS). - Page 14 ÉTAPE 4 1. Enfoncez 16 capuchons en plastique (C) dans les trous de vis des deux cadres latéraux (2). *Conseil : Si une pression supplémentaire est nécessaire pour maintenir les capuchons en plastique en place, couvrez les bouchons avec un morceau de papier et tapez légèrement avec un marteau pour fixer le capuchon.
- Page 15 TEILELISTE BESCHREIBUNG ANZ. Oberstes Brett Seitenrahmen Regal Rückseitige Querleiste Vordere Querleiste Schraube (5x45mm) Schraube (4x35mm) Kunststoffkappe Schraube (4x55mm) Kunststoffdübel Inbusschlüssel FÜR DIE MONTAGE BENÖTIGTE WERKZEUGE: FLACH- UND KREUZSCHLITZSCHRAUBENDREHER (NICHT ENTHALTEN). DIE VERWENDUNG EINES ELEKTRISCHEN SCHRAUBENDREHERS WIRD FÜR DIE MONTAGE NICHT EMPFOHLEN. VERWENDEN SIE DEN ARTIKEL NICHT, WENN TEILE FEHLEN ODER BESCHÄDIGT SIND.
- Page 16 SCHRITT 4 1. Drücken Sie 16 Kunststoffkappen (C) in die Schraubenlöcher an beiden Seitenrahmen (2). Tipp: Wenn zusätzlicher Druck erforderlich ist, um die Kunststoffkappen an ihrem Platz zu halten, die Kappen mit einem Stück Papier abdecken und mit einem Hammer leicht darauf klopfen, um die Kappen zu sichern.