Table of Contents
Advertisement
Quick Links
Advertisement
Table of Contents

Related Manuals for Philco PL 1062 D CHIVA


Summary of Contents for Philco PL 1062 D CHIVA
- Page 1 AUTOMATIC WASHING MACHINE USER‘S MANUAL PL 1062 D CHIVA...
- Page 2 Dear customer, Thank you for buying a PHILCO brand product. So that your appliance serves you well, please read all the instructions in this user’s manual. Copyright © 2020, Fast ČR, a. s. Revision 06/2021...
-
Page 3: Table Of Contents
CONTENTS PART 1: BEFORE PUTTING INTO OPERATION ....................2 Important safety instructions ................................ 2 General safety instructions ................................3 Recommendation ....................................7 PART 2: INSTALLATION .............................8 Removal of the transportation screws ............................8 Levelling the washing machine ..............................8 Electrical connection ..................................9 Water supply connection ................................ -
Page 4: Part 1: Before Putting Into Operation
PART 1: BEFORE PUTTING INTO OPERATION Important safety instructions industry norms and meets legal appliance safety requirements. However, as manufacturers, we consider it our duty to provide you with the following safety instructions. an safe place so that you can use it in the future. If you intend to sell the appliance, give it to another owner, or if you move, always make sure that the the new owner can learn about the operation of the... -
Page 5: General Safety Instructions
months, when the temperature falls under 0°C, store the appliance at room temperature for 24 hours before first use. General safety instructions other modifications to the appliance is dangerous. the door heats up to a high temperature. Do not touch the door! the drum. - Page 6 washing bands, etc. should be washed in a special purpose washing bag or in a pillow case, because the individual items could become jammed between the tube and the rotating drum. from metal skeletons, fabrics which are not hemmed or that snag. disconnect the washing machine from the power supply and turn off the water inlet.
- Page 7 hands. feet. while washing. during operation, do not touch the hose during the water inlet. Do not attempt to repair the device yourself. Contact the nearest authorised service. washing machine may present a danger to children. machine. washing machine. persons fully instructed about the instructions, manual.
- Page 8 similar surface, which could block the ventilation vents on the underside. or sink. EN - 6 Copyright © 2020, Fast ČR, a. s. Revision 06/2021...
-
Page 9: Recommendation
Recommendation and fabric softener immediately before washing. impairments or by inexperienced persons, unless properly trained or schooled in the safe use of the appliance, or unless they have been properly supervised by a person who will be responsible for their safety. -
Page 10: Part 2: Installation
PART 2: INSTALLATION safe place for future reference. Removal of the transportation screws it into operation. NOTE: Defects caused by starting the washing machine with the transportation screws installed are not covered by the warranty. Levelling the washing machine slip and rigid surface. the feet. -
Page 11: Electrical Connection
Electrical connection fuse or circuit breaker to which the washing machine is connected should be 10 A. If you do not have such sockets and fuses/circuit breakers at home, have them installed by a qualified electrician. washing machine without grounding. Water supply connection these seals on the end of the water inlet hose connected to the tap. -
Page 12: Water Drain Connection
Water drain connection to the drain of the wash basin. EN - 10 Copyright © 2020, Fast ČR, a. s. Revision 06/2021... -
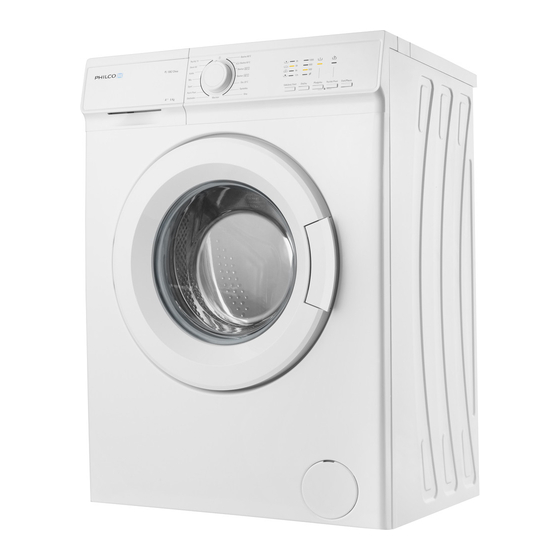
Page 13: Part 3: Description Of The Appliance And The Control Panel
PART 3: DESCRIPTION OF THE APPLIANCE AND THE CONTROL PANEL Description of the appliance 1. Display 2. Program selection dial 4. Drawer for washing detergents 5. Drum 6. Pump cover 8. Water inlet valve 9. Drain hose 10. Power cord EN - 11 Copyright ©... -
Page 14: Control Panel
Control panel 1. Drawer for washing detergents 2. Program selection dial 3. Display Washing detergent drawer Liquid washing detergent adapter Main washing compartment Fabric softener compartment Prewash compartment If you are going to use a liquid washing detergent, it is necessary to use a special liquid detergent adapter. without a prewash. - Page 15 Main washing compartment Fabric softener compartment can dilute it using water. Prewash compartment Fill this compartment only if the prewash function is selected. We recommend that you use this function only EN - 13 Copyright © 2020, Fast ČR, a. s. Revision 06/2021...
-
Page 16: Program Selection Dial
Program selection dial selection may be done by turning the program selection dial in both directions. When making settings, ensure that the symbol on the program selection dial exactly matches your selected washing program. If you switch EN - 14 Copyright ©... -
Page 17: Display
Display Control panel Wash Rinse Additional Spin functions indicator light Start/Pause button Additional functions 2 button Additional functions 1 button Delayed start button prewash / washing cycle / rinsing / At the same time, LED lights indicate the current status of the washing program; also combinations of LED lights communicate warning messages. -
Page 18: Part 4: Washing Laundry
PART 4: WASHING LAUNDRY First wash cycle to perform the first wash without laundry so as to drain this water; put half a measure of standard detergent into compartment 2, which is used for washing detergents and select the program for cotton at 90 °C. Sorting laundry the level of dirtiness. -
Page 19: Operating The Washing Machine
Operating the washing machine Placing laundry into the washing machine from the previous wash. Remove the laundry from the washing machine. the manner shown in the illustration below. NOTE: Maximum loading capacity may wary based on the laundry type you will wash, degree of contamination and the programme you have chosen etc. -
Page 20: Additional Functions
Selecting programs and functions Select a program and additional functions appropriate for your laundry using the program selection dial. Additional functions available. NOTE: Additional functions are not compatible with all the programs. There is only a limited time period for the selection of an additional function. The combination of individual additional functions is not available for all programs. - Page 21 NOTE: The prewash function will extend the selected program by a certain amount of time. This time depends on the type of selected program. Do not use liquid washing detergents in the prewash compartment. Quick wash Selecting this function makes it possible to shorten the washing program time, thus reducing water and energy consumption.
-
Page 22: Child Safety Lock
Cancelling a program Cancelling a program that is currently running End of a program Move the program selection dial to the 0 position. Pull the power cord out of the power socket. Shut off the water inlet. Open the drum door and take the laundry out. After completing the wash, leave the door of the washing machine open so that the water remaining in the drum can dry out. -
Page 23: Part 5: Program Table
PART 5: PROGRAM TABLE Max. amount of Program Temperature Compartment Duration Laundry description dry laundry Heavily soiled cotton, linen laundry 90 °C 6.0 kg 179 min Soiled cotton, linen laundry s předpírkou 60 °C 6.0 kg 1 + 2 164 min Soiled cotton, linen laundry 60 °C 6.0 kg... - Page 24 of 40 °C or 60 °C together within a single cycle; this programme is used to assess compliance with EU legislation on ecodesign. Energy Programme Residual water Water consumption consumption duration temperature content In litres/cycle in kWh/cycle in °C in % 1000 RPM 2,22 0,81...
- Page 25 recommendations of the detergent manufacturer regarding the amount to be used. spinning phase, the louder the noise and the lower the residual water content. the QR code at the energy data label. Important information foam and the automatic foam absorption system has been activated because too much detergent was used.
-
Page 26: Part 6: Maintenance And Cleaning
PART 6: MAINTENANCE AND CLEANING CAUTION! The washing machine and its components could be damaged if you use agents containing solvents. Do not use washing detergents or fabric softeners containing solvents. Water inlet filters and foreign materials contained in water entering the washing machine. If the washing machine is not filling seals and clean them. -
Page 27: Pump Filter
Pump filter washing machine. WARNING: Danger of scalding! Because the water in the pump may be very hot, wait until it has cooled down. Drawer for washing detergents Over time washing detergent deposits may accumulate in the drawer and in the washing machine opening. washing machine. -
Page 28: Siphon Plug
Siphon plug residue. Reinsert the cleaned siphon plug in its place. Check that it is properly inserted. Siphon plug. Washing machine cabinet Clean the washing machine from the outside using lukewarm water and a gentle cleaning agent, which will not damage the surface coat of the washing machine cabinet. After rinsing with clean water, wipe the washing machine with a soft and dry wiping cloth. -
Page 29: Part 7: Practical Information
PART 7: PRACTICAL INFORMATION Alcoholic beverages: First prewash the stain in cold water, then apply glycerine and water and rinse in a solution of water and vinegar. Shoe polish: First lightly scrub the stain without damaging the fabric using washing detergent and rinse. If subsequently wash in lukewarm water. -
Page 30: Part 8: Prevention Of Minor Malfunctions
PART 8: PREVENTION OF MINOR MALFUNCTIONS All necessary repairs of the washing machine should be performed by an authorised service centre. If it is necessary to repair your washing machine or you are unable to remedy the malfunction using the information MALFUNCTION POSSIBLE CAUSE REMEDY... - Page 31 MALFUNCTION POSSIBLE CAUSE REMEDY amount of foam in the washing detergent. prevent foam from forming by pouring a drawer for washing mixture of half a spoon of fabric softener detergent. and half a litre of water into the washing detergent drawer. Press the Start/Pause button again after the correct amount of washing detergent.
-
Page 32: Part 9: Automatic Malfunction Detection System
PART 9: AUTOMATIC MALFUNCTION DETECTION SYSTEM correct progress and in the case of any malfunction takes the necessary remedy measures and will at the same time inform you about the malfunction. Error code Possible cause Solution Open washing machine door. Close the washing machine door. -
Page 33: Part 10: Product Information Sheet
PART 10: PRODUCT INFORMATION SHEET Product Information Sheet Supplier's name or trademark: PHILCO Supplier's address: Model identifier: PL 1062 D Chiva General product parameters: Washmachine Parameter Parameter Height Rated capacity Dimensions in cm Width Depth class Rinsing Washing 1.04 effectiveness... - Page 34 Additional information: Weblink to the supplier’s website, where the information in point 9 of Annex II to Commission Regulation (EU) 2019/2023 is found: www.philco.cz EN - 32 Copyright © 2020, Fast ČR, a. s. Revision 06/2021...
- Page 35 TECHNICAL INFORMATION TESTING INFORMATION operation of the device, the minimum distance from the wall and the dimensions of the device are part of this manual. If you have any further questions, please contact the manufacturer. CUSTOMER CARE AND SERVICE Always use original spare parts. Model name and serial number can be found on the rating plate.
- Page 36 Changes to the text, design and technical specifications may occur without prior notice and we reserve the right to make these changes. Original spare parts for and components are available minimally 10 years. www.philco.cz EN - 34 Copyright © 2020, Fast ČR, a. s.
- Page 41 Importer to SK: FAST PLUS, a.s. Na pántoch 18, 831 06 Bratislava SLOVAKIA Importer to PL: FAST Poland Sp. z o. o. Ul. Kwietniowa 36, 05-090 Wypędy POLAND Importer to HU: FAST HUNGARY Kft. Kántor út 10., 2310 Szigetszentmiklós HUNGARY...
Need help?
Do you have a question about the PL 1062 D CHIVA and is the answer not in the manual?
Questions and answers