Table of Contents
Advertisement
Quick Links
SERVICE MANUAL
MULTI DECK HOT MERCHANDISERS WITH IMPROVED AIR TECHNOLOGY
MULTI DECK 60 ESSENTIAL - 4 LEVEL
MULTI DECK 100 ESSENTIAL - 4 LEVEL
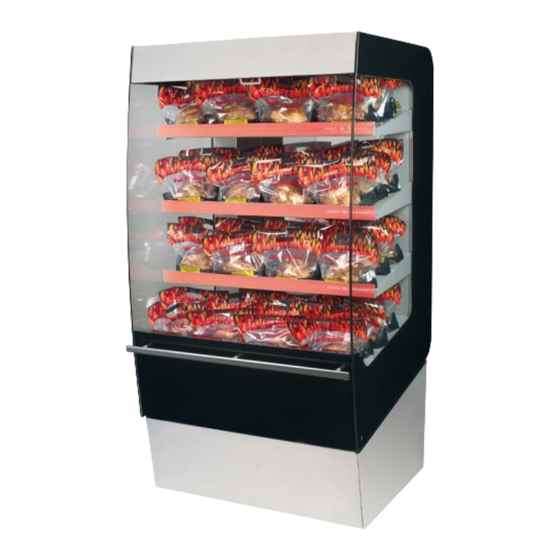
MULTI DECK 60 TRANSPARENT LIGHT
MULTI DECK 100 TRANSPARENT LIGHT
MULTI DECK 120 TRANSPARENT LIGHT
CLASSIC DECK HOT MERCHANDISER
Multi Deck 60 Essential
WWW.FRIJADO.COM
Multi Deck 100 Essential
This manual is prepared for the use of trained Service Technici-
ans and should not be used by those not properly qualified. If
you have attended a trianing for this product, you may be quali-
fied to perform all the procedures in this manual.
This manual is not intended to be all encompassing. If you have
not attended training for this product, you should read, in its
entirety, the repair procedure you wish to perform to determine
if you have the necessary tools, instruments and skills required
to perform the procedure. Procedures for which you do not have
the necessary tools, instruments and skills should be performed
by a trained technician.
Reproduction or other use of this Manual, without the express
written consent of Fri-Jado, is prohibited.
Multi Deck 120 transparent
- NOTICE -
Service Manual Multi Deck 60/100/120 / Classic Deck form 9123788 rev.07/2015
BOX
BOX
BOX
Classis Deck Hot
Advertisement
Table of Contents

Subscribe to Our Youtube Channel
Related Manuals for Fri-Jado Multi Deck 60 Essential


Summary of Contents for Fri-Jado Multi Deck 60 Essential
- Page 1 SERVICE MANUAL MULTI DECK HOT MERCHANDISERS WITH IMPROVED AIR TECHNOLOGY MULTI DECK 60 ESSENTIAL - 4 LEVEL MULTI DECK 100 ESSENTIAL - 4 LEVEL MULTI DECK 60 TRANSPARENT LIGHT MULTI DECK 100 TRANSPARENT LIGHT MULTI DECK 120 TRANSPARENT LIGHT CLASSIC DECK HOT MERCHANDISER...
- Page 2 Page 2 Service Manual Multi Deck 60/100/120 / Classic Deck form 9123788 rev. 07/2015...
- Page 3 Versions Version Issue date Remarks dd/mm/yy 07/2015 01/07/2015 MD 60 and 100 Essential added. Glass front doors added. Update exploded views. Various updates. Page 3 Service Manual Multi Deck 60/100/120 / Classic Deck form 9123788 rev. 07/2015...
-
Page 4: Table Of Contents
Troubleshooting ............................22 Trouble shooting Multi Deck 60/100/120 and Classis Deck Hot ............22 Exploded views & Part lists ........................24 Multi Deck 60 Essential ........................24 Multi Deck 100 Essential ........................26 Multi Deck 60 Transparent light box ....................28 Multi Deck 100 / 120 Transparent light box .................. -
Page 5: General Technical Data
GENERAL TECHNICAL DATA GENERAL TECHNICAL DATA This manual covers the Multi Deck 60, 100 and 120 Hot and the Classic Deck Hot series mer- chandiser cabinets. The cabinets come in three sizes, 60, 100 and 120 centimeter. • Multi Deck 60 Hot - Merchandiser 620 mm wide. •... -
Page 6: Removal And Replacement Of Parts
REMOVAL AND REPLACEMENT OF PARTS REMOVAL AND REPLACEMENT OF PARTS WARNING: Disconnect the electrical power to the machine at the main circuit box. Place a tag on the circuit box indica- ting the circuit is being serviced. PANELS BOTTOM SIDE (MULTI DECK 60/100/120) 1. -
Page 7: Back Panel On Bottom Side (Classic Deck)
REMOVAL AND REPLACEMENT OF PARTS BACK PANEL ON BOTTOM SIDE (CLASSIC DECK) 1. Remove the panels on bottom side accor- ding prior procedure. 2. Loosen the screws that secure the back panel and remove this panel. COVER PLATE ON FIELD WIRING BOX 1. -
Page 8: Electronic Ballast/Interference Filter
REMOVAL AND REPLACEMENT OF PARTS ELECTRONIC BALLAST/INTERFERENCE FILTER 1. Remove the screws on the top side and remove cover panel. 2. Remove the nuts on the ballast and re- move the wiring. 2a. Remove the screws on the filter and re- move this filter. -
Page 9: Back Panels
REMOVAL AND REPLACEMENT OF PARTS BACK PANELS 1. Remove the screws that secure the back panel and remove this panel. 2. Remove the insulation. 3. Remove the screws that secure the cover panel and remove this panel. 4. Reverse the procedure to install. THERMOSTAT (DANFOSS) 1. -
Page 10: Sensor Danfoss Thermostat Md 60 And Classic Deck
REMOVAL AND REPLACEMENT OF PARTS SENSOR DANFOSS THERMOSTAT MD 60 AND CLASSIC DECK 1. Remove the thermostat according prior procedure. 2. Remove the back panels + insulation + cover panel. 3. Remove the panels on the bottom side. 4. Remove the bolts that secure the holder and remove the holder with sensor. -
Page 11: Blower Shelf Heating
REMOVAL AND REPLACEMENT OF PARTS BLOWER SHELF HEATING 1. Remove the electric panel and all panels on the bottom side according prior proce- dures. 2. Remove the socket screws from the ben- ded plate and fastening plate and remove these plates. 3. -
Page 12: Heating Element Md 60 And Classic Deck
REMOVAL AND REPLACEMENT OF PARTS HEATING ELEMENT MD 60 AND CLASSIC DECK 1. Remove the back panels, insulation, cover plate and the thermostat sensor according prior procedures. 2. Remove all the panels on the bottom side side + the back panel on bottom side ac- cording prior procedures. -
Page 13: Safety Thermostat (Reset)
REMOVAL AND REPLACEMENT OF PARTS SAFETY THERMOSTAT (RESET) 1. Remove the electric panel, back panels, insulation and cover plate, and the cover plate on the field wiring box according prior procedures. 2. Remove the sensor from the clip. 3. Remove the wiring on the thermostat. 4. -
Page 14: Replacing Side Glass
REMOVAL AND REPLACEMENT OF PARTS Replacing a side glass in the MD REPLACING SIDE GLASS Remove all traces of glass and silicone past. Remove the product stopper from the bottom Remove the six screws from the top plate. plate. - Page 15 REMOVAL AND REPLACEMENT OF PARTS Putting the new glass in place Attach all nuts B by hand. Hold nut B in position using a spanner. Tighten nut A firmly using a spanner. Put the insulation plates in the top ! ...
-
Page 16: Mounting Instruction Glass Door(S)
REMOVAL AND REPLACEMENT OF PARTS MOUNTING INSTRUCTION GLASS DOOR(S) Note: The models MD 100 ans 120 have double glass doors. See also next page. Page 16 Service Manual Multi Deck 60/100/120 / Classic Deck form 9123788 rev. 07/2015... - Page 17 REMOVAL AND REPLACEMENT OF PARTS Part nr. Description 9220084S Front door ass. MD 60 9220085S Front door ass. MD 100 9220086S Front door ass. MD 120 9220078S Door ass. MD 60 9220077S L or R door ass. MD 100 9220076S L or R door ass.
-
Page 18: Electrical Tests And Service Procedures
ELECTRICAL TESTS AND SERVICE PROCEDURES ELECTRICAL TESTS AND SERVICE PROCEDURES WARNING: Disconnect the electrical power to the machine at the main circuit box. Place a tag on the circuit box indica- ting the circuit is being serviced. HEATING ELEMENT TEST Note: When testing the resistance of the element remove the wiring. -
Page 19: Adjusting Danfoss Ekc 102A Thermostat
ELECTRICAL TESTS AND SERVICE PROCEDURES ADJUSTING DANFOSS EKC 102A THERMOSTAT Note: In order to adjust the thermostat, first remove the thermostat according prior proce- dure. Changing set point 1. Press the middle button until the temperature value is shown. 2. Change value with upper or lower button. 3. -
Page 20: Adjusting Danfoss Ekc 102A Thermostat (Continued)
ELECTRICAL TESTS AND SERVICE PROCEDURES ADJUSTING DANFOSS EKC 102A THERMOSTAT (CONTINUED) Parameters Danfoss EKC 102A thermostat Setpoint °C Differential °C Higher setpoint limit °C Lower setpoint limit °C Off-set temperature indication °C Temperature unit (°C / °F) °C °C Correction of signal from air output °C Start / stop of temperature control Minimum “ON”... -
Page 21: Control Locations
ELECTRICAL TESTS AND SERVICE PROCEDURES CONTROL LOCATIONS heating switch light switch thermostat EKC 102A Service Manual Multi Deck 60/100/120 / Classic Deck form 9123788 rev. 07/2015 Page 21... -
Page 22: Troubleshooting
TROUBLESHOOTING TROUBLESHOOTING TROUBLE SHOOTING MULTI DECK 60/100/120 AND CLASSIS DECK HOT Symptom Possible causes No power to cabinet controls. 1. Main breaker open. 2. Wiring loose. Main fuse or breaker blows. 1. Wiring incorrectly. 2. Heating element shorted. 3. Wiring shorted. Illumination does not work. - Page 23 TROUBLESHOOTING This is an analytic description for servicing and repairing all major parts of the Multi Deck 60, 100 and 120 Hot and Classic Deck Hot. It consists of 4 basic steps to recognize and solve the problems: 1. Symptoms. 2.
-
Page 24: Exploded Views & Part Lists
EXPLODED VIEWS AND PART LISTS EXPLODED VIEWS & PART LISTS MULTI DECK 60 ESSENTIAL 63-64-65 D-0211 Page 24 Service Manual Multi Deck 60/100/120 / Classic Deck form 9123788 rev. 07/2015... - Page 25 EXPLODED VIEWS AND PART LISTS Item Part number Qty Description Item Part number Qty Description 9222011 Protection plate, illumination inside 9220026 Bottom shelf, ass. 9181008 Switch, tumble 9070793 Spacing pin, 3D nut M6 9221013 Interference filter 9226106 Holder, price rail 9181071 Sticker, light 9223024...
-
Page 26: Multi Deck 100 Essential
EXPLODED VIEWS AND PART LISTS MULTI DECK 100 ESSENTIAL 63-64-65 D-0212 Page 26 Service Manual Multi Deck 60/100/120 / Classic Deck form 9123788 rev. 07/2015... - Page 27 EXPLODED VIEWS AND PART LISTS Item Part number Description Item Part number Description 9222032 Protection plate, 9281008 Socket illumination inside 9222408 Heating element, 900 W 9181008 Switch, tumble 9224005 Shelf support 9221013 Interference filter 9220035 Shelf ass., incl. heating element 9181071 Sticker, light 9220036...
-
Page 28: Multi Deck 60 Transparent Light Box
EXPLODED VIEWS AND PART LISTS MULTI DECK 60 TRANSPARENT LIGHT BOX 11-1 63-1 63-2 MD60 2009 D-0143 Page 28 Service Manual Multi Deck 60/100/120 / Classic Deck form 9123788 rev. 07/2015... - Page 29 EXPLODED VIEWS AND PART LISTS Item Part number Qty Description Item Part number Qty Description 9222012 Protection plate dia, transparent 9172125 Castor without brake 9222011 Protection plate, illumination inside 9224092 Protection plate electricity 9181008 Switch, tumble 9225074 Cover plate 9221013 Interference filter 9224005 Shelf support...
-
Page 30: Multi Deck 100 / 120 Transparent Light Box
EXPLODED VIEWS AND PART LISTS MULTI DECK 100 / 120 TRANSPARENT LIGHT BOX 11-1 63-1 63-2 MD100-120 - 2009 D-0144 Page 30 Service Manual Multi Deck 60/100/120 / Classic Deck form 9123788 rev. 07/2015... - Page 31 EXPLODED VIEWS AND PART LISTS Item Part number Model Description Item Part number Model Description 9222033 MD100 Protection plate dia, 9224121 MD100-120 1 Sensor holder transparent 9224570 MD100 Top plate, bended 9222007 MD120 Protection plate dia, 9224070 MD120 Top plate, bended transparent 9224577 MD100...
- Page 32 EXPLODED VIEWS AND PART LISTS Item Part number Model Description 9220028 MD100 Profile ass. for price rail 9220029 MD120 Profile ass. for price rail 9224578 MD100 Rear plate 9224077 MD120 Rear plate 9224102 MD100-120 1 Cover, box 9224101 MD100-120 1 Connection box 9070840 MD100-120 1...
- Page 33 EXPLODED VIEWS AND PART LISTS Page 33 Service Manual Multi Deck 60/100/120 / Classic Deck form 9123788 rev. 07/2015...
-
Page 34: Classic Deck
EXPLODED VIEWS AND PART LISTS CLASSIC DECK 11-1 63-1 63-2 81-1 Classic Deck Hot 2009 D-0145 Page 34 Service Manual Multi Deck 60/100/120 / Classic Deck form 9123788 rev. 07/2015... - Page 35 EXPLODED VIEWS AND PART LISTS ITEM PART NO Description ITEM PART NO Description 9222109 Protection plate dia, transparent 9224005 Shelf support 9222011 Protection plate, illumination 9220025 Shelf inside 9220026 Bottom shelf 9181008 Switch, tumble 9070793 Spacing pin, 3D nut M6 9221013 Interference filter 9226023...
-
Page 36: Electrical Diagrams
ELECTRIC DIAGRAMS ELECTRICAL DIAGRAMS CIRCUIT DIAGRAM MULTI DECK 60 HOT & CLASSIC DECK HOT Page 36 Service Manual Multi Deck 60/100/120 / Classic Deck form 9123788 rev. 07/2015... -
Page 37: Wiring Diagram Multi Deck 60 Hot & Classic Deck Hot
ELECTRIC DIAGRAMS WIRING DIAGRAM MULTI DECK 60 HOT & CLASSIC DECK HOT Page 37 Service Manual Multi Deck 60/100/120 / Classic Deck form 9123788 rev. 07/2015... -
Page 38: Circuit Diagram Multi Deck 100 Hot
ELECTRIC DIAGRAMS CIRCUIT DIAGRAM MULTI DECK 100 HOT Page 38 Service Manual Multi Deck 60/100/120 / Classic Deck form 9123788 rev. 07/2015... -
Page 39: Wiring Diagram Multi Deck 100 Hot
ELECTRIC DIAGRAMS WIRING DIAGRAM MULTI DECK 100 HOT Page 39 Service Manual Multi Deck 60/100/120 / Classic Deck form 9123788 rev. 07/2015... -
Page 40: Circuit Diagram Multi Deck 120 Hot
ELECTRIC DIAGRAMS CIRCUIT DIAGRAM MULTI DECK 120 HOT Page 40 Service Manual Multi Deck 60/100/120 / Classic Deck form 9123788 rev. 07/2015... -
Page 41: Wiring Diagram Multi Deck 120 Hot
ELECTRIC DIAGRAMS WIRING DIAGRAM MULTI DECK 120 HOT Page 41 Service Manual Multi Deck 60/100/120 / Classic Deck form 9123788 rev. 07/2015... - Page 42 Page 42 Service Manual Multi Deck 60/100/120 / Classic Deck form 9123788 rev. 07/2015...
- Page 43 Service Manual Multi Deck 60/100/120 / Classic Deck form 9123788 rev. 07/2015 Page 43...
- Page 44 Fri-Jado B.V. • P.O. Box 560 • 4870 AN • Etten-Leur • The Netherlands • tel +31 76 50 85 400 • fax +31 76 50 85 444 • info@frijado.com • www.frijado.com...
Need help?
Do you have a question about the Multi Deck 60 Essential and is the answer not in the manual?
Questions and answers