
Related Manuals for SHARE 202S Pro V2


Summary of Contents for SHARE 202S Pro V2
- Page 1 Aerial Oblique Camera SHARE 202S Pro V2 User Manual V2.0 2021.03 深圳赛尔智控科技有限公司 SHENZHEN SHARE UAV TECHNOLOGY CO., LTD...
- Page 3 For update information, visit website www.shareuavtec.com and click on the product page for this product. Do Not allow people under the age of 18 to use the SHARE 202S Pro V2. Do Not modify or disassemble the SHARE 202S Pro. SHARE UAV accepts no liability for damage, injury or any legal responsibility incurred directly or indirectly from the use of this product.
-
Page 4: Table Of Contents
Contents 1. Product Overview..........................1 1.1 SHARE 202S Pro V2 Introduction..................1 1.2 Features..........................1 1.3 In the Box..........................2 1.4 Parameters..........................2 2. Installation............................2 2.1 Camera Introduction......................2 2.2 Camera Installation....................... 3 3. Camera Operation........................... 6 3.1 Power On..........................6 3.2 Take Photo.......................... -
Page 6: Product Overview
210 million. It can realize high accuracy surveying and mapping with no GCP used. With high compatibility, SHARE 202S Pro V2 is able to mounted on VTOL, multi rotor and DJI M300 RTK. By using CNC designed, SHARE 202S Pro V2 is light-weight but tough structure. -
Page 7: In The Box
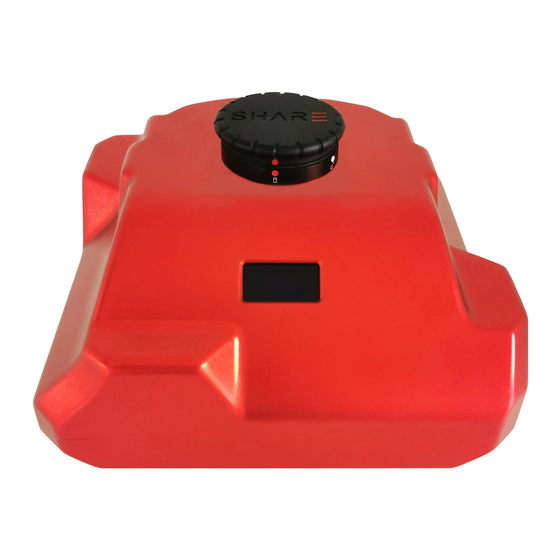
≈1200 g 2. Installation 2.1 Camera Introduction The front of the oblique camera SHARE 202S Pro V2 is equipped with an OLED screen. When installing the camera, please make sure the direction of the camera and the drone is the same. -
Page 8: Camera Installation
2.2 Camera Installation Mounting methods of aerial oblique camera SHARE 202S Pro: 2.2.1 SkyPort Connection Installation step: 1) Press the button of the gimbal port, remove the gimbal cover of it. 2) Remove the lens cover. 3) Align the white dots of the two port of the camera with the red dots on the UAV, and embed them in the installation position. - Page 9 2.2.2 J30J-15 Port Connection This camera cable is included in the box. Items Pictures Functions Plug A Connect to Camera Plug B Power Line (XT30) (12V ~ 50V) PPS Signal Cable Plug C PIN1: PPS A2547H-4P) PIN4: GND Shutter and Hot Shoe Cable: Plug D PIN1: Shutter PIN2: Hot shoe signal +...
- Page 10 TTL Cable: PIN1: NC Plug E PIN2: NC (A2547H-5P) PIN3: GND PIN4: TX/RS232 TX PIN5: RX/RS232 RX The end of the J30J-15 signal cable is plugged into the J30J-15 connector of the oblique camera. The power end is XT30 male, which is used to supply power to the camera; the three-pin signal plug (male) is the camera shutter hot shoe wire.
-
Page 11: Camera Operation
The oblique camera use drone to supply power, power on/off in sync with the drone. Take M300 RTK as an example. Step of power on: 1) Mount the SHARE 202S Pro on the DJI drone, and please make sure the installation is firm. - Page 12 Step of power on: 1) Mount the SHARE 202S Pro V2 on the drone, and please make sure the installation is firm. 2) Turn on the power of the drone, the camera will start to self-checking. It will take about 40s to power on.
-
Page 13: Take Photo
3.2 Take Photo 3.2.1 When using DJI Pilot to control After the oblique camera is started, the camera enters the photo-capable state. The bottom left corner of the upper picture shows the real-time image of the downward-looking camera. The indoor light is insufficient and the image is black. At this point, the user can control the camera to take a single photo by single-clicking the camera button on the right-hand side of the remote control. -
Page 14: Camera Setting
3.3 Camera Setting Using DJI Pilot to create routes and set parameters. 1) Setting SHARE 202S Pro oblique camera Open DJI Pilot – Mission Flight -- Create a Route -- Mapping -- Create a mapping area – Custom Camera – Add Camera – Camera Setting -- Overlap setting... - Page 15 3) Payload setting Enter the payload setting menu, which has those functions: Items Functions Real-time data ON/OFF Control the display and hide of the real-time data window Shutter Change the shutter speed (500/640/800/1000/1250) ENTER Enter button, using when the camera reports an error ON/FF Control camera on/off (default setting: off) Test...
-
Page 16: Data Copy
3.4 Data Copy Different from other series of products, SHARE 202S Pro V2 camera uses a pluggable data storage module to store data. The photos and POS data collected by the camera work are stored in the data storage module. When reading data, users only need to plug the storage module into the reading data module. -
Page 17: Camera Maintenance
2) When the three error happen, there are two method to repair A. Automatic repair: user can restart the power of the device, and the camera will automatically initiate the repair. B. Manual repair: Click the ENTER button in the payload settings and confirm the selection according to the instructions. -
Page 18: After Sales
5. After Sales 5.1 Delivery (1) All equipment delivered by SHARE UAV shall be packed in accordance with the standard protective measures for packaging and transportation. Such packaging shall meet the requirements for long-distance transportation, moisture resistance, shock resistance, rust prevention, etc. - Page 19 Feedback:...
- Page 20 Share UAV Technical Support www.shareuavtec.com/en If you have any questions about the product, please contact us via the email: info@shareuavtec.com SHENZHEN SHARE UAV TECHNOLOGY CO., LTD...
Need help?
Do you have a question about the 202S Pro V2 and is the answer not in the manual?
Questions and answers