Advertisement
Advertisement

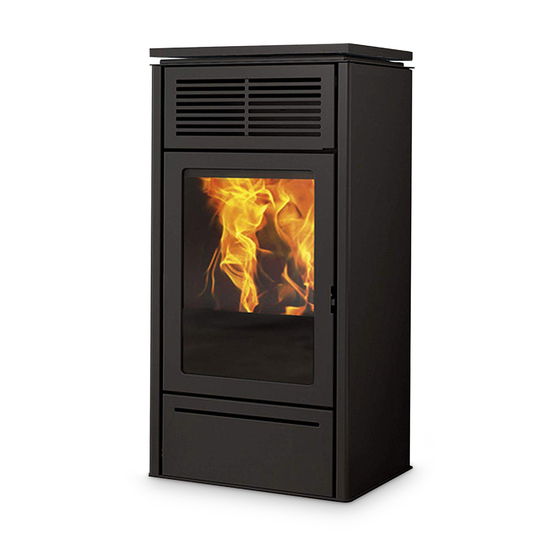
Related Manuals for EdilKamin SLIDE


Summary of Contents for EdilKamin SLIDE
- Page 1 SLIDE PELLET STOVE Installation, use and maintenance...
-
Page 2: Table Of Contents
SLIDE DoP - EK n° 140 SLIDE 7 Dop - EK n°132 Nameplate reference And also declares that: the SLIDE wood pellet stove satisfi es the requirements of the following European directives: 2014/35/EC - Low Voltage Directive 2014/30/EC - Electromagnetic Compatibility Directive... - Page 3 Proper commissioning is required for activation of the with local and national law and European regulations. For the Edilkamin warranty. The warranty is only valid in the country installation, and for anything not specifi cally indicated in the of sale of the product.
-
Page 4: Safety Information
SAFETY INFORMATION • The appliance is not designed for use by people, PLACE DRYING RACKS WITHIN THE SAFETY including children, with limited physical, sensory CLEARANCE. Keep fl ammable fl uids away from and mental capacities. the product. Fire hazard. • The appliance is not intended to be used for •... -
Page 5: General Information
GENERAL INFORMATION DIMENSIONS (cm) Ø 8 cm outlet Ø 4 cm combustion Ø 8 cm outlet... - Page 6 Fuse 4 AT, 250 Vac 5x20 The above data are illustrative and are drawn from the certifi cation by a notifi ed body. EDILKAMIN s.p.a. reserves the right to modify the product without notifi cation in the interests of improvement.
-
Page 7: Installation
INSTALLATION PREPARATION AND UNPACKING TO REMOVE THE STOVE FROM THE PALLET The packaging materials are neither toxic nor noxious The packaging materials are neither toxic nor noxious proceed as follows (refer to the fi gures next pages): proceed as follows (refer to the fi gures next pages): and do not require special disposal. - Page 8 INSTALLATION To remove the stove from the pallet: remove the screws; take the side panels off to remove the front screws. To remove the stove from the pallet: remove the screws; take the side panels off to remove the front screws.
- Page 9 INSTALLATION Fit the interlocking side panels and screw down the bolts on the back Fit the interlocking side panels and screw down the bolts on the back...
- Page 10 1. 1. Fit four screws (V) on the back of the upper top(1) provided with the package, without tightening. Fit four screws (V) on the back of the upper top(1) provided with the package, without tightening. 2. 2. Slide the bottom top (2), Slide the bottom top (2), 3.
- Page 11 • The appliance may not be installed in a bedroom, Contact the authorised Edilkamin Technical Assistance bathroom or in the same room as other equipment Centre. which draws air for combustion from the room itself, or in any area with an explosive atmosphere.
- Page 12 INSTALLATION FLUE SYSTEM FLUE SYSTEM • be certifi ed, with a chimney plate if metal ( ( Fumes duct, fl ue and chimney pot Fumes duct, fl ue and chimney pot) ) • be of uniform cross section or vary in cross section Thsi chapter has been drawn up pursuant to European only immediately after the outlet, not at some mid regulations EN 13384, EN 1443, EN 1856 and EN...
- Page 13 INSTALLATION THE FLUE THE FLUE: EXTERNAL AIR INTAKE Further to the general prescriptions for the fumes duct In general, we suggest two ways for ensuring a proper and fl ue, the fl ue: : fl ow of combustion air. • must serve solely to exhaust fumes •...
- Page 14 (the power socket must be located in an PELLET TANK easy to access position) Slide the top to load the pellets The stove is equipped with an electrical power cord 1) When doing so, DO NOT rest or connection to a 230V 50 Hz socket, preferably with the bag of pallets on the top electromagnetic cutout.
-
Page 15: Instructions For Use
USER INSTRUCTIONS OPERATION PHASES Further to the above operational procedures, the stove Description. has the following phases The access to and adjustment of these functions is described on page: - Ignition (display reads ON ) Flame ignites and grows stable Method Settings This is the result of:... - Page 16 • hooked up electrically use. Edilkamin and the reseller will not consider • THE AUDIBLE SIGNALS PRESS THE claims for battery life under any circumstances. If...
- Page 17 USER INSTRUCTIONS The display reads the POSSIBLE STATES described below: - OFF STATE The product is “deactivated” and will not produce heat due to manual switching off using the ON/OFF button on the remote control or due to an external contact (crono, phone dialler) The display shows the current time, room temperature fi...
- Page 18 USER INSTRUCTIONS USER CONTROLS (REMOTE CONTROL) Ventilation setting - ON/OFF Follow the instructions below to manually regulate the - Switch-on/switch-off power levels of the fan. - Manual mode setting Press “OK” once • Power setting The fan setting displays, next to the blade symbol •...
- Page 19 USER INSTRUCTIONS - Stand by - Relax function When the Stand by function is active, in automatic Natural convection function with automatic power and timer modes, the product shuts off when the limiting. temperature setpoint is reached and turns on again This function is available in all modes: automatic, when the temperature drops.
- Page 20 USER INSTRUCTIONS Crono The following screen will appear. Scroll to “ENABLE” When the Crono function is active, the user sets a (underlined) using the “+/-” buttons. temperature setpoint and a time zone for which that To enable the Crono function to 7 days a week or setpoint is specifi...
- Page 21 USER INSTRUCTIONS To combine one of the three temperatures To set the temperature setpoints (“TEMP” on to a time period (“SET” on the display), from the the display), from the Crono function, press the “OK” Crono function, press the “OK” button. The following button.
- Page 22 USER INSTRUCTIONS The second screen (accessible by pressing the “OK” To view/change the settings (“CHANGE” on button from the fi rst screen) allows you to set the start the display), from the Crono function, press the “OK” button. The following screen will appear. and end time of the time period matching the chosen temperature setpoint (T1,T2 and T3).
- Page 23 USER INSTRUCTIONS Night (deferred switching on/off) Load Pellets This function switches the product on/off after a set Allows you to load pellets after the screw feeder has emptied following a no-pellets alarm. period from activation of the function. Useful for the technician during commissioning. This is convenient if you go to bed and want the product Available only in the OFF state.
- Page 24 USER INSTRUCTIONS Date/Time Beep Sets the current date/time. Allows you to enable/disable the beep. This displays the fi rst time the remote control is To access the function from the main menu (as activated with the stove powered on, or by selecting indicated in the Menu section above), press the M the option in the menu.
-
Page 25: Maintenance
MAINTENANCE Before doing any maintenance, disconnect the appliance from the mains. Regular maintenance essential keeping the appliance in good working order. FAILURE TO SERVICE THE STOVE WILL PREVENT IT FROM WORKING PROPERLY. Any problems due to failure to service the stove will void the warranty. - Page 26 MAINTENANCE WEEKLY MAINTENANCE Extract the ceiling panel (3 - fi g. C) and drop the residues into the ash tray. The ceiling panel is subject to wear; the manufacturer is not responsible for breakage, especially if this occurs when its is being removed or repositioned. Once you have fi...
- Page 27 For any spare parts, contact your reseller or technician. months. Using non-original spare parts may damage the appliance and relieves Edilkamin of all liability for You should clean the chimney system at least once a damage resulting therefrom. year (check local regulations for details).
-
Page 28: Troubleshooting
TROUBLESHOOTING If problems occur, the stove shuts itself off automatically. The display will show the reason (see below). DO NOT disconnect the electrical power supply. To start the product up again, allow the shutdown procedure to complete, then press the remote control's ON/OFF button or the simplifi... - Page 29 The battery symbol displays on the remote’s display if the battery is low. MAINTENANCE: A wrench symbol is shown on the display after 2000 hours of operation. The product is working, but it must be serviced by an authorised Edilkamin technician.
- Page 32 *941296-GB* w w w . e d i l k a m i n . c o m cod. 941296-GB 06.18/N...
Need help?
Do you have a question about the SLIDE and is the answer not in the manual?
Questions and answers