Advertisement
Quick Links
Advertisement

Related Manuals for CASPR COMPACT


Summary of Contents for CASPR COMPACT
-
Page 2: Table Of Contents
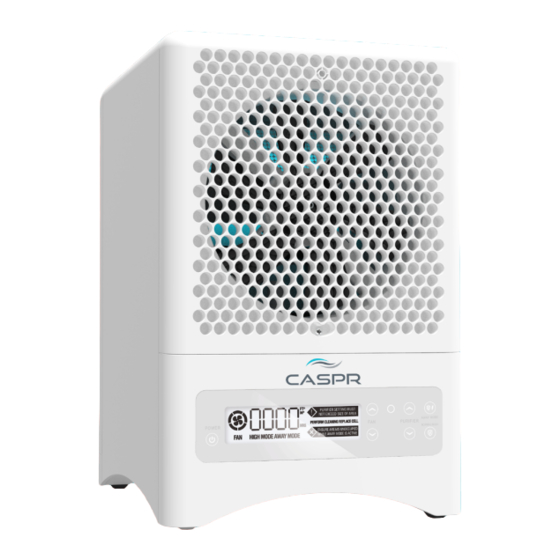
Specifications ………………………………...…..19 Start here… Initial set up 1. For your most ideal effectiveness, place CASPR COMPACT unit 4-7 feet off the ground ensuring there is a minimum of 6 inches behind the unit to allow for proper airflow. 2. Face the unit towards the center of the area you are protecting. - Page 3 4. Plug the power cable into any standard wall outlet and plug the other end of the power cable into the rear of the COMPACT unit. 5. Insert the battery inside the remote control. 6. Power on the unit by either using the remote...
- Page 4 Note: Some CASPR Compact Versions (CASPR COMPACT-CA) do not include purification plates. You may also choose to remove the purification plate yourself. When the purification plate has been removed your unit will remain in Standard PCO/NCC Mode regardless of what mode is displayed on screen and can always be used in occupied spaces.
-
Page 5: Warnings
CAUTION: Unit should be powered OFF and Power Cord should be disconnected when Cleaning/Disassembling/ Reassembling/Servicing. Note: Some CASPR Compact Versions (CASPR COMPACT-CA) do not include purification plates. You may also choose to remove the purification plate yourself. When the purification plate has been removed your unit will remain in Standard PCO/NCC Mode regardless of what mode is displayed on screen and can always be used in occupied spaces. -
Page 6: Routine Maintenance
Additional Information • Each CASPR COMPACT can effectively treat 1,500 sq feet of space, if there is air circulation in the space. Ensure doors remain open in rooms you are trying to disinfect. • Best practice is to face your COMPACT unit towards the largest open space you are disinfecting so it can efficiently process and circulate the air in the area. - Page 7 Removing and Cleaning the Filter Assembly 1. Turn off the unit by pressing the Power button. 2. Unplug the unit from the power source and then remove the power cord from the back of the unit. 3. Unscrew and remove the Rear Cover screw located above the Power Cord Port on the rear of the unit.
- Page 8 1. Gently lay the filter back onto the machine with the diamond pattern facing the interior of the unit and the honeycomb pattern facing out. 2. Replace the Rear Cover by sliding it from the top of the unit towards the bottom to secure the filter in place.
- Page 9 8. Pull the NCC cell away from the unit and attach the new NCC cell. 9. Reinsert the two screws to secure the new cells. assembly. 10. Reconnect the new power cable. 11. Replace the filter honeycomb facing inside and fabric facing toward you. Then, replace Rear Cover by sliding it from the top of the unit towards the bottom to secure the filter in place.
-
Page 10: Troubleshooting
Removing and Cleaning the Front Grille 1. Locate the Front Grille Screw on the front of the machine above the CASPR logo. 2. Using your screwdriver, carefully remove the Front Grille Screw and place the screw where you will easily find it later. - Page 11 CASPR technologies and request a new purification plate. Note: Some CASPR Compact Versions (CASPR COMPACT-CA) do not include purification plates. These versions will remain in Normal PCO/NCC Mode regardless of what mode is displayed on screen. If you don’t have a purification plate in your unit then it cannot produce ozone in any mode.
- Page 12 Outlet. To ensure the proper connection, gently push until the tabs at the top and bottom of the Cell Power Connector snap into place, securing it to the Cell Power Connector Outlet. 2) If the Cell still fails to operate, it needs to be replaced. Contact your distributor or CASPR (www.casprtech.com).
- Page 13 WE SHALL NOT IN ANY CASE BE LIABLE FOR SPECIAL, INCIDENTAL OR CONSEQUENTIAL DAMAGES ARISING FROM BREACH OF EXPRESSED OR IMPLIED We warrant the CASPR Compact to the Customer, subject to the WARRANTIES, CONDITIONS, GUARANTEES conditions below, against defects in workmanship or material,...
-
Page 14: Diagrams
Diagrams... -
Page 17: Specifications
IONIZATION NEEDLE 24 to 30 KV, 20-30 Khz Ion Generation Pulsator 6 KV DC Needle Ion Generator CASPR Technologies declines all responsibility for all damages arising from improper use of the unit or in case of tampering with the unit.
Need help?
Do you have a question about the COMPACT and is the answer not in the manual?
Questions and answers