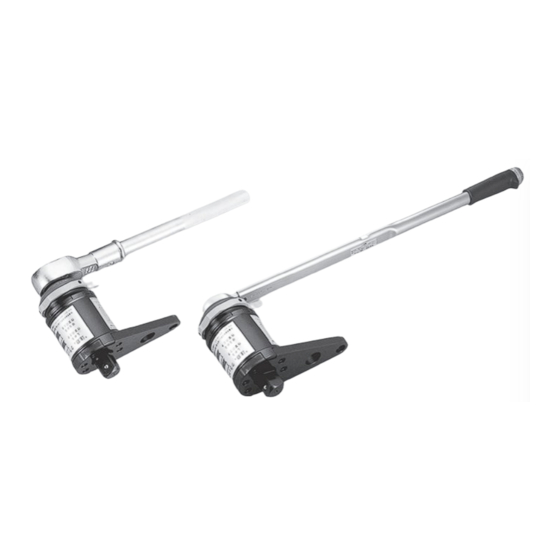
Download Print this page

Advertisement

Quick Links

●製品をご使用される前に、取扱説明書をお読みいただき、理解していただいた上でご使用く
ださい。
Read this instruction manual before use and operate wrench after full understanding of the contents. 
●取扱説明書は、いつでも読めるように所定の場所に大切に保管してください。
Preserve the instruction manual at designated place so that it may be referred again at any time upon 
necessity. 
2008
TO BE 
PRESERVED
要保 管

Advertisement

loading
Need help?

Need help?

Do you have a question about the 8-150P and is the answer not in the manual?

Questions and answers

Subscribe to Our Youtube Channel

Summary of Contents for Tone 8-150P

  • Page 1 TO BE  PRESERVED 要保 管 2008 ●製品をご使用される前に、取扱説明書をお読みいただき、理解していただいた上でご使用く ださい。 Read this instruction manual before use and operate wrench after full understanding of the contents.  ●取扱説明書は、いつでも読めるように所定の場所に大切に保管してください。 Preserve the instruction manual at designated place so that it may be referred again at any time upon  necessity. ...
  • Page 2 目次 ご使用上の注意 2 〜5 内容品 ・ ご使用になる前に 6 〜11 ご使用方法 ・ 点検 ・ 修理 1 2 〜17 仕様 1 8 〜20 TABLE OF CONTENTS C a utions  for  us e 2 2 〜26 C ontents  of  pac king & P art  name 2 7 〜28 Before use 2 9 〜37 Method ...
  • Page 3 このたびは 「TONE  強 力パワーレンチ」 および 「TONE  強 力パワーレンチ(トルクレンチ付) 」 をお買上げいただき、誠に有り難うございます。 ■本製品は トネ独自の遊星歯車機構により、 小さな入力 トルクで大きな出力 トルクを得ることが    可 能なパワーレンチです。 また、 入力側にクラッチを装着していますので、 締め付け効率が向上     しています。 ■高精度に加工された本製品は軽量 ・ 小型で作業負担を軽減し、 作業効率と安全性を向上させて     います。 ■入力用に トルクレンチを使用することにより トルク管理が可能となりました。   「強力パワーレンチ(トルクレンチ付)」 ■まず、 下記項目をご確認ください。  ● 輸送中に破損した箇所がないか。  ● ねじ ・ ボル トに脱落 ・ 緩みがないか。...
  • Page 4 ご使用上の注意 必ずお守りください。 ■この製品は大型ボル ト ・ ナッ ト類の締め付け、 又は緩め作業専用です。  この目的以外の作業には使用しないでください。 危 険 ●高所では必ず落下防 ○過大入力、 不適切な反力の取り方  などにより、 レンチが破損または        止 の 処 置をしてくだ  反力受が外れたとき、 大変危険で  さい。  す。 ○作業場の下に人がいないことを確  認し、 作業をしてください。 レンチが落下し、 人身事故の原因になります。 ●ラチェッ トハンドル又 ○入力作業後、 クラッチ部チェンジダイヤルの切り替えをすると   き、 ラチェ ッ トハン ドル (又は トルクレンチ)が逆回転する場合が  は...
  • Page 5 ご使用上の注意 必ずお守りください。 警 告 ●反力受は固くて( 変形 ○反力受をあてる部材は出力トルク  とほぼ同じ負荷を受けますので、  しない)丈 夫な部材に 緩  固くて変形しない箇所を選んでく 衝  あててください。 板  ださい。 反力受取り付けボルトの破損 ・ 変形やレンチの破損、 焼付きなどの原因になります。 ●クラッチ部チェンジダ ○P14 及びP16 の操作を行うとき、  クラッチ部チェンジダイヤルの切  イヤルの切り替えが  り替えが固く、 動かないほど荷重  固い場合、 チェンジダ  がかかっている場合もあり、 往々  にしてクラッチ部をハンマーなど  イヤル突起部をハン  の打撃による荷重解除をされるこ  マーでたたかないで  とがあります。  ください。 破損 ・ 故障、 けがの原因になります。 ●作業中は、...
  • Page 6 ご使用上の注意 必ずお守りください。 警告 ●出力角とソケッ トの結 ○誤った装着をされますと、  移動及び作業中にソケット   合がOリング仕 様 の  が落下する場合がありま  場合、 正しくピン ・ Oリ     す。  ングを装着してくださ けがの原因になります。  い。 ●無理に使用しないで ○能力範囲内で使用してくだ  さい。  ください。 破損、 けがの原因になります。 ●分解 ・ 改造をしないで ○分解・改造は故障、 けがの  原因になります。   ください。 ◆但し、 次の消耗品は必要に       応じて交換してください。  反力受/ ラチェットハンドル 故障、...
  • Page 7   A 寸 法を超える位 置  付けボル トの破損や出力軸の焼き  で受けるようにセッ ト L形反力受  付きなどの原因となります。 塗りつぶして  してください。   いる箇所で反力 A ( mm) 製品番号 を受けてくださ  8-150P い。  8-300P 12-450P 12-600P 12-1200P ― ●ソケッ トは完全にボル ○不十分ですとボル ト ・ ナッ トを痛め  たり、 レンチが外れけがの原因に    ト ・ ナッ トが隠れるまで...
  • Page 8 内容品 強力パワーレンチ 製品番号  8-150P  8-300  12-450  12-600 12-1200P 内容品 ○ ○ ○ ○ ○ 強力パワーレンチ本体 ○ ○ ○ ○ ○ ストレート形反力受 ○ ○ ○ ○ − L形反力受 六角棒L形レンチ ○ ○ ○ ○ ○ (5mm) (6mm) (6mm) (6mm) (5m m / 8 mm)
  • Page 9 ご使用になる前に 8 -1 5 0P 〜1 2 -6 0 0 P 銘板 注意シール  クラッチ部 (チェンジダイヤル) ストレート形反力受 入力差込角 出力角 反力受取り付けボルト 1 2 -1 2 0 0 P ストレート形反力受 注意シール 銘板 移動角軸 (38.1mm)  クラッチ部 出力角 (チェンジダイヤル) 入力差込角 角軸ナット 座金 反力受取り付けボルト (19.0mm角) ラチェットハンドル( 4 7 1 S 、 4 7 1 ) ハンドル...
  • Page 10 ご使用になる前に 強力パワーレンチの能力範囲 本製品は左表の能力範囲で、ご使用く 能力範囲(N・m) 能力 ださい。 最小出力トルク 最小入力トルク 最大出力トルク 最大入力トルク 製品番号 1 2 −120 0 Pは付属の63. 5 mm出力    8 -1 5 0 P   500 1 22   1 500 366 角に交換すれば1800 0 N・mまでご使    8 -3 0 0 P  1 000  95...
  • Page 11 ご使用になる前に 入力トルクの算出 ラチェットハンドル又はトルクレンチで入力するトルクを算出します。お客様にて決められた トルクを出力させるために見いだします。 『算出例』 方法は2通りあります。 ①本取扱説明書P.18の入力・出力線図またはパワーレンチ本体の貼り付けの銘板より算出    する方法があります。しかし、これらの入力・出力線図の倍率は、およその値ですので、より    正確な値を求められる場合は、②の方法により算出してください。 ②付属の検査合格書で、使用される出力トルクに近い測定点のレンチの倍率を確認し、 の式より算出してください。 出力トルク 入力トルク レンチの倍率 = × ※レンチの倍率は、使用頻度、使用状況によって変化します。  ご購入後のレンチの倍率測定については、ご購入の販売店または  弊社営業所にお申し付けください。 レンチ:8−150P トルク:1000N・m 1500 1000 ① の 方 500 法 100 200 300 400 Input torque(N・m) の式より × 出力トルク = 入力トルク レンチの倍率 ② の 出力トルク...
  • Page 12 出力角  ソケッ ト 六角  差込角 六角 または 十二角 ボル ト 反力受の交換 図のように強力パワーレンチの出力角側に反力受取り付け ボルト(六角穴付きボルト)がありますので、付属の六 角棒L形 レンチを使って反力受を取り外し、ご使用になる反力受を 取り付け六角棒L形レンチで反力取り付けボルト(六角穴付き ボルト)をしっかりと締め付けてください。   使用する工具 六角棒L形レンチ 5 ● 8-150P 出力角 mm ● 8-300P ストレート形反力受 6  12-450P mm    12-600P  反力受取 付ボル ト 8 ● 12-1200P mm (六角穴付きボル ト) 注意 ●反力受を交換するときは、強力パワーレンチ  を立てたまま放置しないでください。...
  • Page 13 ご使用になる前に 出力角の交換(12-1200P、12-1200PTのみ) セット内容品の63.5mm出力角に交 換 す る こ と に よ り 、 最 大 出 力 ト ル ク 18000N・ mまで使用可能となりま す。交換方法はあらかじめ装着されて います38.1 mm出力角先端に穴があ いており、その奥に六角穴付きボルト で出力角を固定していますので、六角 棒レンチなどで六角穴付きボルトを緩 め出力角を取り外し、63.5mm出力 角 穴 5 を取り付け、六角棒レンチなどでしっ かりと締め付けください。 M6×55 38. 1 mm 5 出力角 mm 63.
  • Page 14 ご使用方法 クラッチについて ①クラッチの目的  ラチェットハンドルで入力する、 かなりの部分が歯車のバックラッシュ (歯車相互のすき間)  や材料の弾性変形に吸収されるため、 ロスが生じます。 このロスを防ぎ、 作業効率を向上さ  せるため、 クラッチを設けています。 チェンジダイヤル(黄色) ②クラッチの名称 方向表示 R 方向表示 L 基準線 ③クラッチの操作  チェンジダイヤルを切り替える。 「出力角を右回転方向 (時計回り)」 「出力角を左回転方向 (反時計回り)」  に回す場合 基準線を 『R』 の位置  に回す場合 基準線を 『L』 の位置 注 意 「出力角が右回転方 ●作業前には必ず、 出力角の回転方向と  向でクラッチ方向  がL位置の場合」  クラッチの方向が合致しているか確認して  から作業を行ってください。 「出力角が左回転方向 クラッチ部が破損する原因になります。  でクラッチ方向がR位置の場合」...
  • Page 15 ご使用方法 右回転(時計回り) ①付属のラチェットハンドル又は 「ラチェットハンドル」    「トルクレンチ」  トルクレンチの切り替えハンド  ル又は切り替えレバーを図の  位置にセットしてください。 切替ハンドル ●トルクレンチを使用する場合は  事前にトルクレンチのトルク  設定を行っておいてください。 切替レバー ②クラッチのチェンジダイヤルを 『  R  』  にセットしてください。 チェンジダイヤル ③本体の出力角とラチェットハンドル又はトルクレンチは 「右回転」、 反力受は 「左回転」となり     ます。 レンチ本体にソケット、 ラチェットハンドル (又はトルクレンチ)を組み付け、 ボルト・ナ     ットに確実にセットしてください。 このとき、 反力を確実に取るため、 反力受を固くて変形し     ない部材にあたるようセットしてください。 反 力 を 受 ける 部 材 は 出力トルクとほぼ同じ...
  • Page 16 ご使用方法 警告 ●作業中は、 反力受に手や指及び足などを近づけないでください。 反力受負荷方向 ○反力受は出力角の回転方向に対し、逆方向に回転します。 けがの原因になります。 出力角 回転方向 ④入力作業完了(レンチの外し方)   入力作業完了後、 レンチをボルト ・ ナッ トから取り外す  ことが困難な場合があります。 これはレンチ内部から  発生した弾性力による荷重が、 反力受とボルト ・ ナッ ト  の間にかかっていることによるものです。 この場合は、  次の手順で取り外してください。 A   ラチェッ トハン ドル (又は トルクレンチ)を入力した  A  まま保持、 クラッチ部チェンジダイヤルを 『L』 位置  に切り替えてください。 B   このとき、 ラチェッ トハンドル (又はトルクレンチ) が   逆回転する場合がありますので、...
  • Page 17 ご使用方法 左回転(反時計回り) 右ねじの場合は緩め作業、 左ねじの場合は締め付け作業となります。 ①付属のラチェットハンドルの切り替えハンドル 「ラチェットハンドル」   を図の位置にセットしてください。 警 告 ●トルクレンチは左回転 (反時計方向) では使用できまん。  付属のラチェットハンドルを使用してください。 トルクレンチの機構上右回転方向(時計回り)以外のご使用はできません。 トルクレンチの破損、けがの原因になります。 切り替えハンドル ②クラッチのチェンジダイヤルを『  L  』  にセットしてください。 ③本体の出力角とラチェットハンドルは 「左回転」、 反力受は 「右回転」となります。 レンチ本体  にソケット、 ラチェットハンドル、 を完全に組み付け、 ボルト・ナットに確実にセットしてくだ     さい。 この時、 反力を確実に取るため、 反力受を固くて変形しない部材にあたるようセットし 反力を受ける部材は出     てください。 力トルクとほぼ同じ負 荷を受けますので、固 くて変形しない箇所を 選んでください。...
  • Page 18 ご使用方法 警告 ●作業中は、反力受に手や指及び足などを近づけないでください。 反力受負荷方向 ○反力受は出力角の回転方向に対し、逆方向に回転します。 けがの原因になります。 出力角 回転方向 ④入力作業完了(レンチの外し方)  入力作業完了後、 レンチをボルト・ナットから取り外 す     ことが困難な場合があります。 これはレンチ内部から発     生した弾性力による荷重が、 反力受とボルト・ナットの     間にかかっていることによるものです。 この場合は、 次     の手順で取り外してください。 A   ラチェットハンドルを入力してまま保持、 クラッチ部 A   チェンジダイヤルを 『 R  』 位置に切り替えてください。   このとき、 ラチェットハンドルが逆回転する場合があ B   りますので、 切り替えが完了するまで保持している   力を抜かないでください。 危険 ●ラチェットハンドルの回転半径内に身体を入れないでください。 ○入力作業後、クラッチ部チェンジダイヤルの切り替えをする時、ラチェ    ット ハンドル(又はトルクレンチ)が逆転する場合がありますので、...
  • Page 19 保守点検 ■使用後は、 故障・サビの原因となるゴミ、 ほこり、 油、 水分などを取り除いてください。 ■作業終了後は、 ケースに入れて乾燥した場所に保管してください。 修理・検定 ■修理の詳細につきましては、 お買い求めの販売店、 あるいは弊社営業所へお問い合わせ  ください。 その際は機種・故障状況など詳しくご報告ください。 ■末長くご使用いただくために、 最低年1回の分解修理をお薦めします。 (有償) ■レンチの倍率は 『ご購入時の状態』 です。 使用状況によって若干変化します。 故障診断方法 ■本製品には、性能・品質について万全を期しておりますが、万一異常と思われる場合には、  下記の表を目安に診断されると便利です。 状   況 箇  所 原   因 診断要領 対策 〈備 考 〉 ●クラッチの操作方法の ●チェンジダイヤル位置 ●チェンジダイヤル位置 ●チェンジダイヤル  項を参照してください  を正しく確認する  が逆になっている...
  • Page 20 強力パワーレンチの入力・出力線図 × = 出力トルク 入力トルク レンチの倍率 8-150P 8-300P (倍率4.1) (倍率10.5) 1 5 0 0 3 0 0 0 2 5 0 0 1 0 0 0 2 0 0 0 1 5 0 0 1 0 0 0 5 0 0...
  • Page 21 最 小 〜 最大 最 小〜 最大 K g 強力パワーレンチ トルクレンチ N ・ m N ・ m   8-150P T    500〜   123 0 122〜30 0 69 3 T6MN30 0   7.1   8-   150   8-300P T  ...
  • Page 22 ボルト数 A B R D d 付けボルト タイプ L T L T H  8-150P(T ) 13 5 19 4 13 0 18 9  8 5  7 0  4 3  6 5  3 7 M 6×1 5  8-300P(T ) 19 0 25 0...
  • Page 23 T his   ins t ruc tion  ma nua l  c ove rs   T ON E   S upe r  P owe r  Wre nc he s   s uffix  P   &   P T  t ype s . ■S witc h-ove r-cl utc h, ...
  • Page 24: Cautions For Use

    Cautions for use Must be followed Super   Power   Wrench   is   designed   for   tightening   or  loosening   of   bolts   and   nuts.   Do not use Super Power Wrench for purposes not intended. D ANG E R ●Take any ○It is very dangerous when the   wrench is busted or the   necessities to   reaction plate is gotten out of   joint by too much input torque. prevent fall-down  ○Confirm there is nobody  accident when   underneath job site.
  • Page 25 Cautions for use Must be followed W ARNI N G W ARNIN G ●Operator  must read   ○R e a d  t hroug h  t he  ins t ruc t ion   ma nua l  c a re fully  bef ore  us e .  the  instruction      manual before  use .
  • Page 26 Cautions for use Must be followed W ARNIN G ●Always keep hand  ○Beware that reaction   plate rotates to  and foot clear from   direction opposite  Direction of  reaction plate the reaction plate.  to input direction. Failure might hurt  Direction of finger or foot. output ●Insert socket to  ○If the insertion is improper,   square drive might be  the square drive   broken by force even  end securely.  below the product's standard. ●Do not use  ○Do not use attachment such as   extension bar, joint, adaptor and  attachment except   etc to square drive. socket. Failure might damage those  attachments and furthermore,  cause serious injury. ●When  usin g  socket   ○If the installation is   improper, socket might ...
  • Page 27 Cautions for use Must be followed WAR NI N G W ARNIN G ●Do not  ○Disassembly and remodel cause deteriorated torque   accuracy, breakage  disassembly.    or personal injury.  Do not remodel. ◆However, reaction   plate and ratchet   handle should be   replaced from time to time. Failure might cause breakage and  personal injury. ●Use safety ○Use safety helmet,   glasses and foot-wear     protections.  during operation. ●Contact your  ○Repairs should only be carried out by a qualified   person using genuine spare parts, otherwise  distributor for   might result not only in improper wrench  repair service.  performance but also considerable damage   to the user. ●Check and confirm  ○If there are no crack, deformation or wear of socket,   wrench and reaction plate. before use. ○If socket and reaction plate are securely installed. Failure  might cause  serious injury − 25  −...
  • Page 28 ●When  usin g  L-type   ○Failure to do so might cause breakage of HSH bolt  reaction  plate,  place    or seizure of output drive. portion  outside  of  L( mm)  L-dimension  to   Model No. L-type   8-150P reaction plate reaction  member .  8-300P 12-450P 12-600P  Portion to be placed   on  rea c tion  member  ( shaded portion ) ●Install  socket  securely  ...
  • Page 29: Contents Of Packing

    Contents of packing Super Power  W renc h (1package )  8 - 150P  8 - 300P  12 - 450P  12 - 600P 12 - 1200P ○ ○ ○ ○ ○ Body ○ ○ ○ ○ ○ Straight-Type  Reaction Plate  (A-type) (A-type) (A-type) (A-type) (B-type) ○...
  • Page 30 Part name ●8 - 1 5 0P 〜1 2 - 6 0 0 P ① ① Bod y ② Strai ght-Type  Reaction  Plat e ③ Switch-O ver-Clutc h ④ Input D rive (19.0mm  sq.  Dr.) ③ ⑤ Warnin g Labe l ② ④ ⑥...
  • Page 31 C a pa c ity of O/ P  &  I/ P  T orque  (N .m) Minimum Maximum O/P  T orq. I/P  T orq. O/P  T orq. I/P  T orq.   8-150P  500   12 2 123 0  12-300P  100 0   9 5 300 0  12-450P...
  • Page 32 Before use Caution for Loosenin It  is   often   the   case   that   more   than   double   of   tightening   torque   is   needed   for  loosening, due to gathered rust or deteriorated threads. Lubricant Spray It  is   recommendabl e  t o  prepa re  mode l  having  ...
  • Page 33   Torqu e Target input torque of ratchet handle or torque wrench can be  calculated by method below. 『Ex ampl e 』 ①Calculate from magnification diagra m (on P39 ) or rating plate. ②Calculate from formula.     Output torque = Input torque x Magnification Wrench to be used : 8-150P  Target torque : 1000 N ・ m 1 5 0 0 1 0 0 0 5 0 0 1 0 0 2 0 0 3 0 0...
  • Page 34 HS H  bolt  s e c urely. Tool to be used Hex Key Wrench 5 ● 8-150P mm Output Drive ● 8-300P Straight-Type 6...
  • Page 35 ご使用になる前に Before use Chan g ing   Output Driv e 1 2 -1 2 0 0 P  c a n  be  us e d  up  t o  1 8 00 0 N・m  c a pa c it y by  c ha nging  t o  6 3 .5 mm ...
  • Page 36 Before use Switch-Over-Clutc ①Considerable portion of input torque is absorbed by gears' bac klash   and/or material's elastic distortion.    Super power wrench incorporates clutch mechanism to  prevent such losses and increase work efficiency. ②Name of clutch components Clutch-stem (Yellow) Direction R Direction L Base Line ③Manipulation of Switch-Over-Clutch Set on R position to  Set on L position to  rotate output drive to  rotate output drive to  clockwise direction. counter-clockwise direction. CAU TI O N ●Confirm  position  of  clutch-stem  before  use . Failure  might cause  breaka ge of  clutch . − 34  −...
  • Page 37 ご使用になる前に Method of use Clockwise Direction (Take reverse procedure for counter-clockwise direction.) ①Set switch over lever of  Ratchet Handle Torque Wrench  ratchet handle or torque   wrench as shown on   figures. ●When using torque   wench, set target   torque before operation. Switch Over Lever ②Set clutch-stem on "R" position. Clutch-stem ③Reaction plate rotates in the direction opposite to the in-and-  output direction.    Mount ratchet handle/torque wrench on power wrench and set to   bolt/nut.  Apply reaction plate on solid and unbendable member s   to burden reaction force. Reaction plate must be placed  squarely against a solid  Direction of reaction plate member or surface adjacent  to the bolt to be tightened, as  such member or surface  receives large force almost  equivalent to output torque. Direction of input with ratchet handle or torque wrench Direction of output Direction  of idle-turn − 35  −...
  • Page 38: Method Of Use

    Method of use WARNIN G ●Al ways  keep  hand  or  f oot  clear  f rom  the   reaction  plate  w hen  w rench  is  in use . Direction of reaction plate ○Reaction plate rotates in the direction   opposite to the output direction. Failure  might cause  serious  injury . Direction of output ④Method to remove wrench after tightening.    After tightening operation, it is often hard   to detach the wrench because elastic   force generated inside of the wrench is   imposing a large load in between reaction   plate and bolt/nut.    In such case, execute following   procedure to release load to ...
  • Page 39 ご使用になる前に Maintenance ■Remove dust, litter, oil or moisture after use to prevent fail ure and corrosion. ■Store idle wrench in the case and keep in dry condition after  use. ご使用になる前に Repair and Inspection ■Contact your distributor for services available. ■Annual inspection is suggested to keep long life of wrench. ■Magnification of wrench might slightly vary depending on freque nt   and period of use. ご使用になる前に Diagnosis ■Following chart is the rough guidance of diagnosis in case of  malfunction. Majority of breakage derives from miss-use of clutch and reacti on  plate and too much input torque. − 37  −...
  • Page 40 Diagnosis Countermeasur e Troubl e Where to chec Caus e Diagnosi s remark s 〈 〉 ●Clutch-stem position ●See switch-over- ●Correct clutch-stem ●Clutch-stem  is reverse  clutch procedure  position   ●Clutch mechanism ●Breakage ●Overhaul ●Contact distributor Input shaft does not rotate: ●Power multiplying ●Breakage ●Overhaul ●Contact distributor  mechanism ●Sliding surface of ●Seized ●Overhaul ●Contact distributor  input drive or output   drive Input drive rotates, ●Power multiplying ...
  • Page 41 ご使用になる前に Magnification Diagram Output Torque = Input Torque x Magnification 8-150P 8-300P (Magf.4.1) (Magf.10.5) 1 5 0 0 3 0 0 0 2 5 0 0 1 0 0 0 2 0 0 0 1 5 0 0 1 0 0 0 5 0 0 1 0 0...
  • Page 42: Specifications

    Mode l (mm ) Kg Hea vy  Dut y N・m N・m T orque  Wr enc h Powe r W renc h  8-150P T   50 0〜  123 0 12 2〜 30 0 69 3  8- 150 P T6MN30 0  7.1  8-300P T  100 0〜  300 0 69 3  8- 300 P...
  • Page 43 B R D d HSH Bolt Type unit L T L T H  8-150P( T ) 13 5 19 4 13 0 18 9  8 5  7 0  4 3  6 5  3 7 M  6 ×1 5  8-300P( T )
  • Page 44 本         社 〒556-0017 大 阪 市 浪 速 区 湊 町 2 丁 目1番 5 7 号 営 業 企 画 部 〒586-0026 大 阪 府 河 内 長 野 市 寿 町 6 番 2 5 号 Web Site: https://www.tonetool.co.jp e-mail: ko-eigyo@tonetool.co.jp TEL (0721)...