Kärcher K 3.450 Operator's Manual
High pressure washer
Hide thumbs
Also See for K 3.450:
- Operator's manual (52 pages) ,
- Operator's manual (18 pages) ,
- Manual (44 pages)

Related Manuals for Kärcher K 3.450


Summary of Contents for Kärcher K 3.450
- Page 1 K 3.450 HIGH PRESSURE WASHER - OPERATOR MANUAL English Français Español 59635480 04/10...
-
Page 2: Table Of Contents
HIGH PRESSURE WASHER OPERATOR MANUAL Model Overview Owner/User Responsibility Important Safety Instructions The owner and/or user must have an Assembly Instructions understanding of the manufacturer’s Operating Instructions operating instructions and warnings be- Using the Accessories fore using this pressure washer. Warning information should be empha- Working with Detergents sized and understood. -
Page 3: Model Overview
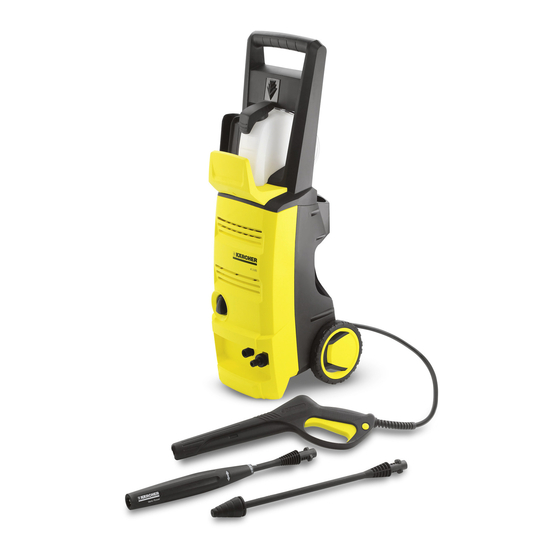
MODEL OVERVIEW 1 Water inlet with garden hose con- 9 Wheels nector 10 Trigger gun 2 High pressure outlet 11 Trigger gun safety lock 3 ON/OFF switch 12 Key to detach the high-pressure 4 Detergent tank (removeable) hose from the trigger gun 5 Storage for trigger gun 13 High pressure hose 6 Transport handle... -
Page 4: Important Safety Instructions
IMPORTANT SAFETY INSTRUCTIONS WARNING WARNING When using this product basic precau- Risk Of Explosion – Do not spray tions should always be followed, includ- flammable liquids. Do not use acids, alkaline, solvents, ing the following: or any flammable material in this product. - Page 5 built into the plug of the power-supply skin. do not point the gun at anyone or cord. This device provides additional any part of the body. In case of penetra- protection from the risk of electric tion seek medical aid immediately. shock.
-
Page 6: Assembly Instructions
ASSEMBLY INSTRUCTIONS STEP 2: Assembly STEP 1: STEP 3: OPERATING INSTRUCTIONS STEP 1: STEP 2: Insert the spray wand of your choice Connect garden hose to unit’s water into the trigger gun. Press in against inlet. - Page 7 STEP 3: STEP 6: Unlock the trigger gun safety lock. STEP 4: Trigger the gun to eliminate trapped Connect garden hose to the cold wa- air, wait for a steady flow of water to ter source and turn water on com- emerge from the spray nozzle.
-
Page 8: Using The Accessories
USING THE ACCESSORIES To apply detergent, the wand must WARNING be positioned to the lower pressure To avoid serious injury never point setting (Mix). spray nozzle at yourself, other per- Dirtblaster sons or animals. ® Always test an inconspicuous area This nozzle features a 0º... -
Page 9: Taking A Break ..Five Minutes Or More
STEP 3: For best results see Cleaning Tips for specific information on how to Turn on the pressure washer (I). Pull clean different surfaces. trigger to operate unit. Liquid deter- gent is drawn into the unit and mixed Always Use Kärcher Detergent for ®... -
Page 10: Shutting Down & Clean-Up
SHUTTING DOWN & CLEAN-UP STEP 1: STEP 5: Turn the switch to OFF (0) position Disconnect the garden hose from and unplug cord from outlet. the water inlet on the unit. STEP 2: STEP 6: Turn off the water source. Disconnect the garden hose from STEP 3: ... -
Page 11: Winterizing And Long-Term Storage
WINTERIZING AND LONG-TERM STORAGE 1: Disconnect all water connections. of heat as it may dry out the pump seals. 2: Turn on the machine for a few seconds, until the water which had CAUTION remained in the pump exits, turn off Failure to follow the above directions immediately. -
Page 12: Cleaning Tips
CLEANING TIPS 6 feet and always apply detergent from CAUTION bottom to top). Allow detergent to re- Before cleaning any surface an in- main on surface 1-3 minutes. Do not al- conspicuous area should be cleaned low detergent to dry on surface, if to test spray pattern and distance for surface appears to be drying, simply maximum cleaning results. - Page 13 keeping the spray nozzle approximately 6-8 inches from the cleaning surface (distance should increase when rinsing pin-striping or other sensitive surfaces). Always clean from top to bottom and from left to right. For best results, wipe surface dry with a chamois or soft dry cloth.
-
Page 14: Optional Cleaning Accessories
OPTIONAL CLEANING ACCESSORIES siding or windows. The water pressure Optional accessories are available to from your pressure washer causes the further enhance your cleaning capabili- inner brushes to gently spin, making ties. These accessories are accurate as your cleaning job much easier. The an- of the printing date of this manual. - Page 15 sure washer, add abrasive material and attack the rust and paint with our eco- friendly alternative. Fits most Kärcher ® pressure washers up to 2300 PSI. (bay- onet) Part No. 2.638-792.0 Detergent Foamer Attachment Ideal for applications which require a thick foam.
-
Page 16: Troubleshooting
TROUBLESHOOTING Disconnect the machine from the power CAUTION source before making any repair. Symptom Cause Solution Motor will not start On/Off switch is in the “OFF” Turn switch to the “ON” (I) posi- (0) position. tion Power cord is not plugged in. Plug in power cord. Electrical outlet does not sup- Try a different outlet. - Page 17 Symptom Cause Solution No detergent. Detergent suction tube not Check connection. properly connected to the machine. Detergent is too thick. Dilute detergent, for best re- sults use Kärcher detergent. ® Filter on detergent suction Run warm water through filter tube is clogged. to remove debris.
Need help?
Do you have a question about the K 3.450 and is the answer not in the manual?
Questions and answers