Table of Contents
Advertisement
Quick Links
Advertisement
Table of Contents

Related Manuals for Cantek 303S


Summary of Contents for Cantek 303S
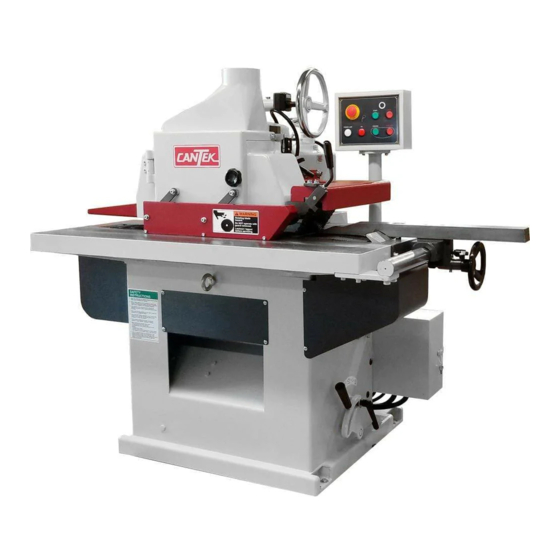
- Page 1 Operations & Parts Manual www.cantekamerica.com 303S SINGLE BLADE RIPSAW Please ensure you have your serial number available when contacting us for parts or service. Cantek America Inc. | 1.888.982.2683 | Parts: sales@cantekamerica.com | Service: service@cantekamerica.com...
- Page 2 INTRUDUCTION Much thanks for you to select our product, 303S RIP SAW. We deep believe your intelligent selection which will make you feel easy and satisfactory. In order to assist you realize the machinery character and how to operate, maintain the machinery etc., affairs. Therefore, we compile this manual for you to study and refer.
-
Page 3: Table Of Contents
TABLE OF CONTENTS SAFETY RULES FOR RIP SAW ................1 CONTROL PANEL ADJUSTMENT (1) ..............2 CONTROL PANEL ADJUSTMENT (2) ..............3 POWER WIRES CONNECTION................4 SOCKET FOR LASER.................... 5 CONNECTING TO DUST COLLECTION SYSTEM .......... 6 WOOD THICKNESS ADJUSTMENT ..............7 LIMIT SWITCH ON BLADE DOOR .............. -
Page 4: Safety Rules For Rip Saw
SAFETY RULES FOR RIP SAW As with all machine, there is a certain amount of hazard involved with the use of this machine. Use the machine with the respect and caution demanded where safety precautions are concerned. When normal safety precautions are overlooked or ignored, personal injury to the operator can result. -
Page 5: Control Panel Adjustment (1)
CONTROL PANEL ADJUSTMENT (1) 1. The location is for installing the control panel box. (Figure 1) (Figure 1) 2. After locating the box, loosen screws by tools and then turn the box to the operating position When all is done, please lock and fix it.(Figure2) (Figure 2) (Figure 2) -
Page 6: Control Panel Adjustment (2)
CONTROL PANEL ADJUSTMENT (2) ※ Correct Direction (Figure 1.2): 1) The front of control panel 2) The bottom of control panel... -
Page 7: Power Wires Connection
POWER WIRES CONNECTION 1. Notice the sawblade direction when the power source is connected. Correct Direction 2. If the direction is wrong, simply change the R & S wires. Ground Wire * Green color R S T * Yellow with green color Power Lines... -
Page 8: Socket For Laser
SOCKET FOR LASER There is a socket for a laser mounted on the electric cabinet’s upper. -
Page 9: Connecting To Dust Collection System
CONNECTING TO DUST COLLECTION SYSTEM • The rip saw is equipped with one dust hood outlet for connecting to a dust collection system. • The dust hood outlet is located in the top of the machine. • The dust hood outlet is 5" in diameter. •... -
Page 10: Wood Thickness Adjustment
WOOD THICKNESS ADJUSTMENT 1. Firstly loosen the L Handle (a.), and then turn around the Handwheel (b.) to make the pressing piece go up and down for meeting the thickness of workpiece. b. HANDWHEEL a. L HANDLE for adjusting the handwheel (Turn the wheel clockwise: the wheel up;... -
Page 11: Limit Switch On Blade Door
LIMIT SWITCH ON BLADE DOOR The door limit switch is mounted on the machine’s blade door. When the operator opens the blade door, the machine’s electric power is shut off immediately. Please note: Always shut off the power source and wait for the machine to completely stop running before doing any maintenance, adjustments and changing the saw blade. -
Page 12: Sawblade Replacement
SAWBLADE REPLACEMENT 1. Loosen the handle. L Handel for loosen the sawblade 2. The handwheel rises. + Handwheel for rising/lowering the sawblade (Turn the wheel clockwise: the sawblade up; Turn the wheel anticlockwise: the sawblade down.) -
Page 13: Sawblade Replacement
SAWBLADE REPLACEMENT Open End 3. Insert the special Open Wrench End Wrench & the 19mm T-wrench, and then loosen the screw. T-wrench 4. Take the old sawblade out. 5. Replace with the new sawblade and lock it. -
Page 14: Auto Pump Oil Level
AUTO PUMP OIL LEVEL 1. Note! The “OIL” key will light & alarm when the oil level is lower than the standard. OIL light 2. When the oil runs out, feed the oil into the pump from the oil inlet (Clean the chips around in case they drop into the oil tank). -
Page 15: Maintenance
MAINTENANCE 1. Refill grease into oil inlet on the saw spindle per 150 hours the spindle runs. 2. Clean the Caterpillar after daily operation to keep its smooth and life-span. Caterpillar... -
Page 16: Wiring Diagram (1)
WIRING DIAGRAM (1) -
Page 17: Wiring Diagram (2)
WIRING DIAGRAM (2) -
Page 18: Diagram& Part List
DIAGRAM& PART LIST... - Page 23 PART LIST 303S RIP SAW Q’TY Q’TY PART NAME PART NAME Triangle belt A54 Handle Spindle driving pulley Motor seat arm Bolt Motor seat handle Motor adjusting seat Brush (short) Motor Brush hanger Spindle fixing ring Fixing brush shaft Motor seat...
- Page 24 PART LIST 303S RIP SAW Q’TY Q’TY PART NAME PART NAME Fence Parallel key Fence seat Reduction gear Fence tooth bar Parallel key Tooth bar fixing plate Chain wheel (right) Tooth bar fixing plate (left) Slide block Scale on tooth bar...
- Page 25 PART LIST 303S RIP SAW Q’TY Q’TY PART NAME PART NAME Outer washer for sawblade Upper frame Sawblade Handwheel 6"1/2*7/8" Inner washer for sawblade Spindle Sawblade lifting rod screw Parallel key Hanger Spindle front cover Bearing UCFL205-14U Bearing 7208 Fixing ring...
- Page 26 PART LIST 303S RIP SAW Q’TY Q’TY PART NAME PART NAME Slide seat press board Bearing nut(left thread) Block Roller Feeding roller seat Side roller seat Safety guard(outfeed) Oil nozzle (straight) Hinge Roller seat (big) Dust hood Roller shaft (long)
Need help?
Do you have a question about the 303S and is the answer not in the manual?
Questions and answers