Table of Contents
Advertisement
Quick Links
Advertisement
Table of Contents

Related Manuals for Kärcher G 3200 X


Summary of Contents for Kärcher G 3200 X
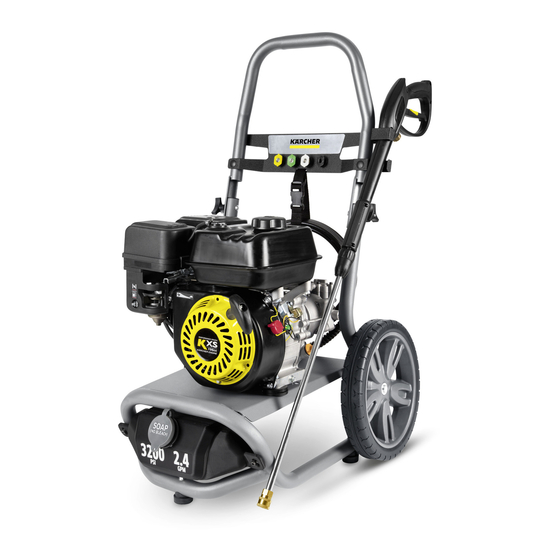
- Page 1 G 3200 X Manual Not For Use in USA and Canada! 8.757-208.0 04/18...
-
Page 2: Model Overview
MODEL OVERVIEW Handle Water inlet for garden hose Trigger gun High pressure outlet Trigger gun safety lock Water inlet filter High pressure hose Detergent tank Spray wand Detergent tube connection Quick connect nozzles On/Off switch Knob Throttle choke and fuel switches Petrol Tank Tap adaptor Oil Dipstick... -
Page 3: Specifications
Warranty Information Please do not place the packaging into the ordinary refuse for disponsal, but Specifications arrange for the proper recycling. G 3200 X Old appliances contain valuable materials Operating Pressure 3200 PSI than can be recycled. please arrange for Water Volume 9.8 L/MIN... -
Page 4: Safety Alert Symbols
HIGH PRESSURE WASHER OPERATOR MANUAL Safety Alert Symbols Symbols on the machine DANGER The high pressure jet may not be directed at persons, animals, live Indicates “an imminently hazardous situation electrical equipment or at the ap- which, if not avoided, will result in death or seri- ous injury.”... -
Page 5: Important Safety Instructions
IMPORTANT SAFETY INSTRUCTIONS Do not direct the jet against yourself or oth Read the operating instructions of ers in order to clean clothes or foot-wear. the engine manufacturer before start-up and follow the safety instructions carefully. Do not use the machine within range of Incorrect fuels shall not be used as they may persons unless they wear protective cloth prove hazardous. - Page 6 IMPORTANT SAFETY INSTRUCTIONS Do not use the machine if a supply cord or important parts of the machine are dam aged, e.g. safety devices, high pressure hoses, trigger gun. WARNING Always switch off the mains disconnecting switch when leaving the machine unatend WARNING Risk of fire, do not add fuel when the product is operating or still hot.
-
Page 7: Hardware Included
IMPORTANT SAFETY INSTRUCTIONS WATER SUPPLY (Cold Water Only) WARNING n The water supply temperature must not ex- ceed 122°F/50°C. Water that has flowed through backflow Never use the pressure washer to draw in preventers is considered to be non potable. water contaminated with solvents, e.g. - Page 8 ASSEMBLY INSTRUCTIONS Hardware (included) Description Purpose Illustration Knob Handle assembly Nozzle holder Nozzle Holder assembly Nozzle holder ¼” carriage bolt assembly Nozzle holder Knob with nut assembly Quick connect Nozzle kit nozzle kit assembly Wand Wand assembly Spray gun VersaGRIP ® assembly Spray gun High pressure hose...
- Page 9 ASSEMBLY INSTRUCTIONS Assembling Illustration 4: Illustration 1: Mount nozzle holder (K) to handle as shown Pass the detergent siphon hose (A) under in illustration, align holes, insert ¼” carriage the machine, aligning the detergent fill hole bolts (L) and secure with knob with nut (M). on the detergent tank (B) towards the front of the machine.
-
Page 10: Using The Accessories
OPERATING INSTRUCTIONS STEP 7: STEP 3: Connect garden hose to the cold water source Check oil level. Oil level should always be and turn water completely on. between the "FULL" and "MAX" marks on the dipstick as shown in the picture below. Do not use hot water. -
Page 11: Working With Detergents
USING THE ACCESSORIES CAUTION 65° spray angle = Black nozzle High pressure in nozzle area. Risk of injury For operating with detergents or cleaning with caused by improperly locked nozzle. low pressure. Make sure you hear the "click" when inserting the nozzle tip into the quick connection. -
Page 12: Shutting Down & Clean-Up
TAKING A BREAK ...five minutes or more STEP 2: STEP 1: Release trigger and engage safety lock. Move the engine ON/OFF switch to OFF position. SHUTTING DOWN & CLEAN-UP STEP 5: STEP 1: If detergents have been used, remove deter- Release trigger and engage gun safety lock. -
Page 13: Maintenance Instructions
MAINTENANCE INSTRUCTIONS Kärcher pump Pump Maintenance Initial Use The pump on your Kärcher pressure washer does All Kärcher pumps ship with oil already inside direct not require maintenance. Any attempts to service from the factory. There is no need to add oil. or alter the pump may damage your pressure washer and void your product warranty. -
Page 14: Optional Accessories
CLEANING TIPS Barbecue Grills, Outdoor Power Optional Accessories Equipment & Gardening Tools Optional accessories are available to further enhance your cleaning capabilities. These acces- (with or without detergent). Pre-rinse cleaning sories are accurate as of the printing date of this surface with fresh water. -
Page 15: Troubleshooting
TROUBLESHOOTING CAUTION Remove the spark plug cable to prevent accidental ignition of the engine before making any repair. Symptom Cause Solution ENGINE WILL No petrol Fill petrol tank NOT START Engine switch OFF Turn engine switch to the ON position Choke is not in the correct Slide choke lever out to closed position position... - Page 16 TROUBLESHOOTING Symptom Cause Solution NO DETERGENT Detergent suction tube not Check connection properly connected to the machine Detergent is too thick Dilute detergent, for best results use Kärcher detergent Filter on detergent suction Run warm water through filter to remove debris tube is clogged Damaged or clogged deter-...
-
Page 17: Warranty Information
WARRANTY INFORMATION High Pressure Washers Limited warranty This Kärcher product is warranted by Kärcher to be free of defects in workmanship and materials under normal use. Specific warranty applies to: • Kärcher KPS and KXS series engines are warranted for two (2) years parts and labor and serviced by a Kärcher service center •... - Page 18 WARRANTY INFORMATION • Damage caused by acts of nature such as floods, fires, earthquakes, lightning strikes, etc. • Devices or accessories not distributed or approved by Kärcher. Any use of such said devices or accessories will void implied warranty. • Repairs made by the end user or any service center not authorized by Kärcher. Any such tampering with Kärcher equipment or accessories will void the implied warranty.
Need help?
Do you have a question about the G 3200 X and is the answer not in the manual?
Questions and answers