
Subscribe to Our Youtube Channel
Related Manuals for Rollei Smart Frame WiFi 100


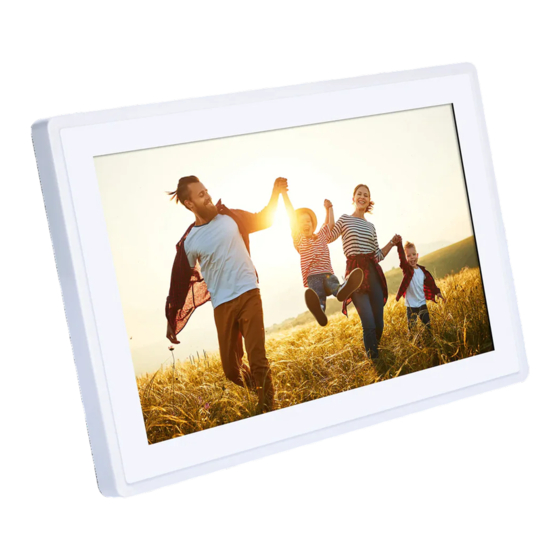
Summary of Contents for Rollei Smart Frame WiFi 100
- Page 1 Smart Frame WiFi 100 Digitaler Bilderrahmen Digital Photo Frame ANLEITUNG AUF DEUTSCH MANUAL IN ENGLISH www.rollei.de...
-
Page 2: Table Of Contents
Inhalt Vorwort . . . . . . . . . . . . . . . . . . . . . . . . . . . . . . . . . . . . . . . . . . . . . . . . . . .4 Vor dem ersten Gebrauch . - Page 3 Content Foreword . . . . . . . . . . . . . . . . . . . . . . . . . . . . . . . . . . . . . . . . . . . . . . . . .26 Before First Use .
-
Page 4: Vorwort
Sie Fotos oder Videos direkt von Ihrem Smartphone oder Tablet an den Rollei Smart Frame WiFi 100 senden – egal, wo auf der Welt Sie sich befinden . Die Fotos oder Videos erscheinen innerhalb von Sekunden auf dem digitalen Bilderrahmen, sodass Sie die Momente direkt genießen können, während sie gerade passieren . -
Page 5: Sicherheitshinweise
Zeichenerklärung Geräte mit diesem Zeichen haben eine zusätzliche oder verstärkte Isolierung und entsprechen der Schutzklasse II . Nur für innen . Geräte mit diesem Zeichen dürfen nur im Haus betrieben werden (trockene Umgebung) . Mit diesem Symbol gekennzeichnete Produkte haben eine positive Polarität . Sie dürfen nur mit Produkten verbunden werden, die ebenfalls eine positive Polarität haben . - Page 6 Sicherheitshinweise – Nutzen oder lagern Sie das Produkt nicht bei hohen Temperaturen oder in geschlos- senen Räumen mit direkter Sonneneinstrahlung . Bei Umgebungstemperaturen von mehr als 40° C sollte das Produkt nicht mehr genutzt werden . – Sorgen Sie für ausreichende Belüftung während des Betriebs . Das Produkt niemals abdecken .
-
Page 7: Lieferumfang
Lieferumfang – Rollei Smart Frame WiFi 100 – Netzadapter mit Stromkabel – Standfuß – Schraube – Bedienungsanleitung Produktübersicht Bildschirm Wandmontage-Anschluss Neustart-Taste Standfuß-Anschluss microSD-Speicherkarten-Slot Ein- / Ausschalt-Taste Micro-USB-Anschluss Strom-Anschluss Lautsprecher... -
Page 8: Montage
Montage – Um den digitalen Bilderrahmen auf einen flachen Untergrund zu stellen, schrau- ben Sie den Standfuß in die Standfuß-Halterung für die horizontale oder vertikale Position . – Um den digitalen Bilderrahmen an einer Wand zu montieren, befestigen Sie die mitgelieferte Schraube mit einem geeigneten Dübel an der gewünschten Wand und haken Sie den digitalen Bilderrahmen mit dem Wandmontage-Anschluss für die horizontale oder vertikale Position an der Schraube ein . -
Page 9: Bedienung
Bedienung Einrichtung des digitalen Bilderrahmens – Schließen Sie das Stromkabel an den Strom-Anschluss des digitalen Bilderrahmens und an eine geeignete Steckdose an . – Der digitale Bilderrahmen schaltet sich daraufhin automatisch ein . – Um die Sprache einzustellen, tippen Sie auf die gewünschte Sprache . –... - Page 10 Bedienung – Um das WLAN-Netzwerk einzustellen, tippen Sie auf das gewünschte WLAN-Netz- werk, geben Sie das Passwort dafür ein und tippen Sie auf „Ok“ . – Um zum nächsten Schritt zu gelangen, tippen Sie auf . DEUTSCH...
- Page 11 Bedienung – Um die Zeitzone einzustellen, tippen Sie auf „Zeitzone“ und auf die gewünschte Zeitzone . – Um das Datum einzustellen, tippen Sie auf „Datum“ und auf das gewünschte Datum . – Um die Zeit einzustellen, tippen Sie auf „Zeit“, stellen Sie die gewünschte Zeit ein und tippen Sie auf „Ok“...
- Page 12 Bedienung – Um eine neue Firmware auf dem digitalen Bilderrahmen zu installieren, tippen Sie auf „Aktualisieren“ . Sollte kein Update erforderlich sein, wird „Bereits auf dem neuesten Stand“ angezeigt . – Um zum nächsten Schritt zu gelangen, tippen Sie auf . DEUTSCH...
- Page 13 Bedienung – Um Ihren Namen einzustellen, tippen Sie auf „Ihr voll ständiger Name“ und geben Sie Ihren Namen ein . – Um den Ort des digitalen Bilderrahmens einzustellen, tippen Sie auf „Ort des Rahmens“ und geben sie den Ort ein . –...
-
Page 14: Einrichtung Der App
Bedienung Einrichtung der App – Um sich die kostenlose Frameo-App zu installieren, scannen Sie den passenden QR-Code oder suchen Sie nach „Frameo” im Apple App Store oder Google Play Store, laden Sie die App auf das Smartphone oder Tablet herunter und starten Sie die Frameo-App . -
Page 15: Verbindung Des Digitalen Bilderrahmens Mit Der App
Bedienung Verbindung des digitalen Bilderrahmens mit der App auf dem Smart- phone oder Tablet – Um den zehnstelligen Zahlencode zum Verbinden des digitalen Bilderrahmens mit der Frameo-App anzuzeigen, tippen Sie auf „Freund hinzufügen“ auf dem digitalen Bilderrahmen . – Um den zehnstelligen Zahlencode in der Frameo-App einzugeben, tippen Sie auf und auf in der... -
Page 16: Senden Von Fotos Und Videos Vom Smartphone Oder
Bedienung Senden von Fotos und Videos vom Smartphone oder Tablet an den digitalen Bilderrahmen – Um Fotos oder Videos vom Smartphone oder Tablet aus- zuwählen, tippen Sie auf , auf , auf die gewünschten Fotos oder Videos, die Sie an den digitalen Bilderrahmen senden möchten und auf „Nächste“... -
Page 17: Weitere Optionen
Bedienung Weitere Optionen – Um das jeweils vorherige oder nächste Foto oder Video anzuzeigen, wischen Sie auf dem Bildschirm des digitalen Bilderrahmens nach links oder rechts . Um zum Fenster für weitere Optionen zu gelangen, tippen Sie auf den Bildschirm des digitalen Bilderrahmens . -
Page 18: Einstellungen
Bedienung Einstellungen Um Einstellungen des digitalen Bilderrahmens vorzunehmen, tippen Sie auf einen der gewünschten Unterpunkte „Mein Rahmen“, „Fotos verwalten“, „Meine Freunde“, „Anzeige“, „Diaschau“, „WLAN“, „Benachrichtigungen“, „Sichern und Wiederher- stellen“, „Hilfe“ oder „Über“ . „Mein Rahmen“ – Um den Namen einzustellen, tippen Sie auf „Name des Rahmens“, geben Sie den gewünschten Namen ein und tippen Sie auf „Ok“... - Page 19 Bedienung – Um die Zeitzone einzustellen, tippen Sie auf „Zeitzone“ und auf die gewünschte Zeitzone . – Um das 24-Stunden-Zeitformat ein- oder auszustellen, tippen Sie auf „24-Stunden- Format verwenden“ . „Fotos verwalten“ – Hier können Sie die Belegung des internen Speichers sehen . –...
- Page 20 Bedienung „Anzeige“ – Um die Helligkeit des Bildschirms einzustellen, verschieben Sie den Regler bei „Helligkeitsstufe“ bis zur gewünschten Helligkeit . – Um den Schlafmodus einzustellen, tippen Sie auf „Schlafmodus“, stellen Sie die gewünschte Startzeit ein, tippen Sie auf „Ok“, stellen Sie die gewünschte Endzeit ein und tippen Sie auf „Ok“...
- Page 21 Bedienung „WLAN“ – Um die aktuellen Netzwerk-Details anzuzeigen, tippen Sie auf Ihr aktuelles WLAN- Netzwerk, auf „Signalstärke“ oder auf „Verbindungsstatus“ . – Um ein anderes WLAN-Netzwerk einzustellen, tippen Sie auf das gewünschte WLAN-Netzwerk, geben Sie das Passwort ein und tippen Sie auf „Ok“ . „Benachrichtigungen“...
- Page 22 Einstellungen „Hilfe“ – Hier können Sie Internetadressen für die Hilfestellung oder den Datenschutz zur Frameo-App sehen . – Um Open-Source-Bibliotheken anzuzeigen, tippen Sie auf „Open-Source-Bibliotheken“ . – Um das Teilen von anonymen Analysedaten ein- oder auszustellen, tippen Sie auf „Teilen anonymer Analysedaten“ . –...
-
Page 23: Technische Daten
2,412 – 2,472 GHz Max. Sendeleistung 17 dBm App-Kompatibilität Frameo-App Stromversorgung Netzadapter für Smart Frame WiFi 100 Eingang: 100 – 240 V / 50 – 60 Hz / 0,3 A Ausgang: AC 5,0 V / 2,0 A / 10,0 W... -
Page 24: Datenschutz
Technische Daten Anschluss Strom-Anschluss, Micro-USB-Anschluss, microSD- Speicherkarten-Slot, 2 x Standfuß-Anschluss, 2 x Wandmontage-Anschluss Betriebstemperatur 0 – 40 °C Montage Horizontal oder vertikal mit Standfuß Horizontal oder vertikal mit Wandmontage Weitere Besonderheiten Import- und Export-Funktion, automatische Dreh- Funktion, manuelle Dreh-Funktion, Rahmenan- passungs-Funktion, Reaktions-Funktion, Beschrif- tungs-Funktion, Ausblend-Funktion, Schlafmodus-Funktion... -
Page 25: Entsorgung
Altgeräte kostenlos entgegennehmen, erhalten Sie bei Ihrer Gemeinde- oder Stadtverwaltung . Konformität Hiermit erklärt die Rollei GmbH & Co . KG der Funkanlagentyp „Rollei Smart Frame WiFi 100“ der Richtlinie 2014/53/EU entspricht . Der vollständige Text der EU-Konformitätserklärung ist unter der folgenden Internetadresse verfügbar:... -
Page 26: Foreword
Frame WiFi 100 with built-in Frameo software . Use the free Frameo app to send photos and videos directly from your smartphone or tablet to the Rollei Smart Frame WiFi 100 – wherever you are in the world . The photos or videos will appear on the digital photo frame within seconds, so you can enjoy the moments right as they happen . -
Page 27: Safety Instructions
Explanation of Symbols Products with this symbol have additional or reinforced insulation and comply with protection class II . For indoor use only . Devices with this symbol may only be operated indoors (dry environment) . Products marked with this symbol have a positive polarity . They may only be connected to products that also have a positive polarity . - Page 28 Safety Instructions – Ensure adequate ventilation during operation . Never cover the product . – If the product is used in ambient temperatures that are too cold or too hot, the product will switch off automatically . – Do not use the product in the vicinity of flammable gases or liquids, as this can lead to explosions .
-
Page 29: What's In The Box
What’s in the Box – Rollei Smart Frame WiFi 100 – Power adapter with power cable – Holder stand – Screw – User manual Product Overview Display Wall mount connection Restart button Holder stand connection microSD memory card slot Power on / off button... -
Page 30: Mounting
Mounting – To place the digital photo frame on a flat surface, screw the holder stand into the holder stand connection for the horizontal or vertical position . – To mount the digital photo frame on a wall, fasten the supplied screw with a suita- ble dowel to the desired wall and hook the digital photo frame onto the screw with the wall mount connection for the horizontal or vertical position . -
Page 31: Operation
Operation Setup of the Digital Photo Frame – Connect the power cable to the power connection of the digital photo frame and to a suitable power socket . – The digital photo frame will then turn on automatically . – To set the language, tap on the desired language . –... - Page 32 Operation – To set the WiFi network, tap on the desired WiFi network, enter the password for it and tap on ”Ok“ . – To move to the next step, tap on . ENGLISH...
- Page 33 Operation – To set the time zone, tap on ”Time zone“ and on the desired time zone . – To set the date, tap on ”Date“ and on the desired date . – To set the time, tap on ”Time“, set the desired time, and tap on ”Ok“ . –...
- Page 34 Operation – To install a new firmware on the digital photo frame, tap on ”Update“ . If no update is required, ”Already up to date“ will be displayed . – To move to the next step, tap on . ENGLISH...
- Page 35 Operation – To set your name, tap on ”Your full name“ and enter your name . – To set the location of the digital photo frame, tap on ”Frame location“ and enter the location . – To finish the setup of the digital photo frame, tap on .
-
Page 36: Setup Of The App
Operation Setup of the App – To install the free Frameo app, scan the appropriate QR code or search for ”Frameo“ in the Apple App Store or Google Play Store, download the Frameo app to your smartphone or tablet, and start the Frameo app . Download on the –... -
Page 37: Connection Of The Digital Photo Frame With The Frameo App On The Smartphone Or Tablet
Operation Connection of the Digital Photo Frame with the Frameo App on the Smartphone or Tablet – To view the ten-digit numeric code to connect the digital photo frame to the Frameo app, tap on ”Add Friend“ on the digital photo frame . –... -
Page 38: Sending Of Photos And Videos From The Smartphone
Operation Sending of Photos and Videos from the Smart- phone or Tablet to the Digital Photo Frame – To select photos or videos from the smartphone or ta- blet, tap on , on , on the desired photos or videos you want to send to the digital photo frame, and on ”Next“... -
Page 39: Additional Options
Operation Additional Options – To view the previous or next photo or video, swipe left or right on the digital photo frame display . To get to the window for additional options, tap on the digital photo frame display . –... -
Page 40: Settings
Operation Settings To adjust settings of the digital photo frame, tap on one of the desired sub-items ”My frame“, ”Manage photos“, ”My friends“, ”Display“, ”Slideshow“, ”Wi-Fi“, ”Notifica- tions“, ”Backup and restore“, ”Help“ or ”About“ . ” My frame“ – To set the name, tap on ”Name of the frame“, enter the desired name and tap on ”Ok“... - Page 41 Operation ”Manage photos“ – Here you can see the occupancy of the internal memory . – To show or hide photos or videos, tap on ”Show / hide photos“ and on the desired photos and videos to show or hide . –...
- Page 42 Operation ”Slideshow“ – To set the display duration of photos or videos, tap on ”Timer“, move the slider to the desired display duration and tap on ”Ok“ . – To turn the display of captions on or off for photos or videos, tap on ”Show caption“ . –...
- Page 43 Operation ”Notifications“ – To turn notifications on or off, tap on ”Show notifications“ . – To adjust the notification volume, move the slider at ”Notification volume“ to the desired volume . – To turn notifications for various events on or off, tap on ”Storage space“, ”Back- up“, ”Network connection“, ”New photos“, ”New friends“, ”Software update“, ”Feature news“, or ”Date and time“...
- Page 44 Operation ”About“ – Here you can see details about the Android version, peer ID, display resolution, RAM, MAC address or app version . – To check the digital photo frame for updates, tap on ”Check for update“ . – To join or leave the beta program, tap on ”Beta program“ and on ”Accept“ . Switching On and Off –...
-
Page 45: Technical Data
Max. transmission power 17 dBm App compatibility Frameo app Power supply Power adapter for Smart Frame WiFi 100 Input: 100 – 240 V / 50 – 60 Hz / 0.3 A Output: AC 5.0 V / 2.0 A / 10.0 W... -
Page 46: Data Protection
Technical Data Connection Power connection, Micro-USB connection, microSD memory card slot, 2 x holder stand connection, 2 x wall mount connection Operating temperature 0 – 40 °C Mounting Horizontally or vertically with holder stand Horizontally or vertically with wall mount Additional features Import and export function, auto rotation function, manual rotation function, frame adjustment function,... -
Page 47: Disposal
. Conformity Rollei GmbH & Co . KG the radio system type “Rollei Smart Frame WiFi 100“ complies with the Directive 2014/53/EU . The full text of the EU declaration of conformity is available at the following Internet address: www .rollei .com/egk/smartframewifi100... - Page 48 Rollei GmbH & Co. KG In de Tarpen 42 D-22848 Norder stedt Service Hotline: +49 40 270750270 /rollei.foto.de @rollei_de Item No.: 30271 (black) 30272 (white) www.rollei.com...
Need help?
Do you have a question about the Smart Frame WiFi 100 and is the answer not in the manual?
Questions and answers