Table of Contents
Advertisement
Quick Links
INSTALLATION & OPERATION
GSM Retail Australia Pty Ltd ABN: 53 007 582 475
For Warranty and technical queries: 1300 373 199 Aus Or 0508123108 NZ www.belliniappliances.com.au
Model: BFDM146X, BFDM146X-F – 60cm Full Integrated Dishwasher
INSTRUCTIONS
60cm Fully Integrated Dishwasher
Model No. BFDM146X
FINELINE NUMBER:0133505
V.4 October 2019
Advertisement
Table of Contents

Related Manuals for Bellini BFDM146X


Summary of Contents for Bellini BFDM146X
- Page 1 60cm Fully Integrated Dishwasher Model No. BFDM146X FINELINE NUMBER:0133505 V.4 October 2019 GSM Retail Australia Pty Ltd ABN: 53 007 582 475 For Warranty and technical queries: 1300 373 199 Aus Or 0508123108 NZ www.belliniappliances.com.au Model: BFDM146X, BFDM146X-F – 60cm Full Integrated Dishwasher...
- Page 2 For all warranty and technical queries, please contact GSM Retail Australia Pty Ltd ABN: 53 007 582 475 1300 373 199 For Warranty and technical queries: 1300 373 199 Aus Or 0508123108 NZ www.belliniappliances.com.au Model: BFDM146X, BFDM146X-F – 60cm Full Integrated Dishwasher...
-
Page 3: Table Of Contents
If lost or out-of-date, you can receive a new user manual from the manufacturer or responsible vendor. GSM Retail Australia Pty Ltd ABN: 53 007 582 475 For Warranty and technical queries: 1300 373 199 Aus Or 0508123108 NZ www.belliniappliances.com.au Model: BFDM146X, BFDM146X-F – 60cm Full Integrated Dishwasher... - Page 4 SAFETY INFORMATION WARNING When using your dishwasher, follow the precautions listed below: Installation and repair can only be carried out by a qualified technician This appliance is intended to be used in household and similar applications such as: -staff kitchen areas in shops, offices and other working environments;...
- Page 5 Earthing Instructions This appliance must be earthed. In the event of a malfunction or breakdown, earthing will reduce the risk of an electric shock by providing a path of least resistance of electric current. This appliance is equipped with an earthing conductor plug. ...
- Page 6 For unmarked plastic items not so marked, check the manufacturer's recommendations. Use only detergent and rinse agents recommended for use in an automatic dishwasher. Never use soap, laundry detergent, or hand washing detergent in your dishwasher. The door should not be left open, since this could increase the risk of tripping.
-
Page 7: Using Your Dishwasher
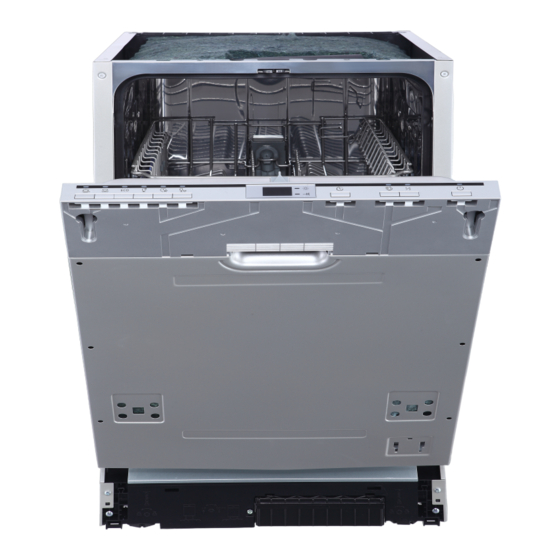
PRODUCT OVERVIEW IMPORTANT: To get the best performance from your dishwasher, read all operating instructions before using it for the first time. NOTE: Pictures are only for reference, different models may be different. USING YOUR DISHWASHER Before using your dishwasher: 1. - Page 8 Basket Positioning Adjusting the upper basket Type 1: The height of the upper basket can be easily adjusted to accommodate taller dishes in either the upper or the lower basket. To adjust the height of the upper rack, follow these steps: Type 2: the upper basket at the center of each adjust handles on each side to...
- Page 9 Folding back the rack shelves The spikes of the lower basket are used for holding plates and a platter. They can be lowered to make more room for large items. MAINTENANCE AND CLEANING External Care The door and the door seal Clean the door seals regularly with a soft damp cloth to remove food deposits.
- Page 10 NOTE: Pictures are only for reference, different models of the filtering system and spray arms may be different. WARNING Do not over tighten the filters. Put the filters back in sequence securely, otherwise coarse debris could get into the system and cause a blockage. ...
- Page 11 Caring For the Dishwasher Frost precaution Please take frost protection measures on the dishwasher in winter. Every time after washing cycles, please operate as follows: Cut off the electrical power to the dishwasher at the supply source. Turn off the water supply and disconnect the water inlet pipe from the water valve. Drain the water from the inlet pipe and water valve.
- Page 12 INSTALLATION INSTRUCTION The installation of the pipes and electrical equipment’s should be done by professionals. About Power Connection WARNING For personal safety: Do not use an extension cord or an adapter plug with this appliance. Do not, under any circumstances, cut or remove the earthing connection from the power cord.
- Page 13 Water Supply And Drain Cold water connection Connect the cold water supply hose to a threaded 3/4(inch) connector and make sure that it is fastened tightly in place. If the water pipes are new or have not been used for an extended period of time, let the water run to make sure ordinary supply hose that the water is clear.
- Page 14 Connection of Drain Hoses Insert the drain hose into a drainpipe with a minimum diameter of 4 cm, or let it run into the sink, making sure to avoid bending or crimping it. The height of drainpipe must be less than 1000mm. The free end of the hose must not be immersed in water to avoid the back flow of it.
- Page 15 Position the Appliance Position the appliance in the desired location. The back should rest against the wall behind it, and the sides, along the adjacent cabinets or walls. The dishwasher is equipped with water supply and drain hoses that can be positioned to either the right or the left sides to facilitate proper installation.
- Page 16 Attention After removing the worktop, the screws must be screwed again under the rear edge of the top (b). The height will then be reduced to 815 mm, as scheduled by the International Regulations (ISO) and the dishwasher will fit perfectly under the kitchen-working top. Built-In Installation (for the integrated model) Step 1.
- Page 17 Full-integrated model Install the metal hook hardware (Supplied) to the back of the decorative cabinet panel, ensure that these align with the slots and mounting pads of the dishwasher door frame as in Figure A Position decorative cabinet panel to the dishwasher and ensure that it is fitted equal distance from the adjoining cabinet doors.
- Page 18 Step 3. Tension adjustment of the door spring The door springs are set at the factory to the proper tension for the outer door. If decorative cabinet panels are installed, you will have to adjust the door spring tension. Rotate the adjusting screw to drive the adjustor to strain or relax the steel cable. 2.
- Page 19 Step 5. Levelling the dishwasher Dishwasher must be level for proper dish rack operation and wash performance. Place a spirit level on door and rack track inside the tub as shown to check that the dishwasher is level. Level the dishwasher by adjusting the three levelling legs individually. When level the dishwasher, please pay attention not to let the dishwasher tip over.
- Page 20 TROUBLESHOOTING TIPS Before Calling For Service Reviewing the charts on the following pages may save you from calling for service. Problem Possible Causes What To Do Dishwasher doesn't Fuse blown or the circuit break Replace fuse or reset circuit breaker. Remove any other start tripped.
- Page 21 Rattling noise in Items of crockery are loose in the Interrupt the program and rearrange the items of the dishwasher dishwasher. crockery. Knocking noise in the This has no influence on the dishwasher function. This may be caused by on-site water pipes If in doubt, contact a qualified plumber.
- Page 22 LOADING THE BASKETS ACCORDING TO AS/NZS 2007.1: Number Item Cups Saucers Glasses Dessert dishes Forks knives 2.Lower basket: Number Item Dinner plates Soup plates Cutlery basket 3. Cutlery basket:...
- Page 23 Information for comparability tests in accordance with (*AS/NZS 2007.1) Capacity: 14 place settings Position of the upper basket: lower position Program: ECO Rinse aid setting: 6 Detergent (Pre/main): 5g/27.5g Door is open at the end of the drying cycle for the drying performance test (Door position: Open 50 mm)
-
Page 24: Control Panel
INSTALLATION & OPERATION INSTRUCTIONS PART 2 CONTENTS USING YOUR DISHWASHER Control Panel Preparing and Loading Dishes Function of the Rinse Aid and Detergent Filling the Rinse Aid Reservoir Filling the Detergent Dispenser PROGRAMMING THE DISHWASHER Wash Cycle Table Starting a Cycle Wash Changing the program Mid-cycle forget to add a dish? ERROR CODES... - Page 25 QUICK USER GUIDE Please read the corresponding content on the instruction manual for detailed operating method. PART Ⅰ : Generic (Please check the section 5 “INSTALLATION INSTRUCTION” of Version.)
- Page 26 Operation (Button) Power: Press this button to turn on your dishwasher, the screen lights up. Half-load: When you have about or less than 6 place setting dishwasher to wash, you can choose this function to save energy and water. (It can only be used with intensive, Heavy, ECO, Glass and 90min).
-
Page 27: Preparing And Loading Dishes
Preparing and Loading Dishes Consider buying utensils, which are identified as dishwasher-proof. For particular items, select a program with the lowest possible temperature. To prevent damage, do not take glass and cutlery out of the dishwasher immediately after the program has ended. - Page 28 NOTE: Very small items should not be washed in the dishwasher as they could easily fall out of the basket. Removing the dishes To prevent water dripping from the upper basket into the lower basket, we recommend that you empty the lower basket first, followed by the upper basket. Loading the upper basket The upper basket is designed to hold more delicate and lighter dishware such as glasses, coffee and tea cups and saucers, as well as plates, small bowls and...
-
Page 29: Function Of The Rinse Aid And Detergent
Function of the Rinse Aid and Detergent The rinse aid is released during the final rinse to prevent water from forming droplets on your dishes, which can leave spots and streaks. It also improves drying by allowing water to roll off the dishes. -
Page 30: Filling The Rinse Aid Reservoir
Filling the Rinse Aid Reservoir The rinse aid reservoir has six settings. Both the recommended setting and the factory setting is “3”. If the dishes are not drying properly or are spotted, adjust the dial to the next higher number until your dishes are spot free. -
Page 31: Starting A Cycle Wash
Description Detergent Running Energy Water Rinse Program of Cycle Pre/Main Time (min) (Kwh) ℃ Intensive ℃ (or All in 1) 18.5 NOTE: AS/NZS 2007.1: This program is the test cycle. The information for comparability test in accordance with AS/NZS 2007.1. Starting a Cycle Wash Draw out the lower and upper basket, load the dishes and push them back. -
Page 32: Error Codes
Forget To Add A Dish? A forgotten dish can be added any time before the detergent dispenser opens. If this is the case, follow the instructions below: Open the door a little to stop the washing. After the spray arms stop working, you can open the door completely. Add the forgotten dishes. -
Page 33: Technical Information
TECHNICAL INFORMATION Height (H) 845mm Width (W) 598mm Depth (D1) 550mm (with the door closed) 1150mm (with the door opened 90°) Depth (D2) - Page 34 Product Specifications Brand Bellini Model Number BFDM146X / BFDM146X-F Standard place settings Energy efficiency class Water consumption class Standard cleaning cycle 0.78 kWh Energy consumption of the standard cleaning cycle 12.3 liter Water consumption of the standard cleaning cycle 175 min...
- Page 35 Consumer until the expiry of three (3) year (Warranty Period). If within the Warranty Period a manufacturing defect is discovered in the Bellini product or it fails to perform to the Company’s specifications as a result of some defect in materials, components or workmanship (Defect) then the Company will, at its option, repair the Bellini product or supply a replacement Bellini product free of charge.
- Page 36 1.8. You must provide proof of your purchase of the Bellini product and the date of purchase in order to obtain the benefit of this warranty. If you live outside the service area of the Company or one of its service agents, this warranty does not cover the cost of transport of the Bellini product for service nor the service agent’s traveling costs to and from your home.
Need help?
Do you have a question about the BFDM146X and is the answer not in the manual?
Questions and answers