Download Print this page

Advertisement

INSTALLATION & OPERATION
INSTRUCTIONS
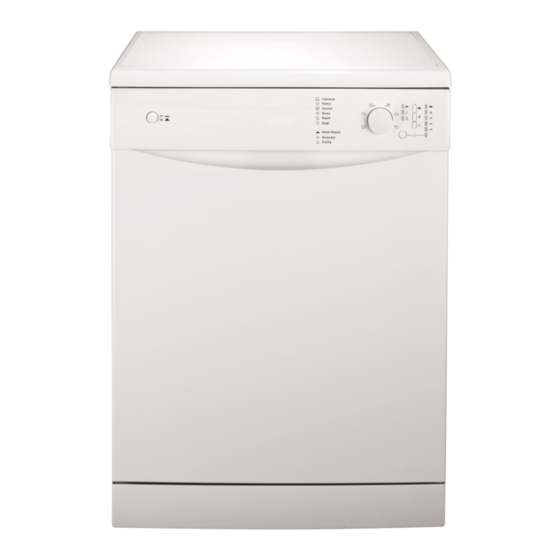
60cm Freestanding Dishwasher
Model No.
BDW127W
BDW127W-F
Fineline 5102930 Aus/NZ
BDW127S
BDW127S-F
Fineline 5102932 Aus Only
BDW127X
BDW127X-F
Fineline 5102931 Aus/NZ
'We recommend you open the door slightly 50mm to assist in the drying of the
dishes after every wash as the drying of the dishes is a natural process'
V.6 SEPT18

Advertisement

loading
Need help?

Need help?

Do you have a question about the BDW127W and is the answer not in the manual?

Questions and answers

Summary of Contents for Bellini BDW127W

  • Page 1 INSTALLATION & OPERATION INSTRUCTIONS 60cm Freestanding Dishwasher Model No. BDW127W BDW127W-F Fineline 5102930 Aus/NZ BDW127S BDW127S-F Fineline 5102932 Aus Only BDW127X BDW127X-F Fineline 5102931 Aus/NZ 'We recommend you open the door slightly 50mm to assist in the drying of the dishes after every wash as the drying of the dishes is a natural process' V.6 SEPT18...
  • Page 2 Thank you Thank you for choosing Bellini Appliances. Bellini prides itself on ‘affordable living’ making sure there is no compromise in your favourite room … The Kitchen All Bellini appliances carry a 3 year In Home warranty, be sure to retain your installation and user manual and receipt.
  • Page 3: Table Of Contents

    GSM Retail Australia Pty Ltd ABN: 53 007 582 475 For Warranty and technical queries: 1300 373 199 Aus Or 0800 764 912 NZ www.belliniappliances.com.au Model: BDW127W- 60CM Freestanding Dishwasher F FN5102930 Aus/NZ, BDW127S-F FN5102932 Aus Only, BDW127X-F FN5102931 Aus/NZ...
  • Page 4: Safety Instructions

    The manual should be kept in a safe place for future reference.In case of failure, only the Authorised Technical Service may repair this dishwasher. Otherwise the guarantee will be null and void. All Bellini Appliances are for domestic use only.
  • Page 5  Only authorised personnel should carry out for an automatic dishwasher. Never use soap, servicing. (Certificate of Compliance to be laundry detergent, or hand washing detergent in retained) your dishwasher.   Always ensure the appliance is switched off Other means for disconnection from the supply before cleaning or replacing parts.
  • Page 6: Product Description

    Product Description 1 Upper Basket 2 Spray Arms 3 Lower Basket 4 Filters 5 Detergent Dispenser 6 Rinse Aid Dispenser 7 Cutlery Tray 8 Cup Holder W x D x H 600x600x850 (mm) Power 12A, 240V Socket a.c 50Hz Power 240V a.c Supply 50Hz...
  • Page 7 Dispenser(Item 5&6 Above) Lid release button Pre-wash detergent compartment D (Rinse aid indicator) Rinse aid cap & adjustor Detergent compartment Accessory Name Accessory Name Picture Picture Quantity Quantity User Manual User Manual Drain hose hanger 1 1 1 1 1 1 Hose Hook 1 1 1 1 Draining Hose Hanger...
  • Page 8: Installation

    Installation Warning Electrical Shock Hazard! Disconnect electrical power before installing dishwasher. Failure to do so can result in death or electrical shock. Positioning & Leveling Take out the appliance from all packaging and check to ensure no damaged during transportation. If it has been damaged, contact the retailer and do not proceed and further with the installation process.
  • Page 9 Connection Of Water Outlet Hose Fit the drainage hose of your machine to the drainage pipe without bending. If the length of the hose is not sufficient, apply to the authorized service for an extension made from the same material as the original. Remember that the length of the hose should not exceed 4meters even when with an extension.
  • Page 10: Start Using Your Appliance

    Start Using Your Appliance 1. Before using 1.1 Fill the Rinse Aid Dispenser Attention! Only use branded rinse aid for dishwasher. Never fill the rinse aid dispenser with any other substances (e.g. dishwasher cleaning agent, liquid detergent). This could damage the appliance. Rinse aid is automatically added during the last rinse, ensuring thorough rinsing, spot and streak free drying.
  • Page 11 Adjusting Rinse Aid Dispenser The rinse aid dispenser cap has 6 settings. Always start from "4" but if dish spots and streaks serious please set it to “5” or higher to increase the amount of rinse aid. Factory default set is “5”. NOTE: Increase the dose if there are water drops or spots on the dishes after washing.
  • Page 12 Attention!  If the dishes are heavily soiled, place an additional detergent dose in the pre-wash detergent compartment. This detergent will take effect during the pre-wash phase.  The dispenser must be refilled before the start of each washing cycle following the instructions provided in the Wash Cycle Table.
  • Page 13 If needed, height of the upper basket can be adjusted to create more space for large utensils either in the upper basket or lower basket. The upper basket can be adjusted for height by putting wheels of different height into the rails. Long items, serving cutlery, salad servers or knives should be placed on the shelf so that they do not obstruct the rotation of the spray arms.
  • Page 14 2.3 Folding Racks(Optional only) Folding racks consisting of two parts that are located on the lower basket which are designed to allow you place big items easier as pots, pans, etc. If needed, each part can be folded separately, or all of them can be folded for larger space.
  • Page 15 Attention!  For washing in the dishwasher the following cutlery/dishes Are NOT suitable Are limited suitable   Cutlery with wooden, horn china or mother-of-pearl Certain types of glasses can become dull handles after a large number of washes  ...
  • Page 16 3. Start Washing 3.1 Control Panel ON/OFF To turn on/off the power supply. Rotate to choose desired program. See clause 3.2 for Program Selector details. Warning Flash if water is not supplied properly for Indicator example the tap turn off, water supply interrupted or supply hose kinked.
  • Page 17 Function “All in one” indictor light. Flashing when door Indicator closed and “All in one” function is chosen. Stay Lights as ON when “All in one” washing cycle is running. Turn ON when Child lock is activated. Turn ON when 9 hours delay time is chosen. Turn ON when 6 hours delay time is chosen.
  • Page 18 Attention!  Normal program: this programme is the test cycle. accordance with AS/NZS.2007.1, as follows: Capacity: 12 settings Position of Upper basket: upper wheels on rails Rinse aid setting: 5(or 4 for four setting dispenser)  We recommend you open the door slightly 50mm to assist in drying of the dishes after every wash. 3.3 Start Washing Load basket and fill in detergent according to section 1 &...
  • Page 19: Maintenance And Cleaning

    Maintenance and Cleaning Remove the Plug Cleaning The Spray Arms Before cleaning or performing maintenance, always It is necessary to clean the spray arms regularly for remove the plug from the socket. hard water chemicals will clog the spray arm jets and No Solvents or Abrasive Cleaning bearings.
  • Page 20 Clean filter assembly The filter is used to avoid the big remnants and other sundries getting inside the pump, efficiently removes food particles from the wash water, allow recirculation during the cycle. The residue can obstruct the filter sometime so suggest removing the larger food particles trapped in the filter after each wash cycle by rinsing the semicircular filter and cup under running water.
  • Page 21: Troubleshooting

    Troubleshooting Error code When some malfunctions happen, the appliance will have below actions to warn you. When Below Indicator Meanings Possible Causes Flash 2 & 4 Door open The door is opened when the dishwasher is operating Water inlet Water inlet malfunction 2 &...
  • Page 22 Troubleshooting Problem Possible Causes What To Do Replace fuse or reset circuit breaker. Remove any other appliances Fuse blown, or the circuit breaker acted sharing the same circuit with the dishwasher. Dishwasher Make sure the dishwasher is turned on and the door is closed securely. Power supply is not turned on doesn't run Make sure the power cord is properly plugged into the wall socket.
  • Page 23 Using a solution of 1/2 cup of bleach and 3 cups of warm water to remove the stains by hand. Yellow or brown Tea or coffee stains WARNING! film on inner You have to wait for 20 minutes after a cycle to let the heating elements surfaces cool down before cleaning interior;...
  • Page 24: Warranty

    Consumer until the expiry of three (3) year (Warranty Period). If within the Warranty Period a manufacturing defect is discovered in the Bellini product or it fails to perform to the Company’s specifications as a result of some defect in materials, components or workmanship (Defect) then the Company will, at its option, repair the Bellini product or supply a replacement Bellini product free of charge.
  • Page 25 1.10 If you are required to transport the Bellini product to the Company or its service agent, you must ensure it is safely disconnected by a qualified tradesman and securely packed and insured. The Company does not accept any responsibility for loss or damage of the Bellini product prior to it being received by the Company or its service agent.