Download Print this page
Bellini BDW96W-F Installation & Operation Instructions

Bellini BDW96W-F Installation & Operation Instructions

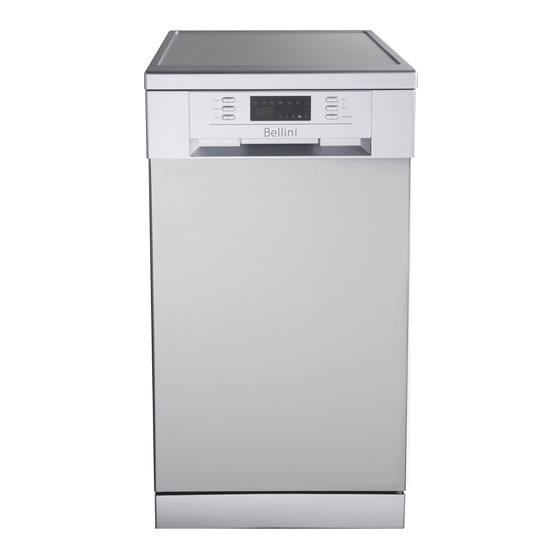
45cm freestanding dishwasher
Hide thumbs Also See for BDW96W-F:

Advertisement

Quick Links

INSTALLATION & OPERATION
INSTRUCTIONS
45cm Freestanding Dishwasher
Model No.
BDW96W
BDW96W-F
FINELINE: 5104010 Aus/NZ
BDW96X
BDW96X-F
FINELINE: 5104011 Aus/NZ
'We recommend you open the door slightly 50mm to assist in the drying of the
dishes after every wash as the drying of the dishes is a natural process'
V13 July22

Advertisement

loading
Need help?

Need help?

Do you have a question about the BDW96W-F and is the answer not in the manual?

Questions and answers

Subscribe to Our Youtube Channel

Summary of Contents for Bellini BDW96W-F

  • Page 1 INSTALLATION & OPERATION INSTRUCTIONS 45cm Freestanding Dishwasher Model No. BDW96W BDW96W-F FINELINE: 5104010 Aus/NZ BDW96X BDW96X-F FINELINE: 5104011 Aus/NZ 'We recommend you open the door slightly 50mm to assist in the drying of the dishes after every wash as the drying of the dishes is a natural process'...
  • Page 2 1300 373 199 GSM Retail Australia Pty Ltd ABN: 53 007 582 475 For Warranty and technical queries: 1300 373 199 Aus Or 0800 764 912 NZ www.belliniappliances.com.au Model: BDW96W-F FINELINE: 5104010 Aus/NZ, BDW96X-F FINELINE: 5104011 Aus/NZ 45cm Freestanding Dishwasher...
  • Page 3 Maintenance ------------------------------------15 Warranty------------------------------------------23 GSM Retail Australia Pty Ltd ABN: 53 007 582 475 For Warranty and technical queries: 1300 373 199 Aus Or 0800 764 912 NZ www.belliniappliances.com.au Model: BDW96W-F FINELINE: 5104010 Aus/NZ, BDW96X-F FINELINE: 5104011 Aus/NZ 45cm Freestanding Dishwasher...
  • Page 4 The manual should be kept in a safe place for future reference. In case of failure, only the Authorised Technical Service may repair this dishwasher. Otherwise the guarantee will be null and void. All Bellini Appliances are for domestic use only.
  • Page 5  Only authorised personnel should carry out for an automatic dishwasher. Never use soap, servicing. (Certificate of Compliance to be laundry detergent, or hand washing detergent in retained) your dishwasher.   Always ensure the appliance is switched off Other means for disconnection from the supply before cleaning or replacing parts.
  • Page 6 Program 3 in1 3 in1 Delay Delay Start/Pause Start/Pause Bellini 1 Power switch: To turn on/off the power supply. 2 Program button : Press the button to scroll through the wash cycles. The corresponding programme light will be ON to indicate which WASH CYCLES has been selected.
  • Page 7 Dishwasher Features Front View 1 Upper Basket 2 Spray Arms 3 Lower Basket 4 Filters 5 Detergent Dispenser 6 Rinse Aid Dispenser 7 Cutlery basket Acc c e e ss ssor ory Name y Name Pict t ure Quantity Quantity User Ma User Manual nual...
  • Page 8 Prior Using for the First Time Before using your dishwasher for the first time: A. Fill the rinse aid dispenser B. Function of detergent A. Fill the Rinse Aid Dispenser Function of Rinse Aid Rinse aid is automatically added during the last rinse, ensuring thorough rinsing, spot and streak free drying.
  • Page 9 RINSE AID DISPENSER To open the dispenser, turn the cap to the "open" (left) arrow and lift it out. Pour the rinse aid into the dispenser, be careful not to overfill. Replace the cap by inserting it aligned with "open" arrow and turning it to the "closed" (right) arrow.
  • Page 10 Concentrated Detergent Based on their chemical composition, dishwasher can be split in two basic types: conventional, alkaline detergents with caustic components low alkaline concentrated detergents with natural enzymes The use of "normal" washing programme in conjunction with concentrated detergents reduces pollution and is good for your dishes;...
  • Page 11 Fill in the detergent Fill the detergent dispenser with detergent. The marking indicates the dosing levels , as illustrated on the right: The place of main wash cycle detergent placed, " MIN means approximately 20g of detergent. " The place of pre-wash cycle detergent placed , approximately 5g of detergent.
  • Page 12 5 Loading the Dishwasher Baskets For best performance of the dishwasher, follow these loading guidelines. Features and appearance of baskets and Cutlery tray may vary from your model. Attention before or after Loading the Dishwasher Baskets 1. Scrape off any large amounts of leftover food. It is not necessary to rinse the dishes under running water.
  • Page 13 Upper Basket Height Adjustment Basket height adjustment mechanism on the upper basket of your machine is designed to let you adjust the height of your upper basket upwards or downwards,without removing it from your machine when it is full,and create large spaces at the top or bottom area of your machine as needed.Basket of your machine is set to lower position in factory settings.
  • Page 14 Cutlery tray Arrange the cutlery in the tray as shown. Cutlery should be placed to ensure that water runs off freely. Cutlery basket Cutlery basket Type Item Tea spoons Dessert spoons Soup spoons Forks Knives Door side Door side For washing in the dishwasher the following cutlery/dishes Are not suitable WARNING! Cutlery with wooden, horn china or...
  • Page 15 NOTE: Please do not overload your dishwasher. There is only space for 9 standard dishes. Do not use dish that is not suitable for dishwashers. This is important for good results and for reasonable energy consumption. Loading Cutlery and Dishes Before loading the dishes, you should: Remove large left-over Soften remnants of burnt food in pans...
  • Page 16 6. Starting a Washing Programme Wash cycle table Running Energy Description Water Cycle Selection Detergent Program Time (kWh) of Cycle Information Pre/main (min) Pre-wash(40 ) For the heaviest soiled loads, Main wash(55 ) such as pots, pans, casserole Rinse1 4/22g dishes and dishes that have 1.10 15.0...
  • Page 17 2. Insert the plug into the socket. The power supply is 220-240V AC 50 Hz, the specification of the socket is 12 A 250 VAC.50 Hz. Make sure that the water supply is turned on to full pressure. Open the door, press the " Power " button, Press the "program."...
  • Page 18 7. Maintenance and cleaning The filter is used to avoid the big remnants and other sundries getting inside Filtering System the pump. The residue can obstruct the filter in sometime. The filter system consists of a coarse filter, a flat (Main filter) and a micro filter (fine filter).
  • Page 19 WARNING! Never run the dishwasher without the filters in place. When cleaning the filters, don't knock on them. Otherwise, the filters could be contorted and the performance of dishwasher could be debased. Cleaning the Spray Arms It is necessary to clean the spray arms regularly for hard water chemicals will clog the spray arm jets and bearings.
  • Page 20 How to Keep Your Dishwasher in Shape After Every Wash When You Go on holiday After every wash, turn off the water supply When you go on holiday, it is to the appliance and leave the door slightly recommended that you run a wash cycle ajar so that moisture and odors are not with the dishwasher empty and then trapped inside.
  • Page 21 3. Position the dishwasher on a level and sturdy floor. If the floor is uneven, the front feet of the appliance may be adjusted until it reaches a horizontal position (the angle of inclination must not exceed 2 degrees). If the appliance is levelled correctly, it will be more stable and much less likely to move or cause vibrations and noise while it is operation.
  • Page 22 Once the appliance has been installed, the power supply cable and the electrical socket should be easily accessible. The cable should not be bent or compressed. If the power supply cable is damaged, it must be replaced by the manufacturer or its Technical Assistance Service in order to prevent all potential hazards.(See Assistance) The company shall not be held responsible for any incidents that occur if these regulations are not observed.
  • Page 23 Start of Dishwasher The followings should be checked before starting the dishwasher: 1 Whether the dishwasher is level and fixed 2 Whether the inlet valve is opened 3 Whether there is leakage at the connections of the conducts 4 Whether the wires are tightly connected 5 Whether the power is switched on 6 Whether the inlet and drain hoses are knotted 7 All packing materials and printings should be taken out from the dishwasher...
  • Page 24 Problem Possible Causes What To Do Replace fuse or reset circuit breaker. Remove any other appliances Fuse blown, or the circuit breaker acted sharing the same circuit with the dishwasher. Make sure the dishwasher is turned on and the door is closed securely. Dishwasher Power supply is not turned on Make sure the power cord is properly plugged into the wall socket.
  • Page 25 Using a solution of 1/2 cup of bleach and 3 cups of warm water to remove the stains by hand. Tea or coffee stains Yellow or brown WARNING! You have to wait for 20 minutes after a cycle to let the heating elements film on inner cool down before cleaning interior;...
  • Page 26 Consumer until the expiry of three (3) year (Warranty Period). If within the Warranty Period a manufacturing defect is discovered in the Bellini product or it fails to perform to the Company’s specifications as a result of some defect in materials, components or workmanship (Defect) then the Company will, at its option, repair the Bellini product or supply a replacement Bellini product free of charge.
  • Page 27 1.10 If you are required to transport the Bellini product to the Company or its service agent, you must ensure it is safely disconnected by a qualified tradesman and securely packed and insured. The Company does not accept any responsibility for loss or damage of the Bellini product prior to it being received by the Company or its service agent.

This manual is also suitable for:

Bdw96wBdw96xBdw96x-fBdw86s-f