Advertisement
Quick Links
Advertisement

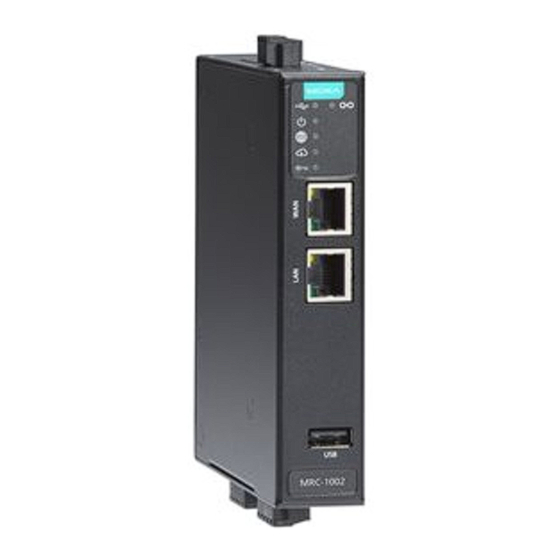
Summary of Contents for Moxa Technologies MRC-1002
- Page 1 echnical Note ◢ MRC Quick Link Easy Setup Guide Playbook 1 Version 1.2...
- Page 2 echnical Note ◢ Easy MRC Quick Link setup Playbook This easy 3-step setup guide shows users to setup MRC Quick Link account, Client and Gateway. (Before you start, please make sure MRC Gateway and Client software are on Ver. 2.4 Firmware or later) Step 1: MRC Quick Link Server Account setup.
- Page 3 echnical Note ◢ 3. Select “Software License Management” under support; Login to your account. 4. Click on “Activate Your License” and select MRC Quick Link under Software Package. 5. Complete the application and survey form for MRC Quick Link account setup: 5.1.
- Page 4 echnical Note ◢ You will receive an activation email from MRC Quick Link Server within a minute, it will contain your MRC Quick Link account ID you just created, an Initial password, and the MRC Quick Lin Account Service Period information. (We recommend you save this email for future reference.) 7.
- Page 5 echnical Note ◢ Step 2: MRC Client and Gateway setup 2.1 Create MRC Client Please follow below steps to create your client list first. 2.1.2 Please click on “Create Client” 2.1.1 Click on the top left corner menu icon and select Wizard 2.1.3 Create Client Login ID, email, and password Login ID can be up to 32 digits •...
- Page 6 echnical Note ◢ 2.2. Create MRC Gateway Please follow below steps to create your Gateway Unit(s) Wizard 1 – Create Gateway Gateway Name An alias that will make the Gateway easily identifiable. - Example “Pump Station 3” or “HMI 2001” etc… *** (Gateway name cannot be modified once it is created) *** ...
- Page 7 echnical Note ◢ Wizard 2 – Choose Connection Scenario Please select your connection mode, once the Gateway Unit(s) has been setup. Cellular-WAN Mode (Recommended) Transparent-LAN Mode WAN-LAN Mode Wizard 3 – Insert Connection Option # 1: Cellular-Wan Mode (Recommended) ...
- Page 8 echnical Note ◢ Wizard 4 – Local Network Please insert the local Network IP address (please consult it with IT dept.) Wizard 5 – Local Devices and remote service assignment to Client(s) Please insert any local devices information which need to be added to the MRC Gateway *** Disable this option will have no device status info display in Client Software...
- Page 9 echnical Note ◢ Below setup will allow users to enhance Remote Local Access Security and Service Management Wizard 6 – Tunnel Control Settings Please setting allow users to setup different local access connection for client(s) • This option will keep a permanent VPN connection for the client to access the MRC portal •...
- Page 10 echnical Note ◢ Wizard 2 – Choose Connection Scenario Wizard 3 – Insert Connection Option # 2: Transparent-LAN Mode Using the existing network for MRC gateway’s Internet access, make sure the device is on the same subnet Install the MRC gateway between the target Ethernet device and the original network.
- Page 11 echnical Note ◢ Wizard 4 – There’s no MRC Gateway IP address assignment for Transparent-LAN mode Wizard 5 – Local Devices and remote service assignment to Client(s) Please insert any local devices information which need to be added to the MRC Gateway ...
- Page 12 echnical Note ◢ Wizard 6 – Tunnel Control Settings Please insert the information for any devices will be added to the MRC Gateway • This option will keep a permanent VPN connection for the client to access the MRC portal •...
- Page 13 echnical Note ◢ Wizard 3 – Insert Connection Option # 3: WAN-LAN Mode WAN-LAN mode is to using an external ADSL modem for MRC gateway’s WAN Internet access Wizard 4 – Local Network Please insert the local Network IP address (please consult it with IT dept.)
- Page 14 echnical Note ◢ Wizard 5 – Local Devices and remote service assignment to Client(s) Please insert any local devices information which need to be added to the MRC Gateway Enhance Remote Local Access Security and Service Management...
- Page 15 echnical Note ◢ Wizard 6 – Tunnel Control Settings Please insert the information for any devices will be added to the MRC Gateway • This option will keep a permanent VPN connection for the client to access the MRC portal •...
- Page 16 echnical Note ◢ 3.2 MRC Client Software Installation Please follow below steps for installation...
- Page 17 echnical Note ◢ Congratulation, the MRC Client Software was successful setup. NOTE: Here’s the final step before you launch the MRC Client Software Please “Right” click the MRC Client software icon on desktop, then please double click the icon to launch the software ...


Need help?
Do you have a question about the MRC-1002 and is the answer not in the manual?
Questions and answers