Advertisement
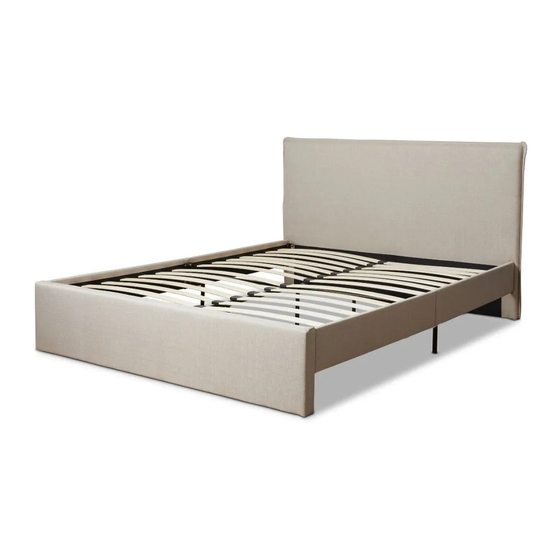
Peyton Bed - Queen
Assembly Instructions
Thank you for your purchase.
Please follow the instructions below for correct assembly.
B
A
double
25mm
cap x1 4
bolt x8
washer x8
F
H
35mm
20mm
bolt x1
plate x2
bolt x20
T3
T2
small allen large allen
key x1
key x1
Hardware Supplied
Phillips & Flathead screwdrivers required.
For quicker assembly, we recommend the
use of a power drill on a low-speed setting.
mocka.co.nz | mocka.com.au |
D
E
C
spring
washer
25mm
x 8
bolt x4
L
R
left
right
plate x2
the supporting leg.
1
Advertisement
Table of Contents

Related Manuals for Mocka Peyton


Summary of Contents for Mocka Peyton
- Page 1 Peyton Bed - Queen Assembly Instructions Thank you for your purchase. Please follow the instructions below for correct assembly. double 25mm spring washer 25mm cap x1 4 bolt x8 washer x8 bolt x4 35mm left right 20mm bolt x1 plate x2...
- Page 2 Peyton Bed - Queen Assembly Instructions mocka.co.nz | mocka.com.au |...
- Page 3 Peyton Bed - Queen Assembly Instructions 1a: Attach 1x left plate (L) to panel [3] and 1x right plate (R) to panel 2a: Attach 1x left plate (L) to panel [3] and 1x right plate (R) to panel [4] and secure with 4x 20mm bolts (F). Tighten with Allen Key (T2).
- Page 4 Peyton Bed - Queen Assembly Instructions 4a: Insert panel [6] and sit on top of the connector [9] and secure with 2x 25mm bolts (E). Tighten with Allen Key (T2) . 4b: Attach 2x panel [5] to panels [1] and [2] and secure with 4x 20mm bolts (F) as shown.
- Page 5 Peyton Bed - Queen Assembly Instructions Lift the bed into the desired location, do not drag, You're done, enjoy! Join the bed planks together in the middle of the frame using 14x double caps (A). Insert the end of the planks into the bed frame as shown and attach the double caps (A) into panel [8].
Need help?
Do you have a question about the Peyton and is the answer not in the manual?
Questions and answers