
Related Manuals for Pratica Forza Express


Summary of Contents for Pratica Forza Express
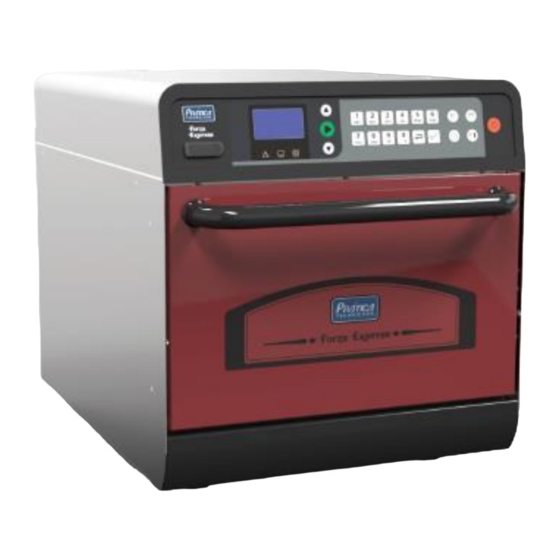
- Page 1 Service Manual For the Forza Express Oven Prática Products, Inc - USA 675 Town Square Boulevard, Suite 200 © 2018 Prática Products, Inc - USA Garland, TX 75040 January 2019...
-
Page 2: Table Of Contents
Precautions To Avoid Possible Exposure To Heat ....................9 DAILY CLEANING & QUARTERLY MAINTENANCE................11 Daily Cleaning ................................. 12 Quarterly Maintenance ............................15 THEORY OF OPERATION ..........................19 Forza Express Technology ............................20 USER SETTINGS..............................21 Control Panel ................................22 Cooking ................................... 23 Cooking the Food ..............................25 Creating Recipes .............................. - Page 3 Control Board Over Temp Count ........................... 35 Keypad Test ................................35 ALERTS & ERRORS ............................37 Open Door Alert ..............................38 Inverter Error ................................. 38 Sensor Error ................................39 TPL Error ................................. 39 IMPINGEMENT SYSTEM ..........................41 Blower Motor ................................. 42 Testing Blower Motor ............................
- Page 4 Testing Control System Fuses ..........................63 FILTERINGSYSTEM ............................65 Air Filter .................................. 66 Catalytic Converter ..............................67 Vent Catalyst ................................67 FORZA EXPRESS SCHEMATICS ........................69 Control Board Schematic ............................70 Heater Schematic ..............................71 Blower/Motor Cooling Fan Schematic ........................72 Pictorial Diagram ..............................73 EXPLODED VIEW PARTS LIST ........................
-
Page 7: Safety Instructions
SAFETY INSTRUCTIONS... -
Page 8: Important Safety Instructions
• Make sure to read the installation instructions to properly install the oven and prevent voiding the warranty. • This Pratica oven should only be serviced by qualified/authorized service personnel. • Please keep power cord away from hot /heated surfaces to prevent damage. -
Page 9: Grounding Instructions
WARNING: To reduce the risk of electrical shock, the unit must be properly grounded. Power Cord Replacement If the power cord is damaged in any way, is must be replaced by the manufacturer (Pratica Inc.), an authorized service agent, or qualified personnel. -
Page 10: Precautions To Be Observed Before And During Servicing
SAFETY INSTRUCTIONS Precautions To Be Observed Before And During Servicing (a) Do not operate or allow the oven operated with the door open. (b) Make the following safety checks on all ovens to be serviced before activating the resistance, and make repairs as necessary: (1) Interlock operation, (2) proper door closing, (3) seal and sealing surfaces (arcing, wear, and other damage), (4) damage to or loosening of hinges and latches, (5) evidence of dropping or abuse. -
Page 11: Specifications & Installation
Specifications & Installation... - Page 12 SPECIFICATIONS & INSTALLATION...
-
Page 13: Certifications
Certifications Electric Specifications Forza Express Voltage Frequency Power Circuit breaker Consumption 208/240V 60Hz 5,2kW 3.6kW/h Oven Dimensions Height: 25 3/8” (644mm) Width: 21” (532mm) Depth (footprint): 21.5” (546mm) Depth: 31 3/4” (805mm) Volume: 0.74 cu/ft (21 Liters) Installation Instructions Please read the following instructions carefully. -
Page 14: Installation Warnings: Please Read Before Lifting Oven To Prevent Injury
WARNING: This unit weights approximately 191 lbs. (87kg). Never attempt to lift this unit with fewer than 2 people. WARNING: The oven must be properly installed on a level surface at all times. Pratica Inc. will not recognize damage from a fallen oven as a warranty and may void warranty all together. -
Page 15: General Instructions
• To facilitate the oven maintenance, Pratica Inc. recommends a space os at least 30in between the right side of the equipment and the wall. • Do not allow the vents on the back or bottom of the unit to be blocked or restricted. - Page 16 SPECIFICATIONS & INSTALLATION...
-
Page 17: Daily Cleaning & Quarterly Maintenance
DAILY CLEANING & QUARTERLY MAINTENANCE... -
Page 18: Daily Cleaning
DAILY CLEANING & QUARTELY MAINTENANCE Daily Cleaning Please follow the steps below when cleaning the oven. Make sure to use non-caustic cleaners as they will not cause damage the oven or components. If damage occurs to unit or components due to incorrect cleaner, that will be considered a non-warranty service call. - Page 19 Step 4: Cleaning Catalyst WARNING: The Catalytic Converter must remain inside the oven during operation. Only clean when the unit is not in use. • Remove the oven rack and bottom jetplate. (Refer to step 1 & 2 for instructions on how to remove the rack and jetplate). •...
- Page 20 DAILY CLEANING & QUARTELY MAINTENANCE Step 7: Cleaning the Oven Cavity • Apply oven cleaner to a dry cloth or scrub pad and wipe down the sides of the cavity. • If large buildup occurs, you may spray the cleaner directly in the affected area and allow to sit for a small period of time to allow cleaner to break u buildup.
-
Page 21: Quarterly Maintenance
Step 12: Cleaning Oven Exterior • If any stains have formed on exterior, wipe away with damp cloth or towel. • You may also spray cleaner on a dry cloth and wipe affected area to remove stain. • Make sure not to spray cleaner directly on exterior of oven. •... - Page 22 DAILY CLEANING & QUARTELY MAINTENANCE Step 4: Removing Rear Vent Catalyst • With the use of a Phillips Screwdriver, remove al 8 screws holding the rear catalyst housing. • Support the housing with your hand prior to removing all screws. •...
- Page 23 Step 8: Accessing Cooling Fans • If there is excessive build u on cooling fans, remove all Phillips screws around the outer edge of the rear panel. • Remove the rear panel completely to gain access to both cooling fans. •...
- Page 24 DAILY CLEANING & QUARTELY MAINTENANCE...
-
Page 25: Theory Of Operation
THEORY OF OPERATION... -
Page 26: Forza Express Technology
THEORY OF OPERATION Forza Express Technology The Forza Express oven uses a combination of high speed air convection and infrared radiation energy to heat and cook food faster than traditional cooking methods. With the use of a single blower fan, air enters the cavity from the top and distributes evenly over the product and forces down through the hokes of the bottom jet plate for even cooking. -
Page 27: User Settings
USER SETTINGS... -
Page 28: Control Panel
USER SETTINGS Control Panel 1. Digital panel 2. Play button 3. Up/Down Arrow keys 4. Numerical keypad 5. Temperature control 6. USB function 7. Warning/ Heater 8. Return Key 9. Ok button 10. Manual cook mode 11. Cool down mode 12. -
Page 29: Cooking
Cooking The unit has a General Market menu installed from factory and is ready to operate out of the box. The end user can delete or edit these recipes to their own preference. New menu settings can be uploaded using a USB drive or inputting manually. Temperature Set Up/ Preheating 1. - Page 30 USER SETTINGS 4. The oven will display Preheating when warming up. 5. The oven has a factory Heat Soak period of 5 minutes. To change this time, turn unit off and press the Cool Down and On/Off keys at the same time. Use the Up/Down arrow keys to change from 0- 15 minutes.
-
Page 31: Cooking The Food
Cooking the Food 1. Select the food category by pressing the numerical button associated with category. Example: Press the number 1 to select Sandwich category. (Note: The Up or Down arrow keys can be pressed to view categories 5-8. ) 2. -
Page 32: Creating Recipes
USER SETTINGS 4. Cook More Option: After each cook cycle, you will be able to select additional cook time if desired; ex.+10s, +20s, +30s. (Note: The oven only gives 10 seconds to make selection before going back to normal menu screen.) 5. -
Page 33: Edit Mode
Edit Mode From Edit Mode, the operator can create, change, or delete menu settings and rename category and item names. Follow these steps to access Edit Mode: 1. While the oven is turned off, press and hold the Down arrow and On/Off keys at the same time. - Page 34 USER SETTINGS 4. The oven will require a password to make any changes. The default password is 123 and then press Enter. 5. Editing the Category will only allow you to change the name of the selected Category. Use the numerical keys to name the category.
- Page 35 8. The Recipe Step screen will allow the end user to create/edit a menu with the ability to add up to 6 steps in the cooking process. 9. Each stage has 4 categories, as shown below. Starting from the top down, the options are time, chamber temperature, RI resistance temperature and blower speed.
-
Page 36: Importing / Exporting Menu
USER SETTINGS Importing / Exporting Menu a) To import or export a menu, remove the black cover under the door, lift the rubber tab of the USB terminal, and insert the USB drive while the unit is on and the menu is displayed. Black cover b) Press c) Using the alphanumeric keypad, press option 2 or 3... -
Page 37: Manufacture Settings
MANUFACTURE SETTINGS... -
Page 38: Thermocouple Temp Readings
MANUFACTURE SETTINGS Thermocouple Temp Readings To view the Thermocouple Temperature Readings, press and hold the number 1 and On/Off keys at the same time from the oven off position. Information screen To view the Information Screen, press and hold the number 2 and the On/Off keys at the same time from the oven off position. -
Page 39: Temperature Measurement / Language Selection
On/Off keys at the same time from the oven off position. • RANGE TEMP = Allows to toggle between Fahrenheit and Celsius. • LANGUAGE = The Forza Express has four available language selections which are English, Portuguese, French, and Spanish. -
Page 40: Frequency Inverter Fault Log
MANUFACTURE SETTINGS Frequency Inverter Fault Log To view the fault log for the Frequency Inverter, press and hold the number 5 and the On/Off keys at the same time from the oven off position. Count Error Inverter - The Inverter error code logs 3 types of malfunctions that happen within the Inverter. -
Page 41: Control Board Over Temp Count
Control Board Over Temp Count To view the Control Board Over Temperature Count, press and hold the number 7 and the On/Off keys at the same time from the oven off position. • TEMP BOARD = The amount of times the board has registered a temperature of 149 degrees Fahrenheit. - Page 42 MANUFACTURE SETTINGS...
-
Page 43: Alerts & Errors
ALERTS & ERRORS... -
Page 44: Open Door Alert
ALERTS & ERRORS Open Door Alert When the Forza Express is in operation and for some reason it is necessary to open the door during the execution of the recipe the message "Door Open" will be displayed on the screen. -
Page 45: Sensor Error
When this error is displayed, it is necessary to check the operation of the fans, as well as whether the installations respect the necessary distances described in the Forza Express Spec sheet and in this service manual (SPECIFICATIONS & INSTALLATION). - Page 46 ALERTS & ERRORS...
-
Page 47: Impingement System
IMPINGEMENT SYSTEM... -
Page 48: Blower Motor
The Forza Express impingement system utilizes different components to heat, filter and recirculate air into the cook rapidly Blower Motor The Forza Express oven utilizes a three-phase motor to spin the turbine clockwise and is controlled by a frequency inverter. (Speed Control). Testing Blower Motor Warning: The blower motor is located on the back of the unit in between the microwave circuits. -
Page 49: Frequency Inverter ( Wegcfw100 )
Frequency Inverter ( WEGCFW100 ) The Forza Express oven regulates the speed of the blower motor by the frequency. This inverter utilizes a data communication protocol called MODBUS to communicate with the main control board. The picture below shows the connections of the frequency inverter. -
Page 50: Frequency Inverter Troubleshooting
IMPINGEMENT SYSTEM Frequency Inverter Troubleshooting The frequency inverter is in constant communication with the electronic board. If the control board registers a problem (ex. lost communication), the control board resets the inverter to fix the problem. When an error in the frequency inverter occurs, the following indicator light will illuminate under the display. - Page 51 • First Line: Inverter Errors / Inverter Critical Errors Inverter Errors (Left): This digit identifies the number of times the inverter resets due to an error. The inverter will try to reset up to 10 times before generating a critical error. Inverter Critical Errors (Right): The digit on the right indicates the amount of critical errors registered after the inverter tries to reset but continues to have a problem.
- Page 52 IMPINGEMENT SYSTEM When a failure occurs, the frequency inverter will flash the code on the screen and will prevent the blower motor from operating. The following table shows the main failures and alarms that may occur in the inverter.
-
Page 53: High Limit Thermostat
High limit thermostats are protective components for heating resistors. They work with automatic reset and so, if they do, they do not need to be reacted manually. There are two thermostats in the Forza Express oven, they are installed in the top of the oven, inside the ventilation duct. -
Page 54: Testing High-Limit Thermostat
IMPINGEMENT SYSTEM Testing High-Limit Thermostat 1. Unplug the oven 2. Remove the right-side panel of the unit. 3. Unplug the wires and test for continuity. • If continuity is present, the high limit is not tripped. • If there is no continuity between both terminals, the high limit has tripped and will need to be replaced or further troubleshooting is required to find the cause. -
Page 55: Convection Heater
Convection Heater The Forza Express oven utilizes a 3000W, 208/240V (3X1000W) circular convection heater that is installed inside the rear chamber around the blower turbine. Testing Convection Heater 1. Remove right side and rear oven panel. 2. Look for any physical damage to the heater or wires. If any damage is seen, remember to unplug the unit before continuing. -
Page 56: Ir Element
IMPINGEMENT SYSTEM IR Element The bottom infrared heater is a sheathed-style heater rated at 3,000 watts at 208 VAC. The bottom heater is controlled by the heater contactor located on the right side of the unit. Testing IR Element 1. Remove the right and left side panels of the unit. 2. -
Page 57: Testing Heat Circuit Breaker
• If continuity is not present and the breaker is in ON position, replace the breaker. CC/IR Temperature Sensors The Forza Express oven utilizes two type J temperature sensors. The sensors are responsible for registering the temperature for the cook cavity and IR element and relaying the information to the main control board. - Page 58 IMPINGEMENT SYSTEM press the number 1 and On/Off keys simultaneously to enter the temperature sensor verification screen as shown below. If the sensor has an issue, the word “ERROR” will appear next to it. To test the temperature sensors, follow the steps below. Unplug the oven 1.
-
Page 59: Control System
CONTROL SYSTEM... -
Page 60: Main Control Board/ Display
CONTROL SYSTEM Main Control Board/ Display The control board signals each oven component based on commands sent from the keypad that were selected by the operator. The display is attached to the control board and will come together if the control board is ordered. -
Page 61: Testing Main Control Board
Testing Main Control Board The main control board sends and receives signals from components throughout the unit. The diagram above shows all the wires connected to the control board and which component they belong to. Always verify for physical damage or loose connections before continuing to check continuity, voltage, etc. -
Page 62: Keypad
Testing Keypad The Forza Express oven has the ability to test each individual button of the keypad from test mode. To access the keypad test, follow the steps below: 1. From the oven off mode (blank screen), press and hold the number 0 and turn the unit on by pressing the On/Off key. -
Page 63: Speaker
Speaker The speaker provides audible feedback to the oven operator whenever a key is pressed or a task (such as a cook cycle) is completed. Testing the Speaker If the speaker is no longer audible, check the speaker wires to make sure they are secure on the terminals. - Page 64 CONTROL SYSTEM...
-
Page 65: Power Components
POWER COMPONENTS... -
Page 66: Emi Filter
POWER COMPONENTS EMI Filter The EMI Filter helps suppress the amount of RF interface through the electrical system that is emitted by the microwave circuit. The EMI filter is installed on back of the unit below the blower motor. Testing EMI Filter To test the EMI Filter, test across both terminals for incoming and outgoing AC voltage to verify that the voltage is passing through correctly. -
Page 67: Testing Power Supply
Testing Power Supply Warning: Make sure to connect the positive (red) Power Supply wire to terminal 1 and negative (black) to terminal 2 on the control board. Switching polarities will cause damage to the control board. 1. Remove both side and top panels from unit. 2. -
Page 68: Ventilation System
POWER COMPONENTS Ventilation System The Forza Express oven ventilation system uses two 3400 RPM cooling fans (dimensions: 7in/172mm x 6in/150mm) that exhaust all of the hot air from electronic compartment. Fans Testing Cooling Fans Warning: For safety purposes, manually discharge capacitors before troubleshooting cooling fans due to proximity. -
Page 69: Testing Control System Fuses
Testing Control System Fuses The fuses are mounted on the side rail and can be removed with the use of a flathead screwdriver. Fuse Post 1. Unplug the oven and remove the right-side panel. 2. Open the fuse post by pushing the cover to the right. 3. - Page 70 POWER COMPONENTS...
-
Page 71: Filteringsystem
FILTERINGSYSTEM... -
Page 72: Air Filter
FILTERING SYSTEM Air Filter The main purpose for the air filter is to prevent debris from entering the unit. The filter will block dirt, dust, lint, and other particles that can cause build up in the air vent system and other components. The filter is located on the bottom of the unit and can be removed by pulling the filter and tray out towards the front of the oven. -
Page 73: Catalytic Converter
Co2 and H2o as it passes through the catalytic converter. The catalyst will operate most efficiently at temperatures above 475ºF (246ºC). CAUTION: The catalyst can only be cleaned by approved non-caustic oven cleaner provided by Pratica Inc. and rinsed with distilled water. The catalytic converter can become seriously damaged if cleaned with any other product. - Page 74 FILTERING SYSTEM...
-
Page 75: Forza Express Schematics
FORZA EXPRESS SCHEMATICS... -
Page 76: Control Board Schematic
FORZA EXPRESS SHEMATICS Control Board Schematic... -
Page 77: Heater Schematic
Heater Schematic... -
Page 78: Blower/Motor Cooling Fan Schematic
FORZA EXPRESS SHEMATICS Blower/Motor Cooling Fan Schematic... -
Page 79: Pictorial Diagram
Pictorial Diagram... - Page 80 FORZA EXPRESS SHEMATICS...
-
Page 81: Exploded View Parts List
EXPLODED VIEW PARTS LIST... -
Page 82: Assembly Level 1
Assembly Level 1... -
Page 83: Assembly Panel
Assembly Panel... -
Page 84: Inverter
Inverter... -
Page 85: Assembly Door
Assembly Door... -
Page 86: Assembly Level 2
Assembly Level 2... -
Page 87: Assembly Motor
Assembly Motor... -
Page 88: Assembly Level 3
Assembly Level 3... - Page 90 For service or information: Prática Products, Inc – USA 675 Town Square Boulevard, Suite 200 Garland, TX 75040 1-214-299-7726 info@praticausa.com www.praticausa.com Prática Products, Inc - USA 675 Town Square Boulevard, Suite 200 © 2018 Prática Products, Inc - USA Garland, TX 75040...
Need help?
Do you have a question about the Forza Express and is the answer not in the manual?
Questions and answers