Table of Contents
Advertisement
Quick Links
Advertisement
Table of Contents

Subscribe to Our Youtube Channel
Related Manuals for Cyrus CLASSIC AMP


Summary of Contents for Cyrus CLASSIC AMP
- Page 1 CLASSIC AMP USER GUIDE Firmware version V1.0 BUILDING A BETTER MUSIC EXPERIENCE...
-
Page 2: Table Of Contents
Auto-standby ..............10 WARRANTY ................23 Selecting an input ..............10 WEEE ..................23 Selecting the ‘Cyrus AV’ or ‘AV Direct’ inputs ...... 10 Volume and balance ............11 Volume ................11 Safe volume levels after standby ........11 Balance ................11 Mute .................. -
Page 3: Important! Read Before Operating This Equipment
Use only with a cart, stand, tripod, bracket or table recommended by the manufacturer, or sold with the product. Any mounting of the product should follow the manufacturer’s instructions, and should use a mounting accessory recommended by the manufacturer. Classic AMP User Instructions... -
Page 4: Power Supply
• When the product exhibits a distinct change in performance. The Classic AMP is supplied with a pair of dual speaker REPLACEMENT PARTS: When replacement parts are plugs. To ensure safe operation of this amplifier, the speaker... -
Page 5: Fcc Notice
• Connect the equipment into an outlet on a circuit different from that to which the receiver is connected. • Consult the dealer or an experienced radio/TV technician for help. Any changes or modifications not expressly approved by the manufacturer could void the user’s authority to operate the equipment. *115V products Classic AMP User Instructions... -
Page 6: Welcome To The World Of Cyrus
• Kit of 2 x dual speaker plugs and respected manufacturers of hi-fi equipment. • Quick-start guide Now is a good time to register your new Cyrus product. After removing these items, please retain the packaging. Registration takes only a few minutes, brings the added... -
Page 7: Installation
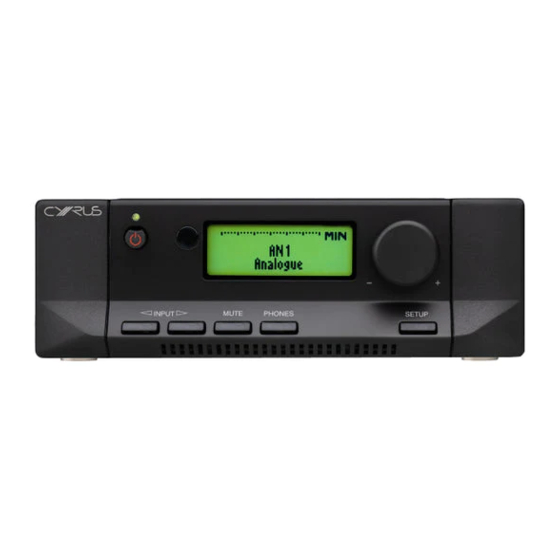
4. Fixed output 11. Left speaker output 18. Headphone socket 5. Phono/MM input 12. PSX-R connection 19. Power inlet 6. Phono ground terminal 13. Upgrade port 7. AN1 analogue input 1 14. DIG4 digital input 4 Classic AMP User Instructions... -
Page 8: Important - Read Before Making Any Audio Connections
• Connect the plugs to the ‘PHONO/MM’ sockets on the back panel. Connect the white plug to the left socket and the red plug to the right socket. • Unscrew the ‘GROUND’ terminal then fasten the ground wire (where fitted) under the terminal. Classic AMP User Instructions... -
Page 9: Connecting Loudspeakers
Connecting loudspeakers The Classic AMP is supplied with a pair of dual speaker plugs. To ensure safe operation of this amplifier, the speaker cables must be terminated with the supplied speaker plugs, assembled in accordance with the instruction supplied with the plugs. -
Page 10: Using The Fixed Output Of Your Amplifier
For this system to function correctly both the amplifier Out’ to the line input or record input of a tape/disc and the Cyrus surround decoder must be included in an recorder. MC-BUS connection loop and the ‘Cyrus AV’ input name You can now record the source you are playing on the tape/ must be set for the input used (see ‘MC-BUS’... -
Page 11: Mc-Bus System
MC-BUS in How it works input of the first. When a PSX-R is connected to a Cyrus product, the power feeds to the internal circuitry are split two ways with the clean, stable power source of the PSX-R feeding sensitive... -
Page 12: Operation
When set to standby, all settings in use are retained. Selecting the ‘Cyrus AV’ or ‘AV Direct’ inputs Auto-standby The ‘Cyrus AV’ and ‘AV Direct’ input names are reserved To save energy, standby will set automatically 20 minutes only for use with surround-sound decoders. When one of after music last played. -
Page 13: Volume And Balance
When muted the volume level display will show that the sound is muted. The recording signal will always track the same source as the main system is playing. • Press mute again to restore the original volume setting. Classic AMP User Instructions... -
Page 14: Remote Control Operation
TV and a Satellite or terrestrial TV set-top box, programmed to the TV and SAT buttons, but could also be other audio components such as a Cyrus tuner or DVD player etc. Switching on Cyrus components *NOTE: It may be necessary to upgrade the firmware in Press one of the keys in the SOURCE group. -
Page 15: Cyrus Amplifier Commands
Cyrus amplifier commands • Press the CYRUS key to set the remote control to Cyrus mode. You can now control the Cyrus amplifier. The CYRUS key will flash red when commands are being sent in Amplifier mode. The Amplifier mode commands available are listed below –... -
Page 16: Cyrus Cd Player Commands
• Press the CYRUS key • Press the key to set the remote control to CD mode. The key will light red. You can now control both a Cyrus CD player and amplifier. The key will flash red when commands are being sent in CD mode. -
Page 17: Cyrus Audio Streamer Commands
• Press the key to set the remote control to Audio streamer mode. The key will light red. You can now control both a Cyrus Audio streamer and amplifier or an Audio streamer that includes an amplifier. The key will flash red when commands are CONTROL being sent in Audio streamer mode. -
Page 18: Cyrus Phono Signature Commands
CONTROL This page lists commands that will control the Phono Signature. SOURCE • Press the CYRUS key to set the remote control to Cyrus mode. Display off You can now control both a Cyrus amplifier and the Phono Signature. The CYRUS key will flash red when commands are being sent in this mode. -
Page 19: Configuration
Set the sensitivity offset for input DIG1 Offset DIG2 Set the sensitivity offset for input DIG2 Offset DIG3 Set the sensitivity offset for input DIG3 Offset DIG4 Set the sensitivity offset for input DIG4 Auto-Standby Enable/Disable Auto-Standby Classic AMP User Instructions... -
Page 20: Input Names
NOTE:- There are two special function input names marked **. source components such as tape ‘Cyrus AV’ is reserved for the connection of Cyrus surround decks or tuners. sound decoders to one of the analogue Inputs 1-6 and should only be used for this purpose. -
Page 21: Factory Settings
‘small input names’, New firmware versions will be available from the ‘Support’ setting all input sensitivity trim settings to 0dB and enabling pages of the Cyrus website www.cyrusaudio.com. Auto-Standby. If new firmware is available, this will be packaged with other... -
Page 22: Remote Control Learning
6. Release the key on the reference remote control. 1. Set the two remote controls up facing each other, spaced 7. Press a key on the Cyrus remote control (volume up by about 5cm. in this example) to select where you want to save that command. -
Page 23: Checking Programmed Commands
If you continue to have problems, it may be that your handset is incompatible with the learning process. This could happen with an older design of handset or one that has an unusual code-set. Classic AMP User Instructions... -
Page 24: Troubleshooting Guide
Remote control lights flash This indicates that the stable. batteries are flat If a fault condition still remains, return the amplifier to your Cyrus appointed retailer or an authorised Service Centre. Classic AMP User Instructions... -
Page 25: Specifications
Max output voltage ....(330Ω load) .....1.85V Signal to Noise Ratio (unwtd) ..(35mW//16Ω) ..90dB THD ..........(35mW//16Ω) ..<0.01% Cyrus reserves the right to change all specifications without notice. E &OE Cyrus classic amp english v0.2 Classic AMP User Instructions... - Page 26 Cyrus Audio Ltd., Ermine Business Park, Huntingdon, PE29 6XY, U.K.
Need help?
Do you have a question about the CLASSIC AMP and is the answer not in the manual?
Questions and answers