Table of Contents
Advertisement
Quick Links
Advertisement
Table of Contents

Related Manuals for Getinge MAQUET CRITICAL CARE


Summary of Contents for Getinge MAQUET CRITICAL CARE
- Page 1 Compressor Mini CRITICAL CARE Service Manual...
- Page 2 Compressor Mini Service Manual Notes Revision 02...
-
Page 3: Table Of Contents
Compressor Mini Service Manual Contents 1. Important ..........................4 2. Introduction ......................... 8 2.1 General description...................... 8 2.2 Main units........................8 2.3 Functional principles ....................9 3. Description of functions ....................10 3.1 Compressed air production ..................10 3.2 Compressor cooling ....................12 3.3 Electric functions ....................... -
Page 4: Important
Compressor Mini Service Manual 1. Important General Symbols used in this manual • This Service Manual is intended to give service • ESD sensitive components. When personnel sufficient knowledge about the handling ESD-sensitive devices, Compressor Mini to be able to diagnose any established procedures must be possible problem or failure and to identify which observed to prevent damage. - Page 5 Compressor Mini Service Manual 1. Important Functional check Service • After any installation, maintenance or service • The Compressor Mini must be intervention in the Compressor Mini, perform a serviced at regular intervals by 'Function check'. Refer to the User's Manual. personnel trained and authorized by MAQUET.
- Page 6 Compressor Mini Service Manual 1. Important Environmental declaration Construction materials The construction materials used in Compressor Purpose Mini in % of the total weight. This environmental declaration is for a Compressor Mini unit. Metal – total 43% Number codes within brackets refers to the •...
- Page 7 Compressor Mini Service Manual 1. Important Articles of consumption 1. Compressor dust filter 2. Thermoelectric coolers dust filter 3. Air inlet filter 4. Water separator filter incl. O-ring 5. Compressor shock absorbers 6. Compressor maintenance kit incl: – Cylinder liners –...
-
Page 8: Introduction
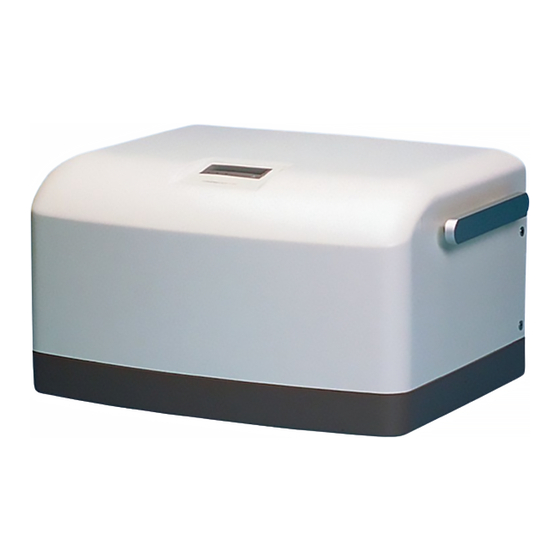
Compressor Mini Service Manual Introduction 2.2 Main units 2.1 General description The Compressor Mini comprises the following main The Compressor Mini is designed to supply medical- grade compressed air. The compressor has a units: capacity of approx. 30 l/min at a pressure of 350 – •... -
Page 9: Functional Principles
Compressor Mini Service Manual 2.3 Functional principles Compressor cooling Efficient cooling is required to keep the specified This description refers to the Functional block working temperature inside the unit, but also to diagram, see chapter 9. 'Diagrams'. condensate water from the compressed air. •... -
Page 10: Description Of Functions
Compressor Mini Service Manual 3. Description of functions 3. Cooling coil A preliminary cooling of the compressed air is The text in this chapter refers to the Circuit and provided by the Cooling coil assembly, which is connection diagrams and the Functional block made of metal tubing. - Page 11 Compressor Mini Service Manual 6. Pressure regulator 10. Compressed air inlet The compressed air supply is tapped off at the Water Compressor Mini is equipped with a Compressed air separator and applied to the Pressure regulator. This inlet. The purpose of this air inlet is to provide device is actually a pressure relief valve.
-
Page 12: Compressor Cooling
Compressor Mini Service Manual 14. Drain valve 18. Axial fan The manual Drain valve is connected to the bottom The Compressor Mini is equipped with an Axial fan. of the Tank with a plastic tube. This valve is a spring- The fan is supplied with 12 V power supplied by the loaded valve that is provided to drain the tank if PC board. - Page 13 Compressor Mini Service Manual 24. Transformer The transformer used is a toroid transformer. The same transformer is used in the 115 V and 230 V versions, but the electrical connection of the transformer differs. The transformer is fitted with a non-resetting thermal switch that will disconnect the current through the transformer if it is overheated.
- Page 14 Compressor Mini Service Manual DIP switch Temperature alarms are activated if measured temperatures are outside alarm limits. Alarm The DIP switch is a selector with 6 different switches. conditions are described in the User's Manual, It is used to: chapter 'Technical data'. •...
- Page 15 Compressor Mini Service Manual Water drainage control 32. Thermostat The drainage valve is controlled by the PC board. The Thermostat is mounted in the compartment of the axial fan and the cooling flanges. If the tempe- To ensure a gentle startup, the drainage valve will be rature at the thermostat exceeds approx.
-
Page 16: Disassembling And Assembling
Compressor Mini Service Manual Disassembling and Before the compressor cover is removed, make assembling sure that the mains power supply is disconnected and that the compressed air tank is 4.1 General depressurized. • Only personnel trained and authorized by MAQUET shall be permitted to With mains power supply connected to perform installation, service or the Compressor Mini, there are... -
Page 17: Compressor Cover
Compressor Mini Service Manual 4.4 Compressor cover Disassembling Before the compressor cover is removed, make sure that the mains power supply is disconnected and that the compressed air tank is depressurized. • Remove the four screws (1). • Pull out and lift off the cover (2). Assembling The assembling procedure is the reverse of the disassembling procedure as described above. -
Page 18: Compressor With Motor
Compressor Mini Service Manual 4.6 Compressor with motor Disassembling • Remove the cover as described in section 4.4 'Compressor cover'. • Remove the six screws (1) holding the cover plate. • Lift off the cover plate (2). • Disconnect the two tubes (3 and 4). <... -
Page 19: Compressor Maintenance
Compressor Mini Service Manual • Lift out the compressor with motor. Note: The sound absorbing mat attached to the chassis may cause the mounting rails (7) to stick. Use a large screwdriver (8) to pry them loose. • Remove the mounting rails (7) from the compressor. •... -
Page 20: Water Separator
Compressor Mini Service Manual 4.8 Water separator Disassembling • Remove the cover as described in section 4.4 'Compressor cover'. • To remove the complete water separator: – Remove the three screws (1). – Disconnect all tubings from the water separator and lift off the water separator (2). -
Page 21: Thermoelectric Cooler
Compressor Mini Service Manual 4.9 Thermoelectric cooler Disassembling • Remove the cover as described in section 4.4 'Compressor cover'. • Disconnect the two cables at the terminal (1). • Disconnect the connector P6 (2) at the PC board. • Remove the four screws (3) and carefully pull out the thermoelectric cooler (4). -
Page 22: Axial Fan
Compressor Mini Service Manual 4.10 Axial fan Disassembling • Remove the thermoelectric cooler as described in section 4.9 'Thermoelectric cooler'. • Disconnect the connector P2 (1) at the PC board. • The cable is routed through a rubber bushing in the housing. -
Page 23: Standby Valve
Compressor Mini Service Manual 4.12 Standby valve Disassembling • Remove the radial fan as described in section 4.11 'Radial fan'. • Remove the inlet and outlet air connection nipples (1 and 2). • Disconnect tubings and cable connectors from the standby valve (3). -
Page 24: Pc Board
Compressor Mini Service Manual 4.14 PC board Disassembling • Remove the cover as described in section 4.4 'Compressor cover'. • Disconnect all tubings and cable connectors from the PC board. • Loosen the screw (1) a few turns. • Remove the two screws (2). •... -
Page 25: Service Procedures
Compressor Mini Service Manual Service procedures Before the compressor cover is removed, make sure that the mains power supply is disconnec- ted and that the compressed air tank is depressurized. With mains power supply connected to the unit, there are energized electrical components as well as moving mechanical parts inside the equipment. -
Page 26: Replacing / Resetting Fuses
Compressor Mini Service Manual 5.2 Replacing / resetting fuses Mains fuses F3/F4 There are two mains power fuses, F3 and F4, located at the mains power inlet. The value for the mains fuses is as follows: • 115 V version ........8.0 AT, 250 V •... -
Page 27: Setting The Dip Switch
Compressor Mini Service Manual 5.3 Setting the DIP switch The following settings are made with the DIP switch (1) on the PC board: • Reset, SW1. Used for factory calibration of the PC board. Not intended for field service. Must remain in OFF-position. -
Page 28: Troubleshooting
Compressor Mini Service Manual Troubleshooting Before the compressor cover is removed, make Before you start any troubleshooting, begin if sure that the mains power supply is disconnected possible by questioning the person reporting the and that the compressed air tank is fault. - Page 29 Compressor Mini Service Manual Malfunction Action Operating pressure (shown on the display) is correct • Too high air consumption. The compressor cannot during functional check but drops when a ventilator supply the equipment connected. is connected: • The dust filters or the air inlet filter are clogged. Clean or replace the filters if necessary.
- Page 30 Compressor Mini Service Manual Malfunction Action The 'Temperature alarm 2' or 'Temperature alarm 3' • Ambient air temperature is too high. is activated: • The thermoelectric cooler's ventilation holes are blocked. Check cooling air inlet as well as cooling air outlet on the underside of the unit. •...
-
Page 31: Preventive Maintenance
Compressor Mini Service Manual 7. Preventive maintenance Before the compressor cover is removed, make 7.1 General sure that the mains power supply is disconnected and that the compressed air tank is depressurized. The Compressor Mini must be serviced at regular intervals by personnel trained and authorized by With mains power supply connected to MAQUET. - Page 32 Compressor Mini Service Manual • Replace the thermoelectric coolers dust filter (2). • Replace the air inlet filter (3). • Replace the O-ring (4). • Replace the water separator filter (5). Safety inspection • Make a visual inspection of the Compressor Mini for external defects or damages.
-
Page 33: Hour Overhaul
Compressor Mini Service Manual 7.3 10.000 hour overhaul When performing the maintenance, a 'Maintenance kit, 10.000 hour' should be used. For disassembling and assembling instructions, refer to chapter 4. 'Disassembling and assembling'. • Replace the following parts as described in section 7.2 5.000 hour overhaul: –... -
Page 34: Index
Compressor Mini Service Manual Index 5.000 hour overhaul 10.000 hour overhaul On/Off switch 9 12 Air inlet PC board 8,9 13 24 Air inlet filter Pressure regulator 9 11 Axial fan 8,9 12 22 Pressure unit selection Buzzer Radial fan 8,9 12 22 Radial fan capacitor Rectifier... - Page 35 Compressor Mini Service Manual Notes Revision 02...
-
Page 36: Diagrams
20. Mains power inlet 21. Mains fuses F3/F4 24. Transformer 22. On/Off switch Rectifier Thermo 110˚C GNYE 230 V 27. Autofuse 23. Mains power F2 20 A terminal 28. PC board 20. Mains power inlet 24. Transformer 26. DC 21. Mains fuses F3/F4 Rectifier Capacitor 22. -
Page 37: Functional Block Diagram
Compressor Mini Service Manual 9.2 Functional block diagram 13. Drainage 34. Transport 10. Compressed 11. Compressed bottle safety lock air inlet air outlet 14. Drain valve 9. Standby valve 22. On/Off Dust filter switch 21. Mains fuses F3/F4 Buzzer 20. Mains power inlet 16. - Page 38 Subject to alterations without prior notice. Issued by Maquet Critical Care AB, SE-171 95 Solna, Sweden. Compressor Mini – Service Manual Order No. 65 43 222...
Need help?
Do you have a question about the MAQUET CRITICAL CARE and is the answer not in the manual?
Questions and answers