Table of Contents
Advertisement
Advertisement
Chapters
Table of Contents

Subscribe to Our Youtube Channel
Related Manuals for Getinge Maquet SERVO-i


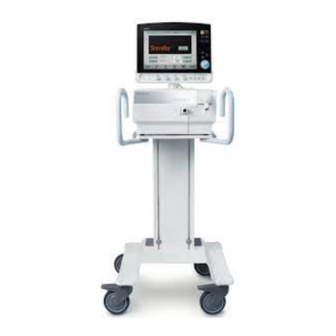
Summary of Contents for Getinge Maquet SERVO-i
- Page 1 User's Manual SERVO-i/s Cleaning and Maintenance...
- Page 3 TABLE OF CONTENTS TABLE OF CONTENTS Introduction Routine cleaning Maintenance SERVO-i/s, User's Manual Infologic 1.45...
- Page 4 | 1 | Introduction 1 Introduction Table of contents Introduction General information Symbols Warning, Caution, Important and Note SERVO-i/s, User's Manual...
- Page 5 Introduction | 1 | 1.1 Introduction 1.3 Symbols Unless otherwise stated, the information in Hazardous waste The device this User´s Manual is valid for all SERVO-i/s contains parts which must not be Ventilator Systems. disposed of with ordinary waste. Here you will find the information needed to 1.4 Warning, Caution, Important and clean and maintain the SERVO-i/s systems Note...
- Page 6 | 1 | Introduction CAUTIONS: • Sterilization is normally not necessary for • All personnel should be aware of the risk the expiratory cassette, as it is not an of parts being infected when invasive instrument, but when applied, disassembling and cleaning the use validated processes only.
-
Page 7: Table Of Contents
Routine cleaning | 2 | 2 Routine cleaning Table of contents Cleaning/disinfection procedures - a summary Preparations and dismantling Wiping and discarding Disinfection procedures Sterilization procedures (not recommended) Assembling SERVO Ultra Nebulizer cleaning Aerogen Pro Nebulizer SERVO-i NAVA system cleaning 2.10 SERVO CO analyzer cleaning... -
Page 8: Cleaning/Disinfection Procedures - A Summary
| 2 | Routine cleaning 2.1 Cleaning/disinfection procedures Disinfection when no bacterial filter is used - a summary Dismantle A summary of the procedures for cleaning, disinfection and sterilization is given here. Wipe off/discard Details for each step are given in the following sections. -
Page 9: Preparations And Dismantling
Routine cleaning | 2 | 2.2 Preparations and dismantling Sterilization with autoclave (NOT recommended) Dismantle Dismantle Wipe off/discard Wipe off/discard Rinse Rinse Washer- Disinfectant Disinfector Rinse Autoclave Assemble Assemble Autoclaving will reduce the lifetime of the 2.2.1 Preparations expiratory cassette and is not recommend as a cleaning method. - Page 10 | 2 | Routine cleaning 2.2.2 Remove the expiratory cassette SERVO-s SERVO-i • Press the locking arm on the rear to tilt the User Interface. • Press the button on the expiratory cassette, • Lift the locking handle and pull out the tilt it upwards and remove.
-
Page 11: Wiping And Discarding
Routine cleaning | 2 | 2.3 Wiping and discarding Note: In case of more contaminated surfaces, use ethyl alcohol (70%) or Dismantle isopropyl alcohol (70%). Avoid contact with electrical contacts. Wipe off/discard CAUTION: Do not immerse battery, CO Rinse analyzer, Edi module or Y sensor module (SERVO-i only) in any fluid. - Page 12 | 2 | Routine cleaning 2.3.1 Rinse before disinfection Important: Rinsing the cassette in water (<35°C/95°F) immediately after use may be Dismantle a useful alternative to disinfection. Immediate rinsing can remove particles and Wipe off/discard reduces the risk of cross-contamination between patients.
-
Page 13: Disinfection Procedures
Rinse 85-95°C (185-203°F). The following cleaning agent can be used: • neodisher® MediClean forte • Getinge MIS Detergent (for the expiratory Assemble cassette) Important: • The expiratory cassette is a precision instrument and must be handled carefully. - Page 14 | 2 | Routine cleaning 2.4.2 Disinfectant (D2) 2.4.3 Rinse after disinfection (D2) Let the parts soak in disinfectant. Pre-disinfectant • Rinse the parts thoroughly in water to remove all traces of disinfectant. Let the • Aniosyme DD1 water flow through the parts. •...
- Page 15 Routine cleaning | 2 | 2.4.4 Drying alternatives Recommended position in a drying cabinet Dismantle Wipe off/discard Rinse Washer- Disinfectant Recommended position in room air Disinfector Rinse Assemble The expiratory cassette must be dried before If the Pre-use check is not passed after drying use (if not dry, the expiratory cassette may not then: pass the Pre-use check).
-
Page 16: Sterilization Procedures (Not Recommended)
| 2 | Routine cleaning 2.5 Sterilization procedures (not 2.5.4 Autoclave recommended) • Instrument parts should be autoclaved in a An autoclave may be used to sterilize the validated process, typically at a temperature expiratory cassette but it is normally not of 134°C (273°F) for 3 minutes. -
Page 17: Assembling
Routine cleaning | 2 | 2.6 Assembling SERVO-s Dismantle Wipe off/discard Rinse CLICK Washer- • Hinge the expiratory cassette and press it Disinfectant Disinfector firmly down into lock position. Rinse WARNING! Make sure that the cassette clicks into position. Check that it cannot be moved upwards and that the button on top of the cassette is Assemble... -
Page 18: Servo Ultra Nebulizer Cleaning
| 2 | Routine cleaning 2.7 SERVO Ultra Nebulizer cleaning 2.7.2 Wiping and discarding The Servo Ultra Nebulizer has been discontinued. The information in this document applies to devices sold with versions 6.1 and earlier of the SERVO-i Ventilator System. Cleaning should be done after each patient or according to hospital routine. - Page 19 Routine cleaning | 2 | Pre-disinfectant • Hexanios G+R • Aniosyme DD1 • Gigazyme Plus Important: Follow the disinfectant • Wipe the nebulizing chamber and control manufacturer's recommendations and cable with a soft cloth moistened in soap & instructions. water or detergent-based disinfectant. Disinfectant Note: In case of more contaminated •...
-
Page 20: Aerogen Pro Nebulizer
| 2 | Routine cleaning 2.8 Aerogen Pro Nebulizer 2.7.6 Nebulizer membrane Cleaning should be done after each patient or according to hospital routine. Perform a function test of the Aerogen Pro Nebulizer after the cleaning. Refer to the SERVO-i User's Manual. Replacement of membrane if needed/used: •... - Page 21 Routine cleaning | 2 | 2.8.1 Preparation 2.8.3 Disinfection procedure • Disconnect the nebulizer unit from the Cleaning control cable, and remove the nebulizer • Disassemble the nebulizer unit and adapters unit, T-piece and adapters from the into individual components. ventilator circuit, mask or mouthpiece.
- Page 22 | 2 | Routine cleaning - Dry at 90 °C (194 °F) for 15 minutes. Steam sterilization can be performed using the following three methods: Pre-disinfectant • Autoclave wrapped parts using steam • Hexanios G+R sterilization pre-vacuum cycle, a minimum of 134°C (270°F - 275°F) for 3.5 minutes Disinfectant with drying cycle (134°C wrapped cycle).
-
Page 23: Servo-I Nava System Cleaning
Routine cleaning | 2 | 2.9 SERVO-i NAVA system cleaning Discard the Edi catheter. The Edi catheter is for single patient use only. 2.9.1 Wiping and discarding Cleaning should be done after each patient or according to hospital routine. Note: The Edi catheter must not be disposed of with ordinary waste. -
Page 24: Servo Co
| 2 | Routine cleaning 2.10 SERVO CO analyzer cleaning 2.10.1 Preparation Cleaning should be done after each patient or according to hospital routine. Preparation • Disconnect the Capnostat sensor and airway adapter from the ventilator. Rinse Disinfectant (wipe off) 2.10.2 Capnostat sensor Disinfectant Sterilization... - Page 25 Routine cleaning | 2 | Disinfection procedure • Let the adapter soak in Cidex OPA solution. • Rinse the adapter thoroughly in distilled water. • Before reusing the adapter, the windows must be dry and wiped off. • After cleaning, wipe the Capnostat sensor with a water-dampened clean cloth.
- Page 26 | 3 | Maintenance 3 Maintenance Table of contents Preventive maintenance sensor cell Extended cleaning of inspiratory channel Accessories SERVO-i/s, User's Manual...
-
Page 27: Preventive Maintenance
Maintenance | 3 | 3.1 Preventive maintenance 3.3 O cell Maquet recommends that the equipment is inspected regularly. A preventive maintenance, according to corresponding chapter in the Service manual, must be performed by authorized personnel at least once every year as long as the unit is Regularly check the cell status in the Status not used more than normal. - Page 28 | 3 | Maintenance 3.3.1 Preparations and dismantling • Unpack the O cell at least 15 minutes SERVO-i before replacement. Turn the ventilator off using the switch on the rear of the user interface. • Disconnect the ventilator from the power and gas supply.
- Page 29 Maintenance | 3 | SERVO-s • Loosen the screw. • Pull out the cover. 3.3.2 Replacement of O cell and/or • Disconnect the O cell connector. bacterial filter • Lift and discard the O cell with the rubber seal to special waste and/or remove and discard the bacterial filter to hazardous waste.
- Page 30 | 3 | Maintenance SERVO-i • Angle up the handle and push it down in position. • Connect the O cell connector. • Perform a Pre-use check, see SERVO-i • Put the O cell in position. User's Manual. • Close the locking catch. SERVO-s 3.3.3 Assembling SERVO-i...
-
Page 31: Extended Cleaning Of Inspiratory Channel
Maintenance | 3 | 3.4 Extended cleaning of inspiratory sensor is installed channel 3.4.1 Preparations and dismantling Follow the instructions for preparation and dismantling as given on page 28. cell is installed • Disconnect the O sensor and carefully unlock the latches. •... - Page 32 | 3 | Maintenance 3.4.2 Remove the inspiratory channel and 3.4.4 Insert the inspiratory channel and tube tube • Put a new bacterial filter in position and connect the filter to the tube. • Press the latches and lift the inspiratory channel upwards.
- Page 33 Maintenance | 3 | • Press the latches and insert the inspiratory • Close the locking catch. channel. Insertion of O sensor Important: • There should always be clearance between the connector muffs and gas modules. • Make sure the latches are locked in position.
-
Page 34: Accessories
| 3 | Maintenance 3.5 Accessories Fischer & Paykel Humidifier MR850 (optional) Refer to the operating manual for the Fisher & Paykel Humidifier MR850. Disposable parts Use disposable and spare parts from Maquet • Connect the O sensor (two "clicks" are only. - Page 36 For local contact: Please visit our website www.maquet.com Getinge Group is a leading global provider of innovative solutions for operating rooms, intensive-care units, hospital wards, sterilization departments, elderly care and for life science companies and institutions. With a genuine passion for life we build quality and safety into every system.
Need help?
Do you have a question about the Maquet SERVO-i and is the answer not in the manual?
Questions and answers