Compaq Deskpro EX User Manual
Hp deskpro ex: user guide
Hide thumbs
Also See for Deskpro EX:
- Maintenance and service manual (2 pages) ,
- Maintenance and service manual (2 pages) ,
- Supplementary manual (20 pages)

Related Manuals for Compaq Deskpro EX


Summary of Contents for Compaq Deskpro EX
- Page 1 Maintenance & Service Guide Compaq Deskpro EX Series of Personal Computers Desktop Models...
- Page 2 Maintenance & Service Guide Compaq Deskpro EX Series of Personal Computers Desktop Models...
- Page 3 Text set off in this manner indicates that failure to follow directions could result in damage to equipment or loss of information. Maintenance & Service Guide Compaq Deskpro EX Series of Personal Computers Desktop Models First Edition (September 2000) Part Number 201855-001...
-
Page 4: Table Of Contents
preface About This Guide Symbols and Conventions...vii Technician Notes...vii Locating Additional Information ...viii chapter 1 Product Description 1.1 Product Features ... 1-2 1.1.1 Front Panel Controls and LEDs ... 1-2 1.1.2 Rear Panel Connectors ... 1-3 1.1.3 Drive Positions ... 1-4 1.2 Serial Number Location... - Page 5 3.3.5 Hard Drives ... 3-6 3.3.6 Lithium Coin Cell Battery... 3-6 chapter 4 Removal and Replacement Procedures 4.1 Disassembly Sequence Chart... 4-1 4.2 Disassembly Preparation... 4-2 4.3 Computer Cover ... 4-3 4.4 Front Bezel ... 4-4 4.5 Bezel Blank... 4-5 4.6 Power Switch/LED Cable...
- Page 6 chapter 6 Specifications 6.1 Specifications... 6-1 6.1.1 System ... 6-1 6.1.2 System Interrupts ... 6-2 6.1.3 System DMA... 6-2 6.1.4 ICH Fixed I/O Registers... 6-3 6.1.5 System Memory Map ... 6-5 6.2 Drives... 6-6 6.2.1 1.44-MB Diskette Drive... 6-6 6.2.2 Ultra ATA Hard Drives...
-
Page 7: Symbols And Conventions
UIDE This Maintenance & Service Guide is a troubleshooting and repair guide that can be used for reference when servicing the Compaq Deskpro EX Series of Personal Computers. Only authorized technicians trained by Compaq should attempt to repair this equipment. -
Page 8: Locating Additional Information
Locating Additional Information The following documentation is available to support these products: User Documentation Technical Training Guides Compaq Service Advisories and Bulletins Compaq QuickFind Technical Reference Guide Compaq Quick Reference Guide Compaq Service Reference Guide Compaq Quick Troubleshooting Guide viii About This Guide... -
Page 9: Product Description
RODUCT ESCRIPTION This chapter describes the model offerings and features of the desktop model of the Compaq Deskpro EX Series of Personal Computers. Compaq Deskpro EX Series of Personal Computers... -
Page 10: Product Features
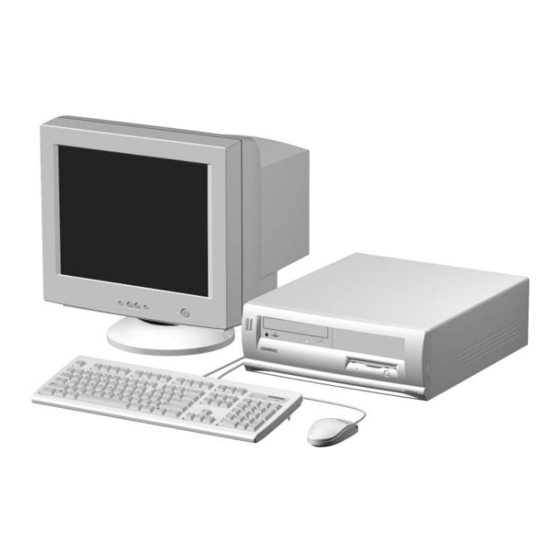
Product Features Compaq Deskpro EX Series of Personal Computers Desktop Model ships with a mouse and keyboard. Some models are also equipped with a CD-ROM drive. A Compaq color monitor or other compatible monitor does not ship with the computer. -
Page 11: Rear Panel Connectors
Plug and Play connector) Serial Connector Parallel Port Connector Ref. Component Monitor Connector Headphone/Line Out Audio Connector Serial Connector Line-In Audio Connector Microphone Connector Compaq Deskpro EX Series of Personal Computers... -
Page 12: Drive Positions
1.1.3 Drive Positions Reference Configuration Two standard 5.25-inch, half-height bays for optional drives One standard 3.5-inch, 1.44-MB diskette drive One standard 3.5-inch, side mounted hard drive To verify the type and size of the mass storage devices installed in the computer, run F10 Compaq Computer Setup. -
Page 13: Serial Number Location
CAUTION: A system board borrowed from another computer is recognized as a valid serial number and will create a mismatch between the serial number label and the electronic serial number. The computer serial number should be provided to Compaq when requesting information or ordering spare parts. Compaq Deskpro EX Series of Personal Computers... -
Page 14: Spare Parts
The chapter provides an illustrated parts breakdown and a reference for spare parts for the desktop model. System Unit Description 1 Computer cover 2 Chassis/basepan 3 Power supply 4 Front bezel Spare Part Number Not spared Not spared 201829-001 213434-001 Compaq Deskpro EX Series of Personal Computers Warranty Tier... -
Page 15: Mass Storage Devices
Mass Storage Devices Description 1 Diskette drive, 3.5-inch, buttonless, opal 2 48X Max tray load IDE CD-ROM drive 3 10.0-GB Ultra ATA hard drive (66/5400) quiet 15.0-GB Ultra ATA hard drive (66/5400) *Not shown (nn/nnnn) = hard drive transfer rate (MBytes/sec)/RPM ✎... -
Page 16: Standard, Memory, And Expansion Boards
933/133 MHz with fansink (191845-002). Fansink includes fan, heatsink, and clip. 10/100 PCI Network Interface Card System Board *Not shown. Spare Part Number 182757-001 192012-001 201827-001 180284-001 170080-001 170081-001 192014-001 192006-001 203969-001 188297-001 203966-001 Compaq Deskpro EX Series of Personal Computers Warranty Tier... -
Page 17: Keyboards
Keyboards Description Easy Access Keyboard-US Spacesaver, Opal Dutch Finnish French International Norwegian Spanish Swedish Miscellaneous Screw Kit Description Miscellaneous Screw Kit, includes: 6-32 x 1/4 hi-top, thread-forming screw with serrations (5 ea.) (192308-001) 6-19 x 5/16 panhead, plastite screw (4 ea.) (101346-068) 6-19 x .5/16 hi-top, taptite screw with captive washer (4 ea.) (114399-069) 6-32 x 3/16 hi-top, thread-forming screw with serrations (5... -
Page 18: Miscellaneous Parts
Documentation and Software Description Maintenance & Service Guide Illustrated Parts Map Service Reference Guide Quick Troubleshooting Guide Spare Part Number 334689-002 166861-001 Spare Part Number 207742-001 Spare Part Number 215877-001 215878-001 152611-001 153837-001 Compaq Deskpro EX Series of Personal Computers Warranty Tier... -
Page 19: Removal And Replacement Preliminaries
800 V 6,000 V 400 V 700 V 2,000 V 2,000 V 4,000 V 11,500 V 3,500 V 5,000 V 14,500 V 7,000 V 20,000 V 26,500 V 5,000 V 11,000 V 21,000 V Compaq Deskpro EX Series of Personal Computers... -
Page 20: Preventing Electrostatic Damage To Equipment
3.1.2 Preventing Electrostatic Damage to Equipment Many electronic components are sensitive to ESD. Circuitry design and structure determine the degree of sensitivity. The following proper packaging and grounding precautions are necessary to prevent damage to electric components and accessories. To avoid hand contact, transport products in static-safe containers such as tubes, bags, or boxes. -
Page 21: Recommended Materials And Equipment
Always turn off the computer when cleaning with liquids or damp cloths. Always turn off the computer before cleaning the keyboard, mouse, or air vents. Disconnect the keyboard before cleaning it. Wear safety glasses equipped with side shields when cleaning the keyboard. Compaq Deskpro EX Series of Personal Computers... -
Page 22: Cleaning The Computer Case
3.2.2 Cleaning the Computer Case Follow all safety precautions in Section 3.2.1 before cleaning the computer. To clean the computer case, follow the procedures described below: To remove light stains or dirt, use plain water with a clean, lint-free cloth or swab. For stronger stains, use a mild dishwashing liquid diluted with water. -
Page 23: Cleaning The Mouse
As each subassembly is removed from the computer, it should be placed away from the work area to prevent damage. Compaq Deskpro EX Series of Personal Computers... -
Page 24: Cables And Connectors
3.3.4 Cables and Connectors Most cables used throughout the unit are flat, flexible cables. These cables must be handled with care to avoid damage. Apply only the tension required to seat or unseat the cables during insertion or removal from the connector. Handle cables by the connector whenever possible. -
Page 25: Removal And Replacement Procedures
Removing an External 3.5-Inch Drive from Left Drive Bay System Memory Removing an Expansion Board 4.10 Graphics Cards 4.11 Processor 4.12 System Board 4.13 Lithium Battery 4.14 Power Supply 4.15 Chassis Fan These steps are interdependent. ROCEDURES Compaq Deskpro EX Series of Personal Computers... -
Page 26: Disassembly Preparation
Disassembly Preparation Before adding any internal options or performing a removal/replacement: 1. Remove any diskette, compact disc, or tape from the computer. 2. Turn off the computer and any peripheral devices that are connected to it. WARNING: Power is continuous to the system board and power supply even when the power switch is turned off. -
Page 27: Computer Cover
2. Press in the button on each side of the front bezel to release the quick release cover latches 1. 3. Slide the computer cover and front bezel forward approximately 1-inch (2.5 cm); then, lift up and off the unit 2. To replace the computer cover, reverse the previous steps. Compaq Deskpro EX Series of Personal Computers... -
Page 28: Front Bezel
Front Bezel 1. Prepare the computer for disassembly (Section 4.2). WARNING: Power is continuous to the system board and power supply even when the power switch is turned off. To prevent damage to the unit, disconnect the power cord from the power source or the unit before beginning disassembly procedures. -
Page 29: Bezel Blank
2. Remove the computer cover (Section 4.3) and lay it down on its top on a soft, protected surface. 3. Push the two snaps 1 down to release from the bezel blank tabs. 4. Remove the bezel blank 2. To install a bezel blank, reverse the removal procedure. Compaq Deskpro EX Series of Personal Computers... -
Page 30: Power Switch/Led Cable
Power Switch/LED Cable 1. Prepare the computer for disassembly (Section 4.2). WARNING: Power is continuous to the system board and power supply even when the power switch is turned off. To prevent damage to the unit, disconnect the power cord from the power source or the unit before beginning disassembly procedures. -
Page 31: Mass Storage Devices
Mass Storage Devices The Compaq Deskpro EX Series of Personal Computers desktop model supports up to four drives in various configurations. Reference Configuration Two standard 5.25-inch, half-height bays for optional drives One standard 3.5-inch, 1.44-MB diskette drive One standard 3.5-inch, side-mounted hard drive To verify the type and size of the mass storage devices installed in the computer, run Computer Setup. -
Page 32: Removing The Internal, Side-Mounted, 3.5-Inch Hard Drive
4.7.1 Removing the Internal, Side-Mounted, 3.5-Inch Hard Drive 1. Prepare the computer for disassembly (Section 4.2). WARNING: Power is continuous to the system board and power supply even when the power switch is turned off. To prevent damage to the unit, disconnect the power cord from the power source or the unit before beginning disassembly procedures. - Page 33 Play hard drive) and will automatically reconfigure the computer. If you installed a third- party hard drive, or one that is not a Plug and Play device, you must run Computer Setup to reconfigure the computer. Compaq Deskpro EX Series of Personal Computers...
-
Page 34: Removing An External 5.25-Inch Drive From Right Drive Bay
4.7.2 Removing an External 5.25-Inch Drive from Right Drive Bay 1. Prepare the computer for disassembly (Section 4.2). WARNING: Power is continuous to the system board and power supply even when the power switch is turned off. To prevent damage to the unit, disconnect the power cord from the power source or the unit before beginning disassembly procedures. -
Page 35: Removing The Diskette Drive
Improper cable placement can damage the computer. CAUTION: Use only 3/16-inch or 5-mm long screws as guide screws. Longer screws can damage the internal components of the drive. Compaq Deskpro EX Series of Personal Computers 4-11... -
Page 36: Removing An External 5.25-Inch Drive From The Left Drive Bay
4.7.4 Removing an External 5.25-Inch Drive from the Left Drive Bay 1. Prepare the computer for disassembly (Section 4.2). WARNING: Power is continuous to the system board and power supply even when the power switch is turned off. To prevent damage to the unit, disconnect the power cord from the power source or the unit before beginning disassembly procedures. -
Page 37: System Memory
Refer to Appendix F, “Electrostatic Discharge,” for more information. CAUTION: When handling a memory module, be careful not to touch any of the contacts. Doing so may damage the module. Compaq Deskpro EX Series of Personal Computers 4-13... - Page 38 To install a memory module, complete the following steps: 1. Prepare the computer for disassembly (Section 4.2). WARNING: Power is continuous to the system board and power supply even when the power switch is turned off. To prevent damage to the unit, disconnect the power cord from the power source or the unit before beginning disassembly procedures.
-
Page 39: Expansion Boards
If not installing a new expansion card, skip to step 10. 8. To install a new expansion card in an open slot, remove the expansion slot cover. 9. Slide the expansion card into the expansion slot and press it firmly into place. Compaq Deskpro EX Series of Personal Computers 4-15... - Page 40 When you install an expansion card, make sure you press firmly on the card so that the entire connector seats properly in the expansion card slot. 10. Replace the screw at the top of the expansion slot. 11. Replace the computer cover. 12.
-
Page 41: Graphics Cards
3. Pull the arm on the right side of the retention mechanism 1. 4. At the same time, rotate the front of the GPA/AIMM card up until it is at a 45 degree angle 2. 5. Remove the card from the expansion slot 3. Compaq Deskpro EX Series of Personal Computers 4-17... -
Page 42: Installing A Gpa/Aimm Card
Installing a GPA/AIMM Card WARNING: Power is continuous to the system board and power supply even when the power switch is turned off. To prevent damage to the unit, disconnect the power cord from the power source or the unit before beginning disassembly procedures. 1. - Page 43 Misalignment may result in damage to the card or the AGP connector. 6. While pulling the arm on the right side of the retention mechanism 5, rotate the card down into the expansion slot until seated 6. Compaq Deskpro EX Series of Personal Computers 4-19...
-
Page 44: Agp Card With A Type I Retention Mechanism
4.10.2 AGP Card with a Type I Retention Mechanism Removing an AGP Card 1. Prepare the computer for disassembly (Section 4.2). WARNING: Power is continuous to the system board and power supply even when the power switch is turned off. To prevent damage to the unit, disconnect the power cord from the power source or the unit before beginning disassembly procedures. -
Page 45: Gpa/Aimm Card With A Type 2 Retention Mechanism
3. Pull the arm on the right side of the retention mechanism. 4. Pull the card straight up to remove it from the expansion slot. To install the graphics card, reverse the above procedures. Compaq Deskpro EX Series of Personal Computers 4-21... -
Page 46: Agp Card With A Type 2 Retention Mechanism
4.10.4 AGP Card with a Type 2 Retention Mechanism Removing an AGP Card 1. Prepare the computer for disassembly (Section 4.2). WARNING: Power is continuous to the system board and power supply even when the power switch is turned off. To prevent damage to the unit, disconnect the power cord from the power source or the unit before beginning disassembly procedures. -
Page 47: Standard Agp Expansion Card
3. Remove the screw at the top of the expansion slot. 4. Remove the AGP graphics board as you would any PCI expansion board (Section 4.9.2). AGP card may differ from illustration. Compaq Deskpro EX Series of Personal Computers 4-23... -
Page 48: Processor
4.11 Processor 1. Prepare the computer for disassembly (Section 4.2). WARNING: Power is continuous to the system board and power supply even when the power switch is turned off. To prevent damage to the unit, disconnect the power cord from the power source or the unit before beginning disassembly procedures. - Page 49 All units with 866 MHz and faster processors require an active fansink. When installing the fan, make sure it is positioned so it blows down on the processor. All units with 866 MHz and faster processors require use of a chassis fan (Section 4.15). Compaq Deskpro EX Series of Personal Computers 4-25...
-
Page 50: System Board
4.12 System Board More information on the system board, including troubleshooting criteria, can be found in the Compaq Quick Troubleshooting Guide (part number 153837-001) and the Compaq Service Reference Guide (part number 152611-001). 1. Prepare the computer for disassembly (Section 4.2). WARNING: Power is continuous to the system board and power supply even when the power switch is turned off. -
Page 51: Battery
In Europe, do not dispose of batteries with general household waste. Dispose of or recycle them by using the public collection system or returning them to Compaq, your authorized Compaq partners, or their agents. Compaq Deskpro EX Series of Personal Computers 4-27... -
Page 52: Power Supply
4.14 Power Supply 1. Prepare the computer for disassembly (Section 4.2). WARNING: Power is continuous to the system board and power supply even when the power switch is turned off. To prevent damage to the unit, disconnect the power cord from the power source or the unit before beginning disassembly procedures. -
Page 53: Chassis Fan
5. Lift the fan out of the chassis 3. Make sure the fan is installed so that it blows air out of the computer. To replace the chassis fan, reverse the above procedure. Compaq Deskpro EX Series of Personal Computers 4-29... -
Page 54: System Board
AGP/AIMM Connector Power Supply Connector Power Button, Front Panel LED Cable Connector Diskette Drive Connector Aux Audio Connector UMPERS Compaq Deskpro EX Series of Personal Computers SOS Connector Primary IDE Connector Secondary IDE Connector CPU Fan Connector P100 ITP Connector (NI) -
Page 55: Clearing Cmos
5.1.2 Clearing CMOS The computer's configuration (CMOS) may occasionally be corrupted. If it does, it is necessary to clear the CMOS memory using push button switch SW50. To clear and reset the configuration, perform the following procedure: 1. Prepare the computer for disassembly (Section 4.2). CAUTION: The power cord must be disconnected from the power source before pushing the Clear CMOS Button (NOTE: All LEDs on the board should be OFF). -
Page 56: Disabling Or Clearing The Power-On And Setup Passwords
9. To re-enable the password features, repeat steps 1-4, then replace the jumper on pins 1 and 2. 10. Repeat steps 6-8, then establish new passwords. Refer to the Computer Setup (F10 Setup) instructions to establish new passwords. Compaq Deskpro EX Series of Personal Computers... -
Page 57: Hard Drive Jumper Settings
Hard Drive Jumper Settings 5.2.1 Seagate, Quantum, and Western Digital The drawings and tables below apply to a number of different size drives in the following paragraphs. Definition Seagate Single 7 - 8 Primary 5 - 6 and 7 - 8 Secondary No connection Cable Select 5 - 6... -
Page 58: Maxtor
Primary (in a dual-drive system) J Secondary Cable Select Disabled* Enabled 4092 Cylinder Limitation Disabled* Enabled Factory Reserved Factory Reserved * = Default setting J = Jumper O = No jumper J50 J48 J46 J44 J42 Compaq Deskpro EX Series of Personal Computers... -
Page 59: Specifications
10 to 35 C -4 to 158 F -20 to 70 C 20% to 90% 20% to 90% 5% to 95% 5% to 95% 10,000 ft 3048 m 30,000 ft 9144 m Compaq Deskpro EX Series of Personal Computers 6-1... -
Page 60: System Interrupts
6.1.2 System Interrupts Hardware IRQ 6.1.3 System DMA Hardware DMA Specifications System Function Timer Interrupt Keyboard Interrupt Controller Cascade Serial Port (COM B) Serial Port (COM A) Audio Diskette Drive Parallel Port (LPT 1) Real-Time Clock Available for PCI Available for PCI Available for PCI Mouse Coprocessor... -
Page 61: Ich Fixed I/O Registers
Channel 2, 3, 1 DMA Memory Low Page Register Reserved Page Registers Channel 6, 7, 5 DMA Memory Low Page Register Reserved Page Registers Refresh Low Page Register Aliased at 81h-8Fh Fast A20 and INIT Register Reset Control Register Compaq Deskpro EX Series of Personal Computers 6-3 continued... - Page 62 ICH Fixed I/O Registers cont Port A4h-A5h, A8h-A8h, ACh-ADh, B0h-B1h, B4h-B5h, B8h-B9h, BCh-BDh C0h, C4h, C8h, CCh C2h, C6h, CAh, CEh 170h-177h 1F0h-1F7h 376h Specifications Register Name Slave PIC ICW1 Init. Cmd Word 1 Register Slave PIC OCW2 Op Ctrl Word 2 Register Slave PIC OCW3 Op Ctrl Word 3 Register Slave PIC ICW2 Init.
-
Page 63: System Memory Map
Reserved (power management) Reserved (GPIO management) Reserved (SMBUS controller) System Function System ROM PCI Memory Expansion HOST or PCI Memory Expansion System ROM PCI Option ROMs Video ROM Video RAM Base Memory Compaq Deskpro EX Series of Personal Computers 6-5... -
Page 64: Drives
Drives 6.2.1 1.44-MB Diskette Drive Size and Capacity Size (in) High Density (MB) Low Density (KB) Compaq Spare Part Number Light Height (inches) Bytes per Sector Sectors per Track High Density Low Density Tracks per Side High Density Low Density Read/Write Heads Average Seek Time (m/s) Track-to-Track (high/low) -
Page 65: Ultra Ata Hard Drives
4.75ms 2.1ms 11.5ms 10.9ms 11.5ms 10.9ms 27.0ms 25.0ms 27.0ms 25.0ms 5.56ms 5.56ms 308 Mbits/s (max.) 308 Mbits/s (max.) 16.6 MB/s 16.6 MB/s 16.6 MB/s 16.6 MB/s 66.6 MB/s 66.6 MB/s 5400+/-0.2% 5400+/-0.2% Compaq Deskpro EX Series of Personal Computers 6-7... -
Page 66: Cd-Rom Drives
6.2.3 CD-ROM Drives Compaq Spare Part Number Data Buffer (ms) Data Transfer Rate Access Time (ms) Random Full-Stroke Seek Cache Buffer Interface Disk Formats Read Disk Capacity Block Size Diameter Thickness Track Pitch Audio Output Level Line Out Headphone Startup Time Operating Conditions Temperature Humidity... -
Page 67: Compaq Keyboards
1 million 1 million operations operations 10% to 90% 10% to 90% 20% to 80% 10% to 90% Compaq Deskpro EX Series of Personal Computers 6-9 2-Button Mouse 166861-001 3.4 cm 11.3 cm 6.0 cm 130 g 400 dpi 25 cm/sec... -
Page 68: Supported Graphics Resolutions
Supported Graphics Resolutions 6.5.1 Intel 3D Graphics Colors 640 x 480 85 Hz 85 Hz 800 x 600 85 Hz 1024 x 768 1152 x 864 85 Hz 85 Hz 1280 x 1024 85 Hz 1600 x 1200 6.5.2 nVIDIA M64 Pro Color Depth Mode (bits/pixel) -
Page 69: Index
AGP card spare part number, 2-3 AGP retention mechanism, 4-17 AIMM card spare part number, 2-3 battery proper disposal, 4-27 removal and replacement, 4-27 bezel blank removal and replacement, cable kit spare part number, 2-2 cable select feature, 4-7 CD-ROM drive spare part number, 2-2 specifications, 6-8 chassis fan... - Page 70 memory removal and replacement, 4-13 spare part number, 2-3 standard, 2-3 memory map, 6-5 microprocessor spare part number, 2-3 miscellaneous screw kit spare part number, 2-4 monitor cleaning, 3-4 mouse cleaning, 3-5 spare part number, 2-5 specifications, 6-9 Network Interface Card spare part number, 2-3 Nvidia graphics card spare part number, 2-3...
- Page 71 215877-001 201855-001...
Need help?
Do you have a question about the Deskpro EX and is the answer not in the manual?
Questions and answers