Compaq Deskpro EP 6500 User Manual
Hp deskpro ep 6500: user guide
Hide thumbs
Also See for Deskpro EP 6500:
- Supplementary manual (56 pages) ,
- Technical reference manual (236 pages)
Table of Contents
Advertisement
Quick Links
Advertisement
Table of Contents

Related Manuals for Compaq Deskpro EP 6500


Summary of Contents for Compaq Deskpro EP 6500
- Page 1 Maintenance & Service Guide Compaq Deskpro EP Series of Personal Computers...
- Page 2 Guide to Features & Upgrades Compaq Deskpro EP Series of Personal Computers...
- Page 3 Notice The information in this guide is subject to change without notice. COMPAQ COMPUTER CORPORATION SHALL NOT BE LIABLE FOR TECHNICAL OR EDITORIAL ERRORS OR OMISSIONS CONTAINED HEREIN; NOR FOR INCIDENTAL OR CONSEQUENTIAL DAMAGES RESULTING FROM THE FURNISHING, PERFORMANCE, OR USE OF THIS MATERIAL. This guide contains information protected by copyright.
-
Page 4: Table Of Contents
preface About This Guide Symbols and Conventions ... vii Technician Notes ... vii Locating Additional Documentation ... viii chapter 1 Product Description 1.1 Model Overview ... 1-2 1.2 System Design... 1-3 1.3 Preinstalled Software ... 1-4 1.3.1 Ordering Additional Software ... 1-4 1.4 Computer Features ... - Page 5 4.18 System Board ... 4-39 4.19 Internal Speaker ... 4-40 4.20 Lithium Battery ... 4-42 4.21 Fan Assembly... 4-45 4.22 Power Supply ... 4-46 4.23 Converting a Desktop to a Minitower ... 4-48 4.24 Converting a Minitower to a Desktop ... 4-51 Contents...
- Page 6 chapter 5 Connectors, Jumpers, and Switches 5.1 System Board ... 5-1 5.1.1 Connectors, Jumpers, and Switches... 5-1 5.1.2 Switches... 5-4 5.1.3 Jumpers (440BX)... 5-5 5.1.4 Jumpers (Intel 810/810e) ... 5-7 5.2 Hard Drives ... 5-10 5.2.1 Using the Cable-Select Feature with Ultra ATA Devices ... 5-10 5.2.2 Drive Jumper Settings ...
-
Page 7: About This Guide
preface BOUT UIDE This Maintenance & Service Guide is a troubleshooting and repair guide that can be used for reference when servicing the Compaq Deskpro EP Series of Personal Computers. Only authorized technicians trained by Compaq should attempt to repair this equipment. Compaq Computer Corporation reserves the right to make changes to these models without notice. -
Page 8: Locating Additional Documentation
Locating Additional Documentation The following documentation is available to support these products: User Documentation Technical Training Guides Compaq Service Advisories and Bulletins Compaq QuickFind Technical Reference Guide Compaq Service Quick Reference Guide viii About This Guide... -
Page 9: Product Description
chapter RODUCT ESCRIPTION This chapter describes the model offerings and features of Compaq Deskpro EP Series of Personal Computers. Compaq Deskpro EP Series of Personal Computers Compaq Deskpro EP Series of Personal Computers... -
Page 10: Model Overview
Model Overview Compaq Deskpro EP Series of Personal Computers ship as either desktop or minitower models. They contain the unique, flexible Compaq ATX chassis, which allows you to easily reconfigure the unit as a minitower by (1) removing the drives from the computer, (2) standing the unit on its side, (3) rotating the drives and bezel blanks 90 degrees, then (4) reinserting the drives into the drive bays. -
Page 11: System Design
System Design Desktop models of the Compaq Deskpro EP Series of Personal Computers use an innovative chassis to house the removable system board, expansion boards, power supply, and mass storage devices. Internal components are accessible when the access panel is removed. -
Page 12: Preinstalled Software
To order copies of suitable device drivers and utilities: Order the Support Software CD for Compaq Desktop Products. This compact disc contains the latest device drivers, utilities, and flashable ROM images needed to run MS-DOS, Windows 3.1, Windows 95, Windows NT Workstation 3.51, IBM OS/2, and NetWare on the Compaq commercial desktop product. -
Page 13: Computer Features
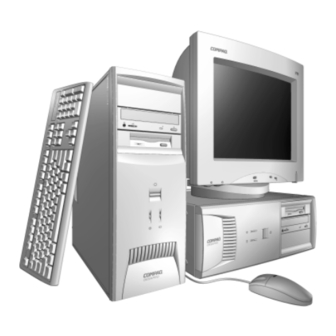
Computer Features Compaq Deskpro EP Series of Personal Computers ship with a mouse and keyboard. Some models are also equipped with a CD-ROM drive. A Compaq color monitor or other compatible monitor does not ship with the computer. 1.4.1 Front Panel Controls and LEDs - 440BX Front Panel Controls and LEDs - 440BX Compaq Deskpro EP Series of Personal Computers... -
Page 14: Front Panel Controls And Leds - Intel 810/810E
1.4.2 Front Panel Controls and LEDs - Intel 810/810e Front Panel Controls and LEDs - Intel 810/ 810e Product Description... -
Page 15: Rear Panel Connectors - 440Bx
1.4.3 Rear Panel Connectors - 440BX Rear Panel Connectors - 440BX < Compaq Deskpro EP Series of Personal Computers... -
Page 16: Rear Panel Connectors - Intel 810/810E
1.4.4 Rear Panel Connectors - Intel 810/810e Rear Panel Connectors - Intel 810/810e Product Description <... -
Page 17: Drive Positions
1.4.5 Drive Positions Drive Positions 1, 2 4, 5 ✎ Drive bay numbers are stamped on the chassis. To verify the type and size of the mass storage devices installed in the computer, run Compaq Computer Setup. Compaq Deskpro EP Series of Personal Computers... -
Page 18: Serial Number Location
Serial Number Location The serial number and model information label is located on the access panel of the unit 1. A second barcode label is located on the rear of the unit 2. Serial Number Locations For the purpose of AssetControl, the serial number is embedded in CMOS and in the EEPROM on the system board and may be accessed through Diagnostics for Windows. -
Page 19: Spare Parts
chapter PARE ARTS Compaq Deskpro EP Series of Personal Computers The Compaq Deskpro EP Series, Intel 440BX chipset models will be referred to in this MSG as 440BX. The Compaq Deskpro EP Series, Intel 810 chipset models will be referred to in this MSG as 810 or Intel 810. -
Page 20: System Unit
System Unit 2.1.1 System Unit - 440BX System Unit Spare Parts - 440BX Model Spare Parts... - Page 21 System Unit Spare Parts - 440BX Description 1 Access panel 2 Front bezel, complete with subpanel and bezel blanks 3 Power supply, 200 Watt 3 Power supply, 145 Watt 4 Logo Kit, Deskpro EP (1 ea., DT and MT) 5 Feet 6 Power switch with cable, LED and switch holder (3 ea.) 7 Chassis/basepan (repair/exchange only) Major Differences Between 440BX and Intel 810/810e...
-
Page 22: System Unit - Intel 810/810E
2.1.2 System Unit - Intel 810/810e System Unit Spare Parts - Intel 810/810e Model Spare Parts... - Page 23 System Unit Spare Parts - Intel 810/810e Description 1 Access panel (includes gasket) 2 Front bezel, complete with subpanel and bezel blanks 3 Power supply, 200W Power supply, 145W (only used with PCA 010697-101) 4 Logo Kit, Deskpro EP (1 ea., DT and MT) 5 Feet 6 Chassis/basepan (repair/exchange only) *Not Shown...
-
Page 24: Mass Storage Devices
Mass Storage Devices Mass Storage Devices Spare Parts... - Page 25 Mass Storage Devices Description 1 2.1-GB Ultra ATA hard drive (33/5400) 3.2-GB Ultra ATA hard drive (33/5400) 4.3-GB Ultra ATA hard drive (33/5400) 4.3-GB Ultra ATA hard drive (66/5400) 5.1-GB Ultra ATA hard drive (33/5400) 6.4-GB Ultra ATA hard drive (33/5400) 6.4-GB Ultra ATA hard drive (66/5400) 10.0-GB Ultra ATA hard drive (33/5400) 10.0-GB Ultra ATA hard drive (66/7200)
-
Page 26: Cables
Cables Cables Spare Parts... - Page 27 Description Cable Kit includes: Diskette drive cable without twist, 11” 440BX only, (166838-001) Audio cable, 21”, (288489-002) IDE hard drive cable, 7” 440BX only, (247116-001) IDE hard drive/CD-ROM cable, 14” 440BX only, (242947-001) Cable Kit (use on Intel 800 series products) includes: Diskette drive cable with twist, 11”, with pull tab, center polarization (143218-001) IDE Ultra ATA hard drive/CD-ROM cable, 10”, with pull tab,...
-
Page 28: Standard And Optional Boards
Standard and Optional Boards Standard and Optional Boards 2-10 Spare Parts... - Page 29 Standard and Optional Boards Description 1a PII System board, three-DIMM model (440BX) (PCA=009635-101). 1b PII System board, two-DIMM model (440BX) (PCA=008312-101). PII/PIII System board, three-DIMM model (440BX) (PCA=010233-101) Shipped on all PII and PIII units after 2/23/99). 1c Intel 810 System Board (PCA=010174-101). Intel 810e System Board (PCA=010546-101).
- Page 30 Standard and Optional Boards, continued 2-12 Spare Parts...
- Page 31 Standard and Optional Boards Continued Description Processor, PIII, 533/133, (137365-003), w/heatsink (401405-003), keyed heatsink clip (120891-001), spacer (168092-001), retention mechanism (350767-005). Use on 010546-101 system board. Processor, PIII, 550/100 (352772-006), w/heatsink (401405-001), and thermal compound (243199-002). Use on 010233-101 system board.
- Page 32 Standard and Optional Boards Continued Description 4 ATI RAGE PRO GRAPHICS 1X ATI RAGE PRO GRAPHICS 2X ATI RAGE PRO GRAPHICS IIC Matrox MGA G100 AGP graphics board Matrox Millenium G200-SD graphics card with 8-MB memory (shipped on all PII and PIII units after 2/23/99) Matrox Millenium G200-SD graphics card with 8-MB memory Matrox Millenium G400 graphics card with 16-MB memory 5 33.6k Modem...
-
Page 33: Keyboards
Keyboards Description Arabic Belgian Brazilian BHCSY (Bosnia-Herzegovina, Croatia, Slovenia, and Yugoslavia) Czech Danish Finnish French French Canadian German Greek Hungarian Italian Japanese Korean (Hanguel) International Latin American Spanish Norwegian Polish Portuguese Russian Slovakian Spanish Swedish Swiss Taiwanese Thai Turkish *Not shown Keyboards Spare Part Number 269513-171... -
Page 34: Miscellaneous Hardware Kit
Miscellaneous Hardware Kit Miscellaneous Hardware Kit Description Miscellaneous hardware kit. Includes: 1 Cover, slot (5 ea.) (101144-001) 2a I/O Panel for 440BX (166802-002) 2b I/O Panel for Intel 810/810e (123556-001) I/O Panel for Intel 810e – PCA=010697-101 (166808-002) 3 Fan guard (105427-003) 4 Screw, 6/32 pan head x 1/4 inch (4 ea.) (192308-001) 5 Thumbscrew (2 ea.) (440BX) (197436-001) * Thumbscrew (2 ea.) (Intel 810/810e) (124702-001) -
Page 35: Miscellaneous Plastics Kit
Miscellaneous Plastics Kit Miscellaneous Plastics Kit Miscellaneous Plastics Kit, Desktop and Minitower Description Miscellaneous plastics kit includes: 1 Diskette bezel (166776-001) 2 Foot, rubber (4 ea.) (166939-002) 3 Processor retainer with pins for PII processor (166889-002) (No longer included in kit) 4 Processor retainers with pins for Celeron processor (2 ea.) -
Page 36: Miscellaneous Parts
Miscellaneous Parts Miscellaneous Parts 1 Two-button mouse Compaq Intellimouse 2 Cable lock bracket 3 Battery (440BX) Battery (Intel 810) (for use on system board 401963-001) 4 Fan assembly with four plastic pins (for use on Pentium II units 450/100 and above and all Pentium III units 450/100 and above) Chassis fan cover 5a Speaker with screws (50mm x 90mm, 5 watt) (440BX) (for use on audio board 356081-001) -
Page 37: Shipping Boxes
Return Kit (international) 2.10 Documentation and Software Documentation and Software (not illustrated) Description Maintenance & Service Guide (desktop & minitower) Deskpro Service Reference Guide Windows 98 Country Kit Windows 95 Country Kit Windows NT Country Kit Shipping Boxes (not illustrated) -
Page 38: Removal And Replacement Preliminaries
chapter EMOVAL AND EPLACEMENT Routine Care 3.1.1 Cleaning Safety Precautions Never use solvents or flammable solutions to clean the computer. Never immerse any parts in water or cleaning solutions; apply any liquids to a clean cloth and then use the cloth on the component. Always turn off the computer when cleaning with liquids or damp cloths. -
Page 39: Cleaning The Keyboard
3.1.3 Cleaning the Keyboard Follow all safety precautions in Section 3.1.1 before cleaning the keyboard. To clean the tops of the keys or the keyboard body, follow the procedures described in Section 3.1.2. When cleaning debris from under the keys, review all rules in Section 3.1.1 before following these procedures: CAUTION: Use safety glasses equipped with side shields before attempting to clean debris from under the keys. -
Page 40: Electrostatic Discharge Information
Electrostatic Discharge Information A sudden discharge of static electricity from your finger or other conductor can destroy static-sensitive devices or microcircuitry. Often the spark is neither felt nor heard, but damage occurs. An electronic device exposed to electrostatic discharge (ESD) may not be affected at all and can work perfectly throughout a normal cycle. -
Page 41: Personal Grounding Methods And Equipment
3.2.3 Personal Grounding Methods and Equipment Use the following equipment to prevent static electricity damage to equipment: Wrist straps are flexible straps with a minimum of one-megohm +/- 10% resistance in the ground cords. To provide proper ground, a strap must be worn snug against bare skin. -
Page 42: Service Considerations
Static-dissipative table or floor mats with hard tie to ground Field service kits Static awareness labels Wrist straps and footwear straps providing one-megohm +/- 10% resistance Material handling packages Conductive plastic bags Conductive plastic tubes Conductive tote boxes Opaque shielding bags Transparent metallized shielding bags Transparent shielding tubes Service Considerations... -
Page 43: Hard Drives
3.3.4 Hard Drives Handle hard drives as delicate precision components, avoiding all physical shock and vibration. This applies to failed drives as well as replacement spares. Use only the packaging provided by Compaq for shipping. Do not remove hard drives from the shipping package for storage. Keep hard drives in their protective packaging until they are actually mounted in the CPU. -
Page 44: Removal And Replacement Procedures
chapter EMOVAL AND EPLACEMENT This chapter provides general service information for the computer. Adherence to the procedures and precautions described in this chapter is essential for proper service. After completing all necessary removal and replacement procedures, run the Diagnostics utility to verify that all components operate properly. Disassembly Sequence Chart Use the chart below to determine the disassembly sequence for removing components from the computer. -
Page 45: Disassembly Preparation
Disassembly Preparation Before adding any internal options or performing a removal/replacement: 1. Remove any diskette, compact disc, or tape from the computer. 2. Turn off the computer and any peripheral devices that are connected to it. WARNING: Power is continuous to the system board and power supply even when the power switch is turned off. -
Page 46: Feet Installation
Feet Installation Eight (8) rubber feet are mounted to the chassis, as shown below. No parts have to be removed to access the feet. The replacement feet have an adhesive surface and are shipped with a protective backing in place. Remove the feet from the backing before installation. If necessary, remove the old feet and remove any adhesive residue from the chassis by rubbing with your finger or a dry cloth. -
Page 47: Logo Plate
Logo Plate Grasp the open side of the logo plate (left side if a desktop, bottom if a minitower) and pull outward 2. To install a new logo plate, align the guide pins in the slots 1, then press into place. -
Page 48: Cable Lock
Cable Lock To avoid injury, use care in handling the separated pieces of the cable lock WARNING: bracket; metal edges may be sharp. Be sure to install the bracket so that sharp edges do not extend from the edges of the computer chassis. Depending on the model, the computer includes a cable lock provision, which consists of a three-piece security bracket. - Page 49 Installing the Cable Lock Provision - Intel 810/810e To remove the cable lock provision, reverse the above procedure. Removal and Replacement Procedures...
-
Page 50: Access Panel
Access Panel 1. Prepare the computer for disassembly (Section 4.2). WARNING: Power is continuous to the system board and power supply even when the power switch is turned off. To prevent damage to the unit, disconnect the power cord from the power source or the unit before beginning disassembly procedures. -
Page 51: Front Bezel
Front Bezel 1. Prepare the computer for disassembly (Section 4.2). WARNING: Power is continuous to the system board and power supply even when the power switch is turned off. To prevent damage to the unit, disconnect the power cord from the power source or the unit before beginning disassembly procedures. -
Page 52: Power Button
Power Button 1. Prepare the computer for disassembly (Section 4.2). WARNING: Power is continuous to the system board and power supply even when the power switch is turned off. To prevent damage to the unit, disconnect the power cord from the power source or the unit before beginning disassembly procedures. -
Page 53: Subpanel And Bezel Blanks
The subpanel and bezel blanks must be removed from the front bezel if you are installing a mass storage device for the first time, or if you are converting the unit from a desktop to a minitower configuration or from a minitower to a desktop configuration. -
Page 54: Power Switch
4.10 Power Switch CAUTION: The power switch should not be removed from the switch holder. Doing so may damage the switch components. 1. Prepare the computer for disassembly (Section 4.2). WARNING: Power is continuous to the system board and power supply even when the power switch is turned off. -
Page 55: Mass Storage Devices
4.11 Mass Storage Devices The Compaq Deskpro EP Series of Personal Computers support up to five drives in various configurations. Drive Bay Locations ✎ Drive bay numbers are stamped on the chassis. To verify the type and size of the mass storage devices installed in the computer, run Computer Setup. - Page 56 When installing additional drives, follow these guidelines: For optimal performance, connect hard drives to the primary controller. Connect expansion devices, such as CD-ROM, IDE tape, and diskette drives to the secondary controller. You may install either a third-height or a half-height drive into a half-height bay. You must install guide screws to ensure that the drive lines up correctly in the drive cage.
-
Page 57: Removing An Internal 3.5-Inch Hard Drive
Disconnecting the Cables 6. Press the drivelock mechanism to unlock the hard drives. Drivelock 1 secures the external drives in the desktop configuration; drivelock 2 secures all drives in the minitower configuration and the internal drives in the desktop configuration. - Page 58 7. While holding the drivelock in the unlocked position, remove the drive from the drive bay. Removing an Internal 3.5-Inch Hard Drive 8. Remove the four guide screws from the drive. 9. Install two guide screws on each side of the replacement drive. ✎...
-
Page 59: Removing An External 5.25-Inch Drive
2. Lay the computer down on its large base for greater stability. 3. Remove the access panel (Section 4.6). 4. Remove the front bezel (Section 4.7). 5. If this is a desktop, push down on drivelock 1 to release the drive; if a minitower, press drivelock 2. Releasing the Drives... - Page 60 6. While the drivelock is held in the unlatched position, remove the drive from the drivebay. 7. Remove the four guide screws from the drive 1. Removing an External 5.25-inch Drive To install a new drive: 1. Install two guide screws on each side of the replacement drive 1. 2.
-
Page 61: Removing An External 3.5-Inch Drive
4. Remove the front bezel (Section 4.7). ✎ The primary diskette drive is always installed in drive bay 3. 5. If this is a desktop, push down on drivelock 1 to release the drives; if a minitower, press drivelock 2. Releasing the Drives... - Page 62 6. While the drivelock is held in the unlatched position, remove the drive from the drive bay. Removing a 3.5-inch Drive and Drive Adapter from a 5.25-inch External Drive Bay 7. Remove the bracket brace 1 from the top of the drive adapter by squeezing inward on both sides 2, then rotating the brace up and out.
- Page 63 The primary 3.5-inch diskette drive should only be installed into bay 3. Bay 3 is the bottom bay in the minitower and the topmost bay in the desktop configuration. When replacing the drive, use the existing screws. Metric screws (M3) have a black finish while U.S.
-
Page 64: Removing The Drivelocks
4.12 Removing the Drivelocks The computer chassis contains two drivelock mechanisms. Drivelock 1 secures the external drives in the desktop configuration, drivelock 2 secures all drives in the minitower and the internal drives in the desktop configuration. Drivelock Mechanism Compaq Deskpro EP Series of Personal Computers... - Page 65 1. Prepare the computer for disassembly (Section 4.2). WARNING: Power is continuous to the system board and power supply even when the power switch is turned off. To prevent damage to the unit, disconnect the power cord from the power source or the unit before beginning disassembly procedures.
- Page 66 10. Press in on the tabs to release the vertical drivelock from the chassis, then lift it up and out of the system while at the same time rotating the drivelock slightly to clear the travel slots at the bottom of the drivelock. 11.
-
Page 67: Expansion Boards
4.13 Expansion Boards 4.13.1 440BX Deskpro EP Expansion Slots - 440BX (2-DIMM Model) Deskpro EP Expansion Slots - 440BX (3-DIMM Model) 4-24 Removal and Replacement Procedures... -
Page 68: Intel 810 And 810E
4.13.2 Intel 810 and 810e Deskpro EP Expansion Slots - Intel 810 Deskpro EP Expansion Slots - Intel 810e ✎ Your 810e system board may differ from the one shown. Compaq Deskpro EP Series of Personal Computers... -
Page 69: Removing An Expansion Board
4.13.3 Removing an Expansion Board 1. Prepare the computer for disassembly (Section 4.2). WARNING: Power is continuous to the system board and power supply even when the power switch is turned off. To prevent damage to the unit, disconnect the power cord from the power source or the unit before beginning disassembly procedures. -
Page 70: Installing An Expansion Board
4.13.4 Installing an Expansion Board 1. Prepare the computer for disassembly (Section 4.2). WARNING: Power is continuous to the system board and power supply even when the power switch is turned off. To prevent damage to the unit, disconnect the power cord from the power source or the unit before beginning disassembly procedures. - Page 71 5. Hold the board at each end and carefully rock it back and forth while pushing downward, until the connectors fit completely and firmly into the expansion slot. Installing an Expansion Board 6. Secure the board to the chassis with the retaining screw. 7.
-
Page 72: Board Guide
4.14 Board Guide 1. Prepare the computer for disassembly (Section 4.2). WARNING: Power is continuous to the system board and power supply even when the power switch is turned off. To prevent damage to the unit, disconnect the power cord from the power source or the unit before beginning disassembly procedures. -
Page 73: System Memory
4.15 System Memory 4.15.1 440BX The 440BX comes with at least 16 megabytes of synchronous dynamic random access memory (SDRAM) dual inline memory modules (DIMMs), upgradeable to 256 or 384 MB. The memory sockets on the system board can be populated with 16-, 32-, 64-, or 128-MB DIMMs. - Page 74 To install a memory module, complete the following steps: 1. Prepare the computer for disassembly (Section 4.2). WARNING: Power is continuous to the system board and power supply even when the power switch is turned off. To prevent damage to the unit, disconnect the power cord from the power source or the unit before beginning disassembly procedures.
-
Page 75: Agp Graphics Board (440Bx)
4.16 AGP Graphics Board (440BX) 4.16.1 AGP Graphics Board Removal (440BX) 1. Prepare the computer for disassembly (Section 4.2). WARNING: Power is continuous to the system board and power supply even when the power switch is turned off. To prevent damage to the unit, disconnect the power cord from the power source or the unit before beginning disassembly procedures. -
Page 76: Graphics Memory Upgrade (440Bx)
4.16.2 Graphics Memory Upgrade (440BX) ✎ It is not necessary to remove the graphics board to install the memory upgrade module. 1. Prepare the computer for disassembly (Section 4.2). WARNING: Power is continuous to the system board and power supply even when the power switch is turned off. -
Page 77: Processor Components
4.17 Processor Components 4.17.1 Processor 1. Prepare the computer for disassembly (Section 4.2). WARNING: Power is continuous to the system board and power supply even when the power switch is turned off. To prevent damage to the unit, disconnect the power cord from the power source or the unit before beginning disassembly procedures. - Page 78 Removing the Celeron Processor from the System Board - 440BX To install a new processor, reverse this procedure. Before installing a Pentium II processor, make sure the release latches are in the locked position. This will cause the processor to make an audible sound when it is properly seated in the retaining clip.
- Page 79 To install a new processor, reverse this procedure. ✎ If the heatsink has a thermal pad attached to its bottom, peel off the protective paper before installing the heatsink. If the heatsink does not have a thermal pad attached to its bottom, apply a single swipe of the thermal crayon to the processor before installing the heatsink.
-
Page 80: Processor Guide Rails
4.17.2 Processor Guide Rails 1. Prepare the computer for disassembly (Section 4.2). WARNING: Power is continuous to the system board and power supply even when the power switch is turned off. To prevent damage to the unit, disconnect the power cord from the power source or the unit before beginning disassembly procedures. - Page 81 7. With the Tuflok pins in their full up position, firmly pull on each leg of the processor rail to disengage it from the system board. 8. Place each of the type 2 processor rail goalposts (Compaq part number 350767-002) in position with the open end facing the processor socket and push firmly down to fully seat the free end of each Tuflok in its hole.
-
Page 82: System Board
4.18 System Board 1. Prepare the computer for disassembly (Section 4.2). WARNING: Power is continuous to the system board and power supply even when the power switch is turned off. To prevent damage to the unit, disconnect the power cord from the power source or the unit before beginning disassembly procedures. -
Page 83: Internal Speaker
4.19 Internal Speaker 1. Prepare the computer for disassembly (Section 4.2). WARNING: Power is continuous to the system board and power supply even when the power switch is turned off. To prevent damage to the unit, disconnect the power cord from the power source or the unit before beginning disassembly procedures. - Page 84 6. If an oval speaker is used on the computer, remove the four screws 2 that secure the speaker 3 to the rear of the chassis. Removing the Speaker From the Rear of the Chassis To install the new speaker, reverse the preceding steps. Compaq Deskpro EP Series of Personal Computers...
-
Page 85: Lithium Battery
4.20 Lithium Battery 1. Prepare the computer for disassembly (Section 4.2). WARNING: Power is continuous to the system board and power supply even when the power switch is turned off. To prevent damage to the unit, disconnect the power cord from the power source or the unit before beginning disassembly procedures. - Page 86 Locating the Battery on the System Board - Intel 810 Locating the Battery on the System Board - Intel 810e Compaq Deskpro EP Series of Personal Computers...
- Page 87 5. Lift the battery out of the holder. Removing the Battery 6. Slide the replacement battery into position with the positive side up. The battery holder automatically secures the battery in the proper position. 7. If you removed expansion boards, reinstall them now. 8.
-
Page 88: Fan Assembly
4.21 Fan Assembly 1. Prepare the computer for disassembly (Section 4.2). WARNING: Power is continuous to the system board and power supply even when the power switch is turned off. To prevent damage to the unit, disconnect the power cord from the power source or the unit before beginning disassembly procedures. -
Page 89: Power Supply
4.22 Power Supply 1. Prepare the computer for disassembly (Section 4.2). WARNING: Power is continuous to the system board and power supply even when the power switch is turned off. To prevent damage to the unit, disconnect the power cord from the power source or the unit before beginning disassembly procedures. - Page 90 Removing the Power Supply - Intel 810/810e To replace the power supply, reverse the above procedure. Compaq Deskpro EP Series of Personal Computers...
-
Page 91: Converting A Desktop To A Minitower
4.23 Converting a Desktop to a Minitower 1. Prepare the computer for disassembly (Section 4.2). WARNING: Power is continuous to the system board and power supply even when the power switch is turned off. To prevent damage to the unit, disconnect the power cord from the power source or the unit before beginning disassembly procedures. - Page 92 6. Rotate the drives 90 degrees, then reinstall them into the drive bays. ✎ The diskette drive should always be placed in bay number 3, the bay nearest the internal 3.5-inch drives, for proper placement within the chassis. Installing a Drive in the Minitower Configuration CAUTION: The use of unnecessary force may result in damage to the drives.
- Page 93 CAUTION: Hold the subpanel straight when you pull it away from the front bezel. Pulling the subpanel away at an angle could damage the pins that align it within the front bezel. Changing from a Desktop 1 to a Minitower 2 Configuration 9. Replace the subpanel, front bezel, and the computer access panel.
-
Page 94: Converting A Minitower To A Desktop
4.24 Converting a Minitower to a Desktop 1. Prepare the computer for disassembly (Section 4.2). WARNING: Power is continuous to the system board and power supply even when the power switch is turned off. To prevent damage to the unit, disconnect the power cord from the power source or the unit before beginning disassembly procedures. - Page 95 ✎ The diskette drive should always be placed in the bay nearest the top of the chassis in the desktop configuration for proper drive clearance and access. Installing a Drive in the Desktop Configuration CAUTION: The use of unnecessary force may result in damage to the drives.
- Page 96 CAUTION: Hold the subpanel straight when you pull it away from the front bezel. Pulling the subpanel away at an angle could damage the pins that align it within the front bezel. Converting a Minitower 2 to a Desktop 1 10. Replace the subpanel, front bezel, and the computer access panel.
-
Page 97: Connectors, Jumpers, And Switches
chapter ONNECTORS UMPERS System Board 5.1.1 Connectors, Jumpers, and Switches System Board Overview - 440BX (Three-DIMM Board) Connectors, Jumpers, and Switches - 440BX (Three-DIMM Board) WITCHES Compaq Despro EP Series of Personal Computers... - Page 98 System Board Overview - 440BX (Two-DIMM Board) Connectors, Jumpers, and Switches - 440BX (Two-DIMM Board) Connectors, Jumpers, and Switches - Intel 810e (PCA=010697-101)* Connectors, Jumpers, and Switches...
- Page 99 System Board Overview - Intel 810 (Two-DIMM Board) System Board Overview - Intel 810e (Two-DIMM Board) Connectors, Jumpers, and Switches - Intel 810/810e (Two-DIMM Board) Compaq Despro EP Series of Personal Computers...
-
Page 100: Switches
5.1.2 Switches Location of SW1 DIP Switches on the System Board - 440BX ✎ As of January 1, 1999, all 300-MHz and faster Celeron and Pentium processors are shipped with the processor speeds preset. This preset processor speed will override any switch settings on the system board. Connectors, Jumpers, and Switches Switch SW1 Settings (440BX) -
Page 101: Jumpers (440Bx)
5.1.3 Jumpers (440BX) This section provides information on enabling/disabling passwords and clearing the configuration (CMOS). E50 Jumper Location When you change a security feature, you must reset the appropriate jumper on the system board, then reconfigure the computer to recognize this change. If the system configuration is incorrect, your computer may not work properly and you may receive error messages. - Page 102 Disabling or Clearing the Power-On and Setup Passwords (440BX) ) 1. Turn off the computer and any external devices, and disconnect the power cord from the power outlet. 2. Set SW1, position 1, to the ON position. 3. Turn on the computer and allow the operating system to start. This clears the current passwords and disables the password features.
-
Page 103: Jumpers (Intel 810/810E)
5.1.4 Jumpers (Intel 810/810e) E49 Jumper Location When you change a security feature, you must reset the appropriate jumper on the system board, then reconfigure the computer to recognize this change. If the system configuration is incorrect, your computer may not work properly and you may receive error messages. Setting system board jumpers is part of the reconfiguration process, along with running the Computer Setup utility. - Page 104 Disabling or Clearing the Power-On and Setup Passwords (Intel 810/810e) 1. Turn off the computer and any external devices, and disconnect the power cord from the power outlet. 2. Disconnect the keyboard, monitor, and any other external devices connected to the computer.
- Page 105 Clearing Configuration Memory (CMOS) - Intel 810/810e) CMOS Button (SW50) Location 1. Turn off the computer and any external devices, and disconnect the power cord from the power outlet. 2. Disconnect the keyboard, monitor, and any other external equipment connected to the computer.
-
Page 106: Hard Drives
Hard Drives The computer supports up to five drives in various configurations. When installing additional drives, follow these guidelines: For optimal performance, connect hard drives to the primary controller. Connect expansion devices, such as CD-ROM, IDE tape, and diskette drives to the secondary controller. -
Page 107: Drive Jumper Settings
5.2.2 Drive Jumper Settings If you are installing a drive with a signal cable that does not support cable select, you must manually set the drive jumpers. Jumper settings for a number of different drives are shown in the tables that follow. The illustrations show the approximate location of the drive jumpers, based on the manufacturer of the drive. - Page 108 Maxtor Ultra ATA Hard Drive Jumper Settings Maxtor Ultra ATA Hard Drive Jumper Settings 5-12 Connectors, Jumpers, and Switches...
-
Page 109: Specifications
chapter PECIFICATIONS Specifications 6.1.1 System Compaq Deskpro EP Series of Personal Computers Continued... -
Page 110: Interrupts
System Specifications, continued 6.1.2 Interrupts Specifications ° ° ° ° ° °... -
Page 111: Dma
6.1.3 6.1.4 Compaq Deskpro EP Series of Personal Computers Continued... - Page 112 Continued Specifications...
-
Page 113: Memory Map
6.1.5 Memory Map Drives 6.2.1 1.44-MB Diskette Drive Compaq Deskpro EP Series of Personal Computers... -
Page 114: Ultra Ata Hard Drives
6.2.2 Ultra ATA Hard Drives Specifications... -
Page 115: Cd-Rom Drives
6.2.3 CD-ROM Drives Continued Compaq Deskpro EP Series of Personal Computers... - Page 116 CD-ROM continued Specifications...
-
Page 117: Compaq Enhanced Keyboard
Compaq Enhanced Keyboard 2-Button Mouse Supported Graphics Resolutions 6.5.1 ATI RAGE PRO TURBO 1X AGP ° ° ° ° Compaq Deskpro EP Series of Personal Computers ° ° ° °... -
Page 118: Ati Rage Pro Iic Agp
6.5.2 ATI RAGE PRO IIC AGP 6.5.3 NVIDIA RIVA 128 AGP 6.5.4 Matrox MGA G100 AGP 6-10 Specifications... -
Page 119: Matrox Millenium G200-Sd Agp
6.5.5 Matrox Millenium G200-SD AGP 6.5.6 Matrox Millenium G400-SG AGP 6.5.7 Integrated Intel 3D Graphics Compaq Deskpro EP Series of Personal Computers 6-11... -
Page 120: Audio Controllers
Audio Controllers µ 6-12 Specifications... - Page 121 µ Compaq Deskpro EP Series of Personal Computers 6-13...
-
Page 122: Chapter 7 Service Notes
chapter ERVICE OTES CAUTION: Use safety glasses equipped with side shields before attempting to clean debris from under the keys. 1. As of January 1, 1999, all 300-MHz and faster Celeron and Pentium processors are shipped with the processor speeds preset. This preset processor speed will override any switch settings on the system board. -
Page 123: Index
access panel spare part number (440BX), spare part number (Intel 810/810e), 2-5 audio controller, specifications 440BX, 6-12 Intel 810, 6-13 battery proper disposal, 4-44 Battery locating on system board, 4-42 bezels spare part number, 2-3, 2-5 boxes, shipping, 2-19 cable select feature, 4-13, 5-10, 5-11 cables, 3-5 service considerations, 3-5... - Page 124 3-1 screws, service considerations, Seagate EIDE hard drive jumper settings, 5-11 serial number need for service call, 1-4 serial number location desktop, 1-10 service considerations, 3-5 shipping boxes spare part numbers, 2-19 software preloaded, 1-4 spare part number battery, 2-18...
- Page 125 system design, 1-3 specifications, 6-1 system board spare part number, 2-11 System memory 440BX, 4-30 810/810e, 4-30 system unit spare part numbers, 2-3, 2-5 tools service considerations, 3-5 Ultra ATA devices, 4-13 Ultra ATA hard drive specifications, 6-6 Western Digital EIDE hard drive jumper settings, 5-11 Index I-3...
- Page 126 181099-001 134011-004...
Need help?
Do you have a question about the Deskpro EP 6500 and is the answer not in the manual?
Questions and answers