
Related Manuals for Apera Instruments ZenTest PH60S-Z


Summary of Contents for Apera Instruments ZenTest PH60S-Z
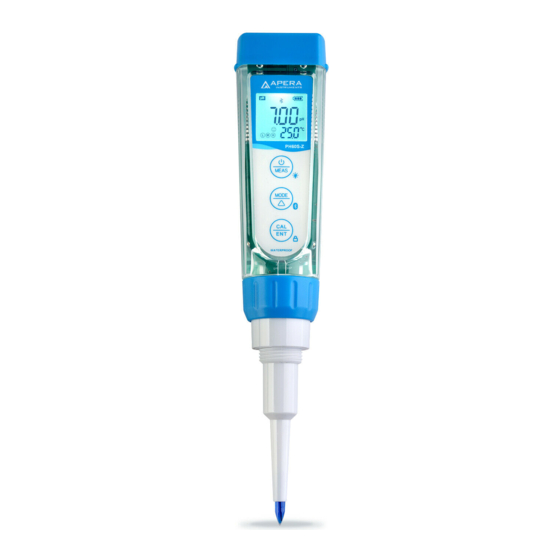
- Page 1 ZenTest™ PH60S-Z Smart Spear pH Tester (pH/Temp./ORP) Instruction Manual APERA INSTRUMENTS (Europe) GmbH www.aperainst.de - 1 -...
-
Page 2: Table Of Contents
Inhaltsverzeichnis 1. Introduction ------------------------------------------------------------------------------------------------------- - 3 - 2. What’s in the Kit ------------------------------------------------------------------------------------------------- - 4 - 3. Battery Installation ---------------------------------------------------------------------------------------------- - 4 - 4. Keypad Functions ------------------------------------------------------------------------------------------------ - 5 - 5. Preparation before Use ---------------------------------------------------------------------------------------- - 5 - 6. pH Calibration ---------------------------------------------------------------------------------------------------- - 5 - 7. -
Page 3: Introduction
1. Introduction Thank you for choosing Apera Instruments PH60-Z Smart pH Tester. Please carefully read this manual before using the product. Search “zentest smart” in Apple App Store or Google Play App Store to download the latest App for your tester. Turn on the Bluetooth of your phone, go to ZenTest™ App, tap on the upper right corner, then select your tester to connect. -
Page 4: What's In The Kit
2. What’s in the Kit PH60S-Z Tester Calibration Vials 3. Battery Installation Please install batteries according to the following steps. *Please note direction of batteries: All POSITIVE SIDES (“+”) FACING UP. (Wrong installation of batteries will cause damage to the tester and potential hazards) - 4 -... -
Page 5: Keypad Functions
4. Keypad Functions ■ Short press------ < 2 seconds ,Long press------- > 2 seconds Battery cap 1. When turned off, short press to turn on the tester; long press to enter parameter setting. 2. In calibration mode or parameter setting, short press to return to measurement mode. - Page 6 is stabilized ( stays on the LCD screen), short press to complete 1 point calibration. After calibration is completed, the tester will return to measurement mode. Icon will appear at the bottom left of the LCD screen. indicating a successful 1 point pH calibration.
-
Page 7: Ph Measurement
Symbol Self-Diagnosis information Potential problems and how to fix 1. Make sure the probe is fully immersed in the calibration solution. 2. Check if calibration solution is expired or polluted. 3. 1st point of pH calibration must be pH 7.00 or 6.86. See 6.2 (1). -
Page 8: Orp Measurement
• For food pH measurement (e.g. sushi, cheese, meat, fruit, etc.), it should always be a sampling test. That means test samples should no longer be edible. How to take pH measurements Short press to turn on the tester. Rinse the probe in distilled water, shake off excess water. Insert the probe in your sample solution, make a quick stir and hold still. -
Page 9: Parameter Setting
11. Parameter Setting Table of Settings Symbol Parameter Setting Contents Content Factory Default ˚C – ˚F ˚F Temperature Unit 5-20 seconds – Off Select automatic lock 1-8 minutes – Off Automatic Backlight Off 10-20 minutes – Off Automatic Power Off USA –... -
Page 10: Technical Specifications
6) pH Back to Factory Default (P08) – Select “Yes” to recover instrument calibration to theoretical value. This function can be used when instrument does not work well in calibration or measurement. Calibrate and measure again after setting the instrument back to factory default. 12. -
Page 11: Probe Replacement
14. Probe Replacement pH probes don’t last forever. Every probe will eventually age and fail even if you don't use it that often. The typical service life of Apera probes is 12-24 months depending on the frequency of usage and how well you keep it clean and properly stored. -
Page 12: Warranty
We warrant this instrument to be free from defects in material and workmanship and agree to repair or replace free of charge, at option of APERA INSTRUMENTS (Europe) GmbH, any malfunctioned or damaged product attributable to responsibility of APERA INSTRUMENTS (Europe) GmbH for a period of TWO YEARS (SIX MONTHS for the probe) from the delivery.
Need help?
Do you have a question about the ZenTest PH60S-Z and is the answer not in the manual?
Questions and answers