Table of Contents
Advertisement
Quick Links
Pro10 Series
Professional DLP
User Guide
IMPORTANT: Please read this User Guide to obtain important information on installing
and using your product in a safe manner, as well as registering your product for
future service. Warranty information contained in this User Guide will describe your
limited coverage from ViewSonic Corporation, which is also found on our web site at
http://www.viewsonic.com in English, or in specific languages using the Regional
selection box in the upper right corner of our website. "Antes de operar su equipo lea cu
idadosamente las instrucciones en este manual"
Model No. VS15149/VS15541
Projector
®
Advertisement
Table of Contents

Related Manuals for ViewSonic Pro10 Series


Summary of Contents for ViewSonic Pro10 Series
- Page 1 Warranty information contained in this User Guide will describe your limited coverage from ViewSonic Corporation, which is also found on our web site at http://www.viewsonic.com in English, or in specific languages using the Regional selection box in the upper right corner of our website.
- Page 2 Compliance Information FCC Statement This equipment has been tested and found to comply with the limits for a Class A digital device, pursuant to part 15 of the FCC Rules. These limits are designed to provide reasonable protection against harmful interference when the equipment is operated in a commercial environment.
- Page 3 Important Safety Instructions 1. Read these instructions. 2. Keep these instructions. 3. Heed all warnings. 4. Follow all instructions. 5. Do not use this unit near water. 6. Clean with a soft, dry cloth. 7. Do not block any ventilation openings. Install the unit in accordance with the manufacturer’s instructions.
- Page 4 Declaration of RoHS2 Compliance This product has been designed and manufactured in compliance with Directive 2011/65/ EU of the European Parliament and the Council on restriction of the use of certain hazard- ous substances in electrical and electronic equipment (RoHS2 Directive) and is deemed to comply with the maximum concentration values issued by the European Technical Adapta- tion Committee (TAC) as shown below: Proposed Maximum...
- Page 5 ViewSonic’s website to register your product online. The ViewSonic CD also provides an opportunity for you to print the product registration form. Upon completion, please mail or fax to a respective ViewSonic office. To find your registration form, use the directory “:\CD\Registration”.
- Page 6 Notes on the AC Power Cord AC Power Cord must meet the requirement of countries where you use this projector. Please confirm your AC plug type with the graphics below and ensure that the proper AC Power Cord is used. If the supplied AC Power Cord does not match your AC outlet, please contact your sales dealer.
-
Page 7: Precautions
Precautions Please follow all warnings, precautions and maintenance as recommended in this user’s guide. ▀■ Do not look into the projector’s lens when the lamp is on. The Warning- bright light may hurt your eyes. ▀■ To reduce the risk of fire or electric shock, do not expose this Warning- projector to rain or moisture. - Page 8 y Turn off and unplug the power plug from the AC outlet before cleaning the product. y Use a soft dry cloth with mild detergent to clean the display housing. y Disconnect the power plug from AC outlet if the product is not being used for a long period of time.
-
Page 9: Table Of Contents
Table of Contents SCREEN | PIP / POP ....... 40 Precautions ..........vi SETTING ......... 41 Introduction SETTING | Lens Function ....42 Product Features ........9 SETTING | Security ......43 Package Overview ....... 10 SETTING | Signal (RGB) ....44 Product Overview ........11 SETTING | Signal (Video) .... -
Page 10: Introduction
Introduction Product Features ` XGA (1024x768) / WXGA(1280x800), support resolution: Up to WUXGA @60Hz (Reduced Blanking) and UXGA @60Hz ` Single lamp system ` Power Zoom/Focus ` Power lens shift ` Dynamic Aperture ` 10W x 1 speaker ` Filter module ` Support PIP/POP function ` Support network management for remote control and monitoring... -
Page 11: Package Overview
Package Overview Unpack and inspect the box contents to ensure all parts listed below are in the box. If something is missing, please contact our customer service. Projector with lens cover Power Cord VGA Cable Power On Pattern Standby Plug for wired remote at Video HDMI S-Video... -
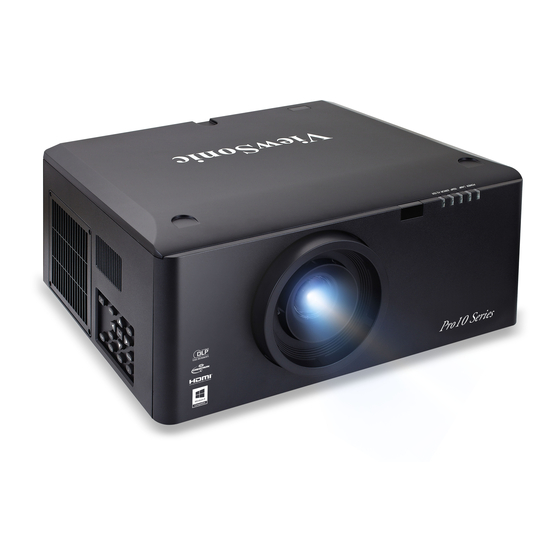
Page 12: Product Overview
Product Overview Main Unit (Front View) (Rear View) 1. Lens Ring 6. Outlet Vent 11. Connector Panel 2. Zoom Lens 7. Kensington Lock 12. Inlet Vent & Filter 3. IR Receivers 8. Security Bar 13. Audio Vent 4. LED Indicators 9. -
Page 13: Control Panel
Control Panel Sync Source Shift / Power key & Power LED 2. Menu key 3. Enter key 4. Exit key 5. Shift key 6. Sync key 7. Focus key 8. Zoom key 9. Source key 10. Information key 11. Four directional select keys... -
Page 14: Connection Ports
Connection Ports 1. Composite Video Input Connector 2. HDMI Connector 3. DVI-D Connector 4. BNC Connector 5. Wired Remote Input Connector 6. 12V Trigger Relay Connector 7. RJ45 Network Connector 8. S-Video Input Connector 9. VGA Input Connector 10. VGA Output Connector 11. -
Page 15: Remote Control
Remote Control 1. Power ON Power on the projector. 2. Pattern Display a test pattern. 3. VGA Power On Switch to VGA source. Pattern Standby 4. BNC Switch to Component video Video HDMI source. S-Video 5. Sync Synchronize projector with Sync Blank Source... - Page 16 18. HDMI Switch to HDMI source. 19. S-Video Switch to S-Video source. 20. DVI Switch to DVI source. 21. Source Automatically scans for connected source. 22. Enter Confirm your item selection. 23. Mute Turn the projector audio off/on. 24. Memory Save the current lens settings to the memory.
-
Page 17: Installation
Installation Installing the Projector Lens Warning: Do not transport the projector with any lens installed. Lens Installing Procedure: 1. Remove the lens ring cover by counter-clockwise rotation. 1 2. Remove the lens cap by counter-clockwise rotation. 2 3. Pull the release bar and push the lens into position. 3 4. -
Page 18: Connecting To Computer/Notebook
Connecting to Computer/Notebook Computer / Notebook +12V Output Power socket Monitor Plug for 12V DC jack Plug for wired remote Plug for wired remote ™ ™ ™ at projector side at remote control side Plug: ID Φ 1.7mm Φ 3.5mm Φ... -
Page 19: Connecting To Video Sources
Connecting to Video Sources S-Video output DVD player, Set-top box, HDTV receiver DVD player Power socket DVD player Audio output 1. Composite Video cable 4. HDMI Cable 2. S-Video Cable 5. Audio Cable 3. BNC Cable 6. Power Cord Due to the difference in applications for each country, some regions may have different accessories. ... -
Page 20: Powering On/Off The Projector
Powering On/Off the Projector Powering On the Projector 1. Securely connect the power cord and signal cable. Power on the switch 1 and the Power LED flashes Blue. 2. Turn on the lamp by pressing the “ ” button either on the control panel of the projector or on the remote control 2. -
Page 21: Powering Off The Projector
Powering Off the Projector 1. Press the “Standby” button on the remote control or the “ ” button on the con- to turn off the projector 1. The following message will be displayed on trol panel the screen. Press the “Standby” button on the remote control or the “ ”... -
Page 22: Warning Indicator
Warning Indicator When the warning indicators (see below) come on, the projector will automatically shutdown: y “LAMP” LED indicator is lit red and the “ERROR” LED indicator flashes red. This indicates that the lamp has failed. y “TEMP” LED indicator is lit red and the “ERROR” LED indicator flashes red. This indicates the projector has overheated. -
Page 23: Adjusting The Projected Image
Adjusting the Projected Image Adjusting the Projector’s Height The projector is equipped with elevator rubber feet for adjusting the image height. 1. Locate the adjustable foot you wish to modify on the underside of the projector. 2. Rotate the adjustable ring clockwise to raise the projector or counter clockwise to lower it. -
Page 24: Adjusting The Projecting Image's Position
Adjusting the Projecting Image’s Position To determine where to position the projector, consider the size and shape of your screen, the location of your power outlets, and the distance between the projector and the rest of your equipment. Width Screen Height Platform WXGA... - Page 25 1.22 1.63 1.61 2.05 2.05 2.57 2.57 4.88 1.37 1.83 1.81 2.30 2.30 2.89 2.89 5.49 1.52 2.03 2.01 2.56 2.56 3.21 3.21 6.10 1.68 2.24 2.21 2.82 2.82 3.53 3.53 6.71 1.83 2.44 2.41 3.07 3.07 3.85 3.85 7.32 1.98 2.64 2.62...
- Page 26 2.29 3.66 3.66 4.69 4.69 5.90 5.86 11.24 2.42 3.88 3.88 4.96 4.96 6.24 6.20 11.90 2.56 4.09 4.09 5.24 5.24 6.59 6.55 12.56 2.69 4.31 4.31 5.51 5.51 6.94 6.89 13.23 3.37 5.38 5.38 6.89 6.89 8.67 8.62 16.53 4.04 6.46 6.46...
-
Page 27: User Controls
User Controls Using the Control Panel Sync Source Shift Description Name Turn the projector on/off. Power Menu Launch the on-screen display (OSD). Exit Exit a menu. Enter Confirm a selected item. 1. Use ▲▼◄► to select items or make adjustments to your Four Directional selection. -
Page 28: On-Screen Display Menus
On-screen Display Menus The Projector has multilingual On-screen Display menus that allow you to make image adjustments and change a variety of settings. The projector will automatically detect the source. How to operate 1. To open the OSD menu, press “Menu” on the Remote Control or Control Panel. 2. -
Page 29: Structure
Structure Please note that the on-screen display (OSD) menus vary according to the signal type selected and the projector model you are using. Main Menu Sub Menu Settings Presentation / Bright / Movie / sRGB / Color Mode DICOM SIM. / User White / Light Yellow / Light Blue / Pink / Wall Color Dark Green... - Page 30 Main Menu Sub Menu Settings Screen PIP Location 1/16 / 1/25 / 1/36 PIP Size SCREEN PIP / POP HDMI / VGA or DVI / S-Video / Video / PIP/POP Source Swap Exit English / German / French / Spanish /Italian / Russian / Portuguese / Language Swedish / Simplified Chinese / Korean...
- Page 31 Settings Internal Speaker On / Off Mute On / Off Audio Settings Volume Exit Logo Viewsonic / Neutral / User Logo Capture On / Off Advanced Closed CC1 / CC2 / CC3 / CC4 / Off Captioning Exit Network State...
- Page 32 Main Menu Sub Menu Settings Auto Source On / Off High Altitude On / Off Status Hide On / Off Keypad Lock Lock / Unlock Test Pattern None / Grid / White Background Color Blue / Black / Red / Green / White Lamp Hour Lamp Reminder On / Off Lamp Settings...
-
Page 33: Picture
Presentation: Good color and brightness from PC input. Bright: Maximum brightness from PC input. Movie: For home theater. The Pro10 Series use Dynamic Color Wheel technology, so screen flickering when you change between color modes is normal. sRGB: Standardised accurate color. - Page 34 Contrast The contrast controls the degree of difference between the lightest and the darkest parts of the picture. Adjusting the contrast changes the amount of black and white in the image. Press the ◄ button to decrease the contrast. Press the ► button to increase the contrast. Sharpness Adjust the sharpness of the image.
-
Page 35: Picture | Advanced
PICTURE | Advanced Noise Reduction The motion Adaptive Noise Reduction reduces the amount of visible noise interlaced signals. The range is from “0” to “10”. (0: Off) BrilliantColor™ Enable the BrilliantColor function to enhance the brightness while providing true, more vibrant colors in picture. Gamma This allows you to choose a gamma table that has been finetuned to bring out the best image quality for the input. - Page 36 Color Space Select an appropriate color matrix type from AUTO, RGB, RGB(0-255), RGB(16- 235) or YUV. “RGB(0-255)” and “RGB(16-235)” are only supported for HDMI source. Color Settings Press into the next menu and then use ▲ or ▼ to select item. Red Gain/Green Gain/Blue Gain/Red Bias/Green Bias/Blue Bias: Use ◄...
-
Page 37: Screen
SCREEN Aspect Use this function to choose your desired aspect ratio. 4:3: This format is for 4x3 input sources. 16:9: This format is for 16x9 input sources, like HDTV and DVD enhanced for Wide screen TV. Native: This format displays the original image without any scaling. Auto: Automatically selects the appropriate display format. -
Page 38: Screen | Geometry
SCREEN | Geometry (additional accessory will be needed) PC Mode Enable RJ45 control with PC software that allows user to control geometry. Warp Enable the Geometry function and control by OSD. Keystone This allows you to correct the keystone distortion. Horizontal: Press the ◄... - Page 39 Pin Cushion/Barrel: Press the ◄ or ► to adjust the pincushion/barrel distortion. +/- 20% pincushion and barrel distortion correction. Reset: Return to the default setting. 4-Corner This allows you to correct the trapezoidal distortion. 4 Corner position adjustments: Top Left, Bottom Left, Top Right, Bottom Right and All.
- Page 40 The screen is separated into 4 (2x2) grids and you can adjust every point of grids. Rotation This allows you to level the rotated image. Rotation: Press the ◄ or ► to adjust the angle of image. Rotation angles can reach to +/- 90 degree.
-
Page 41: Screen | Pip / Pop
SCREEN | PIP / POP Screen Single Screen: Projection single window. PIP Screen: Main source is at large window; PIP source is at small window and displays in the corner of the main window. POP Screen: Main source is at the left window and POP source is at the right widow, they are equal sizes and side by side. -
Page 42: Setting
SETTING Language Choose the multilingual OSD menu. Press ◄ or ► into the sub menu and then use the ▲ or ▼ to select your preferred language. Press “Enter” to finalize the selection. Projection Front-Desktop This is the default selection. The image is projected straight on the screen. Rear-Desktop When selected, the image will appear reversed. -
Page 43: Setting | Lens Function
Rear-Desktop and Rear-Ceiling are to be used with a translucent screen. Menu Location Choose the menu location on the display screen. SETTING | Lens Function Focus Adjust focus function on the projected image. Zoom Adjust zoom function on the projected image. Lens Shift Shift the projected image. -
Page 44: Setting | Security
SETTING | Security Security Timer Use this function to set the how long (Month/Day/Hour) the projector can be used. Once this time has elapsed you will be requested to enter your password again. Change Password First time: 1. Press “ ”... -
Page 45: Setting | Signal (Rgb)
Security On: Choose “On” to use security verification when turning on projector. Off: Choose “Off” to be able to switch on the projector without password verification. SETTING | Signal (RGB) Signal is supported except Video and S-Video. Frequency Change the display data frequency to match the frequency of your computer’s graphic card. -
Page 46: Setting | Signal (Video)
SETTING | Signal (Video) “Signal” is only supported when the source is Video or S-video. White Level Allow user adjust White Level when inputting S-Video or Video signals. Black Level Allow user adjust Black Level when inputting S-Video or Video signals. Saturation Adjust a video image from black and white to fully saturated color. -
Page 47: Setting | Audio Settings
SETTING | Audio Settings Internal Speaker Choose the “On” or “Off” to turn on or off the internal speaker. Mute Choose the “On” to turn mute on. Choose the “Off” to turn mute off. Volume Press the ◄ to decrease the volume. Press the ►... -
Page 48: Setting | Advanced
Use this function to set the desired startup screen. If changes are made they will take effect the next time the projector is powered on. Viewsonic: The default startup screen. Neutral: Logo is not displayed on startup screen. User: Use stored picture from “Logo Capture” function. -
Page 49: Setting | Network
SETTING | Network Network State Display the network connection status. DHCP Use this function to select your desired startup screen. If you change the setting from one to another, when you exit the OSD menu, the new setting will take effect on next open. - Page 50 Gateway Select the default gateway of the network connected to the projector. Select DNS number. Apply Press “ ” and then choose “Yes” to apply the selection. All of the new settings of the non-DHCP mode shall be triggered by “Yes”. ...
- Page 51 Crestron RoomView Control Tool Crestron RoomView™ provides a central monitoring station for 250+ control systems on a single Ethernet network (more are possible, the number depends on the combination of IP ID and IP address). Crestron RoomView monitors each projector, including projector’s online status, system power, lamp life, network setting and hardware faults, plus any custom attribute as defined by the Administrator.
- Page 52 3. Edit Attribute 4. Edit Event For more information, please visit http://www.crestron.com & www.crestron.com/getroomview. Network supports Crestron (Room View), AMX (Device Discovery Beacon Validation Tool) , PJLink and RS232 control.
-
Page 53: Setting | Image Blending
SETTING | Image Blending (additional accessory will be needed) Blending Choose the “On” to turn blending on. Choose the “Off” to turn blending off. Crop Choose the “On” to turn crop on. Choose the “Off” to turn crop off. Overlap This allows you to set the overlap edge of blending area. -
Page 54: Options
OPTIONS Auto Source On: The projector will only search current input connection. Off: The projector will search for other signals if the current input signal is lost. Press direct source key on remote controller, it will change source directly and automatically set the ... - Page 55 OPTIONS (Continue) 12V Trigger 12V trigger provides a standard trigger for motorized screens. HDMI Cable Specify the HDMI cable length. Available options: Normal / Long / Short. Information Display the projector information for source, resolution, and software version on the screen.
-
Page 56: Options | Lamp Settings
Remote code: show the remote code of the projector. Remote code(Active): show the remote code of the remote control. Reset Choose “Yes” to return the display parameters on all menus to the factory default settings. The following settings will still remain: Phase, H. Size, User, Language, Projector Position, High Altitude Mode, Security Settings, and Keystone. -
Page 57: Options | Remote Settings
OPTIONS | Remote Settings My Button Choose your desired function from “BrilliantColor”, “Gamma”, "DynamicBlack", "Color Temp.", "Projection", "Projector ID" or “HDMI Cable”. Top IR Function When this function is “On”, the projector can be operated by the remote control from top IR receiver. -
Page 58: Options | Advanced
OPTIONS | Advanced Direct Power On Choose “On” to activate Direct Power mode. The projector will automatically power on when AC power is supplied, without pressing the “ ” key on the projector control panel or on the remote control. Auto Power Off Sets the countdown timer interval. -
Page 59: Appendices
Appendices Troubleshooting If you experience a problem with your projector, please refer to the following information. If a problem persists, please contact your local reseller or service center. Image Problems No image appears on-screen ` Ensure all the cables and power connections are correctly and securely connected as described in the “Installation”... - Page 60 ` If you are using a Notebook: First, follow the steps above to adjust resolution of the computer. Press the toggle output settings. example: [Fn]+[F4] Notebook Brand Function Keys Acer [Fn]+[F5] Asus [Fn]+[F8] Dell [Fn]+[F8] Gateway [Fn]+[F4] IBM/Lenovo [Fn]+[F7] HP/Compaq [Fn]+[F4] [Fn]+[F3] Toshiba...
- Page 61 Image has vertical flickering bar ` Use “Frequency” to make an adjustment. ` Check and reconfigure the display mode of your graphic card to make it compatible with the projector. Image is out of focus ` Make sure the lens cover is removed. ` Adjust the Focus function for the projector lens.
-
Page 62: Projector Problems
Projector Problems The projector stops responding to all controls ` If possible, turn off the projector, then unplug the power cord and wait at least 60 seconds before reconnecting power. ` Check that “Keypad Lock” is not activated by trying to control the projector with the remote control. - Page 63 Step 4: On the General tab, under This connection use the following items, click Internet Protocol(TCP/IP), and then click “Properties”. Step 5: Click Use the following IP address, and type in as below: 1) IP address: 192.168.0.101 2) Subnet mask: 255.255.255.0 3) Default gateway: 192.168.0.254...
- Page 64 Step 6: To open Internet Options, click IE web browser, click Internet Options, click the Connections tab and click “LAN Setting…”. Step 7: All items in the Local Area Network (LAN) Setting window must unchecked. Then click “OK” button twice. Step 8: Connect a cat5 Ethernet cross-over cable between the projector and the computer.
-
Page 65: On Screen Messages
On Screen Messages y Power off confirm y Lamp error y Lamp Life warning y Filter error... -
Page 66: Replacing The Lamp
A warning message will be displayed once the lamp has surpassed life expectancy. At this point, it is recommended to change the lamp as soon as possible. Please contact your local reseller or ViewSonic to acquire a lamp. Type number: RLC-087 Warning: If ceiling mounted, please use caution when opening the lamp access panel. - Page 67 Lamp Replacing Procedure: 1. Switch off the power to the projector by pressing the “ ” button. 2. Allow the projector to cool down for at least 30 minutes. 3. Disconnect the power cord. 4. Unscrew the two screws on the lamp door. 1 5.
-
Page 68: Replacing The Filter
Replacing the Filter Filter Replacing Procedure: 1. Switch off the power to the projector by pressing the “ ” button. 2. Allow the projector to cool down for at least 30 minutes. 3. Disconnect the power cord. 4. Unscrew the four screws on the filter cover and pull out the cover. 1 5. -
Page 69: Compatibility Modes
Compatibility Modes Computer Compatibility (PC) Frequency H. Refresh Rate Signal Resolution Video Digital Analog Remark (KHz) (Hz) NTSC 15.734 ○ PAL/SECAM 15.625 ○ 640 x 350 31.5 70.1 ○ ○ 70Hz 640 x 400 37.9 85.1 ○ ○ 85Hz 720 x 400 31.5 ○... - Page 70 Frequency H. Refresh Rate Signal Resolution Video Digital Analog Remark (KHz) (Hz) 1920 x 1080i ○ ○ 1920 x 1080i ○ ○ 1920 x 1080p ○ ○ 1920 x 1080p ○ ○ 1920 x 1080p ○ ○ 1920 x 1080p ○...
-
Page 71: Remote Key Code
Remote Key Code Default custom code => 83F4 Mode 01 ~ 99 => 8301 ~ 8399 Format => NEC Byte3 Byte4 Byte3 Byte4 Sync(Auto Sync) Pattern Keystone My Button HDMI Down Left Right Focus Mode(Color Mode) Zoom Aspect Shift(Lens Shift) Mute Memory(Lens Shift Memory) Enter... -
Page 72: Rs232 Pin Assignments
RS232 Pin Assignments Projector Side Pin No. PC Side (RS232 Terminal) Setup Information RS-232 protocol Baud Rate 9600 bps (default) Data Length 8 bit Parity Check None Stop Bit 1 bit Flow Control None RS232 shell is grounded. RS232 interface need use swap pin for RS232 communication. ... -
Page 73: Rs232 Protocol Function List
RS232 Protocol Function List Main Menu Sub Menu Sub Menu 2 Sub Menu 3 Sub Menu 4 Value RS232 Command Presentation Presentation 0x06 0x14 0x00 0x04 0x00 0x34 0x12 0x0B 0x04 0x6D Bright 0x06 0x14 0x00 0x04 0x00 0x34 0x12 0x0B 0x00 0x69 Movie 0x06 0x14 0x00 0x04 0x00 0x34 0x12 0x0B 0x01 0x6A Color Mode... - Page 74 Main Menu Sub Menu Sub Menu 2 Sub Menu 3 Sub Menu 4 Value RS232 Command Color Settings Red Bias 0x06 0x14 0x00 0x04 0x00 0x34 0x12 0x1D 0x00 0x7B 0x06 0x14 0x00 0x04 0x00 0x34 0x12 0x1D 0x01 0x7C Read 0x07 0x14 0x00 0x05 0x00 0x34 0x00 0x00 0x12 0x1D 0x7C Green Bias...
- Page 75 Main Menu Sub Menu Sub Menu 2 Sub Menu 3 Sub Menu 4 Value RS232 Command 4-Corner Bottom Left Read 0x07 0x14 0x00 0x05 0x00 0x34 0x00 0x00 0x13 0xA2 0x02 Bottom Right + 0x06 0x14 0x00 0x04 0x00 0x34 0x11 0xA3 0x01 0x01 Bottom Right - 0x06 0x14 0x00 0x04 0x00 0x34 0x11 0xA3 0x00 0x00 Bottom Right Read...
- Page 76 Main Menu Sub Menu Sub Menu 2 Sub Menu 3 Sub Menu 4 Value RS232 Command English 0x06 0x14 0x00 0x04 0x00 0x34 0x15 0x00 0x00 0x61 German 0x06 0x14 0x00 0x04 0x00 0x34 0x15 0x00 0x02 0x63 French 0x06 0x14 0x00 0x04 0x00 0x34 0x15 0x00 0x01 0x62 Spanish 0x06 0x14 0x00 0x04 0x00 0x34 0x15 0x00 0x04 0x65 Italian...
- Page 77 0x07 0x14 0x00 0x05 0x00 0x34 0x00 0x00 0x14 0x04 0x65 Exit 0x02 0x14 0x00 0x04 0x00 0x34 0x02 0x04 0x0A 0x5C Logo Viewsonic / Neutral Viewsonic 0x06 0x14 0x00 0x04 0x00 0x34 0x11 0x0B 0x02 0x6A / User Neutral...
- Page 78 Main Menu Sub Menu Sub Menu 2 Sub Menu 3 Sub Menu 4 Value RS232 Command On / Off Quick Auto 0x06 0x14 0x00 0x04 0x00 0x34 0x13 0x02 0x01 0x62 Search on Auto Source Quick Auto 0x06 0x14 0x00 0x04 0x00 0x34 0x13 0x02 0x00 0x61 Search off Read 0x07 0x14 0x00 0x05 0x00 0x34 0x00 0x00 0x13 0x02 0x62...
- Page 79 Main Menu Sub Menu Sub Menu 2 Sub Menu 3 Sub Menu 4 Value RS232 Command Normal / Long Normal 0x06 0x14 0x00 0x04 0x00 0x34 0x0C 0x37 0x00 0x8F / Short Short 0x06 0x14 0x00 0x04 0x00 0x34 0x0C 0x37 0x01 0x90 HDMI Cable Long 0x06 0x14 0x00 0x04 0x00 0x34 0x0C 0x37 0x02 0x91...
-
Page 80: Ceiling Mount Installation
Ceiling Mount Installation If you wish to use a third party ceiling mount kit, please ensure the screws which are used to attach a mount to the projector meet the following specifications: y Screw type: M6 x 4 Please note that damage resulting from incorrect installation will invalidate the warranty. ... -
Page 81: Specifications
Specifications Technology TI 12°, Type A DMD, 0.7” XGA, DC3 / 0.65” WXGA, DC3 ASIC DDP2431 + PW392C Native Resolution XGA (1024x768) / WXGA (1280x800) Support Resolution: Up to WUXGA @60Hz (Reduced Blanking) and UXGA @60Hz Computer compatibility IBM PC Compatible, support HDTV (1080i/p, 720p, 576i/p, 480i/p) include both PC and component inputs Video compatibility NTSC M(3.58MHz), 4.43MHz... - Page 82 I/O connectors Power socket x 1 HDMI x 1 VGA In x 1 VGA Out x 1 S-Video x 1 DVI-D x 1 Video x 1 Composite x 1 BNC x 1 Audio input x 1 Audio output x 1 RS232 x 1 12V Trigger x 1 RJ45 x 1...
-
Page 83: Customer Support
Note : You will need the product serial number. T = Telephone Country/Region Website Email F = FAX AUS= 1800 880 818 Australia/New Zealand www.viewsonic.com.au service@au.viewsonic.com NZ= 0800 008 822 T (Toll-Free)= 1-866-463-4775 Canada www.viewsonic.com T (Toll)= 1-424-233-2533 service.ca@viewsonic.com F= 1-909-468-3757 www.viewsoniceurope. -
Page 84: Limited Warranty
If a product proves to be defective in material or workmanship during the warranty period, ViewSonic will, at its sole option, repair or replace the product with a like product. Replacement product or parts may include remanufactured or refurbished parts or components. - Page 85 Exclusion of damages: ViewSonic’s liability is limited to the cost of repair or replacement of the product. ViewSonic shall not be liable for: Damage to other property caused by any defects in the product, damages based upon...
-
Page 86: Mexico Limited Warranty
If a product proves to be defective in material or workmanship during the warranty period, ViewSonic will, at its sole option, repair or replace the product with a like product. Replacement product or parts may include remanufactured or refurbished parts or components &... - Page 87 Tel: (52) 999-925-1916 Tel: 01(52)95-15-15-22-22 E-Mail: rrrb@sureste.com Fax: 01(52)95-15-13-67-00 E-Mail. gpotai2001@hotmail.com Tijuana: FOR USA SUPPORT: ViewSonic Corporation Av Ferrocarril Sonora #3780 L-C 381 Brea Canyon Road, Walnut, CA. 91789 USA Col 20 de Noviembre Tel: 800-688-6688 (English); Tijuana, Mexico Fax: 1-800-685-7276 E-Mail: http://www.viewsonic.com...
Need help?
Do you have a question about the Pro10 Series and is the answer not in the manual?
Questions and answers