Table of Contents
Advertisement
Quick Links
INSTRUCTION MANUAL
Orion
SpaceProbe
130mm EQ
®
™
Equatorial Newtonian Reflector Telescope #9007
Corporate Offices: 89 Hangar Way, Watsonville CA 95076 - USA
Toll Free USA & Canada: (800) 447-1001
International: +1(831) 763-7000
Customer Support: support@telescope.com
A N E M P L O Y E E - O W N E D C O M P A N Y
Copyright © 2022 Orion Telescopes & Binoculars. All Rights Reserved. No part of this product instruction or any of its contents
may be reproduced, copied, modified or adapted, without the prior written consent of Orion Telescopes & Binoculars.
IN 153 Rev D 5-22
Advertisement
Table of Contents

Related Manuals for ORION TELESCOPES & BINOCULARS Orion SpaceProbe 130ST


Summary of Contents for ORION TELESCOPES & BINOCULARS Orion SpaceProbe 130ST
- Page 1 INSTRUCTION MANUAL Orion SpaceProbe 130mm EQ ® ™ Equatorial Newtonian Reflector Telescope #9007 Corporate Offices: 89 Hangar Way, Watsonville CA 95076 - USA Toll Free USA & Canada: (800) 447-1001 International: +1(831) 763-7000 Customer Support: support@telescope.com A N E M P L O Y E E - O W N E D C O M P A N Y Copyright ©...
-
Page 2: Table Of Contents
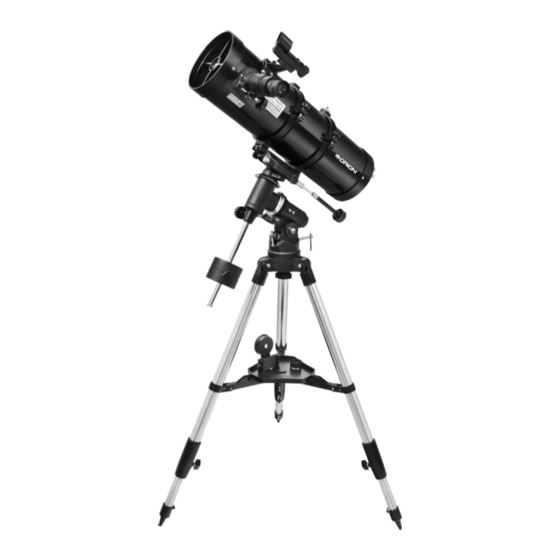
Contents Congratulations on your purchase of a quality Orion telescope. Your new SpaceProbe 130ST EQ Unpacking is designed for high-resolution viewing of astro- nomical objects. With its precision optics and equa- II. Parts List torial mount, you’ll be able to locate and enjoy hun- III. -
Page 3: Unpacking
I. Unpacking The entire telescope system will arrive in one box. Be care- Retaining ful unpacking the box. We recommend keeping the original clip shipping container. In the event that the telescope needs to be shipped to another location, or returned to Orion for warranty repair, having the proper shipping container will help ensure that your telescope will survive the journey intact. - Page 4 Dovetail saddle Saddle clamp knobs Dec. lock knob R.A. lock knob Dec. slow-motion cable R.A. slow-motion cable Safety stop Figure 4. A ) Thread the counterweight shaft onto the mount. ) After removing the safety stop, slide the counterweight onto the shaft.
-
Page 5: Balancing The Telescope
Figure 7. The Visual Back (eyepiece adapter) threads onto the focuser drawtube. 14. Attach the finderscope to the dovetail beside the focuser (Figure 8). IV. Balancing the Telescope To ensure smooth movement of the telescope on both axes of the equatorial mount, it is imperative that the optical tube be properly balanced. -
Page 6: Using The Ez Finder Ii Finder Scope
Red LED Power knob Azimuth adjustment knob Battery cover Altitude adjustment knob Figure 10. Features of the EZ Finder II. 3. Retighten the counterweight lock knob. The telescope is now balanced on the R.A. axis. 4. To balance the telescope on the Dec. axis, first tighten the R.A. -
Page 7: Polar Alignment
Without moving the main telescope, use the EZ Finder II's azi- muth (left/right) and altitude (up/down) adjustment knobs (see Figure 10) to position the red dot on the object in the eyepiece. When the red dot is centered on the distant object, check to make sure that the object is still centered in the telescope's field of view. -
Page 8: Control Cables
and Dec. axes. Once the telescope is pointed somewhere Dec. setting close to the object to be viewed, retighten the mount’s R.A. circle and Dec. lock knobs. The object should now be visible somewhere in the field of view of the EZ Finder II. If it isn’t, use the slow-motion controls to scan the surrounding area of sky. - Page 9 Reflective surface Primary mirror of collimation center mark Figure 15. Collimating the optics. (a) When the mirrors are properly aligned, the view down the focuser drawtube should look like this (b) With the collimation cap in place, if the optics are out of alignment, the view might look something like this.
-
Page 10: Collimating The Optics (Aligning The Mirrors)
Primary locking screws Collimation adjustment screws Out of collimation Collimated Figure 18. A star test will determine if a telescope’s optics are properly collimated. An unfocused view of a bright star through the eyepiece should appear as illustrated on right if optics are perfectly collimated. -
Page 11: Using Your Telescope-Astronomical Observing
adjusted. Typically, this adjustment will rarely, if ever, need to mirror to center the “dot” of the collimation cap in the ring of the be done. It helps to adjust the secondary mirror in a brightly lit mirror mark. room with the telescope pointed toward a bright surface, such When you have the dot centered as much as possible in the as white paper or wall. - Page 12 after midnight, when much of the heat absorbed by the Earth during the day has radiated off into space. Especially important for observing faint objects is good “transparency”— air free of moisture, smoke, and dust. All tend to scatter light, which reduces an object’s brightness. Transparency is judged by the magnitude of the faintest stars you can see with the unaided eye (6th magnitude or fainter is desirable).
- Page 13 Objects to Observe is necessary for a good view. You will probably see a bright “star” close by, which is Saturn’s brightest moon, Titan. Now that you are all set up and ready to go, one critical deci- sion must be made: what to look at? VENUS At its brightest, Venus is the most luminous object in the sky, excluding the Sun and the Moon.
-
Page 14: Care And Maintenance
Start by choosing bright objects to view. The brightness of er scope. Never use regular glass cleaner or cleaning fluid an object is measured by its visual magnitude; the brighter designed for eyeglasses. Before cleaning with fluid and tissue, an object, the lower its magnitude. Choose an object with a however, blow any loose particles off the lens with a blower visual magnitude of 9 or lower. -
Page 15: Specifications
XII. Specifications Optical tube: Steel Primary mirror diameter: 130mm Primary mirror coating: Aluminum with silicon dioxide (SiO ) overcoat Primary mirror figure: Parabolic Secondary mirror minor axis: 37mm Focal length: 650mm Focal ratio: f/5 Focuser: Rack and pinion, accepts 1.25” eyepieces Eyepieces: 25mm and 10mm Plössl, fully coated with multi-coatings, 1.25"... - Page 16 One-Year Limited Warranty This Orion product is warranted against defects in materials or workmanship for a peri- od of one year from the date of purchase. This warranty is for the benefit of the original retail purchaser only. During this warranty period Orion Telescopes & Binoculars will repair or replace, at Orion’s option, any warranted instrument that proves to be defec- tive, provided it is returned postage paid.
Need help?
Do you have a question about the Orion SpaceProbe 130ST and is the answer not in the manual?
Questions and answers