Table of Contents
Advertisement
Available languages
Available languages
Advertisement
Table of Contents

Related Manuals for W'eau WMIP-003


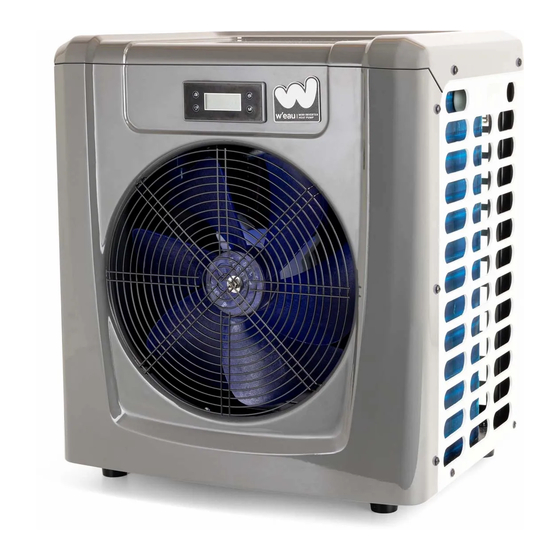
Summary of Contents for W'eau WMIP-003
- Page 1 Installation & Operation Manual Mini Inverter Plus Heat Pump Model: WMIP-003/004/006 ENGLISH/ DUTCH Thank you very much for purchasing our product,please keep and read this manual carefully before you install heat pump.
- Page 3 Fluorinated greenhouse gas – (R32) The device contains the fluorinated greenhouse gas (R32) which is required for the device to work. Industrial designation HFC-32 Common designation Global warming potential (GWP) Further information can be found on the device itself or the Specifications. WARNING! Risk of fire and explosion through leaking finned heat exchanger! The refrigerant circuit of the finned heat exchanger contains highly pressurised, easily flammable, odourless...
- Page 4 the event of repairs carried out on your own, improper operation. - Ensure that children do not insert any objects into the fan blade and heat pump. - Ensure that the electrical system to which the heat pump is connected has an earth conductor. - If the unit would be installed where is vulnerable to lightning stroke, lightning protection measurements must be carried out.
-
Page 5: Specifications
1. Specifications 1.1 Technical data pool heat pumps Model No. WMIP-003 WMIP-004 WMIP-006 * Heating Capacity at Air 26℃, Humidity 80%, Water 26℃ in, 28℃ out Heating Capacity (kW) 3.0~0.95 4.5~1.2 6.0~1.5 Power Input (kW) 0.55~0.1 0.73~0.12 1.1~0.16 9.5~5.5 10~5.5 9.4~5.5... -
Page 6: Dimension (Mm)
2. Dimension (mm) WMIP-003/004/006 3.Installation and connection Attention: Please observe the following rules when installing the heat pump: 1. Any addition of chemicals must take place in the piping located downstream from the heat pump. 2. Always hold the heat pump upright. If the unit has been held at an angle, wait at least 24 hours before starting the heat pump. - Page 7 3.2 Initial operation Note: In order to heat the water in the pool (or hot tub), the filter pump must be running to cause the water to circulate through the heat pump. The heat pump will not start up if the water is not circulating. 3.3 Electrical connection Before connecting the unit, verify that the supply voltage matches the operating voltage of the heat pump.
- Page 8 After all connections have been made and checked, carry out the following procedure: 1. Switch on the filter pump. Check for leaks and verify that water is flowing from and to the swimming pool. 2. Connect power to the heat pump and press the On/Off button on the electronic control panel.
-
Page 9: Electrical Wiring
4.Electrical wiring 4.1 Swimming pool heat pump wiring diagram - 7 -... -
Page 10: Display Controller Operation
NOTE: (1) Above electrical wiring diagram only for your reference, please subject machine posted the wiring diagram. (2) The swimming pool heat pump must be connected ground wire well, although the unit heat exchanger is electrically isolated from the rest of the unit. Grounding the unit is still required to protect you against short circuits inside the unit. - Page 11 5.3 Switch Heating & Cooling mode Under main interface, press to switch Heating & Cooling mode. 5.4 Set the desired water temperature When machine is under main interface in Heating or Cooling mode, press directly to adjust the desired water temperature, the data will be saved in 3 seconds or you can press to save the data.
- Page 12 Press to check below parameters , press to check the data of selected parameter, press again to return back. Press to return back the main interface. Parameter Name Range Return water temp. difference 1℃~18℃ Desired water temp. under cooling 8℃~28℃ Desired water temp.
-
Page 13: Troubleshooting
Trouble shooting 6.1 Error code on the LED controller Code Description Reason Solutions 1. Insufficient or no water flow. 1. Check the water pump or water piping system. Water flow failure 2. The wiring for water flow 2. Check the wiring or change a new water flow switch is in loose situation. -
Page 14: Maintenance
6.2 Other Malfunctions and Solutions (No display on LED wire controller) Malfunctions Observing Reason Solution No power supply. LED wire controller Check cable and circuit breaker if no display. it is connected. Heat pump is 1. Water temperature is not running 1. -
Page 15: Wifi Function
WiFi Function 1. Search ‘Weau’ in App Store (IOS) or Google Play (Android), or scan the QR code, then download. 2. Sign up for the first time - 13 -... - Page 16 3. Press ‘+’ to add a device 4. Put your mobile phone close to the pool heat pump, which are under the same Wifi area - 14 -...
- Page 17 5. Make sure the device is reset, then enter the WIFI account and password to connect Wifi. Reset the Wifi function: Hold the for 5 seconds, the will flash quickly. - 15 -...
- Page 18 6. Press ‘Next’ to start the connection after completing. The device is successfully added if it’s connect, then press ‘Done’. - 16 -...
- Page 19 7. Connection finished & App Main Interface - 17 -...
- Page 20 8. Functions * Turn On/Off the machine * Temperature setting and display * Mode Selection * Failure status display * Timer setting * Rename and Sharing your device - 18 -...
- Page 21 Installatie- en bedieningshandleiding Mini Inverter Plus Warmtepomp Model: WMIP-003/004/006 Hartelijk dank voor de aankoop van ons product. Bewaar en lees deze handleiding zorgvuldig voordat u de warmtepomp installeert. - 19 -...
- Page 22 Gefluoreerd broeikasgas – (R32) Het apparaat bevat het gefluoreerde broeikasgas (R32) dat nodig is om het apparaat te laten werken. Industriële aanduiding HFC-32 Gemeenschappelijke aanduiding Vermogen tot opwarming van de aarde (GWP) Verdere informatie is te vinden op het apparaat zelf of de Specificaties. WAARSCHUWING! Brand- en explosiegevaar door lekkende warmtewisselaar met lamellen! Het koelcircuit van de warmtewisselaar met lamellen bevat onder hoge druk, licht ontvlambaar, geurloos gas.
- Page 23 - Gebruik de warmtepomp niet als er zichtbare schade is of als het netsnoer of de netstekker defect is. - Open de behuizing niet. Laat reparaties over aan gekwalificeerde specialisten. Aansprakelijkheids- en garantieclaims zijn uitgesloten bij zelf uitgevoerde reparaties, ondeskundig gebruik. - Zorg ervoor dat kinderen geen voorwerpen in het ventilatorblad en de warmtepomp steken.
- Page 24 1. Specificaties Technische gegevens zwembad warmtepompen Model No. WMIP-003 WMIP-004 WMIP-006 * Verwarmingscapaciteit bij lucht 26℃, vochtigheid 80%, water 26℃ in, 28℃ uit Verwarmingscapaciteit (kW) 3.0~0.95 4.5~1.2 6.0~1.5 Stroomaansluiting (kW) 0.55~0.1 0.73~0.12 1.1~0.16 9.5~5.5 10~5.5 9.4~5.5 * Verwarmingscapaciteit bij lucht 15℃, vochtigheid 70%, water 26℃ in, 28℃ uit Verwarmingscapaciteit (kW) 2.2~0.66...
-
Page 25: Installatie En Aansluiting
2. Dimensie (mm) WMIP-003/004/006 3.Installatie en aansluiting Aandacht: Neem de volgende regels in acht bij het installeren van de warmtepomp: 1. Eventuele toevoeging van chemicaliën moet plaatsvinden in de leidingen die zich stroomafwaarts van de warmtepomp bevinden. 2. Houd de warmtepomp altijd rechtop. Als de unit schuin is gehouden, wacht dan minimaal 24 uur voordat u de warmtepomp start. - Page 26 blokkeren. Dergelijke locaties belemmeren de continue toevoer van verse lucht, wat resulteert in een verminderd rendement en mogelijk onvoldoende warmteafgifte. 3.2 Eerste gebruik Opmerking: om het water in het zwembad (of de hot tub) te verwarmen, moet de filterpomp draaien om het water door de warmtepomp te laten circuleren.
- Page 27 Voer de volgende procedure uit nadat alle aansluitingen zijn gemaakt en gecontroleerd: 1.Schakel de filterpomp in. Controleer op lekken en ga na of er water van en naar het zwembad stroomt. 2.Sluit de stroom naar de warmtepomp aan en druk op de aan / uit-knop op het elektronische bedieningspaneel.
-
Page 28: Elektrische Bedrading
4.Elektrische bedrading 4.1Bedradingsschema - 26 -... - Page 29 NOTITIE: (1) Bovenstaand elektrisch bedradingsschema is alleen ter referentie, onderwerp de warmtepomp aan het bedradingsschema. (2) De warmtepomp van het zwembad moet goed worden aangesloten op de aardedraad, hoewel de warmtewisselaar van de unit elektrisch geïsoleerd is van de rest van de unit. Aarding van het apparaat is nog steeds vereist om u te beschermen tegen kortsluiting in het apparaat.
- Page 30 5.3 Schakelen tussen verwarming en koeling Druk onder de hoofdinterface op om de modus Verwarmen en koelen te schakelen. 5.4 Stel de gewenste watertemperatuur in Wanneer de warmtepomp ingesteld staat op verwarmen of koelen, drukt u rechtstreeks op om de gewenste watertemperatuur aan te passen, de gegevens worden binnen 3 seconden opgeslagen of u kunt op drukken om de gegevens op te slaan.
- Page 31 5.6 Parameters controleren Houd 3 seconden ingedrukt om de huidige gegevenscontrole te starten Druk op om onderstaande parameters te controleren, druk op om de gegevens van de geselecteerde parameter te controleren, druk nogmaals op om terug te keren. Druk op om terug te keren naar de hoofdinterface.
- Page 32 6. Probleemoplossen 6.1 Foutcode op de LED-controller Code Omschrijving Reden Oplossing 1. Onvoldoende of geen 1. Controleer de waterpomp of het waterstroom. waterleidingsysteem. Waterstroomstoring 2. De bedrading voor de 2. Controleer de bedrading of vervang een nieuwe waterstroomschakelaar zit los. waterstroomschakelaar.
- Page 33 6.2 Andere storingen en oplossingen (geen weergave op LED-draadcontroller) Observeren Storing Reden Oplossing Controleer kabel en Geen stroomvoorziening. LED-draadcontroller stroomonderbreker als deze is geen display. aangesloten. Warmtepomp 1. Controleer de instelling van de 1. De watertemperatuur LED-draadcontroller draait niet watertemperatuur. bereikt de ingestelde waarde geeft de werkelijke 2.
- Page 34 7. Onderhoud (1) Controleer het watertoevoersysteem regelmatig om te voorkomen dat er lucht in het systeem komt en dat er een lage waterstroom optreedt, omdat dit de prestaties en betrouwbaarheid van de warmtepomp zou verminderen. (2) Reinig uw zwembaden en filtersysteem regelmatig om schade aan de unit als gevolg van het vuil of verstopt filter te voorkomen.
- Page 35 8. WiFi 1. Zoek 'Weau' in de App Store (IOS) of Google Play (Android) en download. 2. Schrijf je voor de eerste keer in - 33 -...
- Page 36 3. Druk op ‘+’ om een apparaat toe te voegen 4. Leg uw mobiele telefoon dicht bij de warmtepomp van het zwembad, die zich onder hetzelfde wifi-gebied bevindt - 34 -...
- Page 37 5. Zorg ervoor dat het apparaat is gereset en voer vervolgens het wifi-account en wachtwoord in om wifi te verbinden. Reset de wifi-functie: Houd 5 seconden vast, de zal snel knipperen. - 35 -...
- Page 38 6. Druk op ‘Volgende’ om de verbinding te starten na het voltooien. Het apparaat is succesvol toegevoegd als het is verbonden en druk vervolgens op 'Gereed'. - 36 -...
- Page 39 7. Verbinding voltooid en app-hoofdinterface - 37 -...
- Page 40 8. Functies * Zet de machine aan / uit * Temperatuurinstelling en weergave * Mode selectie * Weergave van storingsstatus * Timerinstelling * Hernoem en deel uw apparaat - 38 -...
- Page 44 14400003000544...
Need help?
Do you have a question about the WMIP-003 and is the answer not in the manual?
Questions and answers