Table of Contents
Advertisement
Available languages
Available languages
Advertisement
Table of Contents

Related Manuals for W'eau WFI-028T


Summary of Contents for W'eau WFI-028T
- Page 1 Installation & Operation Manual Swimming Pool Heat Pump Model No.: WFI-028T/035T ENGLISH/ DUTCH Thank you very much for purchasing our product,please keep and read this manual carefully before you install heat pump.
- Page 3 Fluorinated greenhouse gas – (R32) The device contains the fluorinated greenhouse gas (R32) which is required for the device to work. Industrial designation HFC-32 Common designation Global warming potential (GWP) Further information can be found on the device itself or the Specifications. WARNING! Risk of fire and explosion through leaking finned heat exchanger! The refrigerant circuit of the finned heat exchanger contains highly pressurised, easily flammable,...
-
Page 4: Table Of Contents
excluded in the event of repairs carried out on your own, improper operation. - Ensure that children do not insert any objects into the fan blade and heat pump. - Ensure that the electrical system to which the heat pump is connected has an earth conductor. - If the unit would be installed where is vulnerable to lightning stroke, lightning protection measurements must be carried out. -
Page 5: Accessories Description
1. Accessories description Each unit produced by our factory is with the following accessories: Name Qty. Instruction Manual 1 PC Guide users to install the system Drain-pipe 1 PC Used for draining the condensate water Drain-pipe connector 1 PC Connect the drain pipe to the heat pump unit Rubber shock absorber 4 PCS Reduce vibration and reduce noise... -
Page 6: Attention For Safety
2. Attention for safety Range of application: 1.Power supply: 380~415V/3N~50/60Hz. 2.Environment temperature: -15°C〜43°C 3.Water temperature range: 8°C~40°C in Heating function 8°C~28°C in Cooling function Confirm the ground connection, if the ground connection is not correctly done, it may cause ● electric shock. -
Page 7: Installation Of The Unit
3. Installation of the unit 3.1 Installation Illustration Above illustration is just for the reference, please take the advice of authorized installers. 3.2 Advised installation space Keep the following indicated space for operation and maintenance when make the installation. - 5 -... - Page 8 3.3 Additional By-pass kits The additional By-pass kits is suggested to be put into the piping system to get the better adjustment of water flow. 3.4 Heat pump unit size (mm) WFI-028T/035T 1084 1056 - 6 -...
- Page 9 3.5 Heat pump Exploded View Parts Parts Fan protective gill Water flow switch Front panel Titanium heat exchanger Fan blade Right structure Fan motor Manometer Left panel Right panel Left structure Control panel Evaporator Electrical terminal cover Fan motor mount Electrical terminal block Upper structure Electrical cable support...
- Page 10 3.6 Electrical connection Suggested power cable specification Model Power Cable Specification WFI-028T/035T mm² 5*2.5 Terminal Terminal cable max. 4 mm² Electrical connection Position A,B,C,N and is for the power connection of our heat pump. Position P1 and P2 is for the Single phase water pump.
-
Page 11: Specifications
4. Specifications 4.1 Specifications Model No. WFI-028T WFI-035T * Heating Capacity at Air 26℃, Humidity 80%, Water 26℃ Heating Capacity (kW) 28~6.8 35~8.8 Power Input (kW) 3.97~0.43 5.15~0.56 15.8~6.8 15.8~6.8 * Heating Capacity at Air 15℃, Humidity 70%, Water 26℃... -
Page 12: Electrical Wiring
5. Electrical wiring 5.1 Electric wiring diagram WFI-028T/35T - 10 -... -
Page 13: Instruction Of Operation
6.Instruction of operation 6.1 Wire controller (Buttons and Icons) 6.2 Start up & Locking Attention: Before you start the machine, please make sure the filtration pump is running and there is water flow goes through the heat pump. Hold the button for 3 seconds to switch the heat pump ON or OFF. - Page 14 6.3 Mode Selected Hold the button for 3 seconds to change the below three operating functions each time: Heating function Cooling function Auto function , if the real situation is Under Auto function, if the real situation is in Heating, it will show in Cooling, it will show Under Heating function, press button to change the below two running modes each time:...
- Page 15 6.4 Set the required temp. On the main interface, press to adjust the required water temp. Of your pool, then press to save the setting. Or you can adjust the Parameters P01/P02 to set the required water temp. 6.5 Clock setting for 3 seconds to enter Clock setting interface.
- Page 16 Hold the button for 3 seconds to enter the setting of Timer ON & Timer Off groups. Then use the same method to make the setting of Hour and Minute like Clock setting. Pay attention: There are 3 groups Timer for your every day setting. See above photo, the icon ‘ON’...
- Page 17 : It will flash when there is Error code or system protection or water flow protection. 6.8 Manual defrosting Hold for 5 seconds, and when the Piping temp. is below than Exit defrosting temp., the system can enter into Manual defrosting. 6.9 Factory setting recovery When machine has been connected power cable and under standby situation, hold for 3 seconds to recover factory setting.
- Page 18 Code Description Range Default Desired water temp. in Heating mode 8℃~40℃ 27℃ Desired water temp. in Cooling mode 8℃~28℃ 27℃ Desired water temp. in Auto mode 8℃~40℃ 27℃ Adjustment of water temp. difference before restart 1℃~18℃ 1℃ Stop once the temperature is reached 0=Non stop, 1=Stop 6.11 Running Parameter checking On the main interface, hold...
-
Page 19: Adjusting And Initial Operation
Code Description Unit Inlet water temp. ℃ Outlet water temp. ℃ Ambient temp. ℃ Exhaust temp. ℃ Gas return temp. ℃ Outer piping temp. ℃ Inner piping temp. ℃ EEV aperture Compressor current Radiator temp. Voltage value Frequency Fan motor speed r/min Fan motor speed r/min... -
Page 20: Operation And Maintenance
● Check if the function keys of the controller can work well. ● Check if the drainage system can work well. ● Check if the system can work well after starting up. ● Check if the water outlet temperature is in correct situation. ●... - Page 21 such experiment. 8.4 Drainage water in heat exchanger If the heat pump will be not used for a long time or in winter season, please do drain the water inside heat exchanger to avoid broken when freezing. 8.5 To remove the compressor, please follow the following steps ●...
-
Page 22: Error Codes & Solutions
9. Error codes & Solutions Code Description Potential reasons Solutions Check the water circuit system, the opening Insufficient water flow of by-pass kits, the running of water pump Water flow protection Water flow switch Check the wiring and reconnect water flow disconnected switch Water flow switch defective... - Page 23 Piping system jammed Check the piping system Exhause piping temp. sensor Change a new sensor (Purple connector) detective Inlet water temp. sensor Sensor disconnected or Reconnect or replace sensor failure defective Outer piping temp. sensor Sensor disconnected or Reconnect or replace sensor failure defective Exhause piping temp.
-
Page 24: Wifi-Function
10. Wifi-Function 1. Search ‘Weau’ in App Store (IOS) or Google Play (Android), then download. 2. Sign up for the first time - 22 -... - Page 25 3. Press ‘+’ to add a device 4. Put your mobile phone close to the pool heat pump, which are under the same Wifi area - 23 -...
- Page 26 5. Make sure the device is reset, then enter the WIFI account and password to connect Wifi. Reset the Wifi function: Hold the for 5 seconds. - 24 -...
- Page 27 6. Press ‘Next’ to start the connection after completing. The device is successfully added if it’s connect, then press ‘Done’. - 25 -...
- Page 28 7. Connection finished & App Main Interface - 26 -...
- Page 29 8. Functions * Turn On/Off the machine * Temperature setting and display * Mode Selection * Failure status display * Timer setting * Rename and Sharing your device - 27 -...
- Page 30 Installatie- en bedieningshandleiding Full Inverter Zwembad Warmtepomp Modelnr.: WFI-028T/035T Hartelijk dank voor de aankoop van ons product. Bewaar en lees deze handleiding zorgvuldig voordat u de warmtepomp installeert.
- Page 31 Gefluoreerd broeikasgas – (R32) Het apparaat bevat het gefluoreerde broeikasgas (R32) dat nodig is om het apparaat te laten werken. Industriële aanduiding HFC-32 Gemeenschappelijke aanduiding Vermogen tot opwarming van de aarde (GWP) Verdere informatie is te vinden op het apparaat zelf of de Specificaties. WAARSCHUWING! Brand- en explosiegevaar door lekkende warmtewisselaar met lamellen! Het koelcircuit van de warmtewisselaar met lamellen bevat onder hoge druk, licht ontvlambaar,...
- Page 32 - Sluit de warmtepomp alleen aan als de netspanning uit het stopcontact overeenkomt met de spanning die is aangegeven op het typeplaatje. - Gebruik de warmtepomp niet als er zichtbare schade is of als het netsnoer of de netstekker defect - Open de behuizing niet.
- Page 33 * Inhoud 1. Accessoires beschrijving 2. Aandacht voor veiligheid 3. Installatie van de unit 4. Specificaties 5. Elektrische bedrading 6. Gebruik van het display 7. Aanpassen en eerste gebruik 8. Bediening en onderhoud 9. Foutcodes en oplossingen 10.WiFi-functie - 31 -...
- Page 34 1. Accessories beschrijving Elke eenheid die door onze fabriek wordt geproduceerd, wordt geleverd met de volgende accessoires: Naam aantal Gebruik Handleiding 1 PC Begeleid gebruikers om het systeem te installeren Afvoerpijp 1 PC Wordt gebruikt om het condenswater af te voeren Afvoerleiding connector 1 PC Sluit de afvoerleiding aan op de warmtepompeenheid...
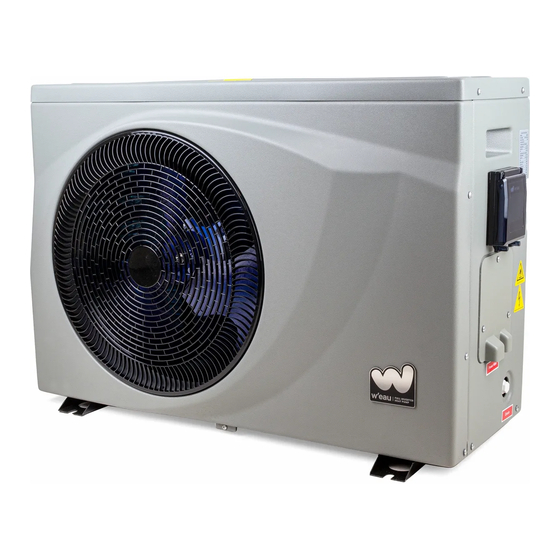
- Page 35 Illustraties van de machine - 33 -...
- Page 36 2. Aandacht voor veiligheid Toepassingsmogelijkheden: 1.Stroomvoorziening: 380~415V/3N~50/60Hz. 2.Omgevings temperatuur: -15°C〜43°C 3.Water temperatuurbereik: 8°C~40°C in verwarmings functie 8°C~28°C in koelfunctie Bevestig de aardaansluiting, als de aardaansluiting niet correct is gemaakt, kan dit elektrische ● schokken veroorzaken. En sluit de stroom af bij onweer. ●...
- Page 37 3. Installatie van de unit 3.1 Installatie illustratie De bovenstaande afbeelding is alleen ter referentie. Neem contact op met geautoriseerde installateurs. 3.2 Geadviseerde installatieruimte Bewaar de volgende aangegeven ruimte tijdens de installatie. - 35 -...
- Page 38 3.3 Extra bypass-kits Er wordt aangeraden om een bypass-kit in het leidingsysteem te plaatsen om de waterstroom beter af te stellen. 3.4 Grootte warmtepompeenheid WFI-028T/035T 1084 1056 - 36 -...
- Page 39 3.5 Warmtepomp Exploded View Onderdelen Onderdelen Ventilator bescherming Waterstroomschakelaar Voorpaneel Titanium warmtewisselaar Ventilatorblad Rechter structuur Ventilatormotor Manometer Linker paneel Rechter paneel Linker structuur Controlepaneel Afdekking elektrische Verdamper aansluiting Ventilatormotor frame Elektrisch aansluitblok Bovenste structuur Elektrische kabelsteun Deksel van elektrische kast Elektronische expansieklep Elektrische doos Reactieve weerstand...
- Page 40 3.6 Elektrische verbinding Aanbevolen voedingskabelspecificatie Model Specificatie stroomkabel WFI-028T/035T mm² 5*2.5 Terminal Terminal cable max. 4 mm² Elektrische verbinding Positie A,B,C,N en is voor de stroomaansluiting van onze warmtepomp. Positie P1 en P2 is voor de enkelfasige waterpomp. 3.7 Condensafvoer Wanneer de warmtepomp werkt, kan het voorkomen dat er condenswater vrij komt onder de warmtepomp.
- Page 41 4. Specificaties Model No. WFI-028T WFI-035T * Verwarmingscapaciteit bij lucht 26℃, vochtigheid 80%, water 26℃ in, 28℃ uit Verwarmingscapaciteit (kW) 28~6.8 35~8.8 Stroomaansluiting (kW) 3.97~0.43 5.15~0.56 15.8~6.8 15.8~6.8 * Verwarmingscapaciteit bij lucht 15℃, vochtigheid 70%, water 26℃ in, 28℃ uit Verwarmingscapaciteit (kW) 23~5.5...
- Page 42 5. Elektrische bedrading WFI-028T/035T - 40 -...
- Page 43 6. Display instructie 6.1 Draadcontroller (knoppen en pictogrammen) 6.2 Opstarten en vergrendelen Let op: Voordat u de machine start, moet u ervoor zorgen dat de filterpomp draait en dat er water door de warmtepomp stroomt. Houd knop 3 seconden ingedrukt om de warmtepomp AAN of UIT te schakelen. Houd op de hoofdinterface 3 seconden ingedrukt om de controller te vergrendelen of ontgrendelen.
- Page 44 6.3 Geselecteerde modus Houd knop 3 seconden ingedrukt om telkens de onderstaande drie bedieningsfuncties te wijzigen: Verwarmingsfunctie Koelfunctie Automatische functie Onder Auto-functie, als de warmtepomp aan het verwarmen is zal het tonen, als de warmtepomp aan het koelen is, zal het tonen.
- Page 45 6.4 Stel de gewenste temperatuur in. Druk op de hoofdinterface op om de gewenste watertemperatuur aan te passen. Druk dan op om de instelling op te slaan. Of u kunt de parameters P01/P02 aanpassen om de gewenste watertemperatuur in te stellen. 6.5 Klokinstelling Houd 3 seconden ingedrukt om de interface voor het instellen van de klok te...
- Page 46 6.6 Timerinstelling Houd de knop 3 seconden ingedrukt om de instelling van Timer ON & Timer Off-groepen te openen. Gebruik vervolgens dezelfde methode om de instelling van de uren en minuten te maken zoals de klokinstelling. Let op, u kunt drie verschillende timers instellen. Zie bovenstaande foto, het icoon ‘ON’...
- Page 47 :Deze knippert wanneer er een foutcode of systeembeveiliging of waterstroombeveiliging is. 6.8 Handmatig ontdooien Houd 5 seconden vast, en wanneer de Piping temp. lager is dan Exit ontdooitemp., kan het systeem overgaan op handmatige ontdooiing. 6.9 Herstel fabrieksinstelling Wanneer de machine is aangesloten op de voedingskabel en in de standby-situatie, houd 3 seconden ingedrukt om de fabrieksinstelling te herstellen.
- Page 48 Code Beschrijving Bereik Standaard 8℃~40℃ 27℃ Gewenste watertemp. in verwarmingsmodus 8℃~28℃ 27℃ Gewenste watertemp. in koelmodus 8℃~40℃ 27℃ Gewenste watertemp. in automatische modus 1℃~18℃ 1℃ Aanpassing van de watertemp. verschil voor herstart 0=Non stop, 1=Stop Stop zodra de temperatuur is bereikt 6.11 Uitvoeren van parametercontrole Houd op de hoofdinterface 3 seconden ingedrukt om parametercontrole te openen.
- Page 49 Code Beschrijving Bereik Inlaatwatertemp. ℃ Uitlaat watertemp. ℃ Omgevingstemp. ℃ Uitlaat temp. ℃ Gasretourtemp. ℃ Buiten temp. ℃ Binnentemperatuur leidingen ℃ EEV-diafragma Compressorstroom: Radiator temp. Spanningswaarde: Frequentie r/min Snelheid ventilatormotor r/min Snelheid ventilatormotor - 47 -...
- Page 50 7.Aanpassen en eerste gebruik 7.1 Aandacht ● Open de klep van watersysteem, injecteer water in het systeem en ontlucht. ● Doe aanpassingen na elektrische veiligheidsinspectie. ● Nadat de stroom is ingeschakeld, start u het proefdraaien van de warmtepomp om te controleren of deze goed kan functioneren.
- Page 51 8. Bediening en onderhoud 8.1 Om de goede werking te garanderen, moet het systeem na verloop van tijd worden gecontroleerd en onderhouden. Let tijdens het onderhoud op onderstaande punten: ● Wanneer u de kast moet openen en een inspectie van binnenuit moet uitvoeren, moet u van tevoren de elektriciteit uitschakelen.
- Page 52 ● Verwijder de bevestigingsschroeven van de compressor. ● Verwijder de compressor. 8.6 Voer regelmatig onderhoud uit volgens de instructies in de gebruikershandleiding om er zeker van te zijn dat de unit in goede staat werkt. ● Brandpreventie: als er brand is, schakel dan onmiddellijk de hoofdschakelaar uit en blus het vuur met een brandblusser.
- Page 53 9. Foutcodes en oplossingen Code Beschrijving Mogelijke redenen Oplossingen Controleer het watercircuitsysteem, de Onvoldoende waterstroom opening van de bypass-kits, de werking van de waterpomp; Waterstroom bescherming Waterstroomschakelaar Controleer de bedrading en sluit de losgekoppeld waterstroomschakelaar opnieuw aan Waterstroomschakelaar Verander een nieuwe defect Omgevings-/inlaatwatertemp.
- Page 54 Slechte draadverbinding Controleer de bedrading Communicatiefout tussen Defecte printplaat Vervang de PCB printplaat en drivermodule Defecte drivermodule Vervang de drivermodule Controleer het Onvoldoende waterstroom watercircuitsysteem/waterstroomschakelaar Gebrek aan gas Controleer of er een gaslekkage is Uitlaat temp. te hoog Leidingsysteem vastgelopen Controleer het leidingsysteem Uitlaatleiding temp.
- Page 55 10. Wifi-Functie 1. Zoek 'Weau' in de App Store (IOS) of Google Play (Android) en download. 2. Schrijf je voor de eerste keer in - 53 -...
- Page 56 3. Druk op ‘+’ om een apparaat toe te voegen 4. Leg uw mobiele telefoon dicht bij de warmtepomp van het zwembad, die zich onder hetzelfde wifi-gebied bevindt - 54 -...
- Page 57 5. Zorg ervoor dat het apparaat is gereset en voer vervolgens het wifi-account en wachtwoord in om wifi te verbinden. Reset de wifi-functie: Houd 3 seconden vast. - 55 -...
- Page 58 6. Druk op ‘Volgende’ om de verbinding te starten na het voltooien. Het apparaat is succesvol toegevoegd als het is verbonden en druk vervolgens op 'Gereed'. - 56 -...
- Page 59 7. Verbinding voltooid en app-hoofdinterface - 57 -...
- Page 60 8. Functies * Zet de machine aan / uit * Temperatuurinstelling en weergave * Mode selectie * Weergave van storingsstatus * Timerinstelling * Hernoem en deel uw apparaat - 58 -...
- Page 64 14400003000986...
Need help?
Do you have a question about the WFI-028T and is the answer not in the manual?
Questions and answers